Application Overview
INFO
For information about the GenAuth user pool version that supports the various benefits of the "Application" function, please check the Official Website "Pricing" page. If your version does not support this benefit and you want to try it, you can activate the trial period. For an introduction to the trial period and how to activate it, please check Trial Period.
Path: Application
The application module includes Self-built Application and Single Sign-On SSO:
You can create a business application in the Self-built Application menu, configure the registration/login method of the application, control access rights, customize the login box and security rules, configure whether to enable application authorization when logging in, and configure the subject that can access this application. GenAuth As a service provider (SP), you can integrate APP into GenAuth; as an identity provider (IDP), you can use GenAuth for authentication.
You can integrate enterprise-built applications and third-party applications in the application market in the Single Sign-On SSO menu. By integrating multiple business applications, single sign-on helps enterprises integrate systems, and users only need to log in once to access all mutually trusted application systems.
Overview of self-built applications
Path: Application->Self-built applications
In GenAuth, user pool is the smallest unit of tenant isolation, storing all user data in the user system; and the application corresponds to the business application created in reality. A user pool may have multiple applications. For example, all students of a school are in a user pool, and the school will develop multiple applications such as course selection application, email application, teacher-student service center, etc., which will use the same user system. You can learn more about application-related introduction here.
To manage the application resources of tenants, you can do the following:
Integrate all application resources into your GenAuth user pool. To do this, you need to create self-built applications one by one. The Self-built applications page displays a list of all self-built applications in the current user pool.
Configure the login interface and login method: _ Quick Start _ Application Configuration _ Login Control _ Access Authorization _ Branding _ Security Management _ Advanced Configuration _ Tenant Configuration
After completing the configuration, you can also perform the following operations:
- Data Overview: Displays login and user statistics for accessing the current application.
- Access Tutorial: Links to the Development Integration document to help users understand how GenAuth integrates the current application through various language SDKs.
- Experience Login: After completing the configuration of the application, the administrator can click this button to simulate the user's login process to verify the configuration effect.
Create a self-built application
Path: Application->Self-built Application
You can view all self-built applications on the Self-built Application page.
Original-image links open source screenshots in a new tab. Labels identify the surrounding section and Chinese UI or unverified language.
Original image 1 (in section "Create a self-built application"; Chinese UI)
To create a new self-built application, perform the following steps:
Click the Create Self-built Application button in the upper right corner of the page.
Fill in the following information in the pop-up window:
Application Name: Specify the application name.
Authentication Address: Enter the secondary domain name, which must be in a legal domain name format (only English, numbers and ‘-’ are allowed, such as
my-awesome-app).Select Type: Select the application type in GenAuth according to the actual type of your business application.
Click the Create button.
Quick Start
Path: Application->Self-built Application->Application Details->Quick Start
The Quick Start tab of each application will briefly introduce how to install and use each language SDK to quickly authenticate and manage users for existing or newly developed applications, and provide methods for handling common errors.
INFO
This section only provides a quick guide. For details on the use of each language SDK, you can click the link in the upper right corner of the page to access the corresponding chapter of the development manual.
Original image 2 (in section "Quick Start"; Chinese UI)
Application Configuration
Path: Application->Self-built Application->Application Details->Application Configuration
When you want to use GenAuth as a service provider (SP), you can complete the configuration of the application Basic Information and Authentication Related on the Application Configuration page. At the same time, when integrating the self-built application into GenAuth, you will need to use Endpoint Information (such as App ID, App Secret, etc.) and Authentication Configuration (Authentication Address) related information.
Original image 3 (in section "Application Configuration"; Chinese UI)
| Field | Description |
|---|---|
| Authentication Configuration->Login Callback URL | This link needs to fill in your business callback address. After the user logs in to this application, the browser will jump to this address, where you can exchange user information. Example: https://myawesomeapp.com/login/callback. |
| Login URL | Click Experience Login in the GenAuth app details or click the app icon in the app panel to jump to this URL, which is the login page of this app by default. |
Protocol configuration
Path: Application->Self-built application->Application details->Protocol configuration
What is a protocol?
First of all, it should be made clear that the protocol works in the authentication scenario.
So, why do users need authentication?
The most direct reason is that the administrator needs to set boundaries for the content that users can access. After a specific user completes identity authentication, he logs in to a specific application. In this process, the system administrator implements the user's "authorization" through function configuration.
Under the identity authentication model provided by GenAuth, this authorization of users occurs during the user's identity authentication process. The protocol is used to clarify the details of information transmission and verification between the client and the server in this authorization process.
In other words, the "protocol" we are discussing here is the standard process and rules that the administrator follows when "authorizing" users during the identity authentication process. **
If you are still unclear about the concept of "authorization", please read: What is authorization?
Protocol types supported by GenAuth
OIDC
1. Definition
OpenID Connect is an authentication protocol based on OAuth 2.0. The authorization process of OIDC is the same as that of OAuth 2.0. The main difference is that the Id Token is returned in the OIDC authorization process.
2. Key subjects
In addition to the subjects already specified in OAuth2.0, in the OIDC protocol, "Authorization Server" not only issues Access Token, but also issues ID Token.
3. Basic elements
In addition to the key elements already specified in OAuth2.0, Id Token is added: issued by OpenID Provider, containing information fields about the end user.
For a more detailed description, please read: Interpretation of OAuth2.0 and OIDC. If you want to learn more about OIDC, you can read the protocol specification.
OAuth2.0
1. Definition
OAuth2.0 is a standard protocol for authorization. An OAuth 2.0 authorization means that the user authorizes the caller to grant permissions.
2. Key Subjects
- Authorization Server: Responsible for issuing Access Tokens, GenAuth is the authorization server.
- Resource Owner: The user of your application is the owner of the resource and authorizes others to access his resources.
- Caller: The caller requests an Access Token, and after the user authorizes it, GenAuth issues an Access Token to it. The caller can carry the Access Token to the resource server to access the user's resources.
- Resource Server: Accepts the Access Token, verifies its granted permissions, and finally returns the resource.
3. Basic elements
- Code authorization code: issued by the authorization server GenAuth, used by the caller to exchange the code for a token.
- Access Token: issued by the authorization server GenAuth, holding an Access Token indicates that user authorization has been completed.
- Refresh Token: an optional token used to obtain a new Access Token after the Access Token expires.
4. Common authorization modes
- In your application, let the user access the login link, the browser jumps to GenAuth, and the user completes the authentication in GenAuth.
- The browser receives an authorization code sent from the GenAuth server.
- The browser sends the authorization code to your application backend through redirection.
- Your application service sends the authorization code to GenAuth to obtain the AccessToken, and returns a refresh token if necessary.
- Your application backend now knows the user's identity, and can subsequently save user information, redirect to other front-end pages, use AccessToken to call other APIs of the resource party, and so on.
For a more detailed description, please read: Interpretation of OAuth2.0 and OIDC. If you want to know more about OAuth 2.0, you can read Protocol Specification.
SAML2.0
1. Definition
The application (SP) needs to know the identity of the user, so it needs to ask the identity provider (IdP). The IdP knows the identity of the user. When the user successfully logs in to the IdP, the IdP sends the user's identity to the SP in the form of a SAML assertion. The SP trusts the identity assertion sent by the IdP, thereby granting the user relevant permissions in the SP.
2. Key Subject
- Service Provider: The application itself
- Identity Provider: The object that provides identity to SP; GenAuth can be used as an identity provider, and there are other identity providers, such as Okta, SSOCircle, and Auth0, which can return identity assertions to SP.
3. Basic Elements
Assertion: Identity assertion in XML format. Identity Provider can send identity assertion to SP. The so-called identity assertion is a token issued by GenAuth that can identify a person's identity, but in the SAML protocol, the format of this token is XML.
For a more detailed description, please read: SAML Protocol Interpretation. If you want to know more about OIDC, you can read the Protocol Specification.
CAS
1. Definition
CAS is a single sign-on protocol that allows websites to authenticate users. It can provide a single sign-on solution for multiple applications. Unlike OAuth and OIDC, CAS is a tool for authenticating users; authorization is based on the actual application.
2. Key Subjects
- Application (SP): It can be a web application with a front-end page or a database server with only back-end services
- Browser: The application communicates with the CAS server through the browser
- CAS Server
3. Basic Elements
The application service (SP) and the CAS server communicate the verification results through Ticket.
4. Common authentication and authorization processes
- The user tries to access an application that has not been authenticated
- The user is redirected to the CAS server (GenAuth can be used as a CAS server)
- The user completes the identity authentication on the authentication page provided by the CAS server, and the CAS server verifies whether the user is credible
- After successful authentication, a Ticket is generated as a credential for successful authentication, which is attached to the URL for return
- The application (SP) sends a request to the CAS server to verify whether the Ticket is valid, and calls back to the application (SP) after verification
If you want to know more about CAS, you can read the Protocol Specification.
Under what circumstances do you need to configure the protocol?
All self-built applications of GenAuth are based on the OIDC protocol for authentication and authorization by default. If your application needs to implement the authentication and authorization process based on other protocol types, you can enable the corresponding type of protocol in the "Protocol Configuration" function area and complete the configuration.
Protocol configuration steps
Step 1: Create a self-built application and find the configuration area
After creating a self-built application, find the "Protocol Configuration" function area:
Step 2: Complete the protocol configuration
Configure the OIDC protocol
1. Select the appropriate authorization mode
When you create a self-built application, GenAuth uses the OIDC authorization code mode by default. If you need to change the authorization mode, please refer to the document in advance to determine the degree of fit between the authorization model and your actual situation: Choose the appropriate OIDC authorization mode
2. Complete the configuration under the authorization mode
After determining the authorization mode to be selected, you can complete the function configuration under the corresponding authorization mode according to the guidance here: OIDC authorization mode configuration
3. Configure Claim and Scope
This is an advanced feature supported by GenAuth for the OIDC protocol. You can:
- View the default claims of GenAuth and their mapping relationship with the GenAuth user fields
- Create custom claims and customize the mapping relationship of these claims
- View the default scope of GenAuth and the claims it contains
- Create custom scopes and customize the claims carried in each of these scopes
For more information about the default scope and claim of GenAuth and how to use this feature, please see: Custom OIDC Scope
Configure OAuth2.0 protocol
1. Select the appropriate authorization mode
In terms of authorization model, OIDC is a superset of OAuth2.0. Therefore, you can refer to the authorization mode of OIDC to select the type that matches your scenario: Select the appropriate OAuth authorization mode
2. Complete the configuration under the authorization mode
After determining the authorization mode to be selected, you can complete the function configuration under the corresponding authorization mode according to the guidance here: OAuth authorization mode configuration
Configure SAML protocol
In the "SAML2 Identity Provider" card, turn on the Enable SAML2 Provider switch, fill in the Default ACS address and Settings information. Then click Save. The specific ACS address will be provided by the SAML SP, and the specific settings need to be configured according to the requirements of the SAML SP. For more detailed configuration process, please refer to: Configure SAML Protocol
Configure CAS Protocol
In the "CAS" card, turn on the Enable CAS IdP switch and enter your user unique identifier, such as: ${user.username}
Click Save to complete the configuration. For more detailed configuration process, please refer to: Configure CAS Protocol
Step 3: Select the default protocol type
After completing the configuration, if you use the hosted login page directly, you can directly switch to your newly configured protocol type in "Default Protocol Type":
Original image 5 (in section "Step 3: Select the default protocol type"; Chinese UI)
Customize OIDC Scope
Usage scenarios
Customize the user information returned by the ID Token by customizing the Scope and the Claims in it.
OIDC Scope Function Configuration
After creating a self-built application, you can find the "OIDC" function area under the "Protocol Configuration" function area and find the "OIDC Scope Configuration".
Original image 6 (in section "OIDC Scope Function Configuration"; Chinese UI)
Claim Configuration
Default Claim
| Claim Name | Mapped GenAuth User Fields |
|---|---|
| sub | userId |
| name | name |
| address | address |
| username | username |
| email_verified | emailVerified |
| phone_number | phone |
| phone_number_verified | phoneVerified |
| birthdate | birthdate |
| family_name | familyName |
| gender | gender |
| given_name | givenName |
| locale | locale |
| middle_name | middleName |
| name | name |
| nickname | nickname |
| picture | picture |
| preferred_username | preferredUsername |
| profile | profile |
| updated_at | updatedAt |
| website | website |
| zoneinfo | zoneinfo |
| external_id | externalId |
| userpool_id | userpoolId |
| formatted | formatted |
| street_address | streetAddress |
| postal_code | postalCode |
| country | country |
Custom Claim
If the above default Claim still does not meet the user fields you expect to be returned, you can create a custom Claim and customize which GenAuth user field (basic field or extended field) your Claim maps to.
Step 1: Click "Add a Mapping"
Original image 7 (in section "Custom Claim"; Chinese UI)
Step 2: Edit the name of your custom Claim
Original image 8 (in section "Custom Claim"; Chinese UI)
Step 3: Configure the GenAuth user field mapped by the custom Claim
Original image 9 (in section "Custom Claim"; Chinese UI)
Scope Configuration
Default Scope
| Scope name | Contained claims | Description |
|---|---|---|
| offline_access | / | If this parameter exists, the token interface will return the refresh_token field |
| openid | sub | Used to store user ID |
| username | username | User name |
| address | address | User address |
| email, email_verified | User email and verification status | |
| phone | phone_number, phone_number_verified | User phone number and verification status |
| profile | birthday, family_name, gender, given_name, locale, middle_name, name, nickname, picture, preferred_username, profile, updated_at, website, zoneinfo | User details |
| roles | roles | User role list corresponding to role information |
| external_id | externalId | User ID in the original system |
| extended_fields | extended_fields | User's extended field information, the content is an object, the key is the extended field name, the value is the extended field value |
Custom Scope
If the default scope above still does not meet the user fields you expect to be returned, you can create a custom scope and customize which claims will be included in your scope.
Step 1: Click "New Custom Scope"
Original image 10 (in section "Custom Scope"; Chinese UI)
Step 2: Modify the name of your custom scope
Original image 11 (in section "Custom Scope"; Chinese UI)
Step 3: Configure the claims included in the custom scope
Original image 12 (in section "Custom Scope"; Chinese UI)
Use custom scope & claim
- Use the hosted login page: GenAuth will return all preset scopes and your custom scope by default.
- Use SDK to call directly: You can freely choose to call all the scopes you have configured and the claims they contain.
Login control
Path: Application->Self-built application->Application details->Login control
Login experience is one of the most important user experiences that software developers need to consider. It is not easy to provide users with a seamless, convenient and secure authentication experience. Generally speaking, login logic is also associated with registration, password reset, account association, etc. More importantly, enhancing security in the form of strong and adaptive authentication during the login process is often critical for many implementations.
Each user pool in GenAuth has an independent second-level domain name and is equipped with an online login page. You can open the login page of this application by visiting the address of the application. GenAuth provides a lot of authentication methods for developers to choose and combine. You don't need to write a line of code. You can maintain the login page through the Login control of the self-built application on the hosted page and make some customized configurations.
The Login Control tab supports the following login/registration methods:
- Account and Password Login
- SMS/Email + Verification Code Login
- Mobile App Scan Code Login
- Social Identity Source Login
- Enterprise Identity Source Login
Original image 13 (in section "Login control"; Chinese UI)
Multiple login/registration methods support multiple cross-implementation scenarios such as web, mobile, and mini-programs. For more details, see the relevant section under Authenticating Users.
Account and Password Login, Verification Code Login, and Mobile App Scan Code Login can implement login and registration paging and login and registration merging in the Login Control tab. The following will introduce each type of login/registration method.
Login and Registration Paging
The following describes the various scenarios for the login and registration paging display.
Login page
You can configure the login method by password, verification code and code scanning.
GenAuth provides the following login combinations:
- Mobile phone number + password
- Email + password
- User name + password
- Mobile phone number + verification code
- Email + verification code
- Mobile APP code scanning
Configure login method
To configure the login method on the hosting page, perform the following steps:
Check the required login method under Login control->Login registration method->Login registration page->Login method.
Select Default login method.
INFO
The default login method refers to the default login method (password, verification code, code scanning) selected when jumping to the login page.
- Click the Save button to save the configuration.
Login using password, verification code, or scan code
Original image 14 (in section "Login using password, verification code, or scan code"; Chinese UI)
Administrators can experience various configured login methods through the Experience Login button.
To log in to the application using an account and password, perform the following steps:
- Enter your mobile number/email address/user name in the upper input box.
- Enter your login password in the lower input box.
- Click the Login button.
For verification code login, perform the following steps:
- Enter your mobile number/email address in the upper input box.
- Click Send Verification Code.
- Enter the verification code received by your mobile phone/email address in the lower input box.
- Click the Login button.
INFO
The scan code login function requires that the customer has both a web application and a mobile APP, and has logged in to the mobile app. At this time, you can use the mobile APP to scan the code to log in.
For the mobile APP scan code login, follow the steps below:
- Open this application on the mobile terminal.
- Use the mobile APP to scan the web login box.
Forgot password
If you forget your password, follow the steps below to retrieve your password:
Click Forgot password in the lower left corner of the login box.
Enter your mobile phone number/email address.
Click Send verification code.
Enter the verification code.
Enter your new password.
Click the Confirm button.
The reset is successful, return to the login page and log in again.
Registration page
You can register the application by password or verification code.
GenAuth provides the following registration combinations:
- Email + Password
- Phone Number + Verification Code
- Email + Verification Code
Configure Registration Method
To configure the registration method on the hosting page, follow these steps:
Check the required login method under Login Control->Login Registration Method->Login Registration Paging->Registration Method.
Select Default Registration Method.
INFO
The default registration method refers to the registration page that is opened by default when you jump to the registration page (password registration, verification code registration).
- Click the Save button to save the configuration.
Register with password or verification code
Original image 15 (in section "Register with password or verification code"; Chinese UI)
To register the app with a password, follow these steps:
- Enter your email address in the upper input box.
- Enter your password in the lower input box and confirm it again.
- Click the Register button.
For verification code registration, follow these steps:
- Enter your phone number/email address in the upper input box.
- Click Send verification code.
- Enter the verification code received by your phone/email address in the lower input box.
- Click the Register button.
Login and Registration Merge
Login and registration combined display supports the following scenarios:
Original image 16 (in section "Login and Registration Merge"; Chinese UI)
INFO
For the two display modes of login and registration paging and login and registration combined, the configuration and usage of login and registration are similar. Please refer to the login and registration paging section for details.
Social Login Method
Social login refers to the process of users using the identity authentication information of the social platform to authenticate and log in to third-party applications or websites. For example, people often use personal WeChat, QQ, Weibo and other social accounts to log in to Didi, NetEase Cloud Music, etc.
Social login not only helps to simplify the user's login experience on third-party platforms, but also provides a simpler and more convenient way for users to create new accounts on third-party platforms. Whether for ordinary users or enterprises, social login has incomparable advantages.
GenAuth currently supports nearly 30 social logins at home and abroad, such as WeChat, GitHub, Apple, Alipay, etc.
INFO
You need to create the social identity source to be used before you can select the created identity source in the Self-built application->Login control tab.
Original image 17 (in section "Social Login Method"; Chinese UI)
To add a social identity source for a single app, follow these steps:
- Select Login Control->Social Login on the app details page.
- Click +Add Identity Source to open the Select Social Identity Source page.
- Select the target social identity source to add.
In addition to integrating existing third-party social identity sources, administrators can also connect custom social logins.
For a detailed introduction to social login methods, see Social Identity Sources.
Enterprise Login Methods
Enterprise identity source login refers to the process of users using the company's identity authentication information to authenticate and log in to internal company applications or third-party applications. In the GenAuth console, enterprise identity sources include two categories: office applications (such as Lark, WeChat for Enterprise, DingTalk) and standard protocol applications (such as OIDC, SAML, CAS and other standard protocols). You can configure the enterprise identity source connection to use a third-party identity source to log in to the GenAuth application and import organizations and users from third-party identity sources to reduce migration costs. GenAuth will automatically synchronize user information to the user directory of GenAuth every time a user logs in using an enterprise identity source.
INFO
You need to create the enterprise identity source to be used before you can select the created identity source in the Self-built application->Login control tab.
Original image 18 (in section "Enterprise Login Methods"; Chinese UI)
To add an enterprise identity source for a single application, perform the following steps:
Select Login Control->Enterprise Login Method on the application details page.
Click +Add Identity Source to open the Select Enterprise Identity Source page.
Select the target enterprise identity source to add.
For more information about enterprise login methods, use the enterprise identity source options in the GenAuth console.
Logged-in Users
Administrators can view the list of logged-in users of the current application, view and manage user information, and force offline in the Login Control tab:
To view the details of a logged-in user, click the target user in the Logged-in Users list to open the user details page.
For more information about managing user information, see Managing User Accounts.
To log out a logged-in user, in the row of the target user, in the Action column, click the More button (...), select Force logout, and click Confirm to confirm the logout.
Access authorization
Path: Application->Self-built application->Application details->Access authorization
Suppose you are a company doing social communication business, and there is another company that wants to develop a chat record sorting and exporting tool by calling your business API, and has signed a cooperation agreement with your company. Now you want to safely authorize user information to this company, and you expect:
- API calls are only open to partner companies.
- Different partners have different access rights and can access different business APIs.
- If the cooperation is terminated or changes in the future, you hope to be able to revoke the permissions of certain data or disable them completely.
As an administrator, you can manage and assign permissions to resources in the console. Before practicing permission management and authorization, you need to understand several concepts first.
- Application: Administrators can create applications. Applications are a definition of the application project you are developing in GenAuth.
- User: You can directly assign permissions to users, or you can divide your users into different groups, roles, and organizational departments, so that it is convenient to manage when assigning permissions in the future.
- Role: A role is a collection of users. Users in a role automatically inherit the permissions granted to the role.
- Resource: You can define some resources in GenAuth. For example, resources in an application may include APIs, data resources, menus, buttons, etc.
Access authorization defines the subject's access rights to the current application from the application dimension. Administrators can integrate the current application into single sign-on (SSO) on the Access authorization page, and can also define authorized subjects, roles, resources, authorization rules, and programmatic access.
Single sign-on
Administrators can add the current self-built application to the application panel in this module.
To do this, administrators only need to turn on the Add to single sign-on switch under the Single sign-on module.
Original image 19 (in section "Single sign-on"; Chinese UI)
Adding an application to Single Sign-on (SSO) means that your users can log in to all SSO-enabled applications at once after logging in to the application panel.
Application Access Control
Administrators can specify the subjects who can access the current application in this module.
Original image 20 (in section "Application Access Control"; Chinese UI)
| Serial number | Field / Button | Description |
|---|---|---|
| 1 | Default permissions | Options include:
|
| 2 | Application Authorization Type | You can filter and view the authorization objects below by authorization type. The options include:
|
| 3 | Add | Open the Add Authorization window to add an authorization object. Authorization types include:
|
| 4 | Whether to take effect | Determine whether to enable the current authorization. After adding a new authorization, it is enabled by default. |
| 5 | Edit | Edit the current authorization item. |
| 6 | Delete | Delete the current authorization item. |
Role Management
Administrators can specify roles that can access the current application in this module. After the specification, all specified subjects under the role have authorized permissions.
INFO
The data source of the Role Management module is synchronized with the Role Management data source in the Permission Management application permission group.
To create a role, perform the following steps:
- Click the Add button in the upper right corner of the Role Management module.
- Enter the Role Code and Role Description in the Create Role window in the side pull box.
- Click the OK button.
The newly added role will be displayed at the top of the Role Management list, and the Role Management list under the Permission Management application permission group will be updated synchronously.
Administrators can click the Role Code column of the role row to open the role details page, edit the role information, and add authorized users, organizations, and rules. For more information, see Role Management.
To delete a role, just click the Delete button in the Operation column of the row where the role is located.
INFO
Role deletion is irreversible, so be careful.
Resources
The resource module classifies all resources in the application into API resources, Data resources, and UI resources. Administrators can view, add, edit, and delete resources in this module.
INFO
There is no essential difference between API resources, data resources, and UI resources. The types are only used to distinguish them at the management level. Creating a good resource classification can help administrators quickly focus on different resources.
To add resources, follow these steps:
- Under Access Authorization->API/Data/UI Resources, click the Add button in the upper right corner.
- Enter the resource information in the Create Resource window in the sidebar and define the operation type.
INFO
- Resource Name: It is recommended to fill in a semantic resource name for easy subsequent management.
- Operation Type: Administrators can customize the operation permissions of resources such as adding, deleting, modifying, and checking. You can click the '+' button in front of the resource row in the resource list to view the detailed operation permissions of each resource.
- Click Save.
A resource is created.
Original image 21 (in section "Resources"; Chinese UI)
API resources
Original image 22 (in section "Resources"; Chinese UI)
Data resources
Original image 23 (in section "Resources"; Chinese UI)
UI resources
To edit or delete a resource, click the Edit / Delete button in the Operation column of the corresponding resource row in the resource list.
Resource authorization
Now that we have resources and people, we need to define "who" can do what "operation" to what "resource".
Original image 24 (in section "Resource authorization"; Chinese UI)
To authorize a resource, follow these steps:
- Under Access Authorization->Resource Authorization, click the Add button in the upper right corner. Open the Authorization window.
- Specify the authorization subject and authorization rules.
INFO
- The authorization subject is the data source of the authorization object list in the Application Access Control module. Among them, Programming Access Account is the AccessKey value automatically generated when adding AccessKey and SecretKey.
- Authorization rules are: Under a certain "condition", allow or deny a certain "subject" to perform specific or all operations on a certain "resource". _ Specific operations include the operation types defined for resources in API resources / data resources / UI resources. Specific operations can only be specified for a single resource, and specific operations cannot be specified for all resources. _ Restrictions are to add restrictions to the authorization rules. * If you want to authorize multiple resources to the user, you can click the +Add Authorization Rules button at the bottom to continue adding rules.
Administrators can also click the View Details and Cancel Authorization buttons in the resource authorization list to view authorization details and cancel authorization.
Programmatic Access Account
The programmatic access account is a pair of AccessKey and SecretKey under the application. Administrators can create AccessKey and SecretKey, and grant corresponding permissions to this set of keys for third-party vendors such as outsourcers to call. The caller uses the programmatic access account in combination with the OIDC authorization code to obtain the user's AccessToken and IdToken, or uses the programmatic access account to request authorization on behalf of the caller itself in the OIDC ClientCredentials mode, thereby calling your resource interface.
Original image 25 (in section "Programmatic Access Account"; Chinese UI)
To create a programmatic access account, follow these steps:
- Under Access Authorization->Programmatic Access, click the Add button in the upper right corner. Open the Add Programmatic Access Account drop-down box.
- Specify the AccessToken expiration time (seconds).
- Click the OK button.
A new record will be added to the top of the programmatic access account list.
Administrators can disable, refresh key, and delete the account in the programmatic access account list.
INFO
Clicking Refresh key will only update the SecretKey.
Branding
Path: Apps->Self-built Apps->App Details->Branding
INFO
- The Branding tab in the application is closed by default. At this time, the branding-related configuration of the application will be controlled by the configuration in the global login box. To configure the login box of a single application separately, you can turn on the Customize this application's login box switch in Advanced Configuration->Custom Configuration.
- When the Customize this application's login box switch is turned on, the login box style of the current application will inherit the configuration in the current global branding (Branding->Global Login Box). After turning it on, the administrator's login box style configuration for this self-built application will be independent of the configuration in the global branding.
Administrators can customize the GenAuth hosted login box UI and login registration information completion function in the Branding tab of the self-built application in the user pool.
Self-built application->Branding configuration and Branding->Global login box configuration are the same. For more information, see Global login box branding configuration.
Security Management
Path: Application->Self-built Application->Application Details->Security Management
This chapter introduces security-related configuration items such as cookie expiration time, registration security, login security, APP scan code login Web security, multi-factor authentication, etc.
INFO
The Security Management tab in the application is closed by default. At this time, the security management-related configuration of the application will be controlled by the global security management configuration. To configure the security of a single application separately, you can turn on the Customize the security rules of this application switch in Advanced Configuration->Custom Configuration.
When the Customize the security rules of this application switch is turned on, the security rules of the current application will inherit the configuration in the current global security management (Security Settings). After turning it on, the administrator's security rule configuration for this self-built application will be independent of the configuration in the global security rules (including general security, password security and multi-factor authentication).
After turning on the Customize security rules for this application switch, you can configure the following related functions for this application:
Basic security
Original image 26 (in section "Basic security"; Chinese UI)
Users can specify the validity period of the login status (i.e. cookie expiration time) in this module:
| Options | Description |
|---|---|
| Browser session | Expires immediately after the current browser is closed, and you need to log in again the next time you open it. |
| Custom expiration time | You can specify the expiration time in the input box on the right. 1209600 seconds (14 days) is recommended. Users need to log in again after the expiration. Note: For the application panel and applications that have been added to the application panel, the cookie expiration time set in the global Security Management will be used. |
Registration security
Original image 27 (in section "Registration security"; Chinese UI)
| Switch | Description |
|---|---|
| Frequent registration limit | Administrators can limit the number of registrations per IP address within a certain number of seconds by specifying Limited period time and Limited frequency within period. |
| Prohibit registration | After turning on this switch, ordinary users will not be able to register through the login box or API. Only administrators can manually create accounts. |
Login anti-brute-forcing
GenAuth provides login security policies for Account lock and Graphic verification code scenarios.
Original image 28 (in section "Login anti-brute-forcing"; Chinese UI)
Account lock
| Switch | Description |
|---|---|
| Login password error limit | When a user enters an incorrect password when logging in, the corresponding policy will be triggered according to the login security policy rules. When the Login Password Error Limit switch is turned on, you can limit the number of incorrect password inputs for the same account within a certain number of seconds by specifying Limited Cycle Time and Limited Frequency Within Cycle. If the number of incorrect password inputs exceeds the specified time, the user needs to enter a graphic verification code when logging in again. |
| Send verification email when logging in with an unverified email address | After turning it on, if a user logs in with an unverified email address, GenAuth will send a verification email to the email address, and the user needs to go to the email address and click the verification link before completing the login. |
Graphic Verification Code
In addition to the two policies for the Account Lock scenario mentioned above, Graphic Verification Code can also define Limited Number of Login Failures: When the user enters incorrect login information, the corresponding policy will be triggered according to the login security policy rules. When the Login Failure Limit switch is turned on, you can limit the number of failed logins for the same account within a certain number of seconds by specifying Limited Cycle Time and Limited Frequency Within Cycle. If the number of incorrect logins exceeds the specified time, the user needs to enter a graphic verification code when logging in again.
Original image 29 (in section "Graphic Verification Code"; Chinese UI)
APP Scan Code Login Web Security
GenAuth has always been committed to providing developers with a highly customized development experience, so we provide the following custom configuration items. Developers can balance security and convenience according to their business needs.
Original image 30 (in section "APP Scan Code Login Web Security"; Chinese UI)
| Field / Switch | Description |
|---|---|
| QR code validity period | Default 120s. |
| Ticket validity period | Default 300s. |
| Web polling interface returns complete user information | Default not returned. Since the QR code status query interface does not have permission verification, it means that returning user information (including login credentials token) directly in this interface is a security risk, so we recommend that developers follow the best practice: the QR code status query interface only returns the user nickname and avatar, and uses the ticket to exchange for user information. |
| Allow using the ticket to exchange for user information in the browser | Allowed by default, it needs to be called on the server side, that is, it needs to be initialized with the user pool key. Click to learn how to initialize the backend SDK. A typical usage scenario is: after the user scans the code to agree to the authorization, the developer gets the ticket and sends it to his own backend, uses the backend SDK to exchange for user information, and then redirects to the logged-in page, and writes the user information to localStorage. |
Multi-factor authentication
Multi-factor authentication (MFA) is a very simple security practice that can add an extra layer of protection beyond the username and password. After enabling MFA, when users log in, in addition to providing their username and password (first authentication), they will also need to perform a second authentication. Multi-factor authentication combined will provide higher security protection for your accounts and resources. You can learn about What is multi-factor authentication here.
You can enable MFA for your application as shown below:
Original image 31 (in section "Multi-factor authentication"; Chinese UI)
For more details, see Overview of Multi-Factor Authentication.
Advanced Configuration
Path: Application->Self-built Application->Application Details->Advanced Configuration
Administrators can enable the application login box switch, application security rule switch, and application authorization page switch in the Advanced Configuration tab according to business needs.
Custom Configuration
Original image 32 (in section "Custom Configuration"; Chinese UI)
INFO
After turning on the switch in this module, the relevant configuration of the application will first inherit the global configuration. Make changes on this basis without worrying about giving users an abrupt login experience.
| Switch | Description |
|---|---|
| Customize the login box of this application | Off by default. After turning it on, the Branding tab is opened on the same page to customize the login box of the current application. For details, see Branding. |
| Customize the security rules of this application | Off by default. After turning it on, the Security Management tab is opened on the same page to customize the security policies such as login/registration of the current application. For more information, see Security Management. |
Identity Branding
When the business software and identity data are not controlled by the same party, before the business software obtains user data through the business API, the identity provider is obliged to inform the end user which user data (such as mobile phone number, email address) and which resource permissions other companies need to obtain from them, and must obtain the user's consent first. After turning it on, the user will be shown the rights confirmation page when logging in.
Original image 33: User consent for application data and permissions (Chinese UI)
Tenant Configuration
Path: Application->Self-built Application->Application Details->Tenant Configuration
Tenants under the application correspond to tenants in your SaaS software. Administrators can configure which users are allowed to log in to the current application here: If Tenant under the application is selected, only end users under the tenant can access it. If Individual User is selected, only end users who do not belong to any tenant can access it.
Original image 34 (in section "Tenant Configuration"; Chinese UI)
GenAuth supports administrators to create tenants and provides tenant-level authentication and authorization, end-user management, login page branding and other functions for the application.
INFO
Currently, only self-built applications support multi-tenant functions.
To create a tenant, the administrator can click the Go to Create Tenant button on the right side of the Tenant Configuration tab. For details on creating tenants, see the Multi-tenant section.
Overview of Single Sign-On SSO
What is Single Sign-On
Single Sign-On (SSO) is one of the more popular solutions for enterprise business integration. The definition of SSO is that in multiple application systems, users only need to log in once to access all mutually trusted application systems.
Let's use an example to illustrate. Suppose there is a university with two systems, one is the mailbox system and the other is the class schedule query system. Now you want to achieve the following effect: log in once in the mailbox system, and then enter the class schedule system website at this time. There is no need to log in again. The class schedule website system directly jumps to the personal class schedule page, and vice versa. A more professional definition is as follows:
If you haven't created an application yet, you can learn about How to create your first application.
If you want to quickly experience single sign-on, you can first learn about Self-built application SSO solution
The following content is in no particular order. You can choose the content you are interested in to read:
- Application Dashboard: It is used to display various applications required by the enterprise. It is a good place to provide employees with single sign-on, improve work efficiency, and ensure information security.
- Integrated Application SSO Solution: It is a set of directories that GenAuth pre-integrates with third-party applications. It allows GenAuth users to quickly connect to the required applications through simple configuration to achieve single sign-on, identity provision and other capabilities.
- Self-built Application SSO Solution: When you have multiple applications, you can quickly implement single sign-on between user pool applications. Users do not need to log in again when switching applications, giving users a better user experience.
- Third-party SSO solution: An integrated solution for implementing SSO using Lark, Enterprise WeChat, DingTalk, Welink, etc. as the single identity source for the enterprise.
Application Panel
The GenAuth application panel is used to display various applications required by the enterprise. It is a good place to provide employees with single sign-on, improve work efficiency, and ensure information security.
The single sign-on (SSO) of enterprise employees to various applications is based on Security Assertion Markup Language (SAML) or GenAuth self-developed secure authentication (GenAuth Secure Authentication).
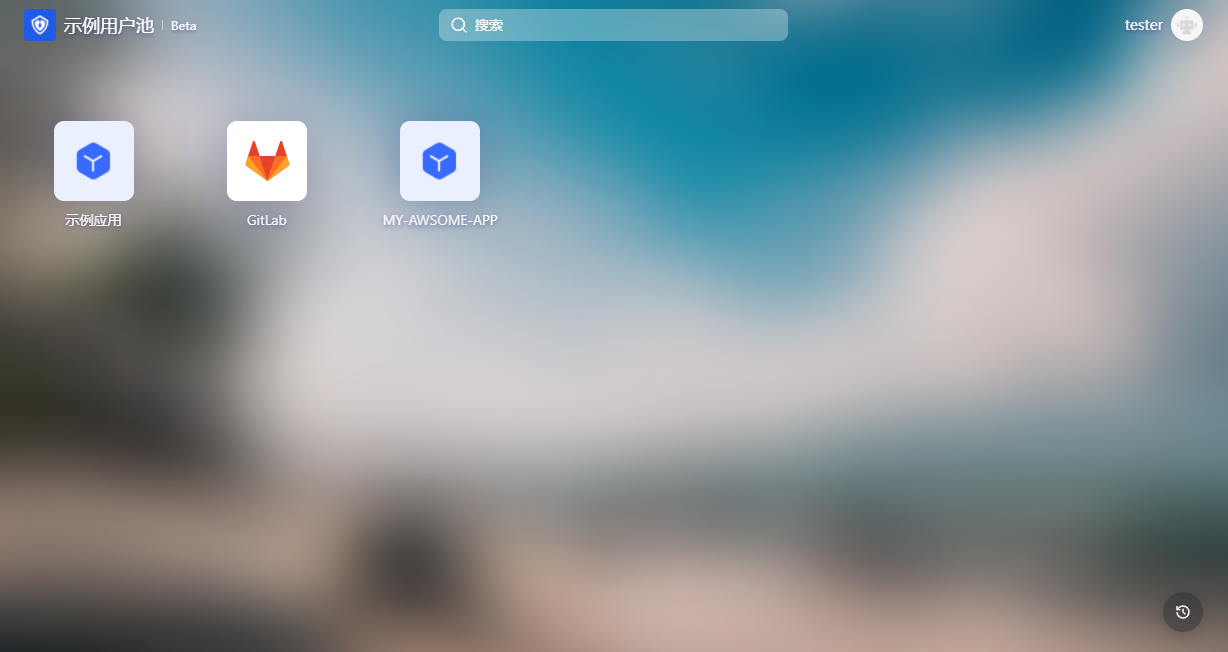
Operation Instructions for End Users
Login to the Application Panel
End users need to log in to GenAuth before accessing the application panel. First, the user needs to enter the login address URL of the application panel in the browser. For example:
INFO
https://org-name.genauth.ai
Here, org-name is the name of the company or organization. Next, the user needs to enter his username and password, or log in through a third-party account. If the user does not know his username or forgets his password, he needs to contact the IT department of his company, and the IT administrator will set up a GenAuth account or reset the password for him.
Original image 35 (in section "Login to the Application Panel"; Chinese UI)
Add or uninstall applications
The application panel will display all applications accessible to the user by default. Users can add or uninstall their frequently used applications at will to reduce the interference of unnecessary applications.
You can add self-built applications or third-party applications to the application panel.
Original image 36 (in section "Add or uninstall applications"; Chinese UI)
To delete an application from the application panel, click the "..." button in the upper right corner of the application to be deleted in the application list and confirm it in the pop-up deletion window.
Original image 37 (in section "Add or uninstall applications"; Chinese UI)
Update personal information
In the upper right corner of the application panel, users can click the Personal Center button to enter the user's personal center to edit personal information.
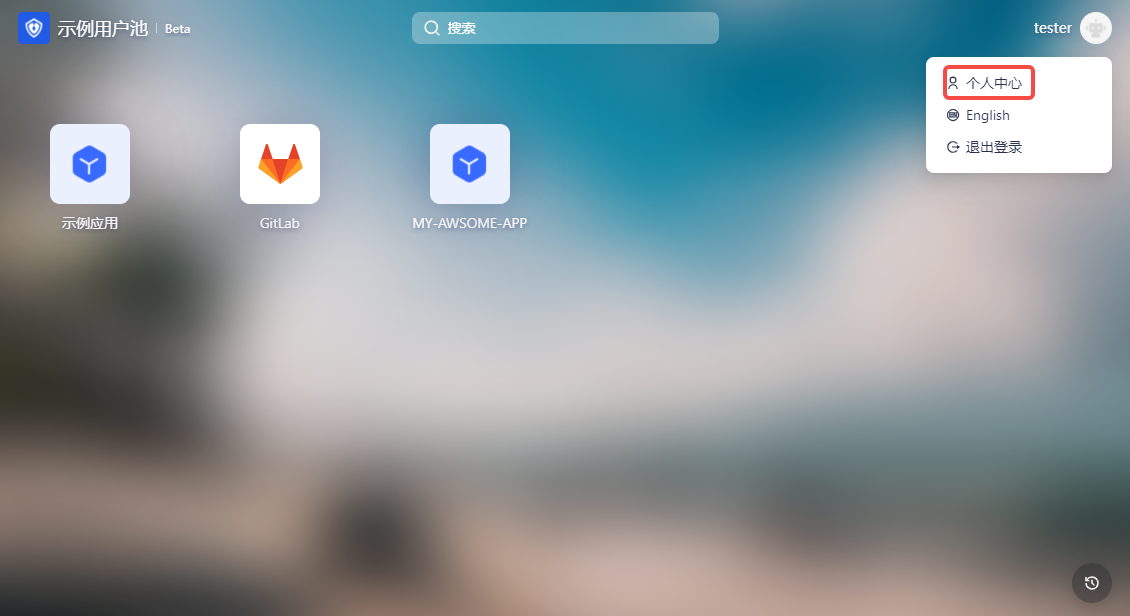
Original image 38 (in section "Update personal information"; Chinese UI)
Instructions for enterprise administrators
Step 1: Install the app for team members
Enterprise administrators or administrators with GenAuth console permissions (for details on administrators and adding collaboration administrators, see Add User Pool Collaboration Administrator) log in to the GenAuth console Application->Single Sign-On SSO->Application List->App Details Page->Access Authorization, and set the permissions to access the app in the Application Access Control module.
Original image 39 (in section "Step 1: Install the app for team members"; Chinese UI)
Step 2: Configure the application panel
Enterprise administrators or administrators with GenAuth console permissions can go to the console Branding->App Panel->Basic Settings and App->Single Sign-On SSO->Configuration to configure the basic information of the application panel, login registration method, social login method, enterprise login method, etc. (For details, please refer to Login Control and Application Panel Configuration).
Original image 40 (in section "Step 2: Configure the application panel"; Chinese UI)Original image 41 (in section "Step 2: Configure the application panel"; Chinese UI)
Step 3: View the applications accessible to users or organizations
Administrators can enter the console Applications->Single Sign-On SSO->Assigned Applications to view the list of applications accessible to users or organizations. Clicking an application will enter the application details page.
Step 4: Configure application single sign-on SSO
Users enter the "Single Sign-On SSO" page and add the self-built application just now.
INFO
After adding, log in to any application (self-built or integrated application) in the SSO list page to single sign-on all applications on the panel.
Original image 43 (in section "Step 4: Configure application single sign-on SSO"; Chinese UI)
Original image 44 (in section "Step 4: Configure application single sign-on SSO"; Chinese UI)
Integrated Application SSO Solution
GenAuth provides integrated applications. Integrated applications are pre-connected applications prepared for users, which allow GenAuth users to quickly connect to the required applications through simple configuration to achieve single sign-on, identity provision and other capabilities.
The GenAuth application market (also known as the cooperation network) is a set of GenAuth pre-integrated with third-party applications in the catalog, where you get integrated applications.
Original image 45 (in section "Integrated Application SSO Solution"; Chinese UI)
Here, you can easily integrate third-party applications in just two steps:
- Find the application you want to integrate in the GenAuth application market.
- Click "Get Application" to fill in the relevant configuration of the application to complete.
Detailed steps for integrating single sign-on in the App Market
Let's use Tencent Cloud as an example to illustrate how to use the App Market. Your users will quickly log in to your application through their Tencent Cloud accounts. First, if you don't have a free GenAuth account, please register one first. After entering the GenAuth console, go to the App Market. Here, you can select the application integration according to your needs. Here, let's search for "Tencent".
Click the first option "Tencent Cloud". This will take you to the Tencent Cloud integration page, which contains the following information:
- Description of the third-party integrated application
- Third-party integrated application address and privacy policy
- "Get the application" button, which will take you to the application installation integration configuration page
Click the "Integration Tutorial" button and you will see detailed step-by-step instructions for configuring the integrated application.
After completing the configuration of "Tencent Cloud" according to the help documentation, click "Save". You will be directed to the GenAuth application list page to assign permissions to the user. To test whether it works, select "Experience Login".
The link works properly and you will see the "Tencent Cloud Console" page containing the user's personal information.
It's that simple! In summary, the GenAuth App Market can help you:
- Search for target applications and reach the target in one step
- Self-service tutorials to help you get started quickly
- Open mode, borderless experience
The value of the App Market:
- Users will be able to integrate third-party applications extremely quickly and simply.
- For example, when configuring Alibaba Cloud SAML applications, users can pre-fill Alibaba Cloud SAML configuration items and upload keys to complete the configuration.
- From a macro perspective, the GenAuth App Market will help improve China's application ecosystem.
- GenAuth has moved the Chinese application market to the "Developer Authorization Platform".
Highlights of the App Market:
- Trustworthy: We provide a variety of safe and effective authorization methods in the App Market, and all listed applications have passed GenAuth's strict security certification.
- Easily find what you want: Not only can you easily find the integrations you need, you can also browse for integrations you don't know about in the app market. We provide a trusted partner and third-party integration application directory. You can add third-party applications to your GenAuth console with just a few clicks.
- Open: GenAuth will provide an open and self-service application market, which is convenient for developers to exchange resources in this market. In the future, you can initiate integration applications in our community forum, and even submit your own integrations. Of course, anyone's submissions will be tested and reviewed by GenAuth so that all users can use the app market safely.
Integrated applications
You can easily add any of them to your application by visiting the page of each integrated application.
Huawei Cloud
Huawei Cloud provides users with public cloud products such as cloud servers, cloud databases, cloud storage, CDN, big data, cloud security, and various solutions such as e-commerce, finance, and games. It provides 7x24-hour customer service support to help enterprises easily go to the cloud - Huawei Cloud.
AWS China
AWS is a cloud computing service platform under Amazon, providing a complete set of infrastructure and cloud solutions for global customers. The secure and reliable cloud computing services based on elastic cloud servers, cloud storage, databases, and machine learning help enterprises easily go to the cloud.
Alibaba Cloud
Alibaba Cloud is a subsidiary of Alibaba Group and is a world-leading cloud computing and artificial intelligence technology company. It provides cloud computing services such as free trials, cloud servers, cloud databases, cloud security, and cloud enterprise applications, as well as big data, artificial intelligence services, and precise customized scenario-based industry solutions. Free filing, 7x24 hours after-sales support, help enterprises to go to the cloud without worries.
Tencent Cloud
Tencent Cloud provides secure and stable cloud computing services to millions of enterprises and developers, covering cloud servers, cloud databases, cloud storage, video and CDN, domain name registration and other full-range cloud services and solutions for various industries.
ServiceDesk Plus
ServiceDesk Plus is a revolutionary product that transforms IT teams from daily firefighting to providing excellent customer service. It provides good visibility and central control when dealing with IT problems to ensure that the business will not be downtime. After 10 years of operation, it has provided good services to millions of IT personnel, end users and stakeholders.
Tencent Enterprise Mailbox
Tencent Enterprise Mailbox is a set of office mailbox systems tailored for enterprises by Tencent based on many years of experience in the development and operation of massive user mail systems. We provide developers with five open interfaces: address book management, new email notification, single sign-on, system log, and function settings. We hope to help companies improve development efficiency, reduce development costs and difficulties, and thus improve the efficiency of collaboration between production and management.
Next steps
This is just the beginning of the GenAuth application market. We will integrate 2000+ SaaS applications next. If you want to cooperate, please contact us. We look forward to cooperation!
At the same time, we hope that the application market will bring the best user experience to developers, so your feedback is very important to us. Please raise your opinions or questions in our community forum and let us know what new features you are looking forward to.
GenAuth Forum address:
INFO
https://forum.genauth.ai
Self-built application SSO solution
GenAuth provides self-built applications. The user pool stores all user data in the user system, while the self-built application corresponds to the business application created according to business needs in reality. A user pool may have multiple self-built applications. After enabling single sign-on between applications, the login status between different applications under the same user pool will be connected, and the end user only needs to log in once to travel between different applications.
Configure single sign-on in the GenAuth console
Step 1: Create two applications
First, you can create two applications according to the Guide.
Step 2: Configure single sign-on
- Go to the menu Application->Single Sign-on SSO, and click Add self-built application in the upper right corner.
Original image 51 (in section "Step 2: Configure single sign-on"; Chinese UI)
- Find and add the created application in the list.
Original image 52 (in section "Step 2: Configure single sign-on"; Chinese UI)
Step 3: Experience application single sign-on
- Go to the Application List tab of Single Sign-On SSO, select an application, and click Experience Login.
Original image 53 (in section "Step 3: Experience application single sign-on"; Chinese UI)
- Complete the login on the login page.
Original image 54 (in section "Step 3: Experience application single sign-on"; Chinese UI)
After success, it will jump to the application callback address:
Original image 55 (in section "Step 3: Experience application single sign-on"; Chinese UI)
- Next, we click the experience button of another application.
Original image 56 (in section "Step 3: Experience application single sign-on"; Chinese UI)
The user does not need to enter the password again and directly enters the callback address of the application:
Original image 57 (in section "Step 3: Experience application single sign-on"; Chinese UI)
Use SDK to access single sign-on
For detailed access process, please refer to the Single Sign-on SDK document.
Third-party SSO solution
The following chapter introduces the integration solution of implementing SSO using Feishu, WeChat for Enterprise, DingTalk, Welink, etc. as the single identity source of the enterprise.
Feishu Workbench SSO Solution
Traditional identity systems are often pieced together from various solutions, and "identity data" is separated from each other. The need for unified account management is becoming more frequent and necessary. By using a centralized identity management platform, the user's login experience and IT office efficiency can be greatly improved, and access security can be effectively improved.
We are often asked by developers how to log in to all applications through a single identity source and the same platform, and uniformly perform fine-grained permission management. Today, we take Feishu as an example to quickly add Gitlab as a single identity source for enterprises, and provide you with a very simple solution to the problem of unified account management.
Demo animation is not included in this documentation set.
Design idea
Original image 58 (in section "Design idea"; Chinese UI)
How to implement
Step 1: Take Feishu as an example and configure Feishu as a single identity source
- Configure Feishu address book in GenAuth and fill in the following information as required.
- Feishu application App ID
- Feishu application App Secret;
- Event subscription Encrypt Key (optional), if you do not need to keep in real-time synchronization with Feishu organization, you can leave it blank;
- Event subscription Verification Token (optional), if you do not need to keep in real-time synchronization with Feishu organization, you can leave it blank.
- Synchronize the organization from Feishu address book to GenAuth.
In the GenAuth console User Management->Organization page, click Organization Import->Sync Center Synchronization in the upper right corner to create Feishu upstream synchronization. After that, Feishu's addition, deletion, and modification operations will be synchronized to the console's organization in real time.
Step 2: Take GitLab as an example and use Feishu account to single sign-on GitLab
Integrate applications
- Enter Feishu Open Platform and click "Create Enterprise Self-built Application".
Original image 64 (in section "Integrate applications"; Chinese UI)
- Fill in the pop-up window information and click "Confirm to create".
Original image 65 (in section "Integrate applications"; Chinese UI)
- Enter the GenAuth console Application->Single Sign-On SSO, click Add Integrated Application in the upper right corner of the page, and get GitLab. Copy the Application Access Link under Application Configuration.
Original image 66 (in section "Integrate applications"; Chinese UI)
- Enter the Lark Open Platform Application Function->Web Page, turn on the Enable Web Page switch, paste the link to Web Page Configuration, and click Save.
Original image 67 (in section "Integrate applications"; Chinese UI)
- Enter Version Management and Release, and click Create Version.
Original image 68 (in section "Integrate applications"; Chinese UI)
- Fill in the version details and save.
Original image 69 (in section "Integrate applications"; Chinese UI)
- Click Apply for online release.
Original image 70 (in section "Integrate applications"; Chinese UI)
In the GenAuth console Application->Single Sign-On SSO->Application List, enter GitLab and set the users who can access GitLab under Access Authorization.
All users who have access to this application can see the newly added application on the Lark workbench. As long as the user logs in to one application, they can single-sign on all applications.
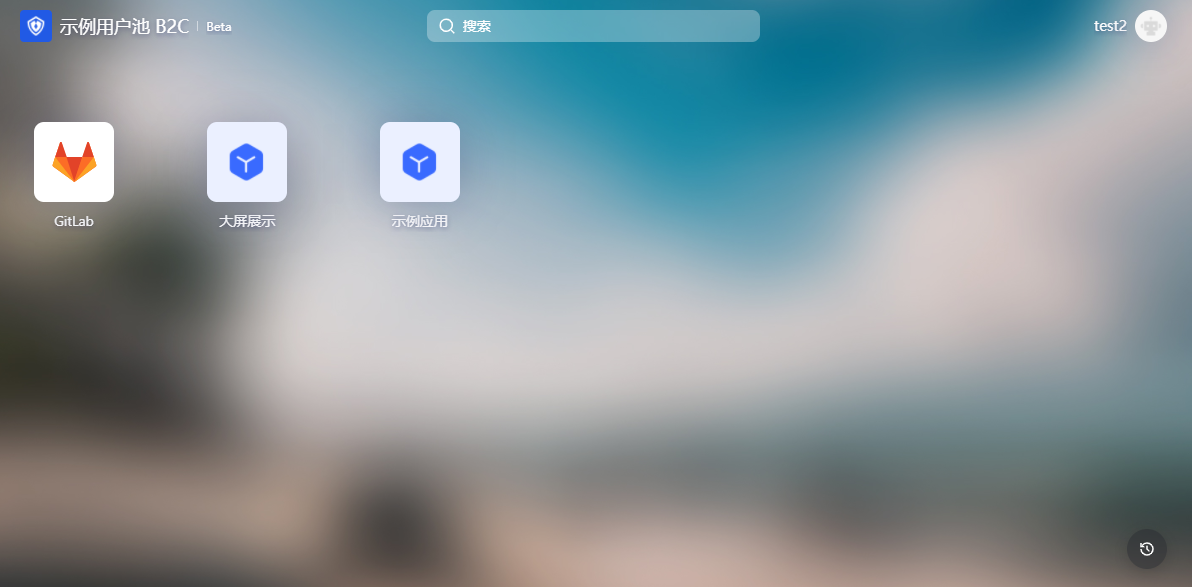
Self-built applications
For self-built applications, you need to do the following:
- Create a self-built application.
INFO
For creating an application, refer to How to create a self-built application.
You can also use an existing application.
- The user goes to Application->Single Sign-On SSO and clicks Add a self-built application in the upper right corner of the page.
Original image 71 (in section "Self-built applications"; Chinese UI)
Original image 72 (in section "Self-built applications"; Chinese UI)
INFO
After adding, log in to any application (self-built or integrated application) in the SSO list page to sign in to all applications on the panel.
- The user returns to the application list, clicks to enter the self-built application, and copies the Authentication address under Application configuration.
Original image 73 (in section "Self-built applications"; Chinese UI)
- Repeat the above "Integrated application" solution, and the user pastes the address in the Feishu Open Platform Application function->Web configuration.
Enterprise WeChat SSO Solution
Traditional identity systems are often pieced together from various solutions, and "identity data" is separated from each other. The need for unified account management is becoming more frequent and necessary. By using a centralized identity management platform, the user login experience and IT office efficiency can be greatly improved, and access security can be effectively improved.
We are often asked by developers how to log in to all applications through a single identity source and the same platform, and uniformly perform fine-grained permission management. Taking Enterprise WeChat as the enterprise's single identity source to quickly add Gitlab as an example, we provide everyone with a very simple solution to the problem of unified account management.
Demo animation is not included in this documentation set.
Design ideas
Original image 74 (in section "Design ideas"; Chinese UI)
How to implement
Step 1: Configure WeChat for Enterprise as GenAuth identity source
Configure the WeChat for Enterprise identity source from the enterprise identity source options in the GenAuth console.
Step 2: Taking GitLab as an example, use WeChat for Enterprise account to log in to GitLab
Integrated application
- Enter WeChat for Enterprise Service Provider Backstage, click "Enterprise Management Backstage"
Original image 75 (in section "Integrated application"; Chinese UI)
- Click "Create Application"
Original image 76 (in section "Integrated application"; Chinese UI)
Fill in the application name and other basic configuration information in the form Original image 77 (in section "Integrated application"; Chinese UI)
Select the visible range of the application Original image 78 (in section "Integrated application"; Chinese UI)
Click "Create Application" to complete the application creation Original image 79 (in section "Integrated application"; Chinese UI)
Enter the Gitlab configuration details page and copy the application access link Original image 80 (in section "Integrated application"; Chinese UI)
Go back to the enterprise micro-management backend and enter the details page of the newly created application Original image 81 (in section "Integrated application"; Chinese UI)
Fill in the URL of the application homepage Original image 82 (in section "Integrated application"; Chinese UI)
Self-built application
For self-built applications, you need to perform the following operations:
- Create a self-built application
First, you need to create a self-built application and complete the configuration. To create an application, refer to How to create a self-built application
- Users need to enter the configured self-built application details page and copy its authentication address
Original image 83 (in section "Self-built application"; Chinese UI)
- Fill in the URL of the application homepage, and the rest can be consistent with the integrated application
Original image 84 (in section "Self-built application"; Chinese UI)
DingTalk SSO Solution
Traditional identity systems are often pieced together from various solutions, and "identity data" is separated from each other. The need for unified account management is becoming more frequent and necessary. By using a centralized identity management platform, the user login experience and IT office efficiency can be greatly improved, and access security can be effectively improved.
We are often asked by developers how to log in to all applications through a single identity source and the same platform, and uniformly perform fine-grained permission management. Taking DingTalk as an enterprise's single identity source to quickly add Alibaba Cloud as an example, we provide everyone with a very simple solution to the problem of unified account management.
Design ideas
Original image 85 (in section "Design ideas"; Chinese UI)
How to implement
Step 1: Configure DingTalk as a GenAuth identity source
Configure the DingTalk identity source from the enterprise identity source options in the GenAuth console.
Step 2: Use DingTalk to single-point sign-on to Alibaba Cloud
Integrate applications
- Enter DingTalk Open Platform Backstage, click the top Type to switch to "Enterprise Application", click the application (Alibaba Cloud) card created in step 1 or create a new application.
Original image 86 (in section "Integrate applications"; Chinese UI)
Original image 87 (in section "Integrate applications"; Chinese UI)
- Enter the application details page, click "Development Management" on the left column, and click the "Modify" button
Original image 88 (in section "Integrate applications"; Chinese UI)
- Enter the Alibaba Cloud configuration details page and copy the application access link
Original image 89 (in section "Integrate applications"; Chinese UI)
Copy the link to the application homepage address and PC homepage address Original image 90 (in section "Integrate applications"; Chinese UI)
Click Version Management and Release on the left column and select Confirm Release Original image 91 (in section "Integrate applications"; Chinese UI)
Select the scope of application Original image 92 (in section "Integrate applications"; Chinese UI)
Add address book interface permissions Original image 93 (in section "Integrate applications"; Chinese UI)
Click Complete Login in the workbench Original image 94 (in section "Integrate applications"; Chinese UI)
Self-built application
For self-built applications, you need to perform the following operations:
- Create a self-built application
First, you need to create a self-built application and complete the configuration. To create an application, refer to How to create a self-built application
- Users need to enter the configured self-built application details page and copy its authentication address
Original image 95 (in section "Self-built application"; Chinese UI)
- Enter the enterprise application details page created in DingTalk, click "Development Management" on the left column, click the "Modify" button, and fill in the URL of the application homepage. The subsequent steps are the same as the integrated application to publish the application.
Original image 96 (in section "Self-built application"; Chinese UI)
Welink SSO Solution
Traditional identity systems are often pieced together from various solutions, and "identity data" is separated from each other. The need for unified account management is becoming more frequent and necessary. By using a centralized identity management platform, the user's login experience and IT office efficiency can be greatly improved, and access security can be effectively improved.
We are often asked by developers how to log in to all applications through a single identity source and the same platform, and uniformly perform fine-grained permission management. Taking Welink as an enterprise's single identity source to quickly add Alibaba Cloud as an example, we provide everyone with a very simple solution to unified account management.
Design ideas

How to implement
Step 1: Configure Welink as GenAuth identity source
Configure the Welink identity source from the enterprise identity source options in the GenAuth console.
Step 2: Use Welink to single-sign on Alibaba Cloud
Integrate applications
- After completing step 1, I believe you have completed the connection of the Welink identity source. Next, select the light application bar under "Enterprise Internal Applications" on the right sidebar of the open platform. Then click "Create Light Application" in the upper right corner to start the application creation process. Fill in the application name and other basic information as shown below to complete the creation.
Original image 97 (in section "Integrate applications"; Chinese UI)
The application is created successfully Original image 98 (in section "Integrate applications"; Chinese UI)
Enter the Alibaba Cloud configuration details page and copy the application access link. Original image 99 (in section "Integrate applications"; Chinese UI)
Switch the top type, enter the "Version Management" page, click Go to Settings after setting the homepage address, and fill in the link copied above into the PC link in the pop-up window. Original image 100 (in section "Integrate applications"; Chinese UI)Original image 101 (in section "Integrate applications"; Chinese UI)
Click on the interface permission Original image 102 (in section "Integrate applications"; Chinese UI)
Open the user login information and user detailed information permissions on the permission details page. Original image 103 (in section "Integrate applications"; Chinese UI)
Then enter the console and fill in the callback address in the Welink identity source into the application management backend. Original image 104 (in section "Integrate applications"; Chinese UI)Original image 105 (in section "Integrate applications"; Chinese UI)
Click "Publish Version" and complete the version release according to the process. Original image 106 (in section "Integrate applications"; Chinese UI)Original image 107 (in section "Integrate applications"; Chinese UI)
At this point, your application has entered the Welink work panel, click to enter.
Original image 108 (in section "Integrate applications"; Chinese UI)
Self-built application
For self-built applications, you need to perform the following operations:
- Create a self-built application
First, you need to create a self-built application and complete the configuration. To create an application, refer to How to create a self-built application
- Users need to enter the configured self-built application details page and copy its authentication address.
Original image 109 (in section "Self-built application"; Chinese UI)
- Similar to the integrated application, copy the authentication address to the PC link of the homepage address of the version management page. The subsequent steps are the same as the integrated application. After completing the permissions and application management background settings, you can publish the application and use it.
Original image 110 (in section "Self-built application"; Chinese UI)Original image 111 (in section "Self-built application"; Chinese UI)
ASA form filling
GenAuth Secure Authentication (ASA) is a feature developed by GenAuth that provides single sign-on (SSO) for external web applications that do not support standard authentication protocols (OAuth2.0, OIDC, SAML, CAS).
Administrators can assign application accounts and passwords to users. GenAuth stores the account and password in encrypted form in the database. When a user accesses the login interface of an application to which an account and password are assigned, GenAuth will automatically fill in the account and password and log in. End users only need to log in to GenAuth to directly access the assigned application.
How to use
Create an ASA application
Find an application that supports ASA in the GenAuth application market. Below we take "Shimo Document" as an example for demonstration.
Original image 112 (in section "Create an ASA application"; Chinese UI)
Click to enter the details, click "Get Application"
Original image 113 (in section "Create an ASA application"; Chinese UI)
Fill in the application name, click "Next"
Original image 114 (in section "Create an ASA application"; Chinese UI)
Click "Finish"
Original image 115 (in section "Create an ASA application"; Chinese UI)
On the Account Assignment page, assign an application account to the user
Original image 116 (in section "Create an ASA application"; Chinese UI)
On the Access Authorization page, select "Allow all users to access"
Original image 117 (in section "Create an ASA application"; Chinese UI)
Experience login
Click the "Go to Experience" button in the single sign-on application list to enter the GenAuth application panel login page.
Original image 118 (in section "Experience login"; Chinese UI)
Enter the email and password of the user who was previously assigned an account, click "Login", and enter the application panel.
Original image 119 (in section "Experience login"; Chinese UI)
A red exclamation mark will appear on the plug-in icon. Click the "plug-in icon" to open the plug-in page and click "Trust" the current account.
Original image 120 (in section "Experience login"; Chinese UI)
The plug-in will display a list of all applications assigned to the current account by the administrator, and you can see the "Graphite Document" you added previously.
Original image 121 (in section "Experience login"; Chinese UI)
Enter the login interface of the corresponding application, and the GenAuth browser plug-in will automatically fill in the previously assigned account password and automatically log in. Sometimes the application needs to perform some human-computer verification, which requires manual operation by the user and cannot be skipped by the plug-in.
Original image 122 (in section "Experience login"; Chinese UI)
Login is successful when verification is completed.
Original image 123 (in section "Experience login"; Chinese UI)
We are accelerating the ASA plug-in to support more applications. If you want your application to be supported, contact the GenAuth support team.
Custom ASA application
If you can't find the application you need in the application market, you can use a custom ASA application.
Create a custom ASA application
The following takes "Graphite Document" as an example. First, find Custom ASA application in the application market
Original image 124 (in section "Create a custom ASA application"; Chinese UI)
Click to enter the details, then click "Get application", enter the application configuration interface, upload the application logo, fill in the application name, and click "Next".
Original image 125 (in section "Create a custom ASA application"; Chinese UI)
Enter the ASA configuration interface
First enter the application login page URL, such as the login page URL of "Shimo Document" is https://shimo.im/loginByPassword.
Then fill in the ASA automatic login steps. The automatic login steps must be a valid JSON string and an object array. The ASA plug-in will perform object operations in sequence according to this array. All keys of the objects in the array are as follows:
- action: indicates the operation type of the current step, all operation types are
- type: input, such as input account
- click: click, such as clicking the login button
- selectFrame: switch iframe, some website login boxes are nested in iframes, at this time, you need to switch to the iframe where the login box is located to enter the account and password to log in
- wait: wait for a certain time, such as some web pages need to wait for a certain time before clicking the login button after entering the account and password
- target: indicates the operation target of the current step, the value is a string, accepts all dom element selectors that querySelector can accept, such as
#password - value: indicates the operation value of the current step
- When used in the type operation, the value is a string, and
{{account}}can be used to indicate the bound account,{{password}}indicates the bound password - When used in the wait operation, the value is a number in milliseconds, such as 1000 means waiting for 1 second
- When used in the type operation, the value is a string, and
- action: indicates the operation type of the current step, all operation types are
- The account allocation method currently only supports Administrators setting accounts and passwords
Original image 126 (in section "Create a custom ASA application"; Chinese UI)
Click "Finish" and assign an application account to the user on the account allocation page
Original image 127 (in section "Create a custom ASA application"; Chinese UI)
On the access authorization page, select "Allow all users to access"
Original image 128 (in section "Create a custom ASA application"; Chinese UI)
You can experience login later
ASAD form filling access tutorial
What is ASAD?
GenAuth Secure Authentication for Desktop is a feature developed by GenAuth that provides single sign-on (SSO) for external desktop applications that do not support standard authentication protocols (OAuth2.0, OIDC, SAML, CAS).
Administrators can assign application accounts and passwords to users. GenAuth stores the account and password in a database. When a user accesses the login interface of an application to which an account and password are assigned, GenAuth will automatically fill in the account and password and log in. End users only need to log in to GenAuth to directly access the assigned application.
How to use
Custom ASAD application
Find an application that supports ASAD in the GenAuth application market. Let's take "DingTalk" as an example for demonstration.
Original image 129 (in section "Custom ASAD application"; Chinese UI)
Get the application
Click to enter the details, click "Get the application" in the upper right corner
Original image 130 (in section "Get the application"; Chinese UI)
Fill in the basic configuration
Fill in the application name and click "Next"
Original image 131 (in section "Fill in the basic configuration"; Chinese UI)
Fill in the login configuration
Original image 132 (in section "Fill in the login configuration"; Chinese UI) Fill in the following configuration information, then click "Finish"
- First enter the application installation path, such as the installation path of "DingDing": C:\Program Files (x86)\DingDing
- Fill in the application name: to facilitate faster positioning of the current application
- Then fill in the ASAD automatic login step, the automatic login step must be a legal JSON The value is a string and is an array of objects. The ASAD plug-in will perform object operations in sequence based on this array. All keys of the objects in the array are as follows:
- action: indicates the operation type of the current step, all operation types are
- type: input, such as input account
- click: click, such as clicking the login button
- target: indicates the operation target of the current step, the value is a string, accepts all dom element selectors that querySelector (opens new window) can accept, such as #password
- value: indicates the operation value of the current step
- type: input, such as input account
- When used in the type operation, the value is a string, you can use
{{account}}to indicate the bound account,{{password}}to indicate the bound password
- action: indicates the operation type of the current step, all operation types are
- Account allocation method: supports administrators to set accounts and passwords; users to set accounts and passwords
Account allocation
Take the administrator setting account and password as an example, on the account allocation page, assign application accounts to users
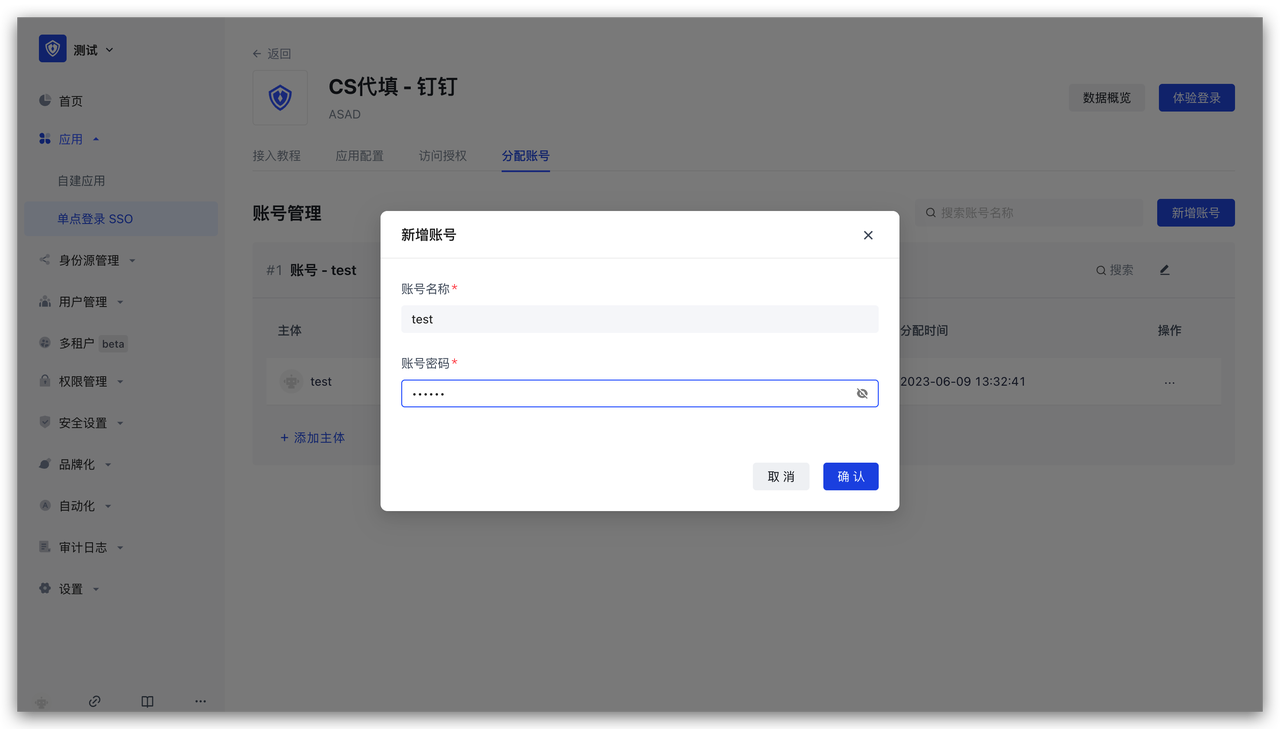
Access authorization
On the access authorization page, add application access authorization
Original image 133 (in section "Access authorization"; Chinese UI)Original image 134 (in section "Access authorization"; Chinese UI)
Experience login
After completion, you can immediately experience login
Original image 135 (in section "Experience login"; Chinese UI)
GenAuth Gateway Filling
GenAuth Gateway Filling uses the gateway provided by GenAuth to proxy the application service, and performs backend filling operations by intercepting login, logout and other APIs. This method is safer than ASA Form Filling. Users do not need to install browser plug-ins, which is more convenient to use. However, for applications that require human-machine verification (such as graphic verification codes), the gateway filling does not yet support filling verification codes.
Administrators can assign application accounts and passwords to users. GenAuth encrypts the account and password and stores them in the database. When a user accesses the login interface of an application that has been assigned an account and password, the GenAuth gateway intercepts the request, automatically fills in the account and password in the gateway, and logs in. End users only need to log in to GenAuth to directly access the assigned application.
How to use
Deploy GenAuth Gateway
Before using the GenAuth Gateway proxy filling capability, you need to deploy the GenAuth Gateway first. For details, please consult GenAuth pre-sales staff.
Connect to the gateway
Open the GenAuth console, enter the Application -> Self-built application menu, and select the Gateway management tab. Original image 136 (in section "Connect to the gateway"; Chinese UI)
Click Create gateway connection, enter the gateway information, where Gateway management backend address is the management interface address of the gateway after the gateway is deployed. Click Create to complete the creation. Original image 137 (in section "Connect to the gateway"; Chinese UI)
Create a gateway proxy filling application
Click Create self-built application, select Gateway proxy filling application, fill in the application information, and click Create to complete the creation.
Original image 138 (in section "Create a gateway proxy filling application"; Chinese UI)
Configure proxy filling strategy
Basic configuration
After creation, enter the application details, enter the Proxy filling strategy tab, and fill in the configuration information:
- Target application URL: the access address of the application that needs to be filled in, which must include the protocol, domain name (IP), and port
- Application proxy URL: the address that the user actually accesses after being proxied, which must include the protocol, domain name, and port
- Application login address: When login is required, the page address accessed by the user, the GenAuth gateway will intercept this page, and perform proxy login operations in the gateway
- User logout address: When the user manually logs out, the API address accessed, the GenAuth gateway will intercept this interface and clear the GenAuth login state
- Login successful redirection address: When the gateway proxy login is successful, the page address entered, generally fill in the application homepage
- Host Request header: In general, if the target application itself does not have a domain name or the target application domain name is the same as the application proxy domain name, select "Keep the domain name consistent with the client request", otherwise select "Use the domain name of the target application URL"
- First release login page: Some applications will return information such as csrf token through cookies when accessing the login page, so the login page cannot be intercepted directly. The browser needs to access the login page once before performing subsequent operations Original image 139 (in section "Basic configuration"; Chinese UI)
Login interface call
The login interface call configures the interface address and parameters called when the user enters the username and password and clicks the login button. The gateway will simulate this process. You can add multiple requests. In each request, you need to select the request method, enter the request address, and optional Params (parameters concatenated to the request URL), Headers (request headers), and Body (request body). In the value of Params, Headers, and Body, you can use variables. For example, if you need to get the user's bound account: ${bound_account.account}. All variables are as follows:
- bound_account.account: the account to which the user is bound
- bound_account.password: the password to which the user is bound
- cookie: request cookie, such as
${cookie.xxx}represents the value of request cookie xxx - api_respN.body.xxx: the value of xxx in the response to the Nth login request, where N is an increasing integer starting from 1, representing the Nth login request Original image 140 (in section "Login interface call"; Chinese UI)
Write localStorage after login is completed
For some single-page applications, after successfully calling the login interface, token information needs to be written to localStorage, and this information needs to be configured. The ${api_respN.body.xxx} variable can also be used in value Original image 141 (in section "Write localStorage after login is completed"; Chinese UI)
Click Save after configuration is completed.
Bind an account
Click the Add button in Account Binding Configuration, enter the real account and password of the replaced application, and click OK to create it successfully. Original image 142 (in section "Bind an account"; Chinese UI)
Click Account Configuration, click Account Binding. Original image 143 (in section "Bind an account"; Chinese UI)
Select the user, role or user group that needs to log in with this account, and click OK to complete the configuration. Original image 144 (in section "Bind an account"; Chinese UI)
On the access authorization page, select "Allow all users to access" Original image 145 (in section "Bind an account"; Chinese UI)
Then you can experience the login.