Connect to an external identity provider
IdP concept
An identity provider (IdP) is a service that collects and stores user identity information, such as username and password, and authenticates users when they log in. Using an external identity provider can reduce user management costs and user usage costs.
IdP connection process
A typical web application and IdP connection process includes the following steps:
- Jump: The user clicks the third-party login button (such as Google, GitHub) on the GenAuth console login page, and the system automatically pops up the third-party login page;
- Request: The user enters the account information and password of the account on the third-party login page;
- Verification: The third-party IdP verifies the user's identity;
- Authorization: After verifying the user's identity, the browser sends the temporary credentials to the GenAuth console, and GenAuth uses this credential to exchange the user's information from the third-party IdP.
IdP Classification
In the GenAuth product, we classify identity source providers into the following categories:
- Social identity source
- Enterprise identity source
- Custom database
Get help
If you have any questions, you can contact the GenAuth support team.
Social Identity Source
INFO
For information about the GenAuth user pool version that supports the "Social Identity Source" feature, please check the Official Website "Pricing" page. If your version does not support this benefit and you want to try it out, you can activate the trial period. For an introduction to the trial period and how to activate it, please check the Trial Period.
Social identity source login refers to the process in which users use the identity authentication information of a third-party social platform to authenticate and log in to the current URL. Social login not only helps to simplify the user's login experience, but also provides users with a simpler and more convenient way to register and log in. In the GenAuth console, there are currently nearly 20 types of social logins supported at home and abroad, such as personal WeChat, Tencent QQ, Facebook, Google, Twitter, etc.
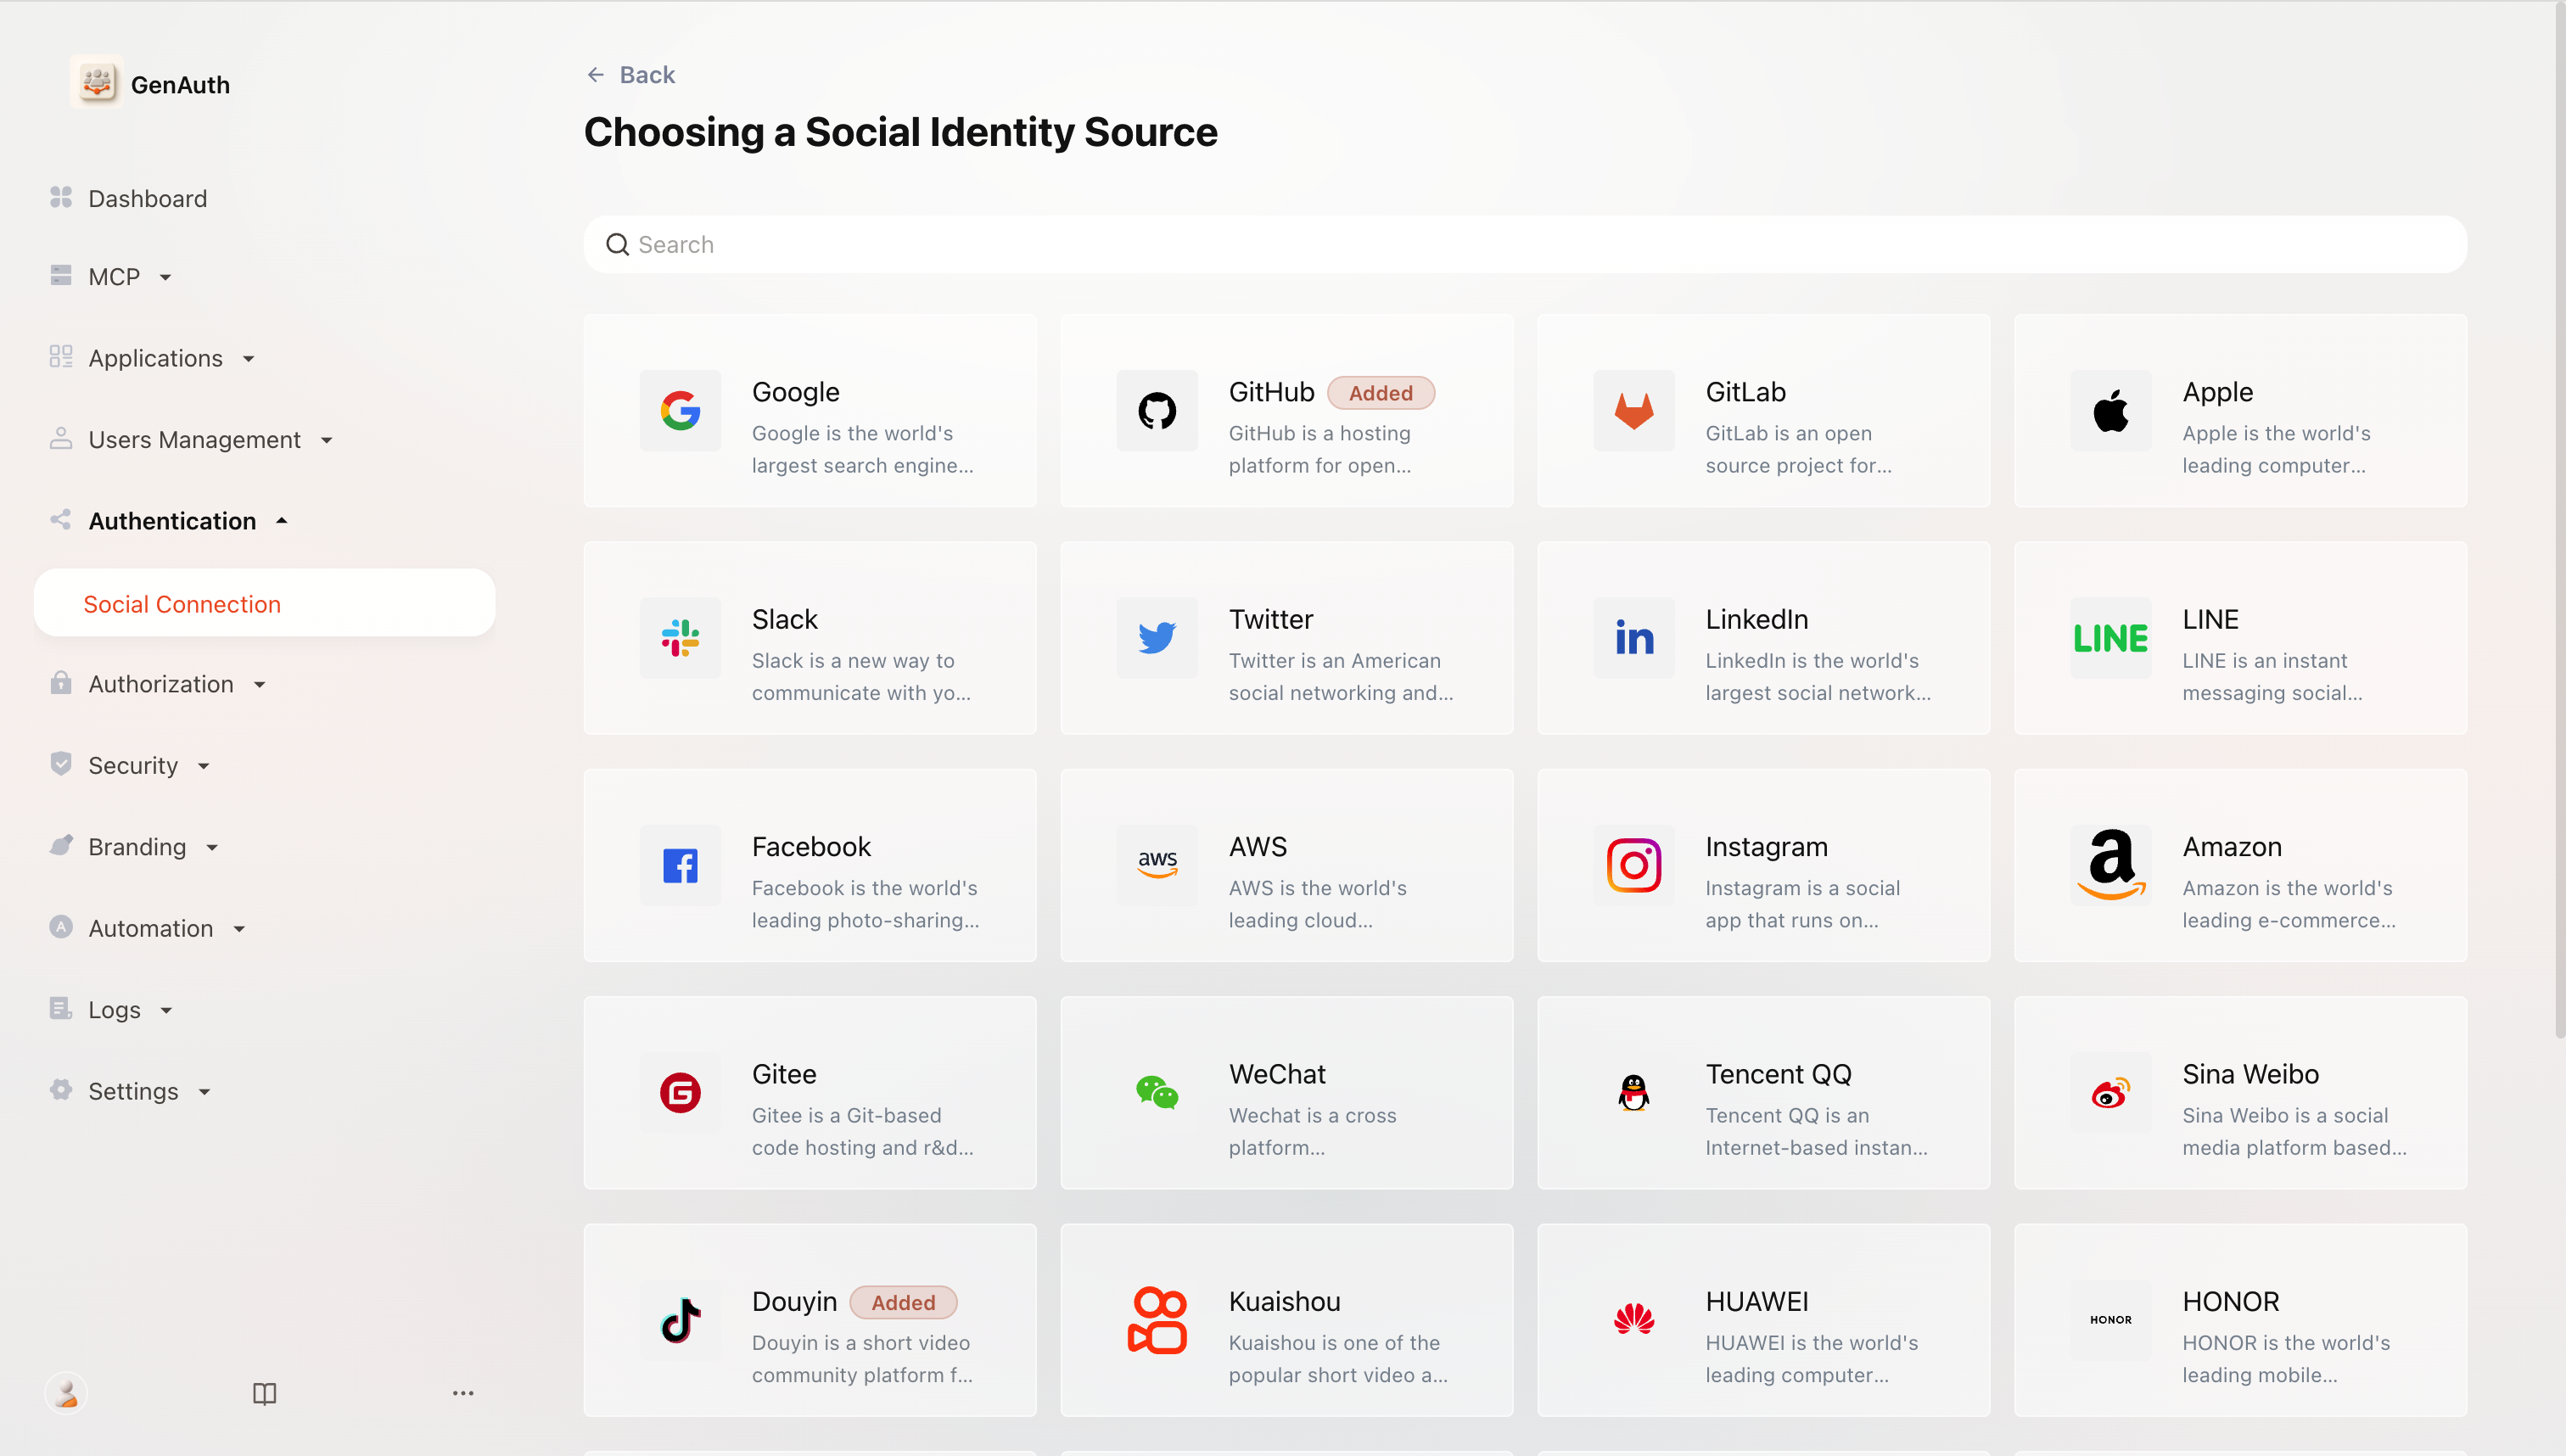
Social login list
The following is a complete list of social logins currently supported by the platform and related usage documents:
| Social Login Method | Usage Scenario | Documentation |
|---|---|---|
| PC WeChat QR Code | PC Website | |
| WeChat Mobile | Mobile APP | |
| WeChat Web Authorization | WeChat Web Page | |
| WeChat Official Account Scanning | PC Website | |
| WeChat Mini Program | WeChat Mini Program | Documentation |
| WeChat PC Mini Program QR Code | PC Website | |
| WeChat Mini Program App Launch | Mobile APP | |
| Tencent QQ | PC Website | |
| Tencent QQ Mobile | Mobile APP | |
| Sina Weibo | PC Website | |
| Sina Weibo Mobile | Mobile APP | |
| GitHub | PC Website | |
| GitHub Mobile | Mobile APP | |
| PC Website | ||
| Facebook Mobile | Mobile APP | |
| PC Website | ||
| Twitter Mobile | Mobile APP | |
| Google Web | PC Website | |
| Google Mobile | Mobile APP | |
| Apple Web | PC Website | |
| Apple Mobile | Mobile APP | |
| Alipay Web | PC Website | |
| Alipay Mobile | Mobile APP | |
| Slack | PC Website | |
| Slack Mobile | Mobile APP | |
| Gitee | PC Website | |
| GitLab | PC Website | |
| GitLab Mobile | Mobile APP | |
| Baidu | PC Website | |
| Baidu Mobile | Mobile APP | |
| PC Website | ||
| LinkedIn Mobile | Mobile APP | |
| NetEase Yidun (One-click Login) | Mobile APP | |
| QingCloud | PC Website | |
| PC Website | ||
| Douyin Mobile | Mobile APP | |
| Douyin Mini Program | Mobile APP | Documentation |
| Line Mobile | Mobile APP |
Social login association methods
Use the "Account association of identity source connection" function to allow your users to log in directly to existing accounts when logging in using the social identity source you configured.
When "Account identity association" is not enabled, a new user is created in the user pool by default when a user logs in through an identity source for the first time. After enabling "Account identity association", you can select the user's "Identity source account association method", allowing users to directly bind and log in to existing accounts through "field matching" or "ask binding".
The following are the ways to associate accounts for social logins currently supported by the platform:
| Social login method | Usage scenario | Query binding | Binding method | Field matching | Matching rules |
|---|---|---|---|---|---|
| PC WeChat code scan | PC website | ✅ | Mobile phone, email, user name | -- | -- |
| WeChat mobile terminal | Mobile APP | -- | -- | -- | -- |
| WeChat web page authorization | WeChat internal web page | -- | -- | -- | -- |
| WeChat public account follow | PC website | ✅ | Mobile phone, email, user name | -- | -- |
| WeChat applet | WeChat applet | -- | -- | -- | -- |
| WeChat PC applet code scan | PC website | ✅ | Mobile phone number | -- | -- |
| App launches applet | Mobile APP | -- | -- | -- | -- |
| Tencent QQ | PC website | ✅ | Mobile phone, email, user name | -- | -- |
| Tencent QQ Mobile | Mobile APP | -- | -- | ✅ | |
| Sina Weibo | PC Website | ✅ | Mobile, Email, Username | -- | -- |
| Sina Weibo Mobile | Mobile APP | -- | -- | ✅ | |
| GitHub | PC Website | -- | -- | ✅ | |
| GitHub Mobile | Mobile APP | -- | -- | ✅ | |
| PC Website | -- | -- | ✅ | ||
| Facebook Mobile | Mobile APP | -- | -- | ✅ | |
| PC Website | -- | -- | -- | -- | |
| PC Website | -- | -- | ✅ | ||
| Apple Web | PC Website | -- | -- | ✅ | |
| Apple Mobile | Mobile APP | -- | -- | ✅ | |
| Alipay Web | PC Website | -- | -- | -- | -- |
| Alipay Mobile | Mobile APP | -- | -- | -- | -- |
| Slack | PC Website | -- | -- | ✅ | |
| Slack Mobile | Mobile APP | -- | -- | ✅ | |
| Gitee | PC Website | -- | -- | ✅ | |
| Gitee Mobile | Mobile APP | -- | -- | ✅ | |
| GitLab | PC Website | -- | -- | ✅ | |
| GitLab Mobile | Mobile APP | -- | -- | ✅ | |
| Baidu | PC Website | -- | -- | -- | -- |
| Baidu Mobile | Mobile APP | -- | -- | -- | -- |
| PC Website | -- | -- | -- | -- | |
| NetEase Yidun (One-click Login) | Mobile APP | -- | -- | ✅ | Phone Number |
| QingCloud | PC Website | -- | -- | ✅ | Mobile number, email |
| PC website | -- | -- | ✅ | ||
| TikTok mobile | Mobile APP | -- | -- | ✅ | |
| Line mobile | Mobile APP | -- | -- | ✅ |
PC WeChat QR code scanning
Scenario introduction
- Overview: PC WeChat QR code scanning login allows users to use WeChat identity to securely log in to third-party applications or websites. After enabling WeChat QR code scanning login in GenAuth, you can quickly obtain WeChat user basic open information and help users realize basic open functions through GenAuth.
- Application scenario: PC website
- Terminal user preview image:
Original-image links open source screenshots in a new tab. Labels identify the surrounding section and Chinese UI or unverified language.
Original image 1 (in section "Scenario introduction"; Chinese UI)
Notes
- If you have not opened a WeChat Open Platform account, please go to WeChat Open Platform to register and log in first.
- If you have not opened a GenAuth console account, please go to GenAuth console to register a developer account.
Step 1: Create a website application
Go to WeChat Open Platform, click Admin Center -> Website Application -> Create Website Application. After the creation is complete, you need to record the AppID and AppSecret of the application, which will be used later.
Original image 2 (in section "Step 1: Create a website application"; Chinese UI)
Original image 3 (in section "Step 1: Create a website application"; Chinese UI)
Please ensure that the application has obtained the permission for WeChat login and set the authorization callback domain to core.genauth.ai
Original image 4 (in section "Step 1: Create a website application"; Chinese UI)
Step 2: Configure WeChat website application in the GenAuth console
2.1 On the Social Identity Source page of the GenAuth console, click the Create Social Identity Source button to enter the Select Social Identity Source page.
2.2 On the Select Social Identity Source page, click the WeChat card to enter the WeChat Login Mode page. Original image 6 (in section "Step 2: Configure WeChat website application in the GenAuth console"; Chinese UI)
2.3 Continue to click PC WeChat Scan login mode, or click Add to open the PC WeChat Scan configuration page. Original image 7 (in section "Step 2: Configure WeChat website application in the GenAuth console"; Chinese UI)
2.4 On the PC WeChat Scan configuration page, fill in the relevant field information. Original image 8 (in section "Step 2: Configure WeChat website application in the GenAuth console"; Chinese UI)
| Field | Description |
|---|---|
| Unique ID | a. The unique ID consists of lowercase letters, numbers, and -, and its length is less than 32 bits. b. This is the unique ID of this connection and cannot be modified after setting. |
| Display Name | This name will be displayed on the button of the terminal user's login interface. |
| AppID | WeChat application ID. |
| AppSecret | WeChat Application Key |
| Callback URL | If you want to jump directly to the social identity source for authentication without any GenAuth page in the middle, you can configure this parameter as the business callback address after successful authentication. GenAuth will send the user's ID Token to this URL. For example, if your website domain is:https://example.comand the URL for processing the GenAuth callback request is /auth/callback, then you should fill it in as:https://example.com/auth/callbackThis parameter has nothing to do with the callback link in the application configuration. |
| Login Mode | After turning on Login Only Mode, you can only log in to existing accounts, and cannot create new accounts. Please choose carefully. |
| Account Identity Association | When Account Identity Association is not turned on, a new user is created by default when a user logs in through an identity source. After turning on Account Identity Association, you can allow users to log in to existing accounts directly through Field Match or Ask Binding. |
2.5 After the configuration is completed, click the Create or Save button to complete the creation.
Step 3: Development Access
Recommended Development Access Method: Use Hosted Login Page
Pros and Cons: Simple operation and maintenance, which is handled by GenAuth. Each user pool has an independent secondary domain name; if you need to embed it into your application, you need to log in using the pop-up mode, that is: after clicking the login button, a window will pop up with the login page hosted by GenAuth, or redirect the browser to the login page hosted by GenAuth.
Detailed access method:
3.1 Create an application in the GenAuth console. For details, see: How to create an application in GenAuth
3.2 On the created PC WeChat QR code scanning identity source connection details page, open and associate an application created in the GenAuth console Original image 9 (in section "Step 3: Development Access"; Chinese UI)
3.3 Click the Experience Login button in the GenAuth console application, and experience PC WeChat QR code scanning login in the pop-up login window Original image 10 (in section "Step 3: Development Access"; Chinese UI)
Original image 11 (in section "Step 3: Development Access"; Chinese UI)
WeChat PC applet code scanning
Scenario introduction
- Overview: This is a groundbreaking design of GenAuth. After enabling scanning the small login QR code in GenAuth, you can obtain the official WeChat real-name user information. Users can complete registration or login with their real number with one-click authorization, and establish an account system based on mobile phone numbers for developers.
- Application scenario: PC website
- Terminal user preview image:
Original image 12 (in section "Scenario introduction"; Chinese UI)
Notes
- If you have not opened a WeChat public platform account, please go to WeChat public platform to register and log in first.
- If you have not opened a GenAuth console account, please go to GenAuth console to register a developer account.
Step 1: Create a mini program on WeChat public platform (optional)
By default, the mini program scan code login will use the default mini program provided by GenAuth. If you need stronger brand customization capabilities, or want to connect the user WeChat account logged in through the mini program scan code with your other WeChat public platforms, you need to apply for your own mini program.
If you belong to one of these two scenarios, please go to WeChat public platform to create a WeChat mini program. You need to record the application's App ID and App Secret, which will be needed later.
At the same time, you need to contact us to obtain the source code of the mini-login. For details, please consult GenAuth after-sales service staff.
Step 2: Configure the WeChat mini-program in the GenAuth console
2.1 Please click the Create Social Identity Source button on the Social Identity Source page of the GenAuth console to enter the Select Social Identity Source page.
2.2 On the Select Social Identity Source page, click the WeChat card to enter the WeChat Login Mode page. Original image 15 (in section "Step 2: Configure the WeChat mini-program in the GenAuth console"; Chinese UI)
2.3 Continue to click PC Mini Program Scan Code login mode, or click Add to open the PC Mini Program Scan Code configuration page. Original image 16 (in section "Step 2: Configure the WeChat mini-program in the GenAuth console"; Chinese UI)
2.4 Fill in the relevant field information on the PC Mini Program Scan Code configuration page. Original image 17 (in section "Step 2: Configure the WeChat mini-program in the GenAuth console"; Chinese UI)
| Field | Description |
|---|---|
| Unique ID | a. The unique ID consists of lowercase letters, numbers, and -, and its length is less than 32 bits. b. This is the unique ID of this connection and cannot be modified after setting. |
| Display Name | This name will be displayed on the button of the terminal user's login interface. |
| Callback URL | The service callback address after the identity source completes authentication |
| Mini Program Logo | The uploaded logo will be used as the logo in the center of the mini program QR code. |
| Whether to enable private deployment | If you want to use your own WeChat or customize the mini login mini program page style, you can contact us to obtain the source code of the mini login mini program. If this option is enabled, you must deploy your own mini login mini program and fill in the WeChat mini program's AppID and AppSecret. |
| Mini Program ID | The mini program's AppID, which is filled by users who choose to privatize the mini program. |
| Mini Program Key | The mini program's AppSecret, which is filled by users who choose to privatize the mini program. |
| Login Mode | After enabling Login Only Mode, you can only log in to existing accounts and cannot create new accounts. Please choose carefully. |
| Account Identity Association | If Account Identity Association is not enabled, a new user is created by default when a user logs in through an identity source. After enabling Account Identity Association, users can be allowed to log in to existing accounts directly through Field Match or Ask Binding. |
2.5 After the configuration is completed, click the Create or Save button to complete the creation.
Step 3: Development Access
Recommended Development Access Method: Use Hosted Login Page
Pros and Cons: Simple operation and maintenance, which is handled by GenAuth. Each user pool has an independent secondary domain name; if you need to embed it into your application, you need to log in using the pop-up mode, that is: after clicking the login button, a window will pop up with the login page hosted by GenAuth, or redirect the browser to the login page hosted by GenAuth.
Detailed access method:
3.1 Create an application in the GenAuth console. For details, see: How to create an application in GenAuth
3.2 On the created PC Mini Program Scan Code identity source connection details page, open and associate an application created in the GenAuth console Original image 18 (in section "Step 3: Development Access"; Chinese UI)
3.3 Click the Experience Login button in the GenAuth console application, and experience the PC Mini Program Scan Code login in the pop-up login window Original image 19 (in section "Step 3: Development Access"; Chinese UI)
Original image 20 (in section "Step 3: Development Access"; Chinese UI)
WeChat Official Account Follow
Scenario Introduction
- Overview: Follow Official Account Login refers to the process of generating a WeChat official account QR code on a PC website, and users use WeChat APP to scan the code and automatically log in after following the official account. Using Follow Official Account Login can quickly attract traffic to the official account and improve brand stickiness. With the Follow Official Account Login of GenAuth, you hardly need to develop any code, just simple configuration, and it can be completed in a few minutes.
- Application scenario: PC website
- End user preview image:
Original image 21 (in section "Scenario Introduction"; Chinese UI)
Notes
- Due to the requirements of the WeChat platform, only service accounts have the Generate a QR code with parameters API capability. Please make sure that your public account is a service account type.
- If you have not opened a GenAuth console account, please go to the GenAuth console to register a developer account.
Step 1: Enable server configuration
Get public account development information
You can get the Developer ID (AppID) and Developer Password (AppSecret) on the Settings and Development -> Basic Configuration page in the WeChat public platform backend, which will be used in step 2. Original image 22 (in section "Get public account development information"; Chinese UI)
Set IP whitelist
You need to add the IP of the GenAuth server to the IP whitelist of the WeChat public account. You can get the external IP list of the GenAuth server through the following API:
INFO
https://core.genauth.ai/api/system/public-ips
Original image 23 (in section "Set IP whitelist"; Chinese UI)
Add API permissions
You need to add the Generate a Parametric QR Code interface permission on the WeChat Official Account Platform Settings and Development-Interface Permissions page: Original image 24 (in section "Add API permissions"; Chinese UI)
Select the server configuration mode
You can enable server configuration on the Settings and Development -> Basic Configuration page in the WeChat Official Account Platform backend. When a user scans the official account QR code and follows the official account, GenAuth can receive the user's scan and follow events to complete the login.
Since only one WeChat server configuration can be set, you need to choose two different modes according to your specific scenario:
- Mode 1: Set the server address to the GenAuth server endpoint. This mode is the simplest, but all events of the WeChat official account will be pushed to the GenAuth server, and you will lose other events except scanning and following.
- Mode 2: Set the server address to your own server, and then forward the scanning and following events to the GenAuth server endpoint. This mode requires some development work, but will not lose events, and is conducive to more expansion based on official account events in the future.
Mode 1
Original image 25 (in section "Mode 1"; Chinese UI)
- URL: Set to
https://core.genauth.ai/connections/social/{Identifier}/{USERPOOL_ID}/events, replace{Identifier}with the unique identifier you entered in the GenAuth console configuration area, and replace{USERPOOL_ID}with your User Pool ID.If you don't have an
Identifieryet, you can create an identity source later and come back here to modify it. - Token: You can set the Token in the WeChat official account to any string. It must be English or numbers and 3-32 characters long. Make sure the token you configure in the GenAuth console is consistent with the token provided by the official account you need to connect to.
- EncodingAESKey: The message encryption key consists of 43 characters and can be modified randomly. The character range is A-Z, a-z, 0-9.
- Message encryption and decryption method: Please select according to business needs. It is recommended to use the safe mode.
Click Submit to save, and don’t forget to enable this server configuration: Original image 28 (in section "Mode 1"; Chinese UI)
Mode 2
The configuration process is exactly the same as Mode 1. You only need to set URL to your own server address. You need to complete the interface verification and message forwarding operations on the server endpoint you configured.
Step 2: Configure WeChat Official Account Follow in the GenAuth console
2.1 On the Social Identity Source page of the GenAuth console, click the Create Social Identity Source button to enter the Select Social Identity Source page.
2.2 On the Select Social Identity Source page, click the WeChat card to enter the WeChat Login Mode page. Original image 30 (in section "Step 2: Configure WeChat Official Account Follow in the GenAuth console"; Chinese UI)
2.3 Continue to click WeChat Official Account Follow Login Mode, or click Add to open the WeChat Official Account Follow configuration page. Original image 31 (in section "Step 2: Configure WeChat Official Account Follow in the GenAuth console"; Chinese UI)
2.4 On the WeChat Official Account Follow configuration page, fill in the relevant field information obtained from step 1. Original image 32 (in section "Step 2: Configure WeChat Official Account Follow in the GenAuth console"; Chinese UI)
| Field | Description |
|---|---|
| Unique ID | a. The unique ID consists of lowercase letters, numbers, and -, and its length is less than 32 bits. b. This is the unique ID of this connection and cannot be modified after setting. |
| Display Name | This name will be displayed on the button of the terminal user's login interface. |
| Developer ID | The developer ID is the public account development identification code. Together with the developer password, the public account's interface capabilities can be called. |
| Developer Password | The developer password is the password to verify the public account developer identity. |
| Token | Must be English or numeric, with a length of 3-32 characters. |
| Message Encryption and Decryption Key | The message encryption key consists of 43 characters and can be modified randomly. The character range is A-Z, a-z, 0-9. If you choose the message encryption and decryption method as plain text mode, this item can be left blank. |
| Message Encryption and Decryption Method | Please choose the same message encryption and decryption method you chose in the WeChat public account. |
| Login mode | After enabling Login-only mode, you can only log in to existing accounts, and cannot create new accounts. Please choose carefully. |
| Account identity association | When Account identity association is not enabled, a new user is created by default when a user logs in through an identity source. After enabling Account identity association, users can be allowed to log in directly to an existing account through Field matching or Query binding. |
2.5 After the configuration is completed, click Create or Save to complete the creation.
Step 3: Development access
Recommended development access method: Use hosted login page
Pros and cons description: Simple operation and maintenance, which is handled by GenAuth. Each user pool has an independent secondary domain name; if you need to embed it in your application, you need to use the pop-up mode to log in, that is: after clicking the login button, a window will pop up with the login page hosted by GenAuth, or redirect the browser to the login page hosted by GenAuth.
Detailed access method:
3.1 Create an application in the GenAuth console. For details, see: How to create an application in GenAuth
3.2 On the created WeChat Official Account Follow identity source connection details page, open and associate an application created in the GenAuth console Original image 33 (in section "Step 3: Development access"; Chinese UI)
3.3 Click the Experience Login button in the GenAuth console application, and experience the WeChat Official Account Follow login in the pop-up login window Original image 34 (in section "Step 3: Development access"; Chinese UI)
Original image 35 (in section "Step 3: Development access"; Chinese UI)
How to cancel the official account's authorization to GenAuth as a third-party platform?
- Log in to the WeChat official account platform;
- Enter the "Settings and Development - Official Account Settings - Authorization Management" page;
- As shown in the figure below, click "View Platform Details"; Original image 36 (in section "How to cancel the official account's authorization to GenAuth as a third-party platform?"; Chinese UI)
- Enter the "Authorization Management" page, confirm the information, and click the "Cancel Authorization" button below to cancel the current official account's authorization to GenAuth as a third-party platform; Original image 37 (in section "How to cancel the official account's authorization to GenAuth as a third-party platform?"; Chinese UI)
- After canceling the authorization in the above figure, GenAuth will be automatically unbound. You can return to the GenAuth console page to view it, and the page will return to the state before authorization.
WeChat Mobile
Scenario Introduction
- Overview: GenAuth provides developers with a way to quickly jump to WeChat login and obtain user information in mobile (iOS or Android) applications. WeChat account access can be completed by simply calling the GenAuth mobile SDK.
- Application scenario: Mobile APP
- End user preview image: Pull up the WeChat APP in the mobile application to log in;
Original image 38 (in section "Scenario Introduction"; Chinese UI)
Notes
- If you have not opened a WeChat Open Platform account, please go to WeChat Open Platform to register a developer account;
- If you have not opened a GenAuth console account, please go to GenAuth console to register a developer account;
Step 1: Create a WeChat mobile application on the WeChat Open Platform
Go to WeChat Open Platform to create a WeChat mobile application. Original image 39 (in section "Step 1: Create a WeChat mobile application on the WeChat Open Platform"; Chinese UI)
After the creation is complete, you need to record the AppID and AppSecret of the application, which will be used later.
Step 2: Configure WeChat mobile login in the GenAuth console
2.1 Please click the "Create Social Identity Source" button on the "Social Identity Source" page of the GenAuth console to enter the "Select Social Identity Source" page.
2.2 On the "Select Social Identity Source" page, click the "WeChat" card to enter the "WeChat Login Mode" page. Original image 42 (in section "Step 2: Configure WeChat mobile login in the GenAuth console"; Chinese UI)
2.3 Click the "WeChat Mobile" login mode, or click … Add to open the "WeChat Mobile" configuration page. Original image 43 (in section "Step 2: Configure WeChat mobile login in the GenAuth console"; Chinese UI)
2.4 On the "WeChat Mobile" configuration page, fill in the relevant field information.
| Field | Description |
|---|---|
| Unique ID | a. The unique ID consists of lowercase letters, numbers, and -, and its length is less than 32 bits. b. This is the unique identifier of this connection and cannot be modified after setting |
| Display name | This name will be displayed on the button of the terminal user's login interface |
| AppID | AppID obtained in step 1 |
| App secret | AppSecret obtained in step 1 |
| Login mode | After turning on "Login only mode", you can only log in to existing accounts and cannot create new accounts. Please choose carefully |
2.5 After the configuration is completed, click the "Create" or "Save" button to complete the creation.
Step 3: Development access
Recommended development access method: SDK
Pros and cons description: Simple access, only a few lines of code are required. Highest degree of customization.
Detailed access method:
3.1 Please follow the WeChat Login SDK Access Document (Android) to access your Android application; please follow the WeChat Login SDK Access Document (iOS) to access your IOS application;
3.2 Create a mobile application in the GenAuth console. For details, see: How to create an application in GenAuth
3.3 On the created "WeChat Mobile" identity source connection details page, open and associate a mobile application created in the GenAuth console; Original image 45 (in section "Step 3: Development access"; Chinese UI)
3.4 Go to the associated mobile APP and experience the APP login function.
Original image 46 (in section "Step 3: Development access"; Chinese UI)
APP launches WeChat Mini Program
Scenario Introduction
Overview: GenAuth provides developers with a method for mobile applications to quickly launch WeChat Mini Programs and obtain user information and complete login through SDK. Through the GenAuth SDK, you can easily obtain the user identity provided by WeChat and quickly establish an account system based on mobile phone numbers.
Application scenario: Mobile APP
Original image 47 (in section "Scenario Introduction"; Chinese UI)
Notes
- If you have not opened a GenAuth console account, please go to GenAuth console to register a developer account;
Step 1: Create a WeChat mobile application on WeChat Open Platform
Go to WeChat Open Platform to create a WeChat mobile application.
After the creation is complete, you need to record the AppID and AppSecret of the application, which will be used later.
Step 2: Associate the mini program in WeChat Open Platform
Go to WeChat Open Platform Admin Center->Mobile Application->Application Details->Associate Mini Program Information Page to associate the mini program.
Step 3: Create a WeChat mini program in WeChat Open Platform (optional)
By default, the default mini program provided by GenAuth will be used when the APP launches the mini program login. If you need stronger brand customization capabilities, or want to connect the WeChat account of the user who logs in through the mini program by scanning the code with your other WeChat public platforms, you need to apply for your own mini program. If you belong to one of these two scenarios:
Please follow the WeChat public platform instructions to create a WeChat mini program. You need to record the application's AppID and AppSecret, which will be needed later. At the same time, you need to contact us to obtain the source code of the mini-login. For details, please consult GenAuth after-sales service staff.
Step 4: Configure APP to launch the mini-program login in the GenAuth console
- Please click the "Create Social Identity Source" button on the "Social Identity Source" page of the GenAuth console to enter the "Select Social Identity Source" page.
- On the "Select Social Identity Source" page, click the "WeChat" card to enter the "WeChat Login Mode" page.
- Click the "APP Launches Mini Program" login mode, or click … Add to open the "APP Launches Mini Program" configuration page.
- On the "APP Launch Mini Program" configuration page, fill in the relevant field information.
| Field | Description |
|---|---|
| Unique ID | a. The unique ID consists of lowercase letters, numbers, and -, and its length is less than 32 bits. b. This is the unique ID of this connection and cannot be modified after setting. |
| Display Name | This name will be displayed on the button of the terminal user's login interface |
| Mini Program ID | Fill in if you choose to privatize the Mini Program |
| Mini Program Secret | Fill in if you choose to privatize the Mini Program |
| Login Mode | After turning on "Login Only Mode", you can only log in to existing accounts and cannot create new accounts. Please choose carefully |
- After the configuration is completed, click the "Create" or "Save" button to complete the creation.
Step 5: Development access
Recommended development access method: SDK
Pros and cons description: Easy access, only a few lines of code are needed. Highest degree of customization.
Detailed access method:
- Refer to the SDK developer access documentation Android and iOS.
- On the created "APP Launch Mini Program" identity source connection details page, open and associate a mobile app created in the GenAuth console.
Original image 54 (in section "Step 5: Development access"; Chinese UI)
- Go to the associated mobile app and experience the APP login function.
Original image 55 (in section "Step 5: Development access"; Chinese UI)
Honor
Scenario Introduction
- Overview: Honor social login allows users to log in to third-party applications or websites securely using Honor as the identity source. Configure and enable Honor social login in GenAuth to quickly obtain Honor's basic open information and help users log in without passwords through GenAuth.
- Application scenario: PC website
- Terminal user preview image:
Original image 56 (in section "Scenario Introduction"; Chinese UI)
Notes
- If you don't have an Honor account yet, please go to Honor Developer Service Platform to register as a developer and complete real-name authentication. For specific methods, please refer to Honor Developer Account Registration and Authentication.
- If you have not opened a GenAuth console account, please go to GenAuth console to register a developer account
Step 1: Create a server application in Honor
Log in to Honor Developer Service Platform, click Management Center: Original image 57 (in section "Step 1: Create a server application in Honor"; Chinese UI)
On the Management Center page, click Account Service: Original image 58 (in section "Step 1: Create a server application in Honor"; Chinese UI)
On the Account Service page, click Operations in sequence Please select application → Web application → New application: Original image 59 (in section "Step 1: Create a server application in Honor"; Chinese UI)
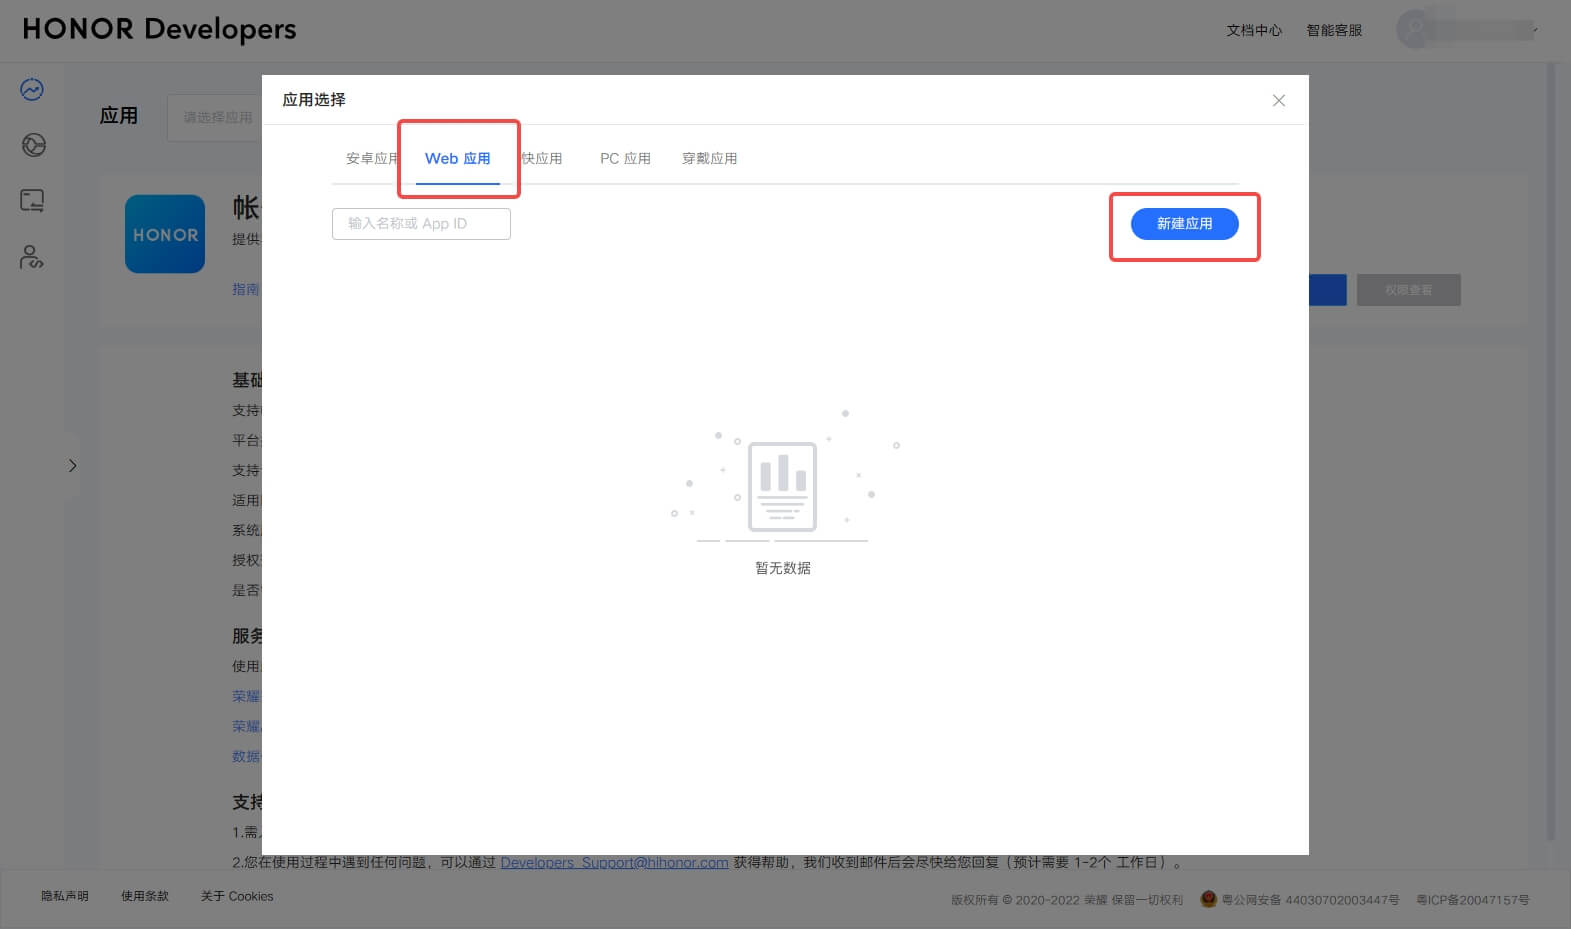
Select platform type as Web → Fill in application name → Select default language → Upload application icon → Create
Original image 60 (in section "Step 1: Create a server application in Honor"; Chinese UI)
Go back to the Account Service page and click Enable
Original image 61 (in section "Step 1: Create a server application in Honor"; Chinese UI)
Configure Application callback address
- Application callback address: Fill in
https://core.genauth.ai/connection/social/{Unique ID}/{User Pool ID}/callback, you need to replace{Unique ID}with theUnique IDfilled in the identity source you are creating in GenAuth, and{User Pool ID}with your User Pool ID
Original image 62 (in section "Step 1: Create a server application in Honor"; Chinese UI)
Finally, click "Submit". After the creation is completed, you need to record the Application ID and APP SECRET, which will be used in the next step. Original image 63 (in section "Step 1: Create a server application in Honor"; Chinese UI)
Step 2: Configure Honor application configuration in the GenAuth console
2.1 On the "Social Identity Source" page of the GenAuth console, click the "Create Social Identity Source" button to enter the "Select Social Identity Source" page.
2.2 On the "Select Social Identity Source" page, click the "Honor" card. Original image 65 (in section "Step 2: Configure Honor application configuration in the GenAuth console"; Chinese UI)
2.3 On the "Honor" configuration page, fill in the relevant field information. Original image 66 (in section "Step 2: Configure Honor application configuration in the GenAuth console"; Chinese UI)
| Field | Description |
|---|---|
| Unique ID | a. The unique ID consists of lowercase letters, numbers, and -, and its length is less than 32 bits. b. This is the unique ID of this connection and cannot be modified after setting. |
| Display Name | This name will be displayed on the button of the terminal user's login interface. |
| APP ID | The Honor application ID obtained in the previous step. |
| APP Secret | The Honor application Secret obtained in the previous step. |
| Login Mode | After turning on "Login Only Mode", you can only log in to existing accounts and cannot create new accounts. Please choose carefully. |
| Account Identity Association | When "Account Identity Association" is not turned on, a new user is created by default when a user logs in through an identity source. After turning on "Account Identity Association", users can be allowed to log in directly to an existing account through "Field Matching" or "Query Binding". |
2.4 After the configuration is completed, click the "Create" or "Save" button to complete the creation.
Step 3: Development Access
Recommended development access method: Use a hosted login page
Pros and cons description: Simple operation and maintenance, which is handled by GenAuth. Each user pool has an independent secondary domain name; if you need to embed it in your application, you need to log in using the pop-up mode, that is: after clicking the login button, a window will pop up with the login page hosted by GenAuth, or redirect the browser to the login page hosted by GenAuth.
Detailed access method:
3.1 Create an application in the GenAuth console. For details, see: How to create an application in GenAuth
3.2 On the created "Honor" identity source connection details page, open and associate an application created in the GenAuth console
Original image 67 (in section "Step 3: Development Access"; Chinese UI)
3.3 Click the "Experience Login" button of the GenAuth console application to experience the "Honor" login in the pop-up login window
Original image 68 (in section "Step 3: Development Access"; Chinese UI)
Tencent QQ
Scenario Introduction
- Overview: Tencent QQ social login is a user's secure login to a third-party application or website using Tencent QQ as the identity source. Configure and enable Tencent QQ social login in GenAuth, and you can quickly obtain Tencent QQ's basic open information and help users log in without passwords through GenAuth.
- Application scenario: Create website application, create mobile application
- Terminal user preview image:
Original image 69 (in section "Scenario Introduction"; Chinese UI)
Notes
- If you have not opened a QQ interconnection platform account, please go to QQ interconnection center to register a developer account.
- You can create an application only after it is approved.
- If you have not opened a GenAuth console account, please go to GenAuth console to register a developer account.
Step 1: Create a website application on QQ Open Platform
Go to QQ Connect Center to create a website application.
Click your personal QQ avatar on the upper left of the page to complete the registration and initiate the review, then click "Website Application" and "Create Application" to create a website application that uses QQ login. If you encounter any problems during the process, please refer to the QQ official "Documentation" at the top of the page.
During the application creation process, you need to configure the allowed callback address. Please use the following settings: https://core.genauth.ai/connection/social/<Unique Identifier>/<USERPOOL_ID>/callback. You need to replace <Unique Identifier> with your Unique Identifier and <USERPOOL_ID> with your User Pool ID
Step 2: Configure Tencent QQ in the GenAuth console
2.1 Please click the "Create Social Identity Source" button on the "Social Identity Source" page of the GenAuth console to enter the "Select Social Identity Source" page.
Original image 71 (in section "Step 2: Configure Tencent QQ in the GenAuth console"; Chinese UI)
2.2 Please go to the GenAuth console's "Social Identity Source" - "Select Social Identity Source" page, click the "Tencent QQ" identity source button to enter the "Tencent QQ Login Mode" page.
Original image 72 (in section "Step 2: Configure Tencent QQ in the GenAuth console"; Chinese UI)
2.3 Please go to the GenAuth console's "Social Identity Source" - "Tencent QQ" page to configure the relevant field information.
Original image 73 (in section "Step 2: Configure Tencent QQ in the GenAuth console"; Chinese UI)
| Field/Function | Description |
|---|---|
| Unique Identifier | a. The unique identifier consists of lowercase letters, numbers, and -, and is less than 32 bits long. b. This is the unique identifier for this connection and cannot be modified after setting. |
| Display Name | This name will be displayed on the button of the terminal user's login interface. |
| APP ID | QQ application ID, which needs to be obtained on the QQ Open Platform. |
| APP Key | QQ application key, which needs to be obtained on the QQ Open Platform. |
| Callback URL | You can fill in your business callback address. After the user completes the login, the browser will jump to this address. |
| Scopes | By default, GenAuth will only apply for authorization of basic user information (such as avatar, nickname, etc.) from the user. If you need more advanced permissions, you can check the corresponding options. |
| Callback Address | QQ valid jump URI. This URL needs to be configured on the QQ Open Platform. |
| Login Mode | After turning on "Login Only Mode", you can only log in to existing accounts, and cannot create new accounts. Please choose carefully. |
| Account Identity Association | When "Account Identity Association" is not turned on, a new user is created by default when the user logs in through the identity source. After enabling "Account Identity Association", users can log in directly to existing accounts through "Field Matching" or "Query Binding". a. Association method: Select |
After configuration, click "Create" or "Save" to complete the creation.
After creating the Tencent QQ identity source on the GenAuth console, you need to configure the callback address to the website callback domain in the platform information on the open platform of QQ Interconnect.
Original image 74 (in section "Step 2: Configure Tencent QQ in the GenAuth console"; Chinese UI)
Step 3: Development Access
Recommended development access method: Use hosted login page
Advantages and disadvantages description: Simple operation and maintenance, GenAuth is responsible for operation and maintenance. Each user pool has an independent secondary domain name; if you need to embed it in your application, you need to log in using the pop-up mode, that is, after clicking the login button, a window will pop up with the content of the login page hosted by GenAuth, or redirect the browser to the login page hosted by GenAuth.
Detailed access method:
3.1 Create an application in the GenAuth console. For details, see: How to create an application in GenAuth
3.2 On the created QQ identity source connection details page, open and associate an application created in the GenAuth console
Original image 75 (in section "Step 3: Development Access"; Chinese UI)
3.3 Experience QQ third-party login on the login page
Original image 76 (in section "Step 3: Development Access"; Chinese UI)
Tencent QQ Mobile
Scenario Introduction
Overview
Tencent QQ social login is a user's secure login to a third-party application or website using Tencent QQ as the identity source. Configure and enable Tencent QQ social login in GenAuth, and you can quickly obtain Tencent QQ's basic open information and help users log in without passwords through GenAuth.
Application Scenario
Mobile
Terminal User Preview
Original image 77 (in section "Terminal User Preview"; Chinese UI)
Notes
- If you have not opened a QQ interconnection platform account, please go to QQ Interconnection Center to register a developer account.
- You need to pass the review before you can create an application.
- If you have not opened a GenAuth console account, please go to GenAuth console to register a developer account.
Step 1: Create a mobile app on QQ Open Platform
Go to QQ Connect Center to create a mobile app.
Click your personal QQ avatar on the upper left of the page to complete the registration and initiate the review, then click "Mobile App" and "Create App" to create a mobile app that uses QQ to log in. If you encounter any problems during the process, please refer to the QQ official "Documentation" at the top of the page.
Original image 78 (in section "Step 1: Create a mobile app on QQ Open Platform"; Chinese UI)
Step 2: Configure Tencent QQ in the GenAuth console
2.1 Please click the "Create Social Identity Source" button on the "Social Identity Source" page of the GenAuth console to enter the "Select Social Identity Source" page.
Original image 79 (in section "Step 2: Configure Tencent QQ in the GenAuth console"; Chinese UI)
2.2 Please click the "Tencent QQ" identity source button on the "Social Identity Source"-"Select Social Identity Source" page of the GenAuth console to enter the "Tencent QQ Login Mode" page.
Original image 80 (in section "Step 2: Configure Tencent QQ in the GenAuth console"; Chinese UI)
2.3 Please configure the relevant field information on the "Social Identity Source"-"Tencent QQ Mobile" page of the GenAuth console.
Original image 81 (in section "Step 2: Configure Tencent QQ in the GenAuth console"; Chinese UI)
| Field/Function | Description |
|---|---|
| Unique ID | a. The unique ID consists of lowercase letters, numbers, and -, and its length is less than 32 bits. b. This is the unique ID of this connection and cannot be modified after setting. |
| Display Name | This name will be displayed on the button of the terminal user's login interface. |
| APP ID | QQ application ID, which needs to be obtained on the QQ Open Platform. |
| APP Key | QQ application key, which needs to be obtained on the QQ Open Platform. |
| Apply for unionid | If enabled, you need to enable "Platform Unified ID Information" in the QQ Interconnection Application Interface first. |
| Login Mode | After enabling "Login Only Mode", you can only log in to existing accounts and cannot create new accounts. Please choose carefully. |
After the configuration is completed, click the "Create" or "Save" button to complete the creation.
Step 3: Development access
Recommended development access method: SDK
Pros and cons description: Simple operation and maintenance, which is handled by GenAuth. Each user pool has an independent secondary domain name; if you need to embed it in your application, you need to log in using the pop-up mode, that is: after clicking the login button, a window will pop up with the login page hosted by GenAuth, or redirect the browser to the login page hosted by GenAuth.
Detailed access method:
3.1 Create an application in the GenAuth console. For details, see: How to create an application in GenAuth
3.2 On the created QQ identity source connection details page, open and associate an application created in the GenAuth console
Original image 82 (in section "Step 3: Development access"; Chinese UI)
3.3 Experience QQ third-party login on the login page (as shown in the end user preview image).
Sina Weibo
Scenario Introduction
- Overview: Sina Weibo social login is a user's secure login to a third-party application or website using Sina Weibo as the identity source. Configure and enable Sina Weibo social login in GenAuth, and you can quickly obtain basic open information of Sina Weibo through GenAuth and help users realize password-free login.
- Application scenario: Website access (PC), mobile application (MOBILE)
- Terminal user preview image:
Original image 83 (in section "Scenario Introduction"; Chinese UI)
Notes
- If you have not opened a Weibo Open Platform account, please go to Weibo Open Platform to register a developer account.
- You need to pass identity authentication before you can create an application.
- If you have not opened a GenAuth console account, please go to GenAuth console to register a developer account.
Step 1: Create an application on Weibo Open Platform
Go to Weibo Open Platform and follow the official instructions to create a website application.
Original image 84 (in section "Step 1: Create an application on Weibo Open Platform"; Chinese UI)Original image 85 (in section "Step 1: Create an application on Weibo Open Platform"; Chinese UI)
Click the avatar icon in the upper right corner of the page, select Developer Information to perform basic information and identity authentication, and create a website application after the authentication is passed. If you have any unsolvable problems, you can send a private message to Weibo Open Platform for consultation.
Original image 86 (in section "Step 1: Create an application on Weibo Open Platform"; Chinese UI)
During the application creation process, you need to configure the allowed callback address. Please use the following settings: https://core.genauth.ai/connection/social/<Unique Identifier>/<USERPOOL_ID>/callback. You need to replace <Unique Identifier> with your Unique Identifier and <USERPOOL_ID> with your User Pool ID
Step 2: Configure Sina Weibo in the GenAuth console
2.1 Please click the "Create Social Identity Source" button on the "Social Identity Source" page of the GenAuth console to enter the "Select Social Identity Source" page.
Original image 87 (in section "Step 2: Configure Sina Weibo in the GenAuth console"; Chinese UI)
2.2 Please go to the GenAuth console's "Social Identity Source" - "Select Social Identity Source" page, click the "Sina Weibo" identity source button to enter the "Sina Weibo Login Mode" page.
Original image 88 (in section "Step 2: Configure Sina Weibo in the GenAuth console"; Chinese UI)
2.3 Please go to the GenAuth console's "Social Identity Source" - "Sina Weibo" page to configure the relevant field information.
Original image 89 (in section "Step 2: Configure Sina Weibo in the GenAuth console"; Chinese UI)
| Field/Function | Description |
|---|---|
| Unique ID | a. The unique ID consists of lowercase letters, numbers, and -, and is less than 32 bits long. b. This is the unique ID for this connection and cannot be modified after setting. |
| Display Name | This name will be displayed on the button of the terminal user's login interface. |
| APP ID | Sina Weibo ID, which needs to be obtained on Weibo Open Platform. |
| App Secret | Sina Weibo key, which needs to be obtained on Weibo Open Platform. |
| Callback URL | You can fill in your business callback address. After the user completes the login, the browser will jump to this address. |
| Scopes | By default, GenAuth will only request authorization for basic user information (such as avatar, nickname, etc.) from the user. If you need more advanced permissions, you can check the corresponding options. |
| Callback URL | Sina Weibo valid jump URI. This URL needs to be configured on Weibo Open Platform. |
| Login Mode | After turning on "Login Only Mode", you can only log in to existing accounts, and cannot create new accounts. Please choose carefully. |
| Account Identity Association | When "Account Identity Association" is not turned on, a new user is created by default when the user logs in through the identity source. After enabling "Account Identity Association", users can log in directly to existing accounts through "Field Matching" or "Query Binding". |
After configuration is complete, click the "Create" or "Save" button to complete the creation.
After creating the Sina Weibo identity source on the GenAuth console, you need to configure the callback address to the website callback domain in the platform information on the Weibo Open Platform.

Step 3: Development Access
Recommended Development Access Method: Use Hosted Login Page
Pros and Cons Description: Simple operation and maintenance, GenAuth is responsible for operation and maintenance. Each user pool has an independent secondary domain name; if you need to embed it into your application, you need to use the pop-up mode to log in, that is: after clicking the login button, a window will pop up with the content of the GenAuth hosted login page, or redirect the browser to the GenAuth hosted login page.
Detailed access method:
3.1 Create an application in the GenAuth console. For details, see: How to create an application in GenAuth
3.2 On the created Sina Weibo identity source connection details page, open and associate an application created in the GenAuth console
Original image 90 (in section "Step 3: Development Access"; Chinese UI)
3.3 Experience Sina Weibo third-party login on the login page
Original image 91 (in section "Step 3: Development Access"; Chinese UI)
Sina Weibo Mobile
Scenario Introduction
Overview
Sina Weibo social login is a user's secure login to a third-party application or website using Sina Weibo as the identity source. Configure and enable Sina Weibo social login in GenAuth, and you can quickly obtain basic open information of Sina Weibo through GenAuth and help users achieve password-free login.
Application Scenario
Mobile
Terminal User Preview
Original image 92 (in section "Terminal User Preview"; Chinese UI)
Notes
- If you have not opened a Weibo Open Platform account, please go to Weibo Open Platform to register a developer account.
- You need to pass identity authentication before you can create an application.
- If you have not opened a GenAuth console account, please go to GenAuth console to register a developer account.
Step 1: Create an application on Weibo Open Platform
Go to Weibo Open Platform and follow the official instructions to create a mobile application.
Original image 93 (in section "Step 1: Create an application on Weibo Open Platform"; Chinese UI)
Original image 94 (in section "Step 1: Create an application on Weibo Open Platform"; Chinese UI)
Click the avatar icon in the upper right corner of the page, select Developer Information to perform basic information and identity authentication, and create a mobile application after the authentication is passed. If you have any unsolvable problems, you can send a private message to Weibo Open Platform for consultation.
Original image 95 (in section "Step 1: Create an application on Weibo Open Platform"; Chinese UI)
During the application creation process, you need to configure the allowed callback address. Please use the following settings: https://core.genauth.ai/connection/social/<Unique Identifier>/<USERPOOL_ID>/callback. You need to replace <Unique Identifier> with your Unique Identifier and <USERPOOL_ID> with your User Pool ID
Step 2: Configure Sina Weibo in the GenAuth console
2.1 Please click the "Create Social Identity Source" button on the "Social Identity Source" page of the GenAuth console to enter the "Select Social Identity Source" page.
Original image 96 (in section "Step 2: Configure Sina Weibo in the GenAuth console"; Chinese UI)
2.2 Please go to the GenAuth console's "Social Identity Source" - "Select Social Identity Source" page, click the "Sina Weibo" identity source button to enter the "Sina Weibo Login Mode" page.
Original image 97 (in section "Step 2: Configure Sina Weibo in the GenAuth console"; Chinese UI)
2.3 Please go to the GenAuth console's "Social Identity Source" - "Sina Weibo Mobile" page to configure the relevant field information.
Original image 98 (in section "Step 2: Configure Sina Weibo in the GenAuth console"; Chinese UI)
| Field/Function | Description |
|---|---|
| Unique ID | a. The unique ID consists of lowercase letters, numbers, and -, and is less than 32 bits long. b. This is the unique ID for this connection and cannot be modified after setting. |
| Display Name | This name will be displayed on the button of the terminal user's login interface. |
| APP ID | Sina Weibo ID, which needs to be obtained on Weibo Open Platform. |
| App Secret | Sina Weibo key, which needs to be obtained on Weibo Open Platform. |
| Callback Address | Sina Weibo valid jump URI. This URL needs to be configured on the authorization callback page of Weibo Open Platform mobile application. |
| Login Mode | After turning on "Login Only Mode", you can only log in to existing accounts, and cannot create new accounts. Please choose carefully. |
After the configuration is completed, click the "Create" or "Save" button to complete the creation.
After creating the Sina Weibo identity source on the GenAuth console, you need to configure the callback address to the authorization callback page in the platform information on Weibo Open Platform.
Original image 99 (in section "Step 2: Configure Sina Weibo in the GenAuth console"; Chinese UI)
Step 3: Development access
Recommended development access method: SDK
Advantages and disadvantages: Simple operation and maintenance, which is handled by GenAuth. Each user pool has an independent secondary domain name; if you need to embed it in your application, you need to log in using the pop-up mode, that is: after clicking the login button, a window will pop up with the login page hosted by GenAuth, or redirect the browser to the login page hosted by GenAuth.
Detailed access method:
3.1 Create an application in the GenAuth console. For details, see: How to create an application in GenAuth
3.2 On the created Sina Weibo identity source connection details page, open and associate an application created in the GenAuth console
Original image 100 (in section "Step 3: Development access"; Chinese UI)
3.3 Experience Sina Weibo third-party login on the login page (as shown in the end user preview image).
Douyin Mobile
Scenario Introduction
Overview
Douyin social login is a user's secure login to a third-party application or website using Douyin as the identity source. Configure and enable Douyin social login in GenAuth to quickly obtain Douyin's basic open information and help users achieve password-free login through GenAuth.
Application Scenario
Mobile
End User Preview
Original image 101 (in section "End User Preview"; Chinese UI)
Notes
- If you have not opened a Douyin Open Platform account, please go to Douyin Open Platform to register a developer account.
- You can create an application only after it is approved.
- If you have not opened a GenAuth console account, please go to the GenAuth console to register a developer account.
Step 1: Create a mobile app on the Douyin Open Platform
Go to the Douyin Open Platform to create a mobile app.
Click the console on the upper left of the page to complete the registration and initiate the review, then click "Mobile App" and "Create App" in turn to create a mobile app that uses Douyin to log in. If you encounter any problems during the process, please refer to the Douyin official "Documentation" at the top of the page.
Step 2: Configure Douyin mobile terminal in the GenAuth console
2.1 Please click the "Create Social Identity Source" button on the "Social Identity Source" page of the GenAuth console to enter the "Select Social Identity Source" page.
2.2 Please click the "Douyin" identity source button on the "Social Identity Source"-"Select Social Identity Source" page of the GenAuth console to enter the "Douyin Mobile Terminal Login Mode" page.
2.3 Please configure the relevant field information on the "Social Identity Source" - "Douyin Mobile" page of the GenAuth console.
| Field/Function | Description |
|---|---|
| Unique ID | a. The unique ID consists of lowercase letters, numbers, and -, and its length is less than 32 bits. b. This is the unique ID of this connection and cannot be modified after setting. |
| Display Name | This name will be displayed on the button of the terminal user's login interface. |
| Client Key | The Client Key of the Douyin mobile application needs to be obtained on the Douyin Open Platform. |
| Client Secret | The Client Secret of the Douyin mobile application needs to be obtained on the Douyin Open Platform. |
| Login mode | After turning on "Login only mode", you can only log in to existing accounts, and you cannot create new accounts. Please choose carefully. |
| Account identity association | When "Account identity association" is not turned on, a new user is created by default when a user logs in through an identity source. After turning on "Account identity association", users can be allowed to log in directly to an existing account through "field matching". |
After the configuration is completed, click the "Create" or "Save" button to complete the creation.
Step 3: Development access
Recommended development access method: SDK
Pros and cons description: Simple operation and maintenance, which is handled by GenAuth. Each user pool has an independent secondary domain name; if you need to embed it in your application, you need to log in using the pop-up mode, that is: after clicking the login button, a window will pop up with the login page hosted by GenAuth, or redirect the browser to the login page hosted by GenAuth.
Detailed access method:
3.1 Create an application in the GenAuth console. For details, see: How to create an application in GenAuth
3.2 On the created "TikTok Mobile" identity source connection details page, open and associate an application created in the GenAuth console
Original image 107 (in section "Step 3: Development access"; Chinese UI)
3.3 Experience TikTok third-party login on the login page (as shown in the end user preview).
Github
Scenario Introduction
- Overview: Github social login allows users to log in to third-party applications or websites securely using Github as the identity source. Configure and enable Github social login in GenAuth to quickly obtain Github's basic open information and help users log in without passwords.
- Application scenario: PC website
- Terminal user preview image:
Original image 108 (in section "Scenario Introduction"; Chinese UI)
Notes
- If you do not have a Github account, please go to GitHub to register a developer account first.
- Follow the GitHub documentation instructions to create a GitHub OAuth application and record the application's Client ID and Client Secret.
- If you don't have a GenAuth console account, please go to the GenAuth console to register a developer account.
Step 1: Create an OAuth application in Github
In the upper-right corner of any Github page, click your profile photo, and then click Settings.
In the left column, click <> Developer Settings.
In the left sidebar, click OAuth Applications.
Click New OAuth App.
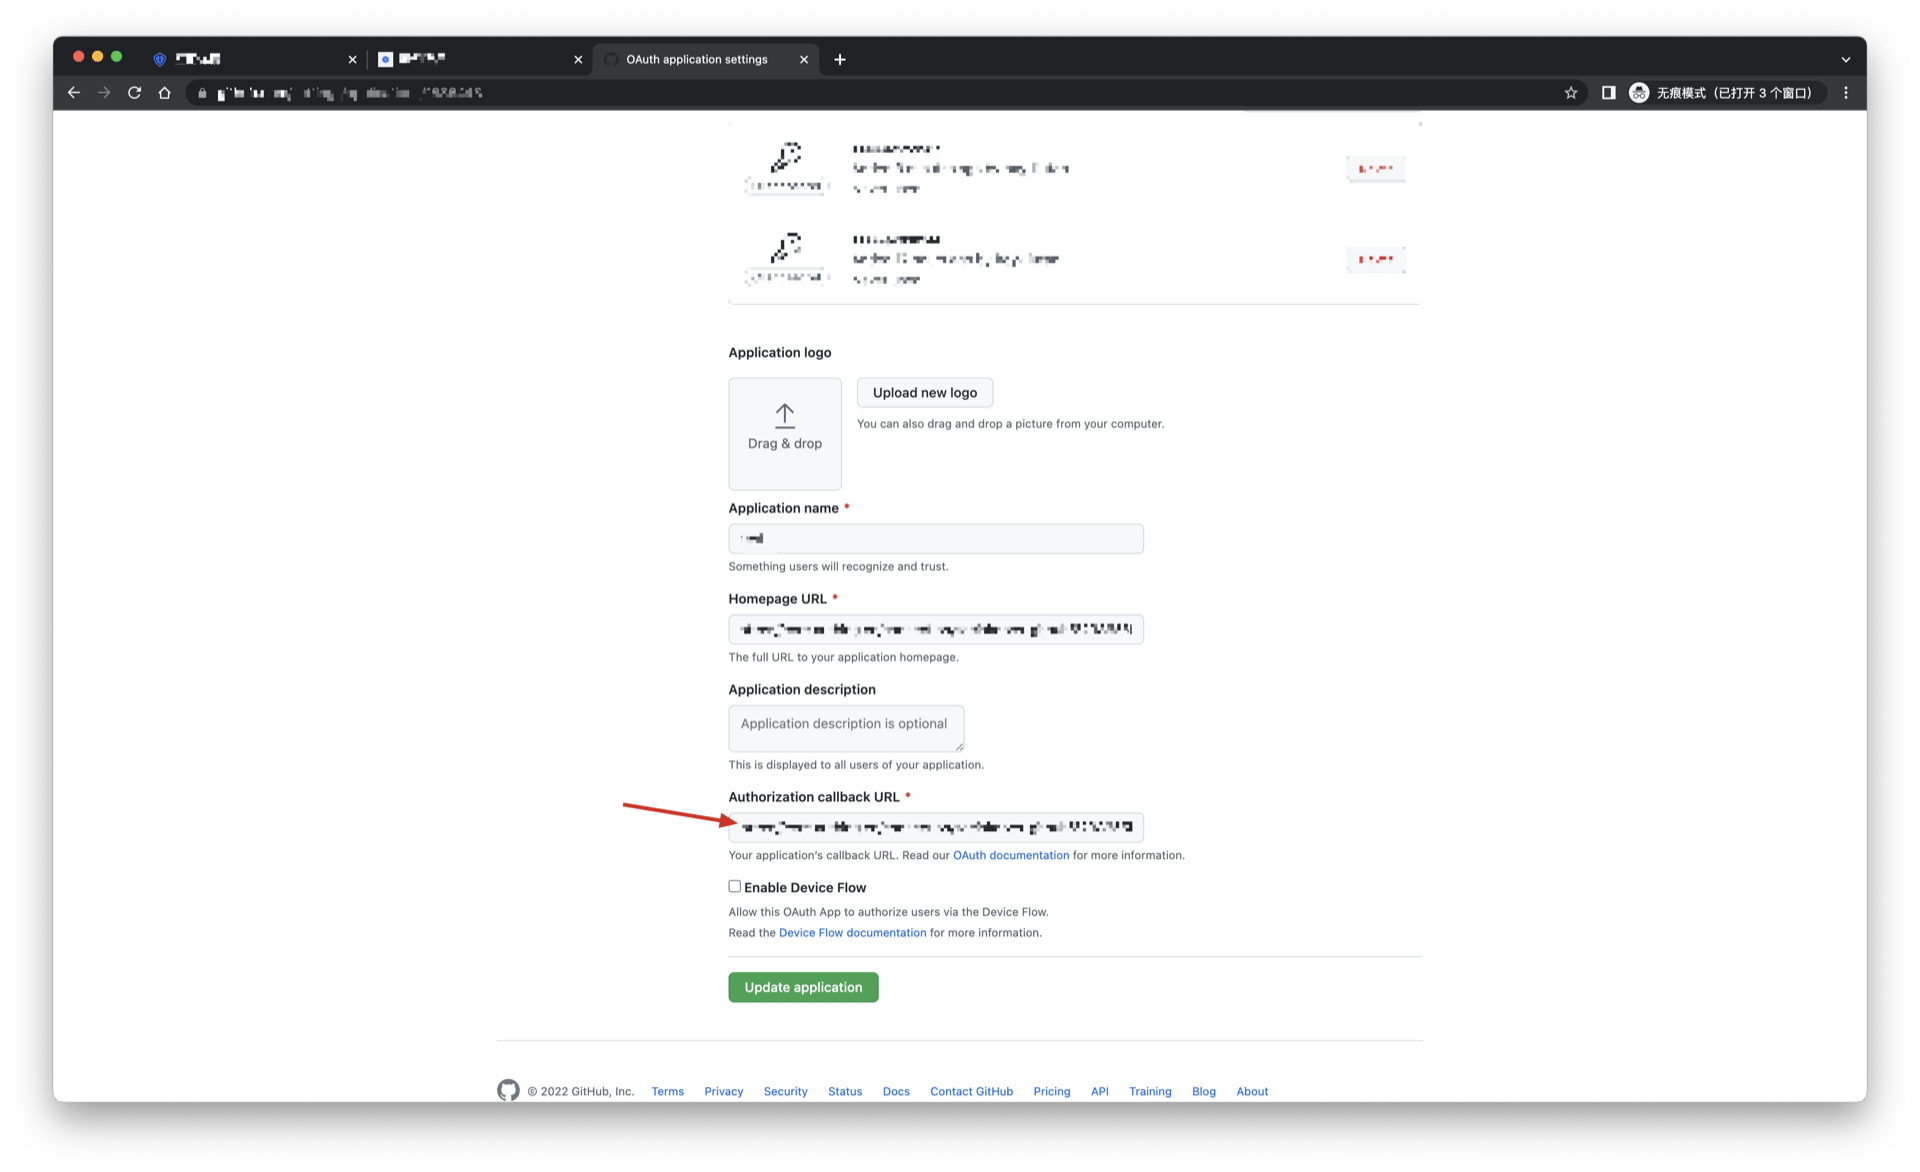
In "Application name", enter a name for your application.
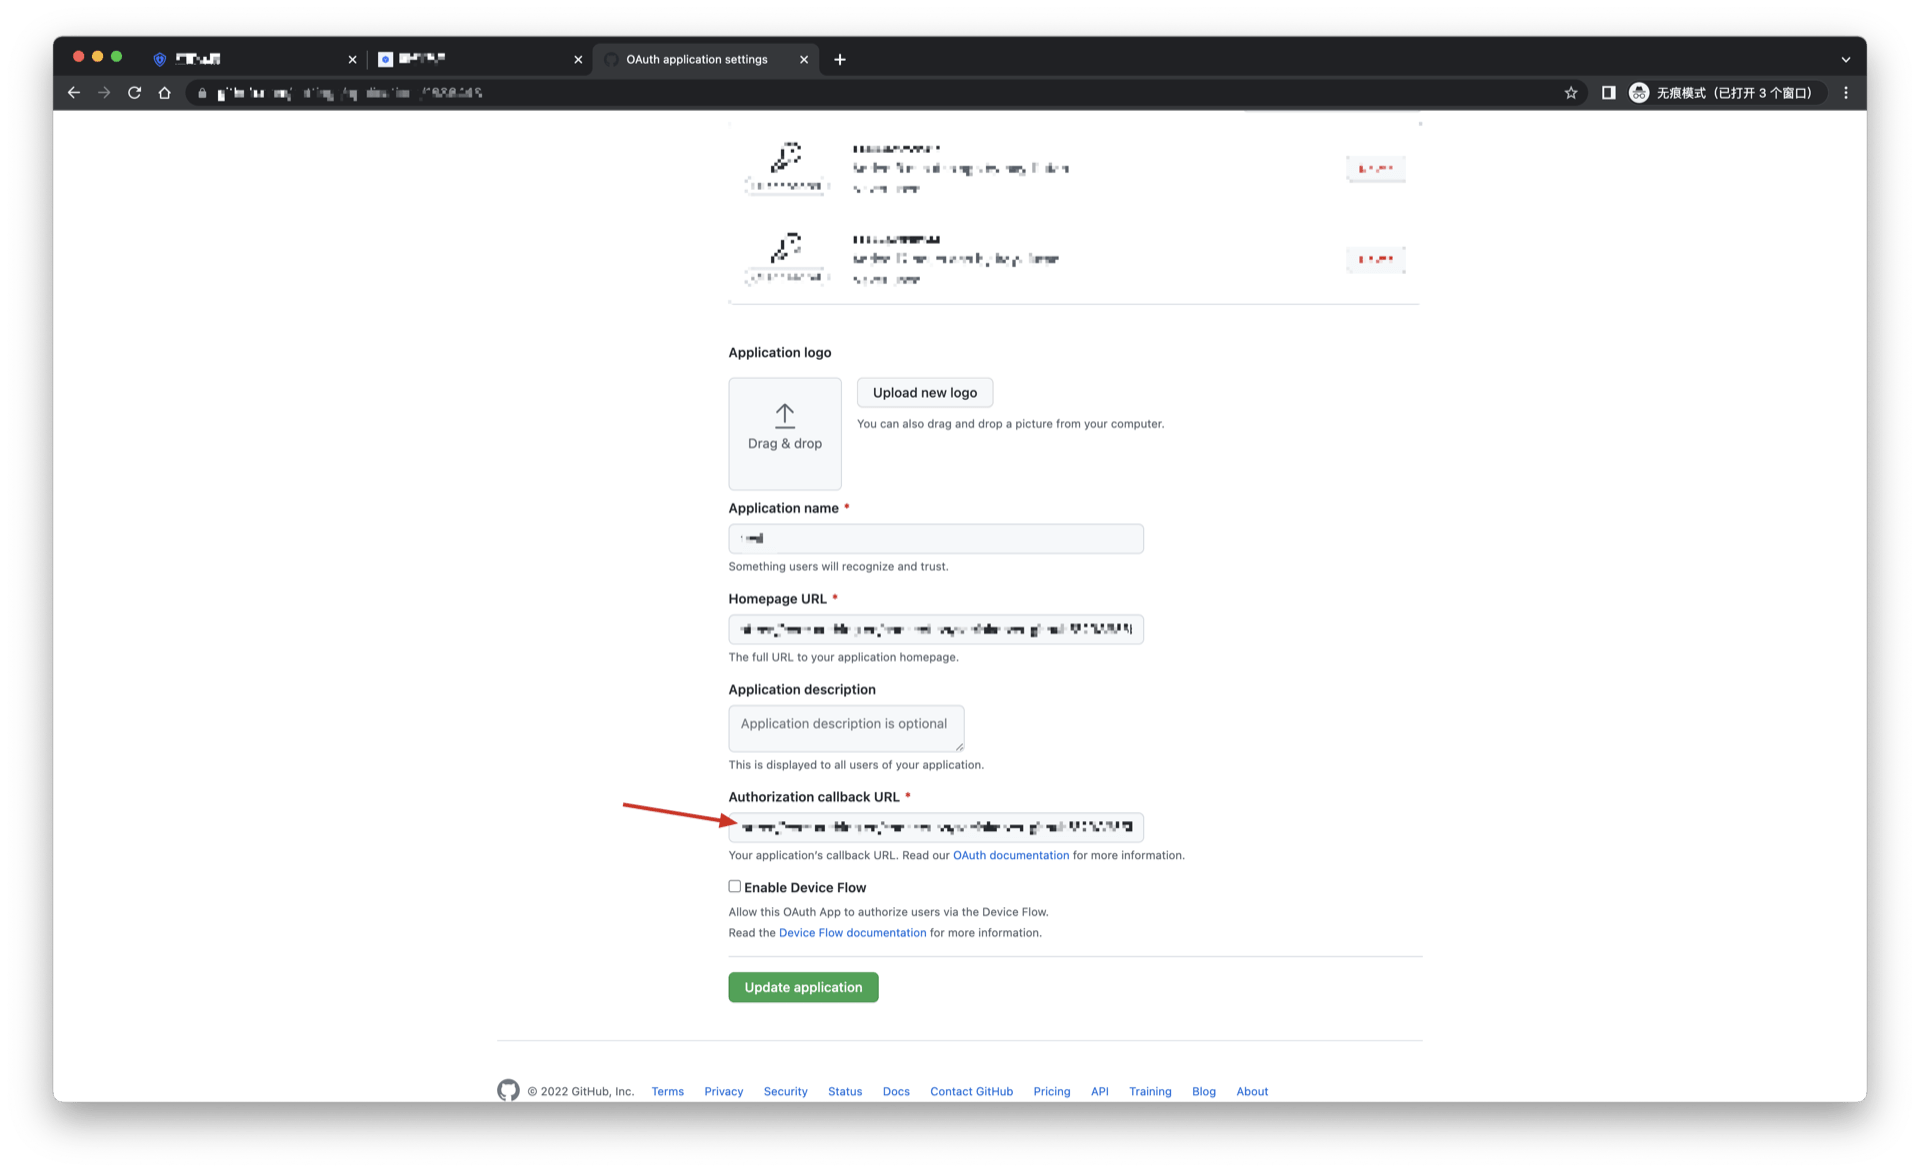
In Homepage URL, enter the full URL of your application's website.
In Authorization callback URL, enter the callback URL for your application.
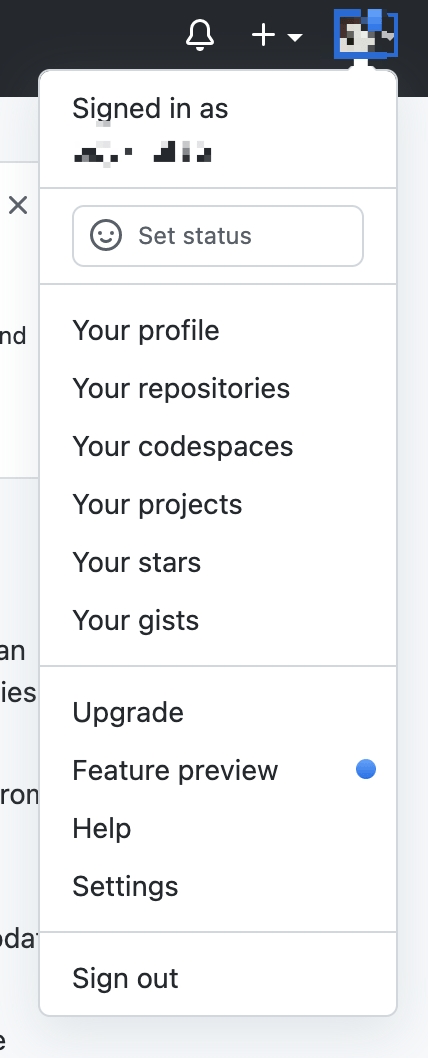
During the application creation process, you need to configure the allowed callback address. Please use the following settings: https://core.genauth.ai/connection/social/<Unique Identifier>/<USERPOOL_ID>/callback. You need to replace <Unique Identifier> with your Unique Identifier and <USERPOOL_ID> with your User Pool ID
Step 2: Configure Github in the GenAuth console
2.1 Please click the "Create Social Identity Source" button on the "Social Identity Source" page of the GenAuth console to enter the "Select Social Identity Source" page.
Original image 109 (in section "Step 2: Configure Github in the GenAuth console"; Chinese UI)
2.2 Please go to the GenAuth console's "Social Identity Source" - "Select Social Identity Source" page, click the "Github" identity source button to enter the "Github Login Mode" page.
Original image 110 (in section "Step 2: Configure Github in the GenAuth console"; Chinese UI)
2.3 Please go to the GenAuth console's "Social Identity Source" - "Github" page to configure the relevant field information.
Original image 111 (in section "Step 2: Configure Github in the GenAuth console"; Chinese UI)
| Field/Function | Description |
|---|---|
| Unique ID | a. The unique ID consists of lowercase letters, numbers, and -, and is less than 32 bits long. b. This is the unique ID of this connection and cannot be modified after setting. |
| Display name | This name will be displayed on the button of the end user's login interface. |
| Client ID | Github ID, which needs to be obtained on Github. |
| Client secrets | Github key, which needs to be obtained on Github. |
| Callback URL | You can fill in your business callback address. After the user completes the login, the browser will jump to this address. |
| Scopes | By default, GenAuth will only request authorization for basic user information (such as avatar, nickname, etc.) from the user. If you need more advanced permissions, you can check the corresponding options. |
| Callback URL | Github valid jump URI. This URL needs to be configured on Github. |
| Login mode | After turning on "Login only mode", you can only log in to existing accounts, and cannot create new accounts. Please choose carefully. |
| Account identity association | When "Account identity association" is not turned on, a new user is created by default when the user logs in through the identity source. After turning on "Account Identity Association", users can log in directly to existing accounts through "Field Matching" or "Query Binding". |
After configuration is complete, click the "Create" or "Save" button to complete the creation.
After creating the Github identity source on the GenAuth console, you need to configure the callback address to the Authorization callback URL on Github.
Step 3: Development Access
Recommended Development Access Method: Use Hosted Login Page
Pros and Cons Description: Simple operation and maintenance, GenAuth is responsible for operation and maintenance. Each user pool has an independent secondary domain name; if you need to embed it into your application, you need to use the pop-up mode to log in, that is: after clicking the login button, a window will pop up with the content of the GenAuth hosted login page, or redirect the browser to the GenAuth hosted login page.
Detailed access method:
3.1 Create an application in the GenAuth console. For details, see: How to create an application in GenAuth
3.2 On the created Github identity source connection details page, open and associate an application created in the GenAuth console
Original image 112 (in section "Step 3: Development Access"; Chinese UI)
3.3 Experience Github third-party login on the login page
Original image 113 (in section "Step 3: Development Access"; Chinese UI)
Github Mobile
Scenario Introduction
Overview
Github social login allows users to log in to third-party applications or websites securely using Github as the identity source. Configure and enable Github social login in GenAuth to quickly obtain Github's basic open information and help users log in without passwords.
Application Scenario
Mobile
End User Preview
Original image 114 (in section "End User Preview"; Chinese UI)
Notes
- If you do not have a Github account, please go to GitHub to register a developer account.
- Follow the instructions in the GitHub documentation to create a GitHub OAuth application and record the application's Client ID and Client Secret.
- If you don't have a GenAuth console account, please go to the GenAuth console to register a developer account.
Step 1: Create an OAuth application in Github
In the upper-right corner of any Github page, click your profile photo, and then click Settings.
In the left column, click <> Developer settings.
In the left sidebar, click OAuth applications.
Click New OAuth App.
In Application name, enter a name for the application.
In Homepage URL, enter the full URL of your application's website.
In Authorization callback URL, enter the callback URL for your application.
During the application creation process, you need to configure the allowed callback address. Please use the following settings: https://core.genauth.ai/connection/social/<Unique Identifier>/<USERPOOL_ID>/callback. You need to replace <Unique Identifier> with your Unique Identifier and <USERPOOL_ID> with your User Pool ID
Step 2: Configure Github Mobile in the GenAuth console
2.1 Please click the "Create Social Identity Source" button on the "Social Identity Source" page of the GenAuth console to enter the "Select Social Identity Source" page.
Original image 115 (in section "Step 2: Configure Github Mobile in the GenAuth console"; Chinese UI)
2.2 Please go to the GenAuth console's "Social Identity Source" - "Select Social Identity Source" page, click the "Github Mobile" identity source button to enter the "Github Mobile Login Mode" page.
Original image 116 (in section "Step 2: Configure Github Mobile in the GenAuth console"; Chinese UI)
2.3 Please go to the GenAuth console's "Social Identity Source" - "Github Mobile" page to configure the relevant field information.
Original image 117 (in section "Step 2: Configure Github Mobile in the GenAuth console"; Chinese UI)
| Field/Function | Description |
|---|---|
| Unique ID | a. The unique ID consists of lowercase letters, numbers, and -, and is less than 32 bits long. b. This is the unique ID of this connection and cannot be modified after setting. |
| Display name | This name will be displayed on the button of the terminal user's login interface. |
| Client ID | The Client ID applied for on Github needs to be obtained on Github. |
| Client secrets | The Client secrets applied for on Github need to be obtained on Github. |
| Callback address | Github valid redirect URI. This URL needs to be configured on Github. |
| Login mode | After turning on "Login only mode", you can only log in to existing accounts, and cannot create new accounts. Please choose carefully. |
| Account identity association | When "Account identity association" is not turned on, a new user is created by default when a user logs in through an identity source. After turning on "Account identity association", users can be allowed to log in directly to an existing account through "field matching". |
After the configuration is completed, click the "Create" or "Save" button to complete the creation.
After creating the "Github Mobile" identity source on the GenAuth console, you need to configure the callback address to the Authorization callback URL on Github.
Step 3: Development access
Recommended development access method: SDK
Pros and cons description: Simple operation and maintenance, GenAuth is responsible for operation and maintenance. Each user pool has an independent secondary domain name; if you need to embed it in your application, you need to log in using the pop-up mode, that is: after clicking the login button, a window will pop up with the content of the login page hosted by GenAuth, or redirect the browser to the login page hosted by GenAuth.
Detailed access method:
3.1 Create an application in the GenAuth console. For details, see: How to create an application in GenAuth
3.2 On the created Github identity source connection details page, open and associate an application created in the GenAuth console
Original image 118 (in section "Step 3: Development access"; Chinese UI)
3.3 Experience Github third-party login on the login page (as shown in the end-user preview).
Facebook
Scenario Introduction
- Overview: Facebook social login is a user's secure login to a third-party application or website using Facebook as the identity source. By configuring and enabling Facebook social login in GenAuth, you can quickly obtain Facebook's basic open information through GenAuth and help users achieve password-free login.
- Application scenario: PC website
- Terminal user preview image:
Original image 119 (in section "Scenario Introduction"; Chinese UI)
Notes
- If you have not opened a Facebook Open Platform account, please go to Facebook Open Platform to register a developer account.
- If you have not opened a GenAuth console account, please go to GenAuth Console to register a developer account.
Step 1: Create a Facebook App
Go to developers.facebook.com, click My Apps, then create a new app and select Consumer or No App Type, fill in the app name.
Original image 120 (in section "Step 1: Create a Facebook App"; Chinese UI)
Original image 121 (in section "Step 1: Create a Facebook App"; Chinese UI)
In the dashboard, find the Facebook Login product and click Set Up to add it to your app. Then find the App ID and App Secret in Settings > Basic in the left menu and write them down.
Original image 122 (in section "Step 1: Create a Facebook App"; Chinese UI)
Original image 123 (in section "Step 1: Create a Facebook App"; Chinese UI)
Step 2: Configure Facebook in the GenAuth Console
2.1 In the GenAuth Console, on the Social Identity Sources page, click the Create Social Identity Source button to go to the Select Social Identity Source page.
Original image 124 (in section "Step 2: Configure Facebook in the GenAuth Console"; Chinese UI)
2.2 On the "Social Identity Source" - "Select Social Identity Source" page of the GenAuth console, click the "Facebook" identity source button to enter the "Facebook Login Mode" page.
Original image 125 (in section "Step 2: Configure Facebook in the GenAuth Console"; Chinese UI)
2.3 On the "Social Identity Source" - "Facebook" page of the GenAuth console, configure the relevant field information.
Original image 126 (in section "Step 2: Configure Facebook in the GenAuth Console"; Chinese UI)
| Field/Function | Description |
|---|---|
| Unique ID | a. The unique ID consists of lowercase letters, numbers, and -, and its length is less than 32 bits. b. This is the unique ID of this connection and cannot be modified after setting. |
| Display Name | This name will be displayed on the button of the end user's login interface. |
| Application ID | The application ID needs to be obtained on the Facebook Open Platform. |
| Application Key | Application ID, which needs to be obtained on the Facebook Open Platform. |
| Scopes | Scopes, data permissions need to be applied for on the Facebook Open Platform |
| Callback Address | Facebook valid OAuth redirect URI. This URL needs to be configured on the Facebook Open Platform. |
| Login Mode | After turning on "Login Only Mode", you can only log in to existing accounts, and cannot create new accounts. Please choose carefully. |
| Account Identity Association | When "Account Identity Association" is not turned on, a new user is created by default when a user logs in through an identity source. After turning on "Account Identity Association", users can be allowed to log in directly to an existing account through "Field Matching" or "Ask Binding". |
After the configuration is completed, click the "Create" or "Save" button to complete the creation.
After creating the Facebook identity source on the GenAuth console, you need to configure the callback address to the OAuth Client Authorization Settings in the Facebook application on Facebook's Open Platform.
Original image 127 (in section "Step 2: Configure Facebook in the GenAuth Console"; Chinese UI)
Step 3: Development access
Recommended development access method: Use a hosted login page
Advantages and disadvantages: Simple operation and maintenance, GenAuth is responsible for operation and maintenance. Each user pool has an independent secondary domain name; if you need to embed it into your application, you need to log in using the pop-up mode, that is: after clicking the login button, a window will pop up with the login page hosted by GenAuth, or redirect the browser to the login page hosted by GenAuth.
Detailed access method:
3.1 Create an application in the GenAuth console, for details, see: How to create an application in GenAuth
3.2 On the created Facebook identity source connection details page, open and associate an application created in the GenAuth console.
Original image 128 (in section "Step 3: Development access"; Chinese UI)
3.3 Experience Facebook third-party login on the login page
Original image 129 (in section "Step 3: Development access"; Chinese UI)
Facebook Mobile
Scenario Introduction
Overview
GenAuth provides developers with a way to quickly jump to Facebook login and obtain user information in mobile (iOS or Android) applications. Facebook account access can be completed by simply calling the GenAuth mobile SDK.
Application Scenario
Mobile APP
End User Preview Image
Pull up the Facebook page in the mobile application to log in.
Original image 130 (in section "End User Preview Image"; Chinese UI)
Preparation
If you don't have a Facebook account, please go to Facebook to register first. Original image 131 (in section "Preparation"; Chinese UI)
Open the Facebook Developer Platform, please go to Facebook Developer Platform to log in, complete the account information according to the page prompts, and complete the registration.
If you have not opened a GenAuth console account, please go to GenAuth Console to register a developer account.
Configuration steps
Step 1: Create an application on the Facebook Developer Platform
- Create a Facebook application and obtain the application number and application key
After completing the registration and login of the Facebook Developer Platform, click "Create an application".
Select the application type and click "Continue".
After filling in the application display name and application contact email, click "Create App". Original image 134 (in section "Step 1: Create an application on the Facebook Developer Platform"; Chinese UI)
In Settings -> Basic, click Add Platform Original image 135 (in section "Step 1: Create an application on the Facebook Developer Platform"; Chinese UI)
In Settings -> Basic, check the App ID and App Key
In Products, set Facebook Login.
Android
Please refer to Facebook Login for Android — Quick Start
INFO
- You need to log in to your mobile app background to obtain Package name (Android app package name) and SHA-1 certificate fingerprint (Android app's SHA-1).
- It will take some time for the settings to take effect after being saved, please be patient.
iOS
Please refer to Facebook Login for iOS — Quick Start
INFO
- You can get Bundle ID in Apple Store Connect.
Step 2: Configure Facebook mobile login in the GenAuth console
- On the Social Identity Source page of the Atuhing console, click the Create Social Identity Source button to enter the Select Social Identity Source page.
- On the Identity Source Management->Social Identity Source->Select Social Identity page of the GenAuth console, click the "Facebook" identity source card to enter the Facebook login mode selection page.
- Select Facebook Mobile to enter.
- Please configure the relevant field information on the "Social Identity Source" - "Facebook Mobile" page of the GenAuth console.
Field Description Unique ID
- The unique ID consists of lowercase letters, numbers, and -, and is less than 32 bits in length.
- This is the unique ID of this connection and cannot be modified after setting. Display Name This name will be displayed on the button of the end user's login interface. Application ID Enter the application ID applied on the Facebook developer platform. In "Settings" -> "Basics", obtain the "Application ID". Application Key Enter the application key of the application applied on the Facebook developer platform. In "Settings" -> "Basics", obtain the "Application Key". Login Mode After turning on Login Only Mode, you can only log in to existing accounts, and cannot create new accounts. Please choose carefully. Account Binding When Account Binding is not enabled, a new user is created by default when a user logs in through an identity source; when Account Binding is enabled, users can be allowed to log in directly to an existing account through Field Matching.
Step 3: Development Access
Recommended Development Access Method: SDK
Pros and Cons: Simple operation and maintenance, GenAuth is responsible for operation and maintenance. Each user pool has an independent secondary domain name; if you need to embed it into your application, you need to log in using the pop-up mode, that is: after clicking the login button, a window will pop up with the login page hosted by GenAuth, or redirect the browser to the login page hosted by GenAuth.
Detailed access method:
3.1 Create an application in the GenAuth console. For details, see: How to create an application in GenAuth.
3.2 On the created Facebook identity source connection details page, open and associate an application created in the GenAuth console.
Original image 143 (in section "Step 3: Development Access"; Chinese UI)
3.3 Experience Facebook third-party login on the login page (as shown in the end user preview).
Twitter
Scenario Introduction
- Overview Twitter social login allows users to log in to third-party applications or websites securely using Twitter as the identity source. Configure and enable Twitter social login in GenAuth to quickly obtain basic open information about Twitter and help users log in without a password.
- Application scenario: PC website
- Terminal user preview image:
Original image 144 (in section "Scenario Introduction"; Chinese UI)
Notes
- If you don't have a Twitter account yet, please go to the Twitter platform to register an account.
- Go to the Twitter developer platform to complete the account information, and apply for Elevated access permissions for the account.
- If you have not opened a GenAuth console account, please go to GenAuth Console to register a developer account;
Step 1: Create a Twitter application
1.1 Create a project. In the sidebar Projects & Apps, select Overview, and in the Elevated directory, click +New Project.
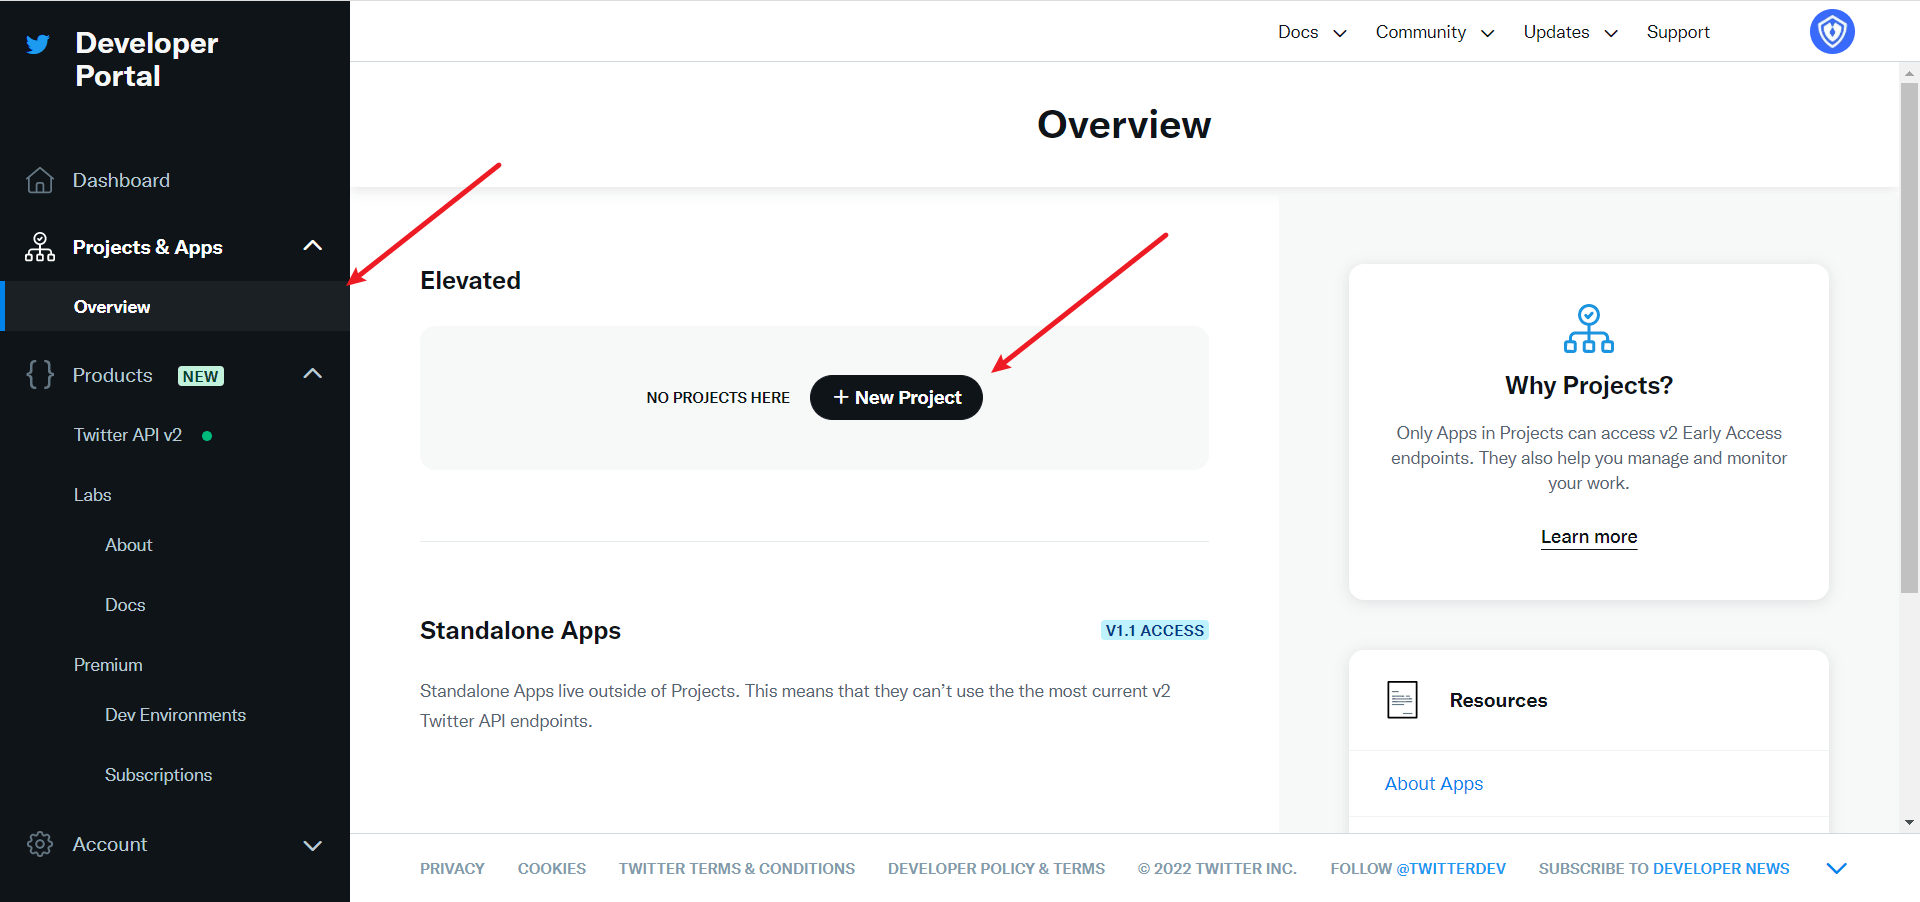
Fill in Project Name, Usage Scenario, Project Description in turn, and start creating the application.
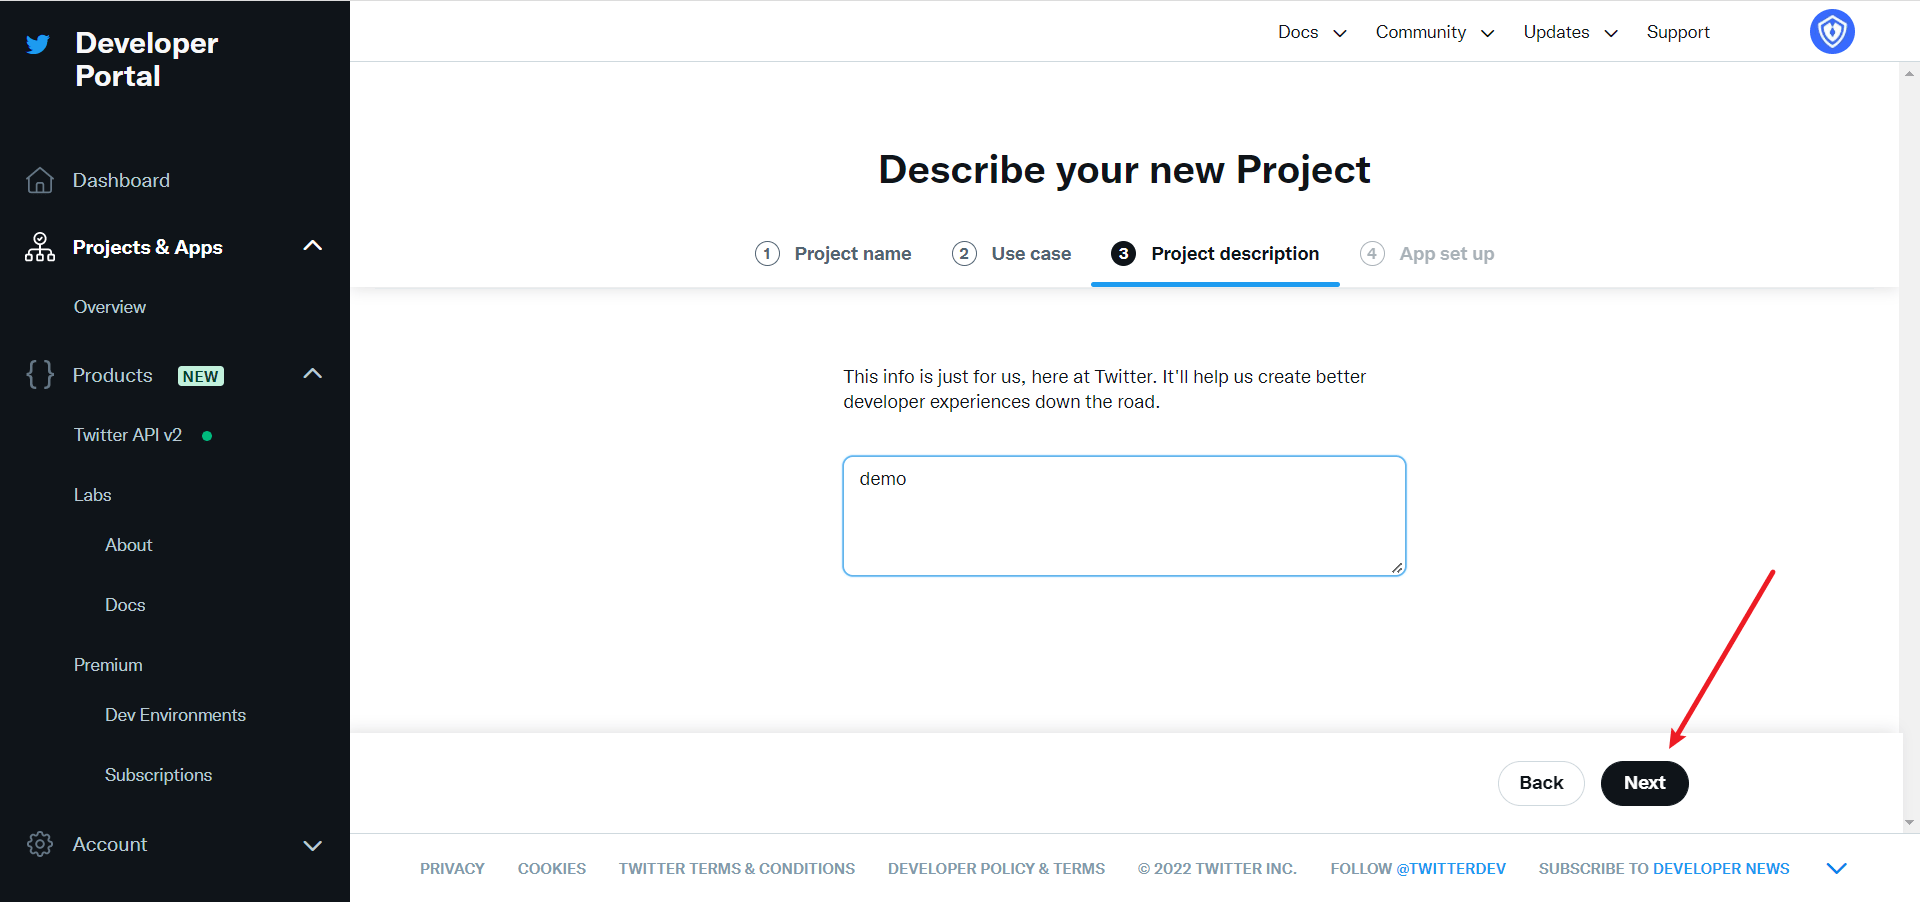
During the development phase, select Development for the application environment, and switch to Production after debugging is complete
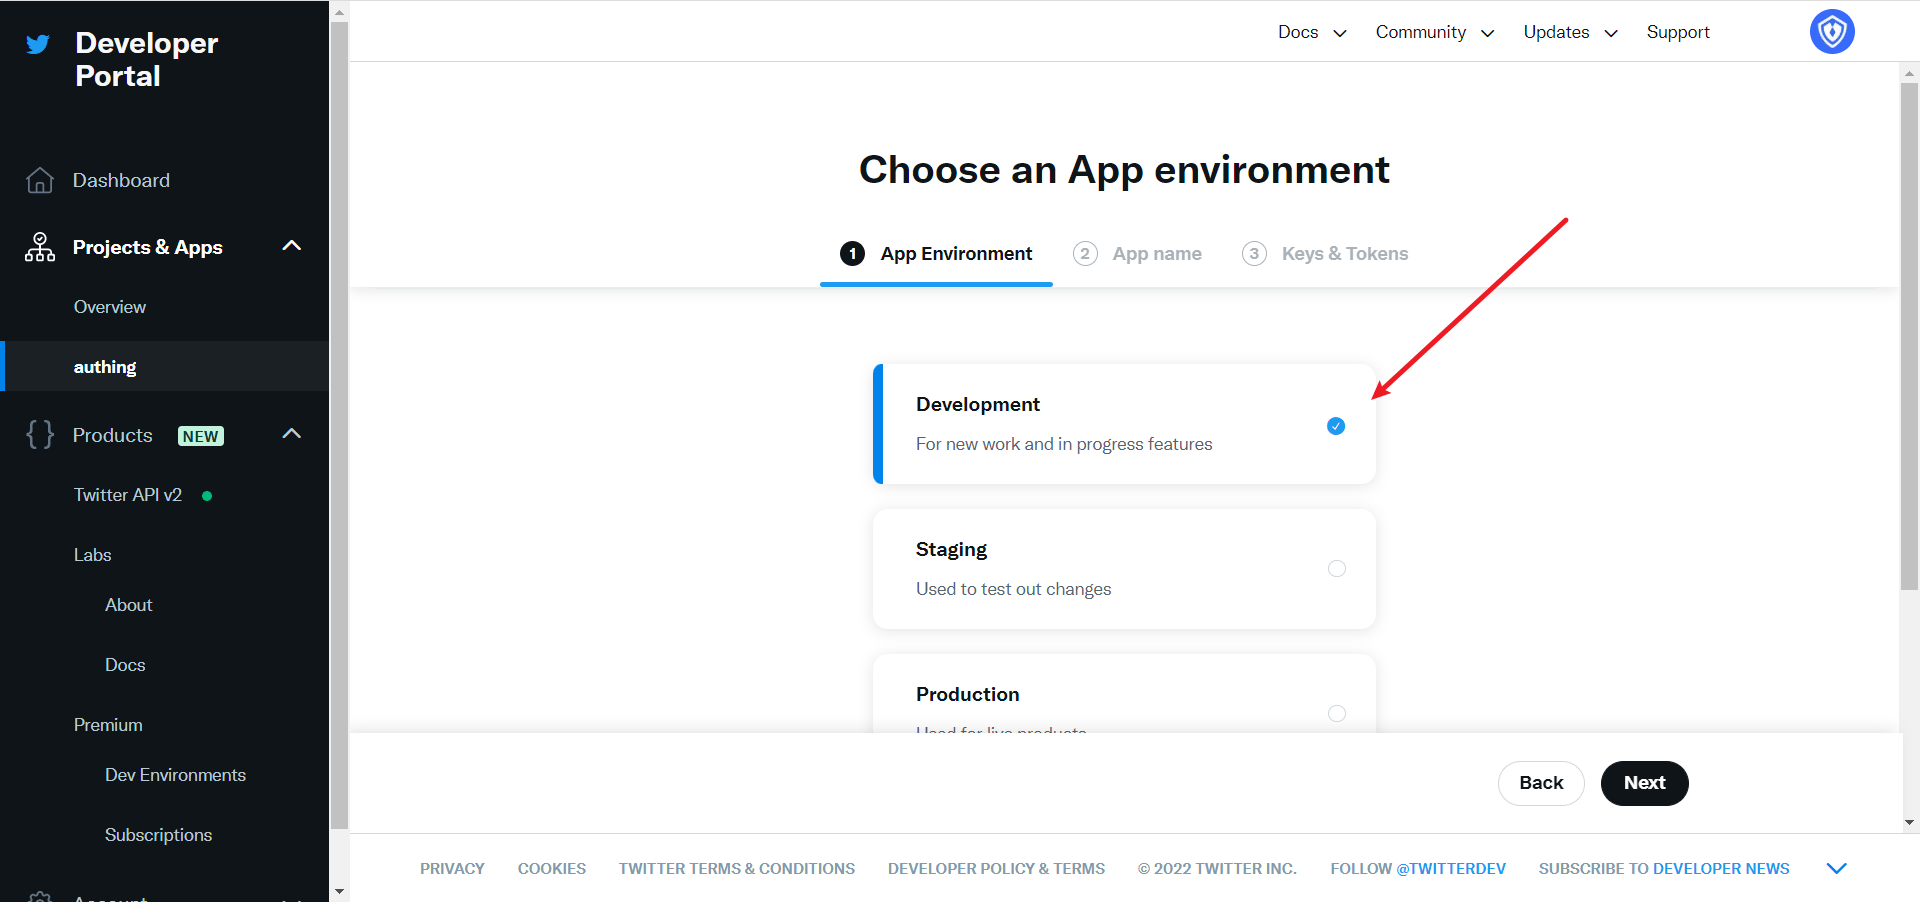
After filling in the name, you will see APP Key and APP Key Secret. Record them first, and they will be used when configuring the GenAuth console
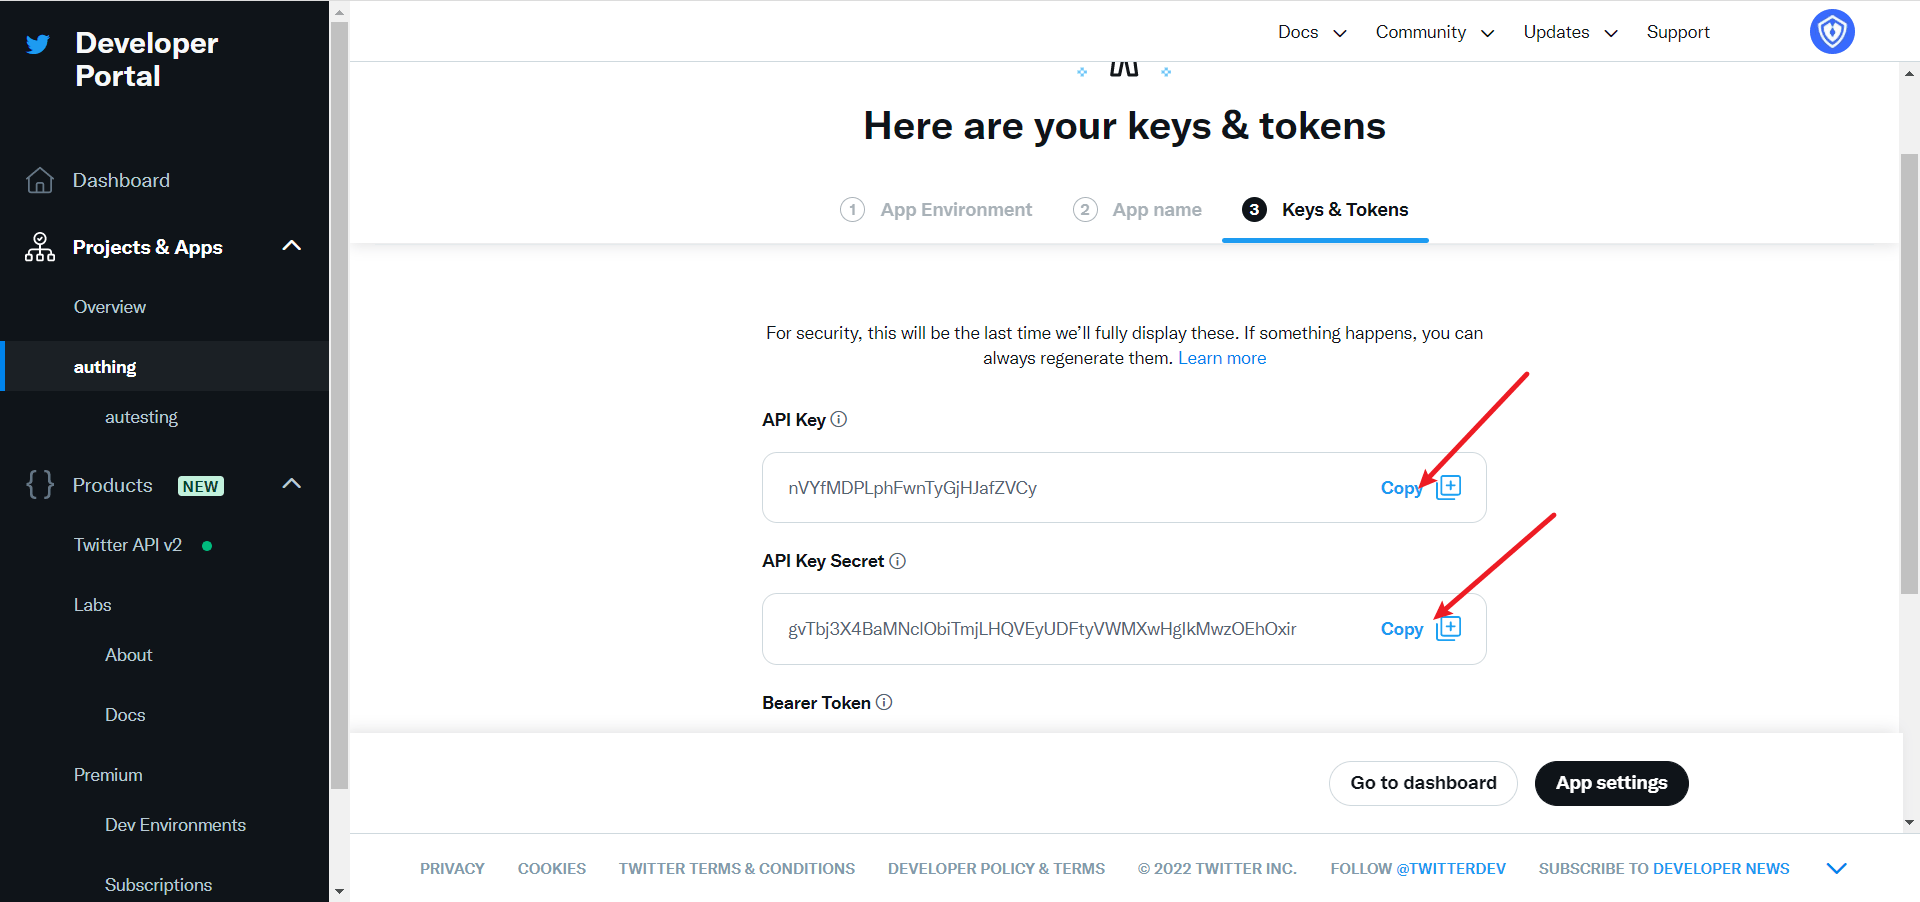
Step 2: Configure Twitter in the GenAuth console
2.1 On the GenAuth Console console, on the "Social Identity Source" page, click the "Create Social Identity Source" button, enter the "Select Social Identity Source" page, select the "Twitter" identity source button, and enter the "Twitter Login Mode" page.
Original image 145 (in section "Step 2: Configure Twitter in the GenAuth console"; Chinese UI)
2.3 Please configure the relevant field information on the "Social Identity Source" - "Twitter" page of the GenAuth Console console.
Original image 146 (in section "Step 2: Configure Twitter in the GenAuth console"; Chinese UI)
| Field/Function | Description |
|---|---|
| Unique ID | a. The unique ID consists of lowercase letters, numbers, and -, and is less than 32 bits in length. b. This is the unique ID of this connection and cannot be modified after setting. |
| Display Name | This name will be displayed on the button of the end user's login interface. |
| API Key | Application ID, which needs to be obtained on the Twitter platform |
| API Secret Key | Application secret key, which needs to be obtained on the Twitter platform |
| Callback URL | This is your business callback domain name, which is not the same as the callback link configured for the self-built application, and is also unrelated to the callback address configuration of the third-party social login console. For example, if your website domain is:https://example.comand the URL for handling the GenAuth callback request is /auth/callback, then you should fill it in as:https://example.com/auth/callbackThis parameter is no longer recommended. It is recommended to configure the callback link separately in the application. You can fill in # for the address here. |
| Callback address | Twitter redirect URI. This URL needs to be configured to the callback address of the application created by the Twitter platform. |
| Login mode | After turning on "Login-only mode", you can only log in to existing accounts and cannot create new accounts. Please choose carefully. |
After the configuration is completed, click the "Create" or "Save" button to complete the creation.
In the project created on Twitter, select the application you just created, scroll down, and under the User authentication settings column, click the Set Up button to enter the authentication settings page 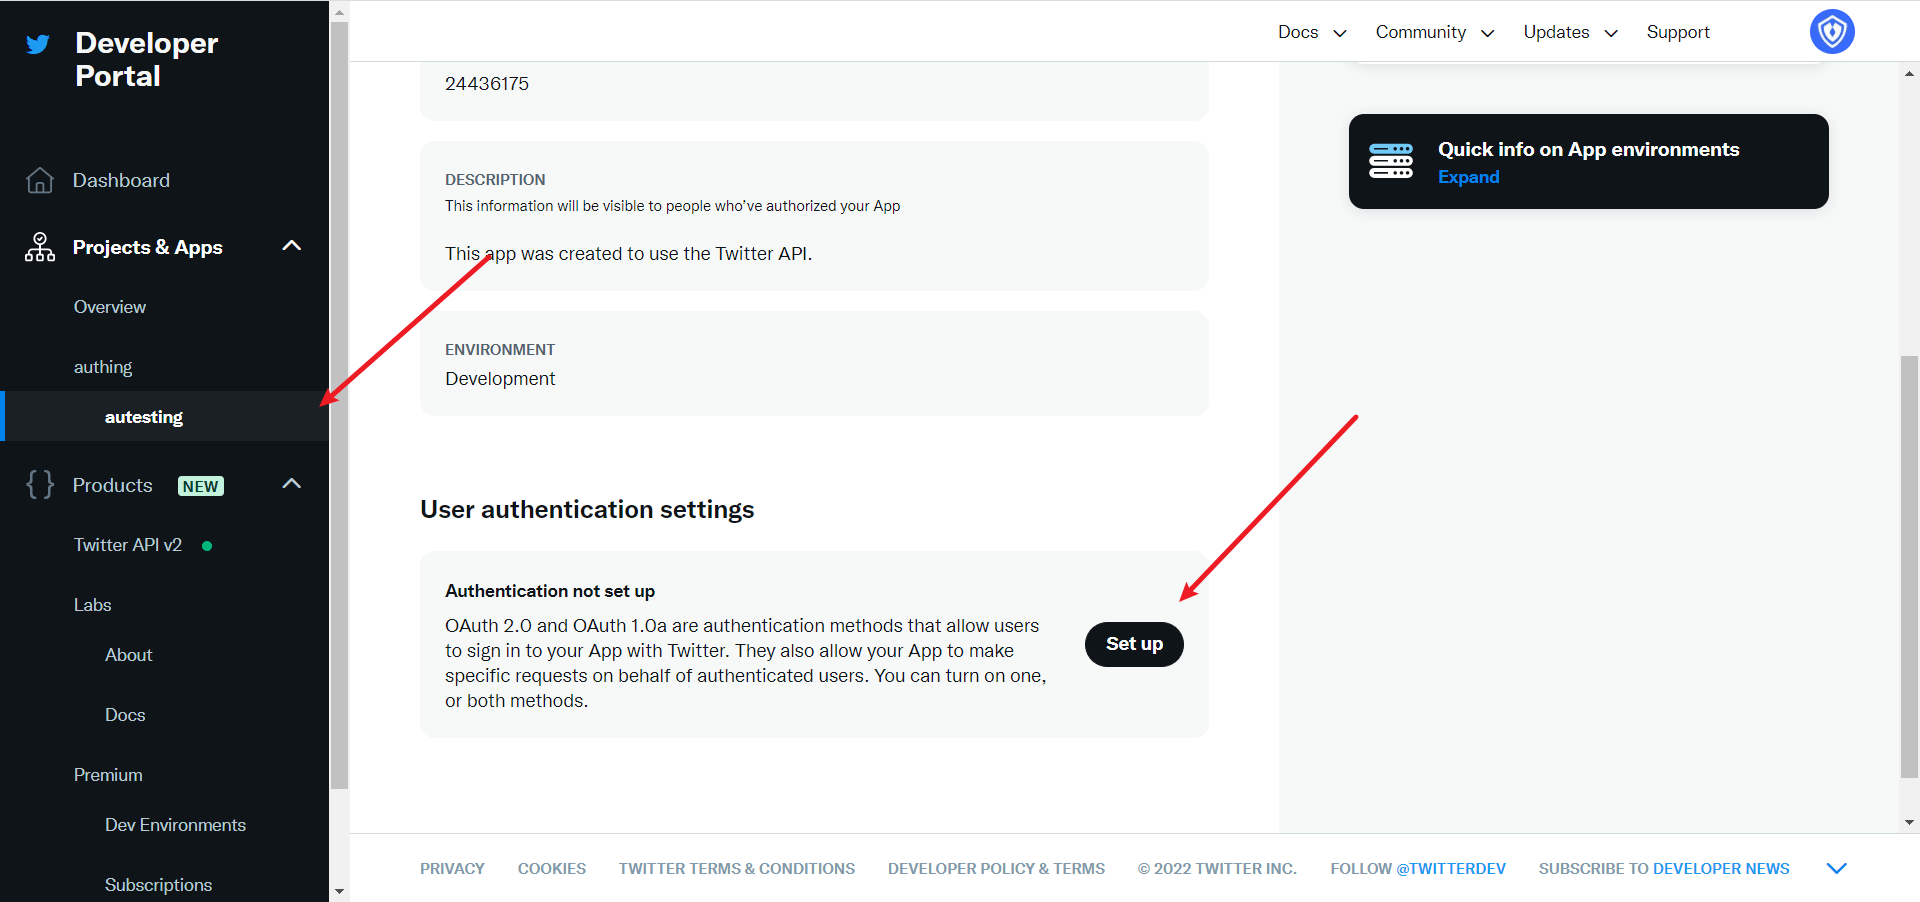
Enable OAuth 1.0a 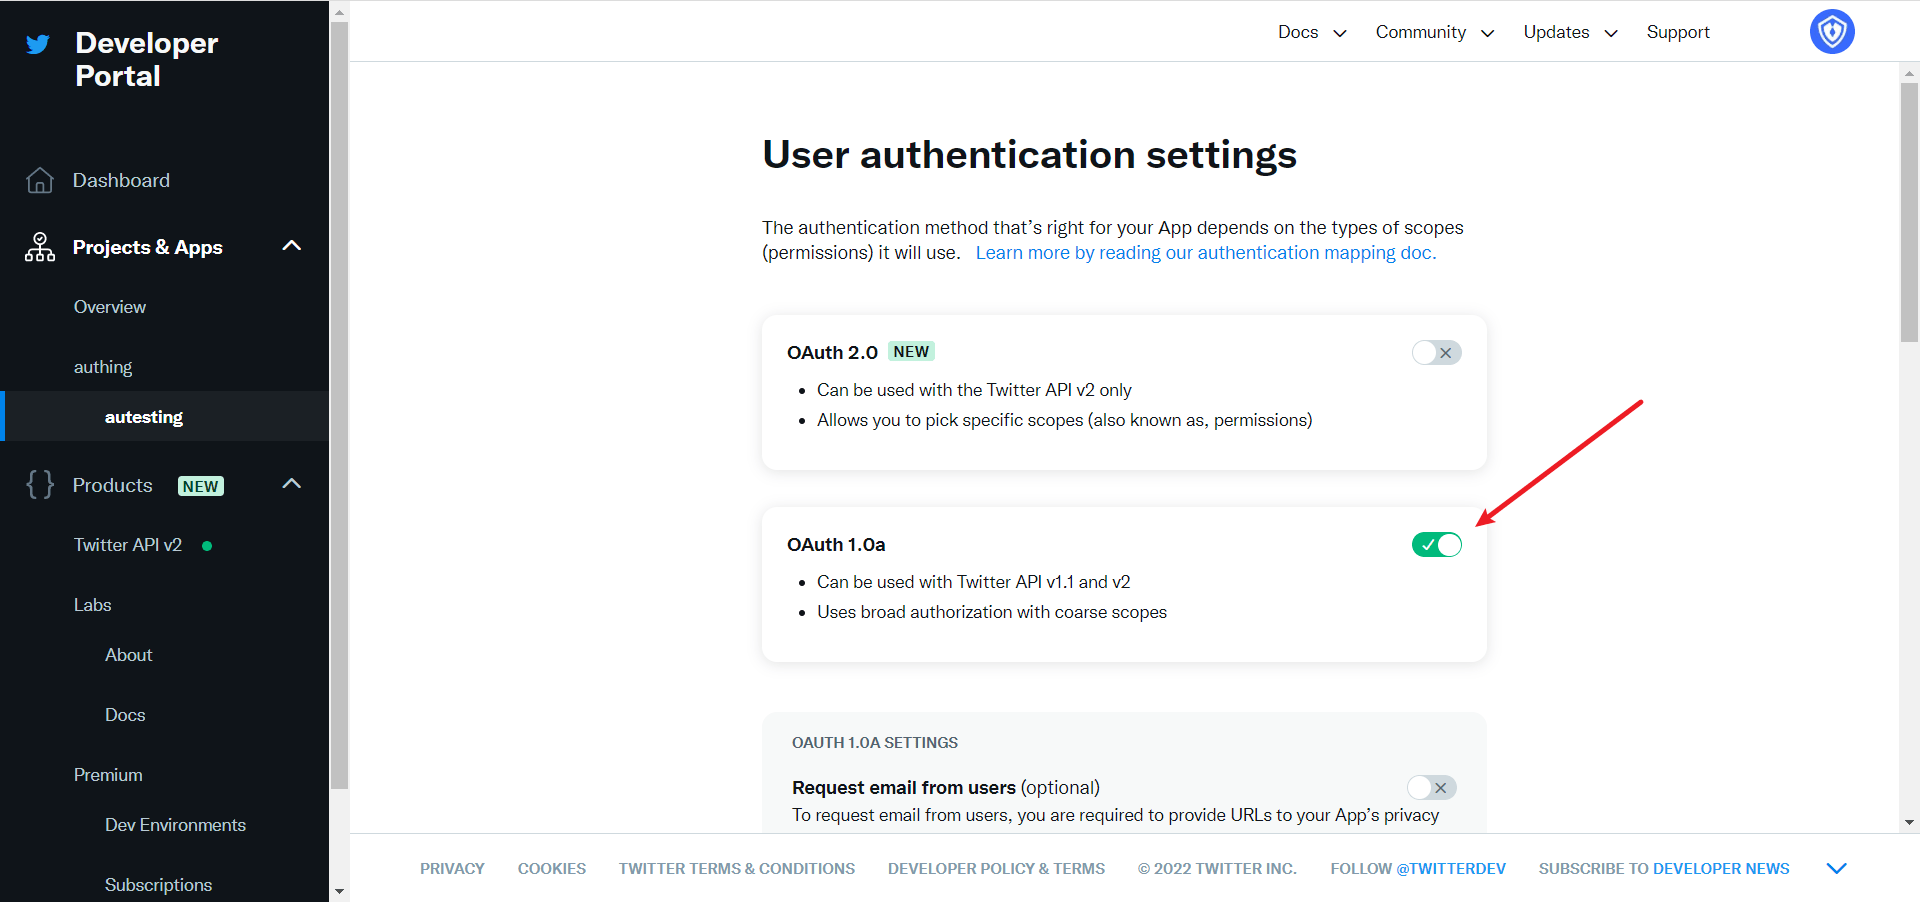
Select the permissions of the App as needed. The default selection of Read can meet the authentication function. Callback URI / Redirect URL fills in the callback address displayed after creating the Twitter identity source on the GenAuth console. 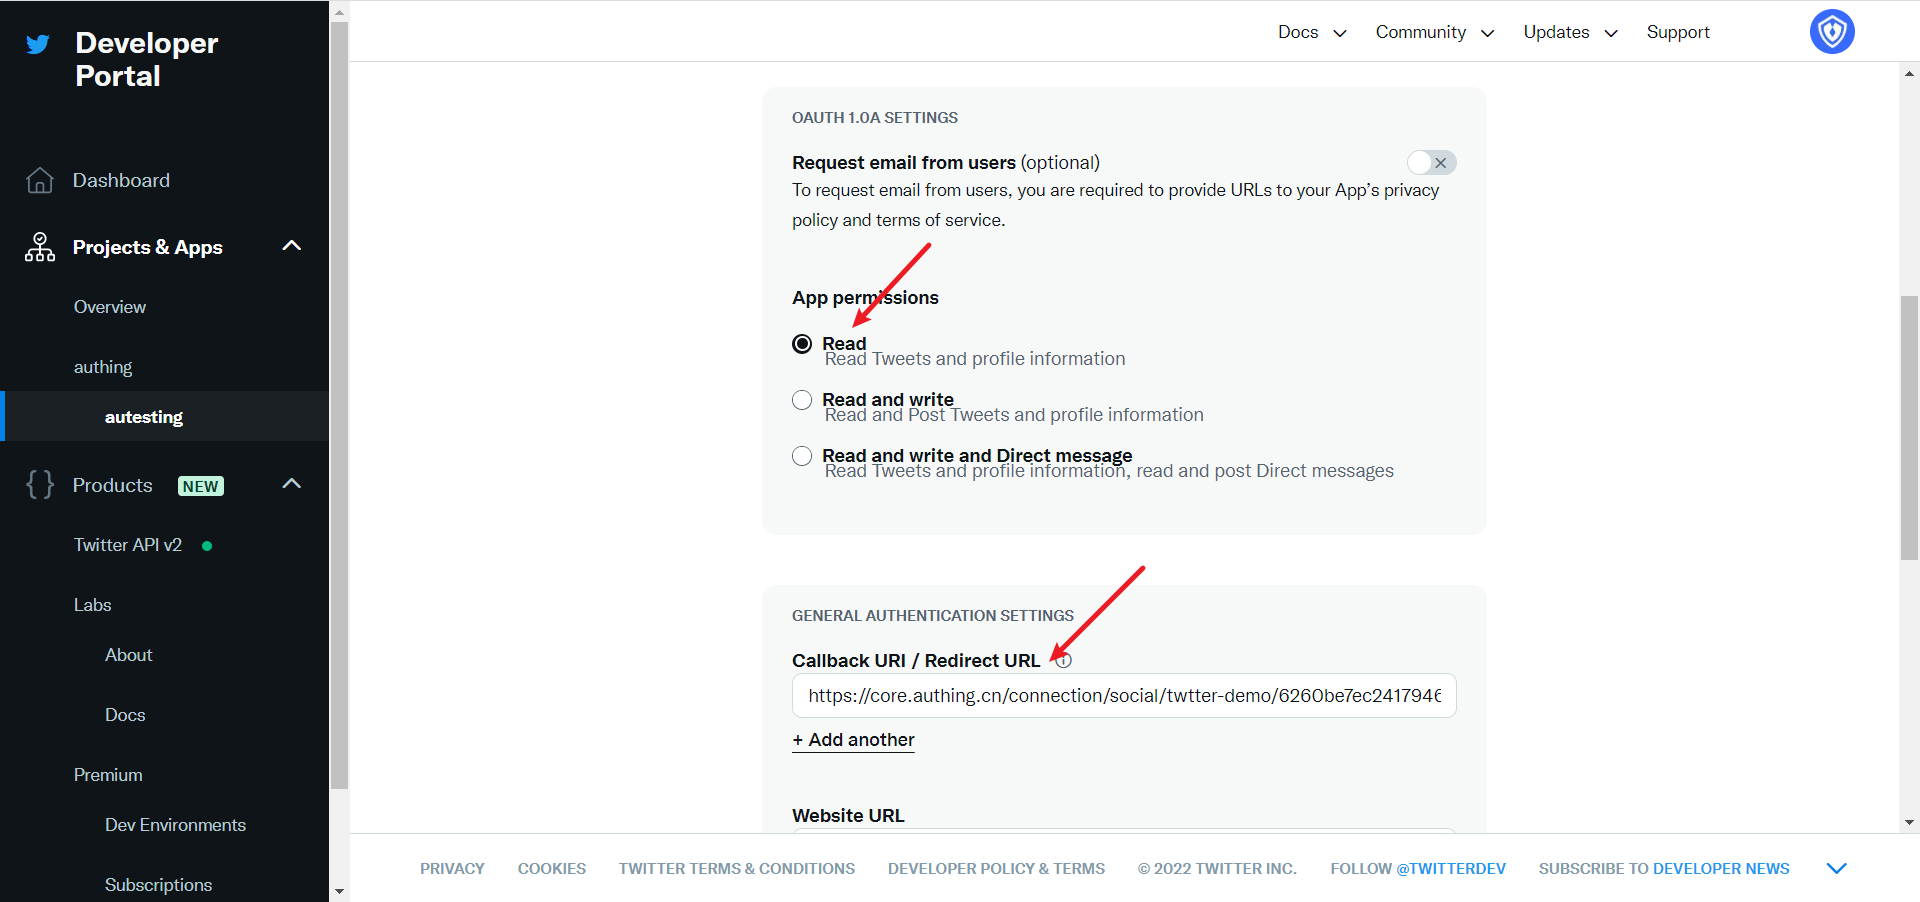
Website URL fills in your site homepage, then click Save 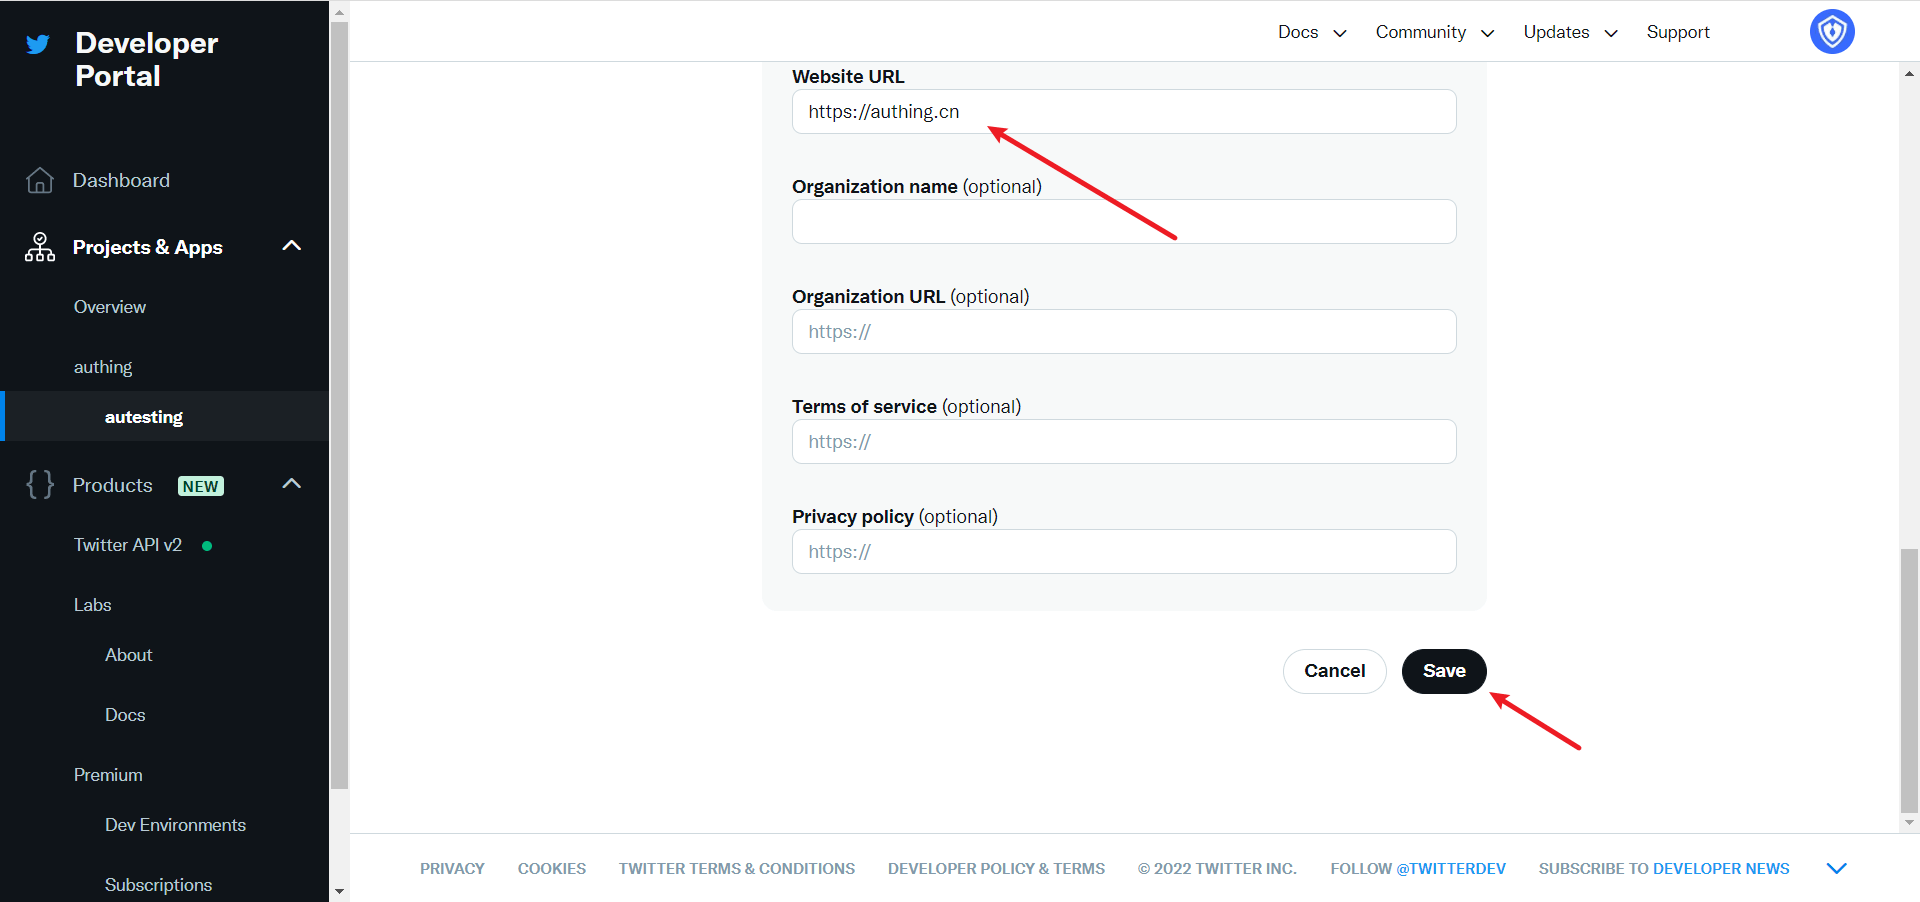
If you forget the application key, you can click Keys and tokens on the application page and select Regenerate to regenerate. 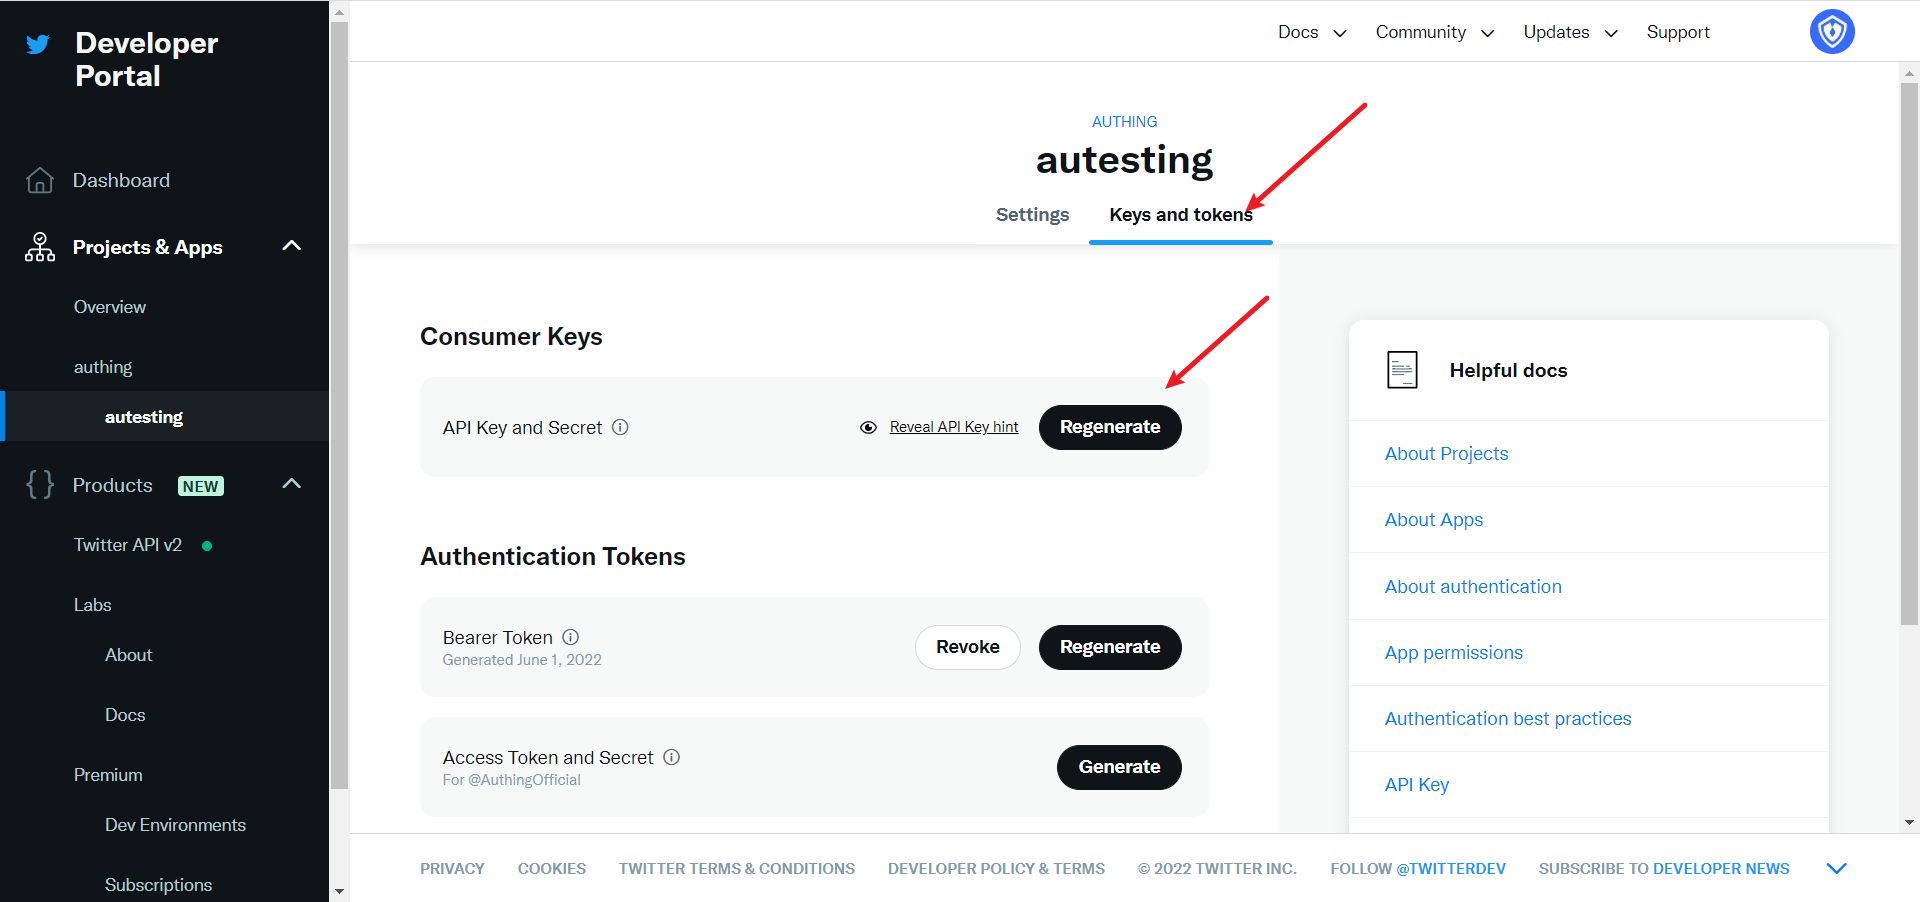
After completing the configuration, return to the application settings page, click Edit, and switch the application environment to Production. 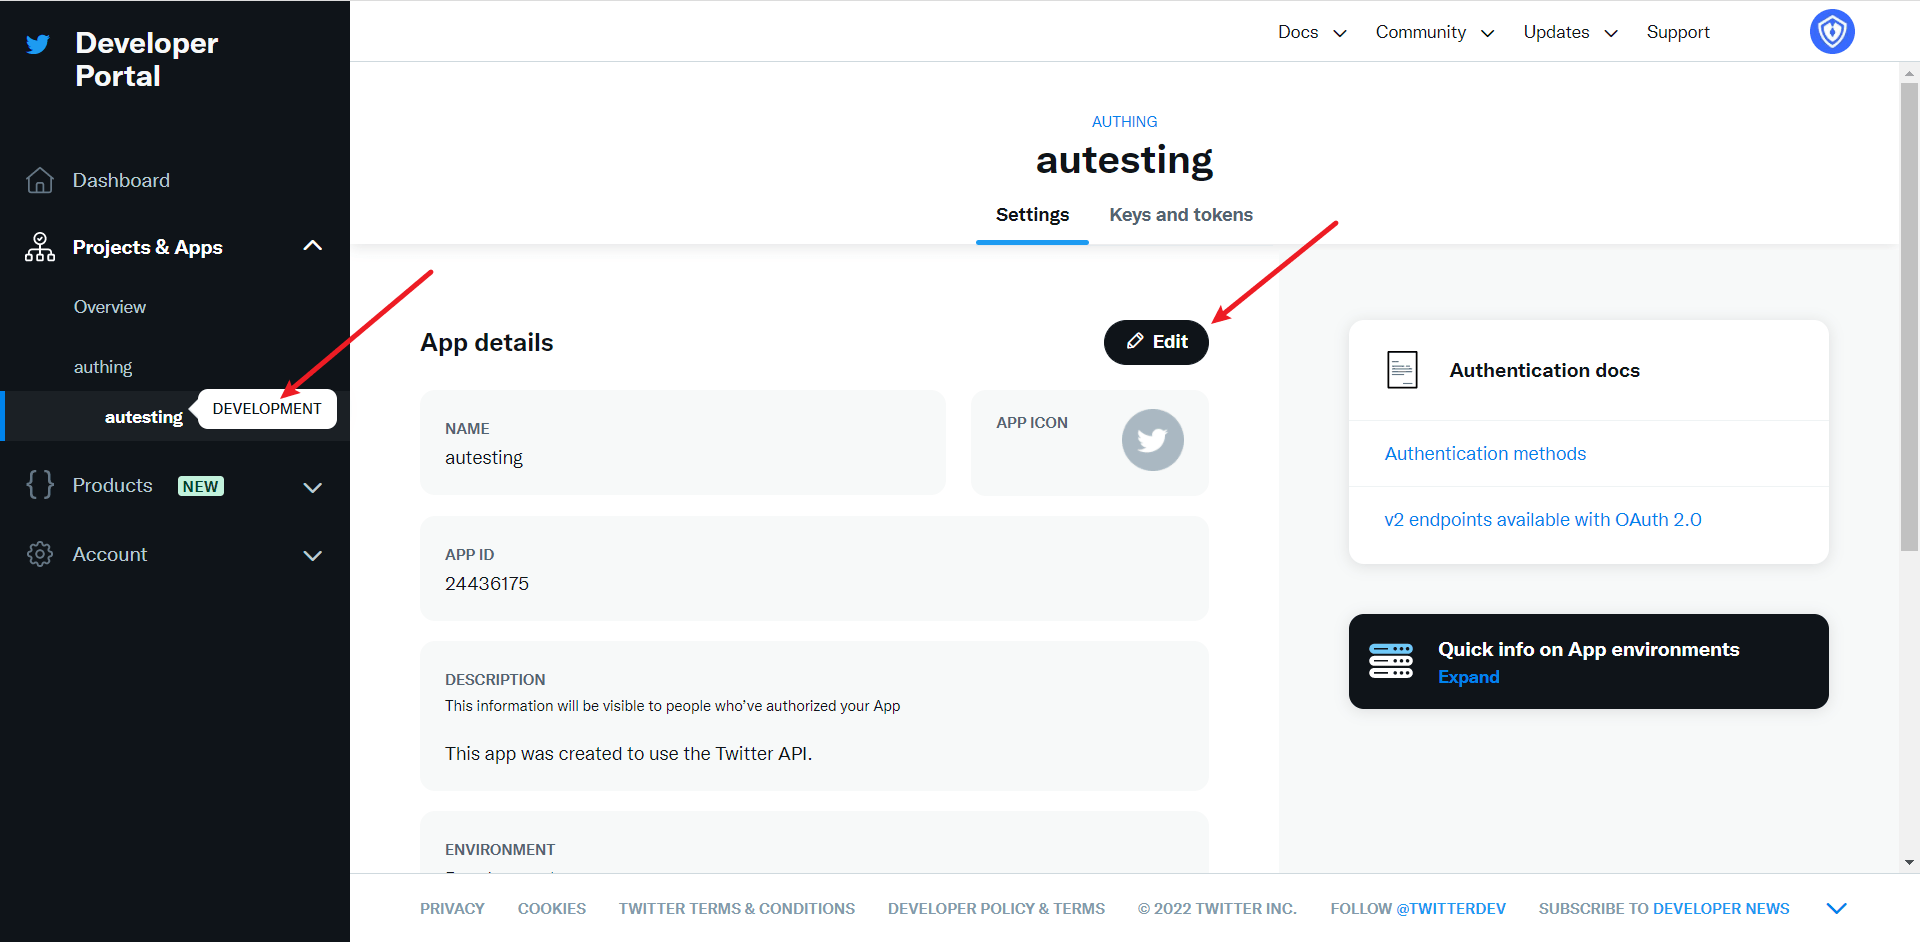
Step 3: Development access
Recommended development access method: Use a hosted login page
Pros and cons description: Simple operation and maintenance, which is handled by GenAuth. Each user pool has an independent secondary domain name; if you need to embed it into your application, you need to log in using the pop-up mode, that is: after clicking the login button, a window will pop up with the content of the login page hosted by GenAuth, or redirect the browser to the login page hosted by GenAuth.
Detailed access method:
3.1 Create an application in the GenAuth console. For details, see: How to create an application in GenAuth
3.2 On the created Twitter identity source connection details page, open and associate an application created in the GenAuth console
Original image 147 (in section "Step 3: Development access"; Chinese UI)
3.3 Experience Twitter third-party login on the login page
Original image 148 (in section "Step 3: Development access"; Chinese UI)
Twitter Mobile
Scenario Introduction
Overview
GenAuth provides developers with a way to quickly jump to Twitter login and obtain user information in mobile (iOS or Android) applications. Twitter account access can be completed by simply calling the GenAuth mobile SDK.
Application Scenario
Mobile APP
End User Preview
Original image 149 (in section "End User Preview"; Chinese UI)
Notes
- If you don't have a Twitter account yet, please go to the Twitter platform to register an account.
- Go to the Twitter Developer Platform to complete the account information, and apply for Elevated access permissions for the account.
- If you have not opened a GenAuth console account, please go to GenAuth Console to register a developer account;
Step 1: Create a Twitter application
1.1 Create a project. In the sidebar Projects & Apps, select Overview, and in the Elevated directory, click +New Project.
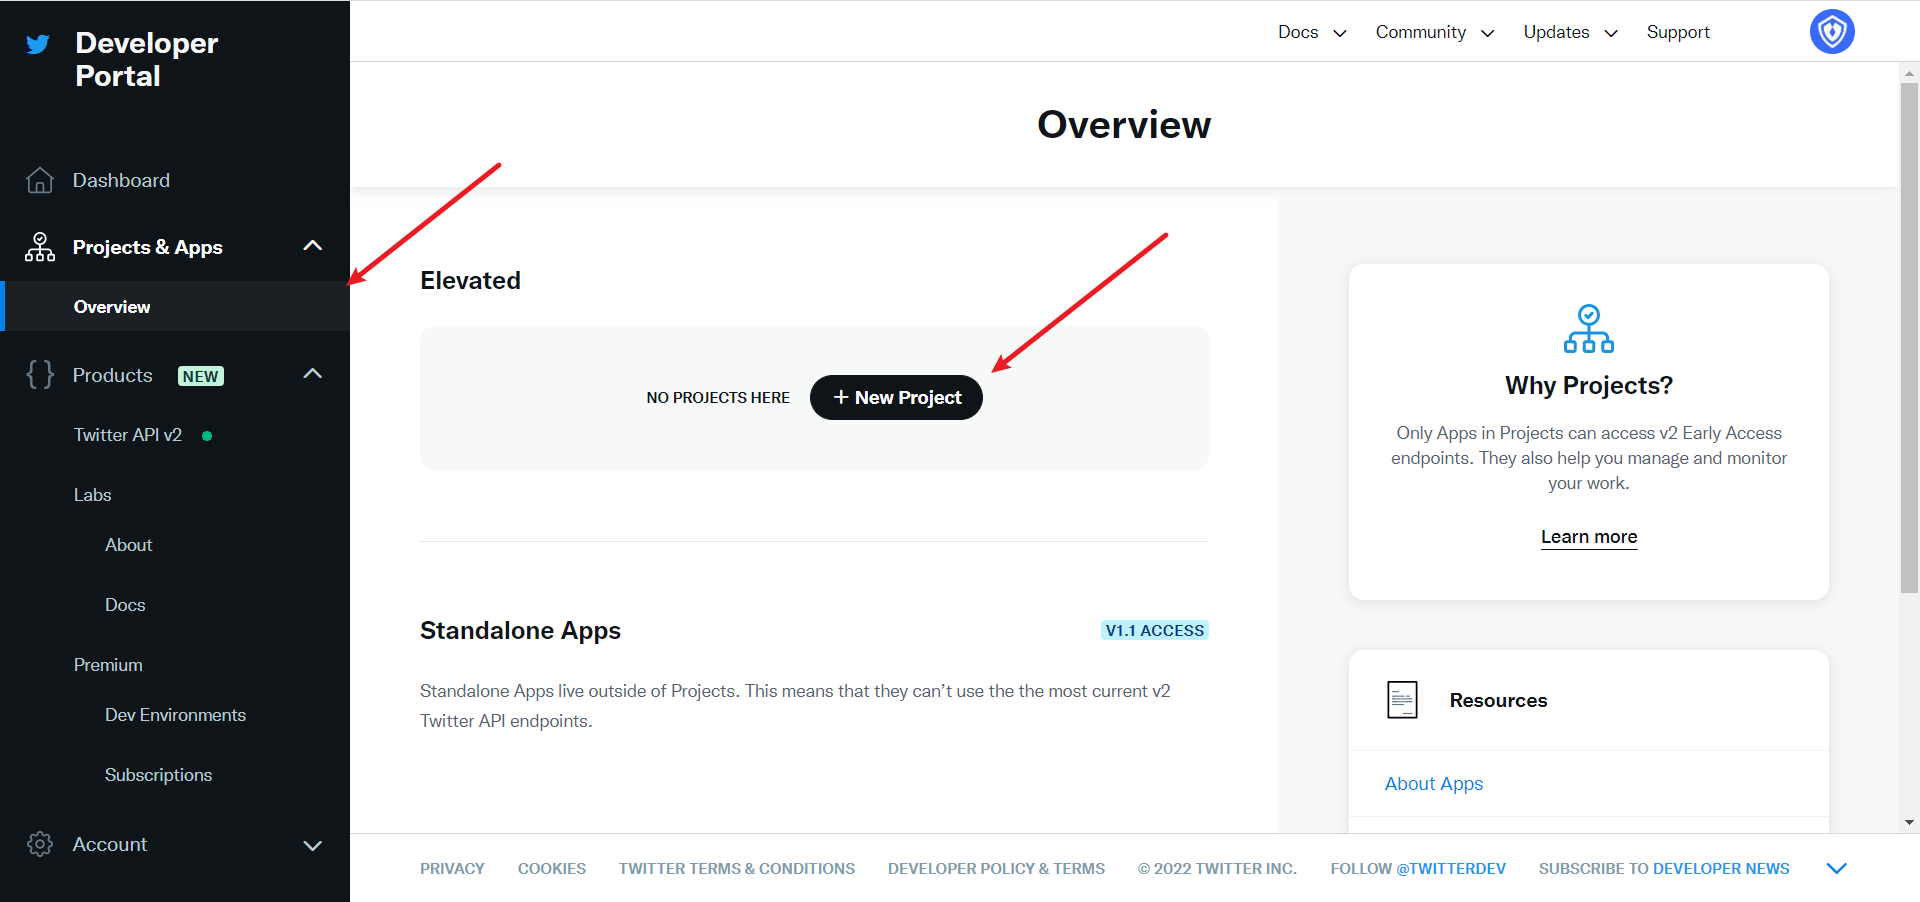
Fill in Project Name, Usage Scenario, Project Description in turn, and start creating the application.
During the development stage, select Development for the application environment first, and switch to Production after debugging is completed
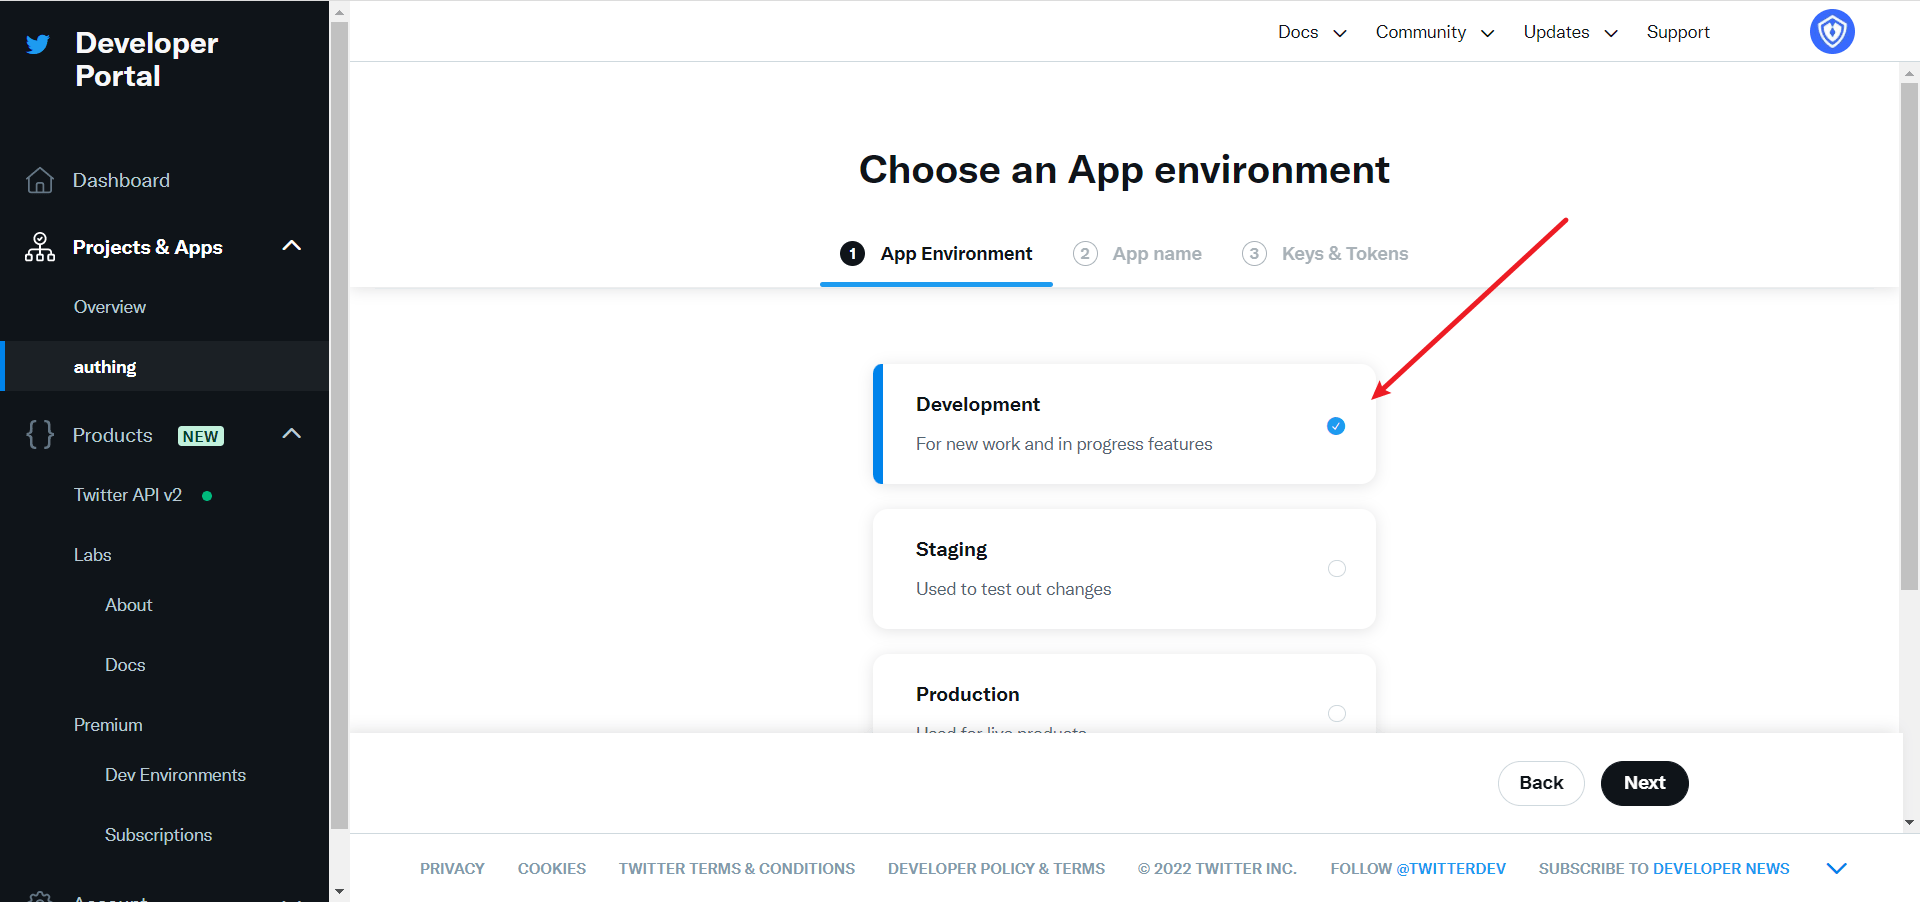
After filling in the name, you will see APP Key and APP Key Secret. Record them first, and they will be used when configuring the GenAuth console
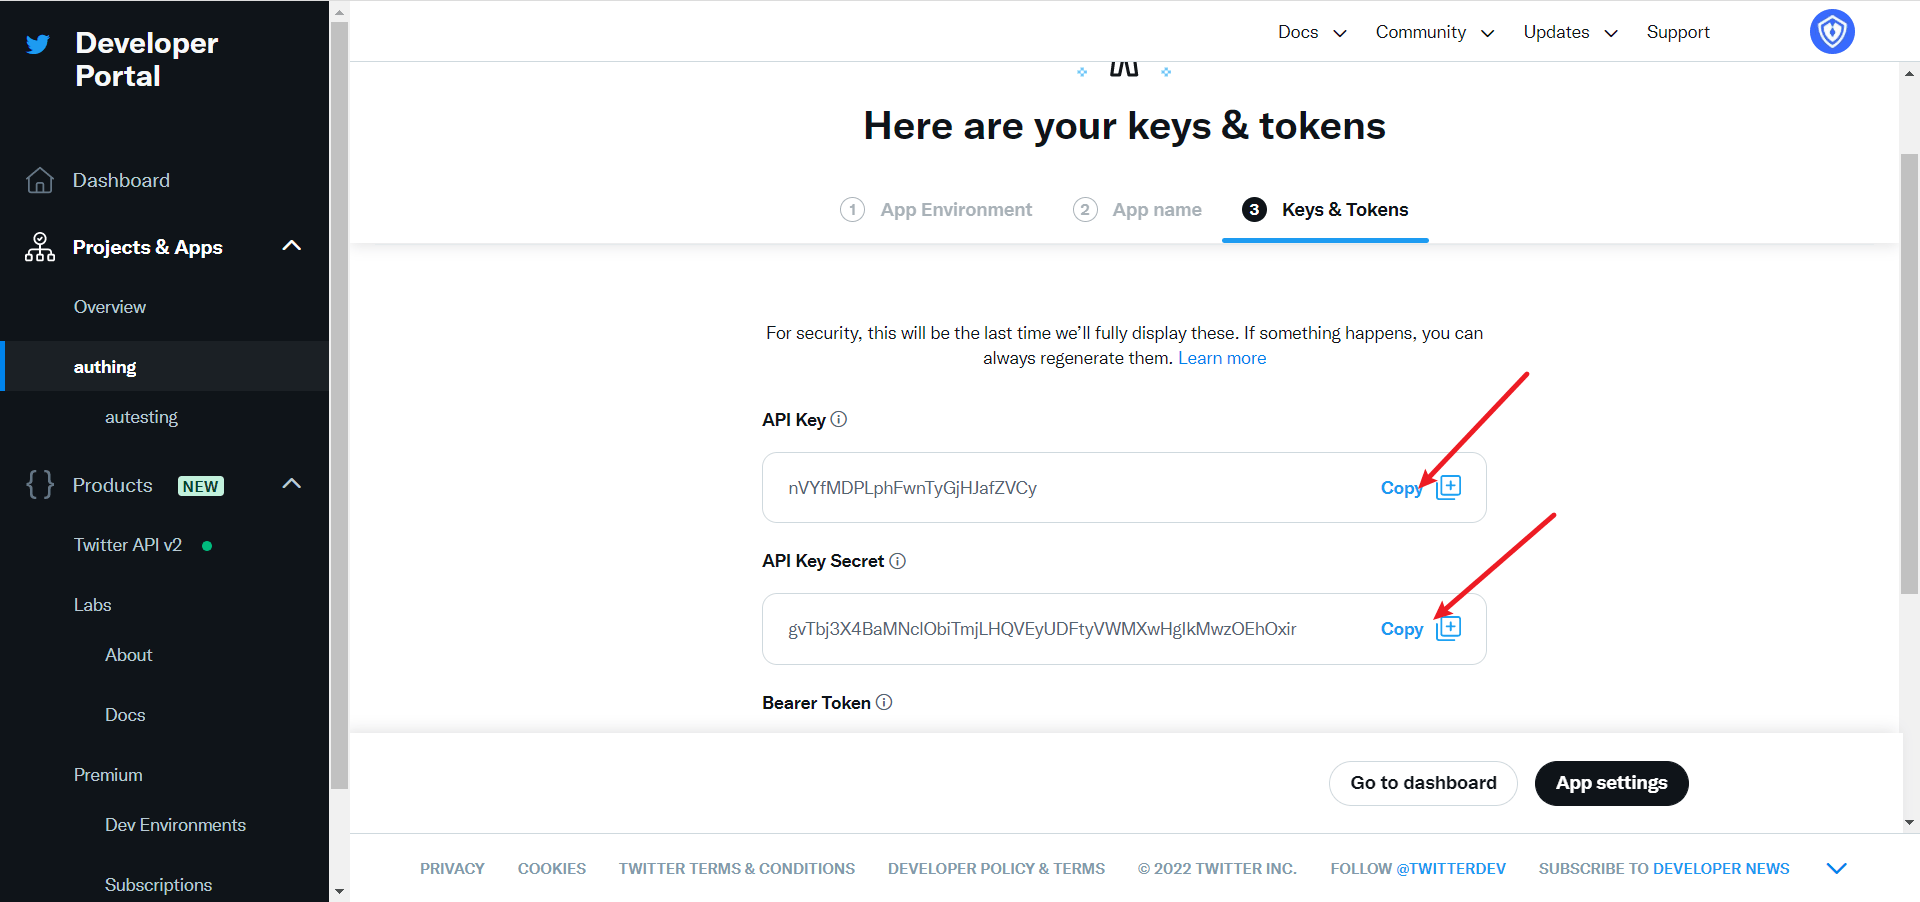
Step 2: Configure Twitter mobile login in the GenAuth console
2.1 On the "Social Identity Source" page of the GenAuth Console, click the "Create Social Identity Source" button to enter the "Select Social Identity Source" page, select the "Twitter" identity source button, and enter the "Twitter Mobile Login Mode" page.
2.3 Please configure the relevant field information on the "Social Identity Source" - "Twitter Mobile" page of the GenAuth Console console.
| Field/Function | Description |
|---|---|
| Unique ID | a. The unique ID consists of lowercase letters, numbers, and -, and its length is less than 32 bits. b. This is the unique ID of this connection and cannot be modified after setting. |
| Display Name | This name will be displayed on the button of the end user's login interface. |
| API Key | Application ID, which needs to be obtained on the Twitter platform |
| API Key Secret | Application key, which needs to be obtained on the Twitter platform |
| Login Mode | After turning on "Login Only Mode", you can only log in to existing accounts, and cannot create new accounts. Please choose carefully. |
After the configuration is completed, click the "Create" or "Save" button to complete the creation.
In the project created by Twitter, select the application you just created, scroll down, and under the User authentication settings column, click the Set Up button to enter the authentication settings page 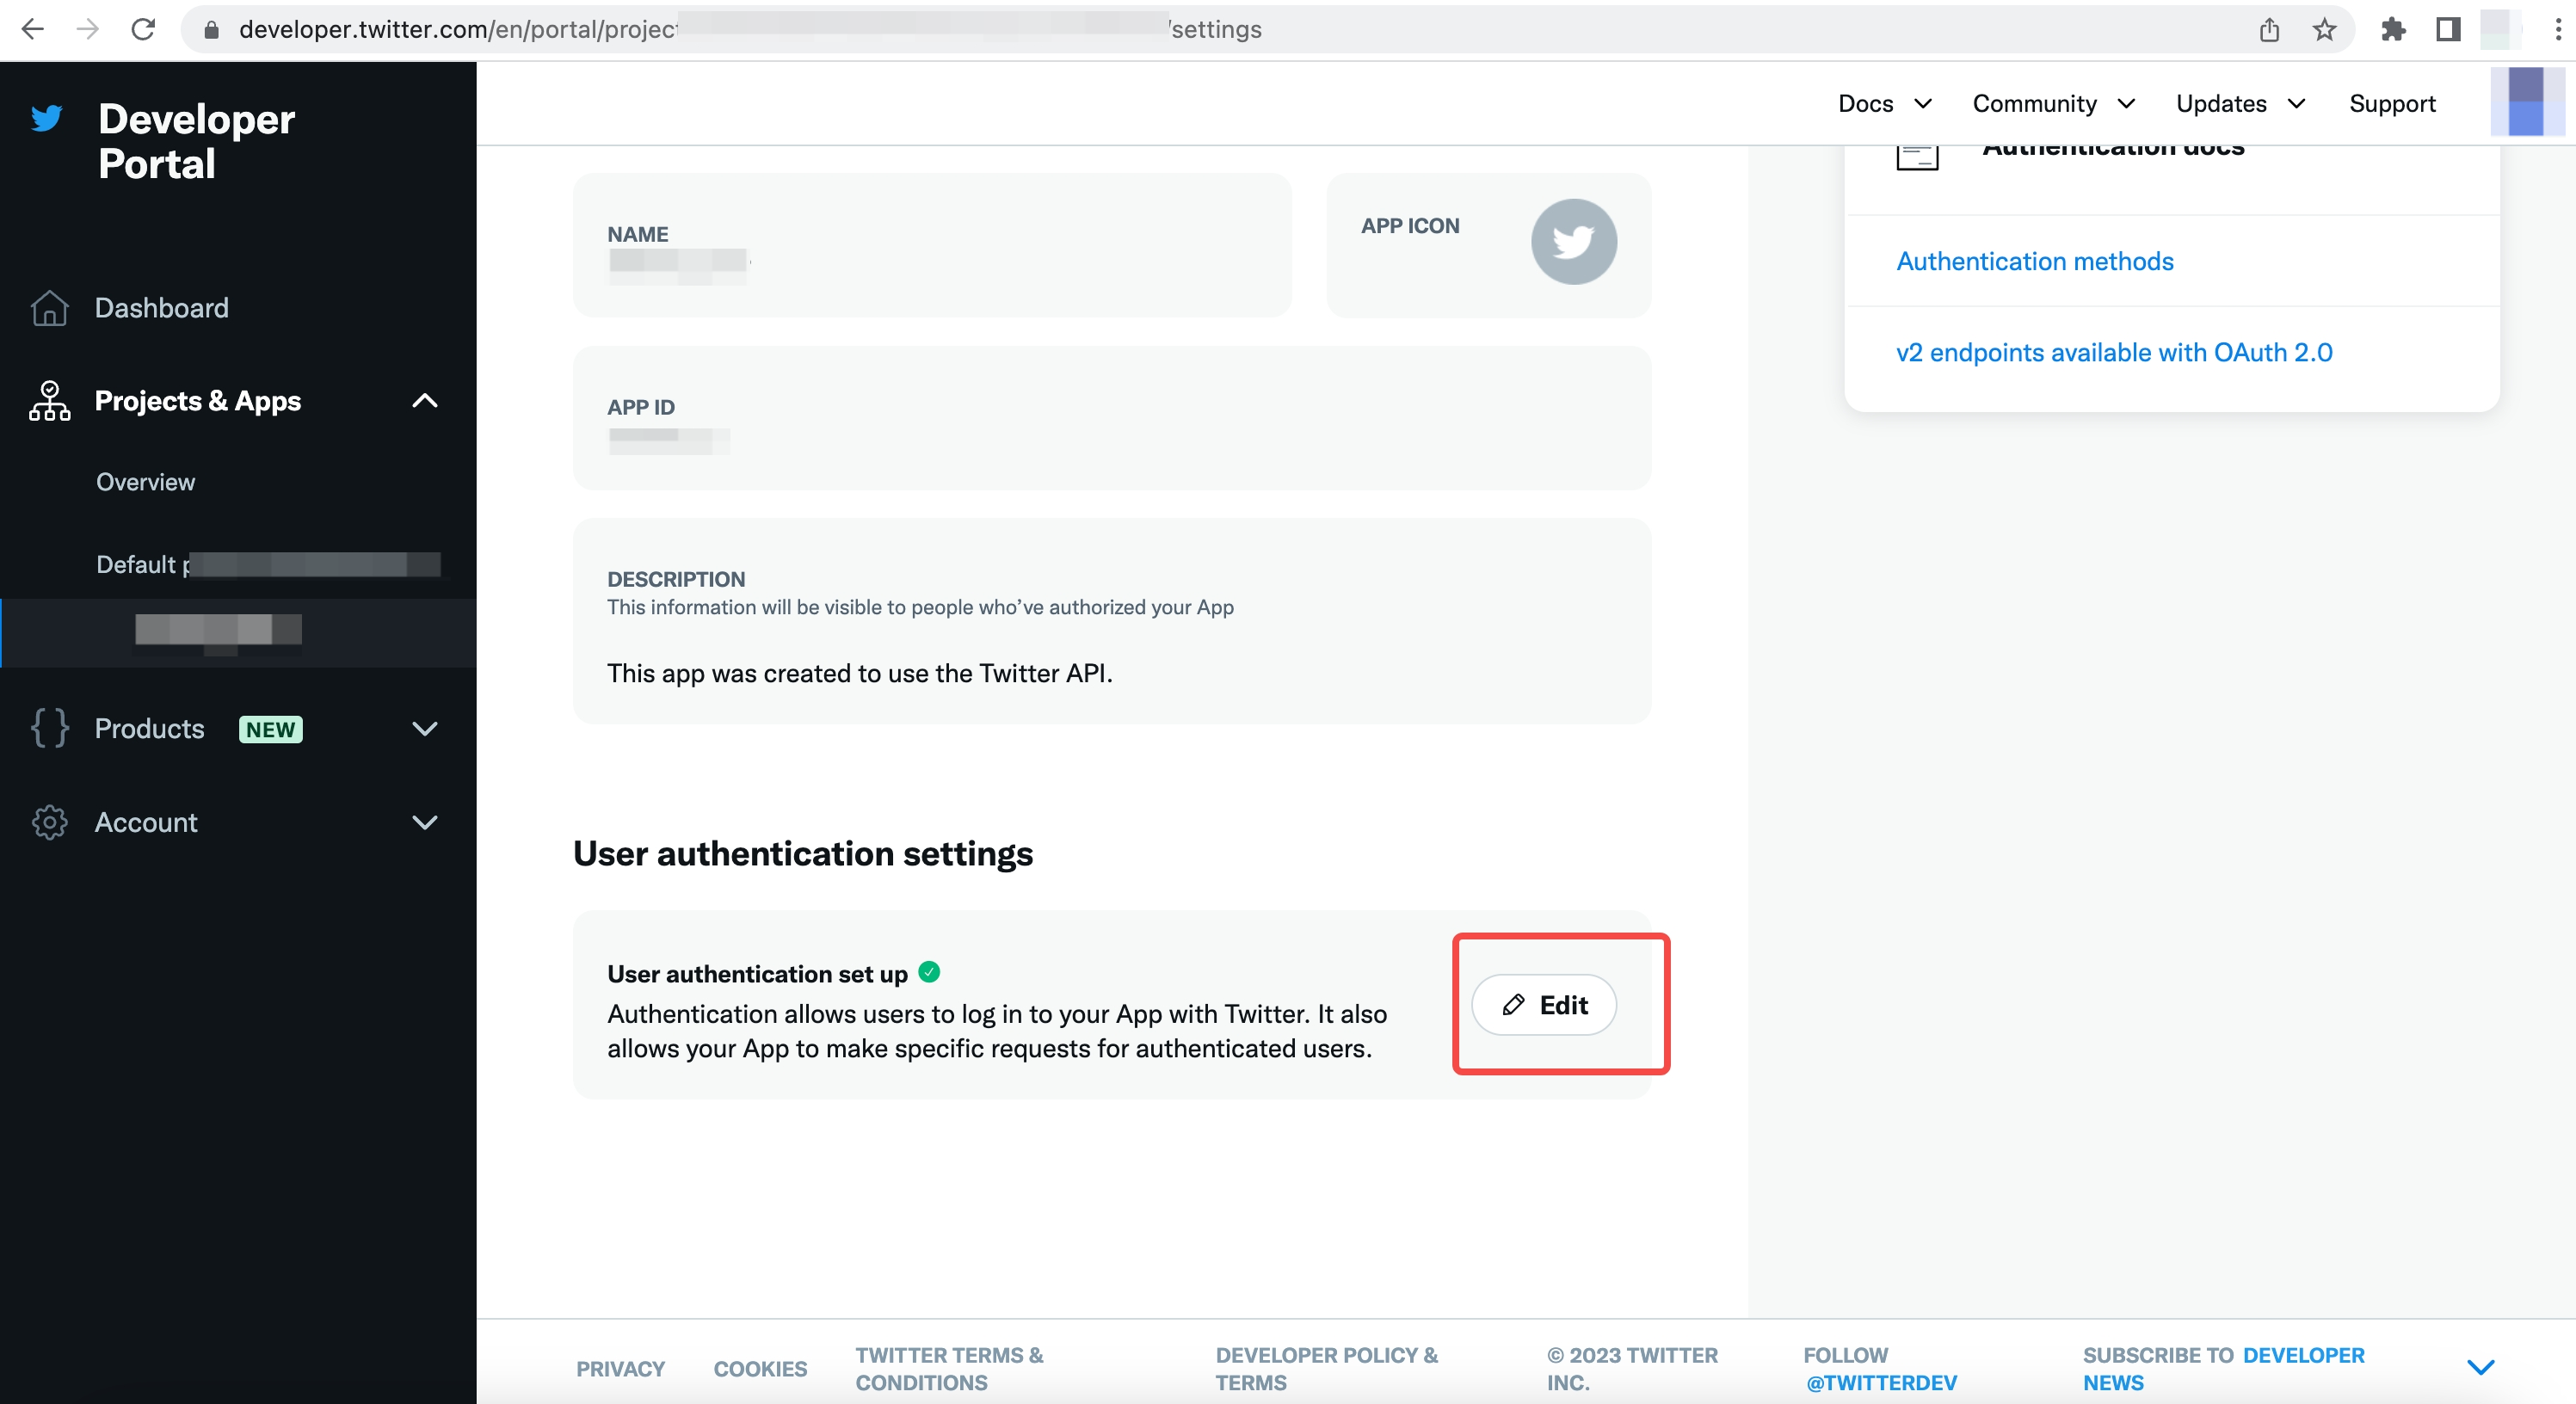
Select the App permissions as needed. The default selection of Read can meet the authentication function 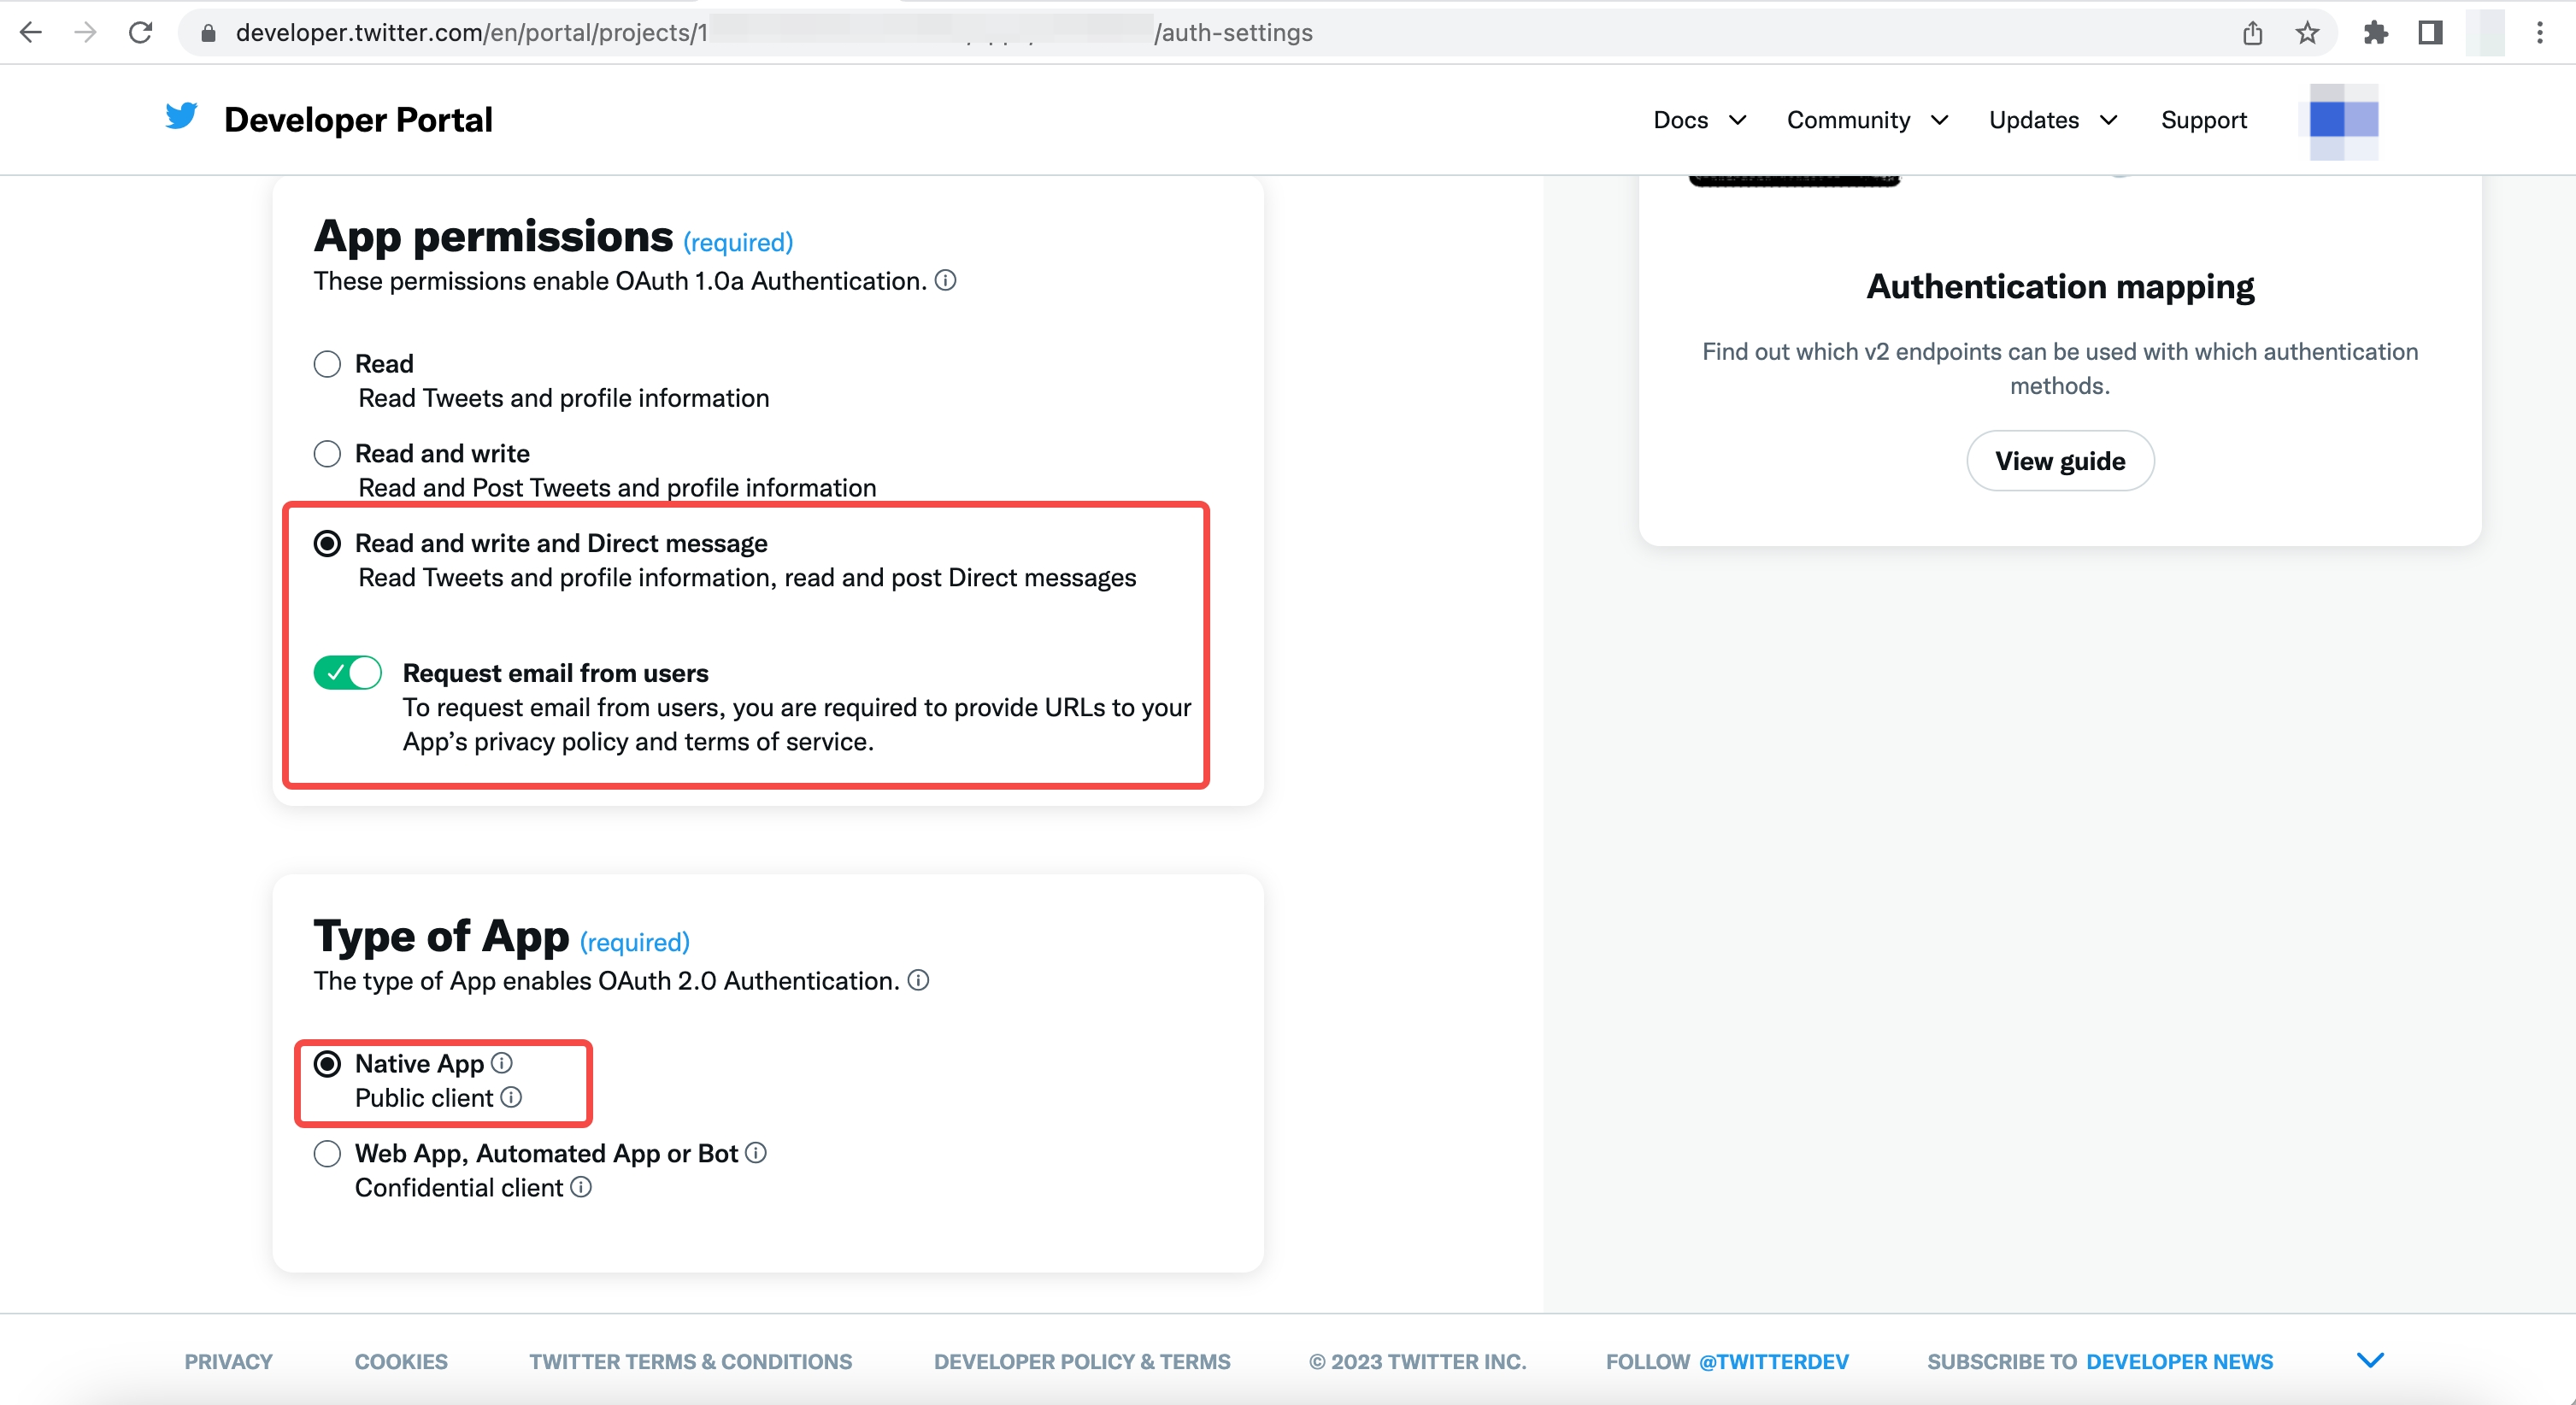
If you forget the application key, you can click Keys and tokens on the application page and select Regenerate to regenerate it. 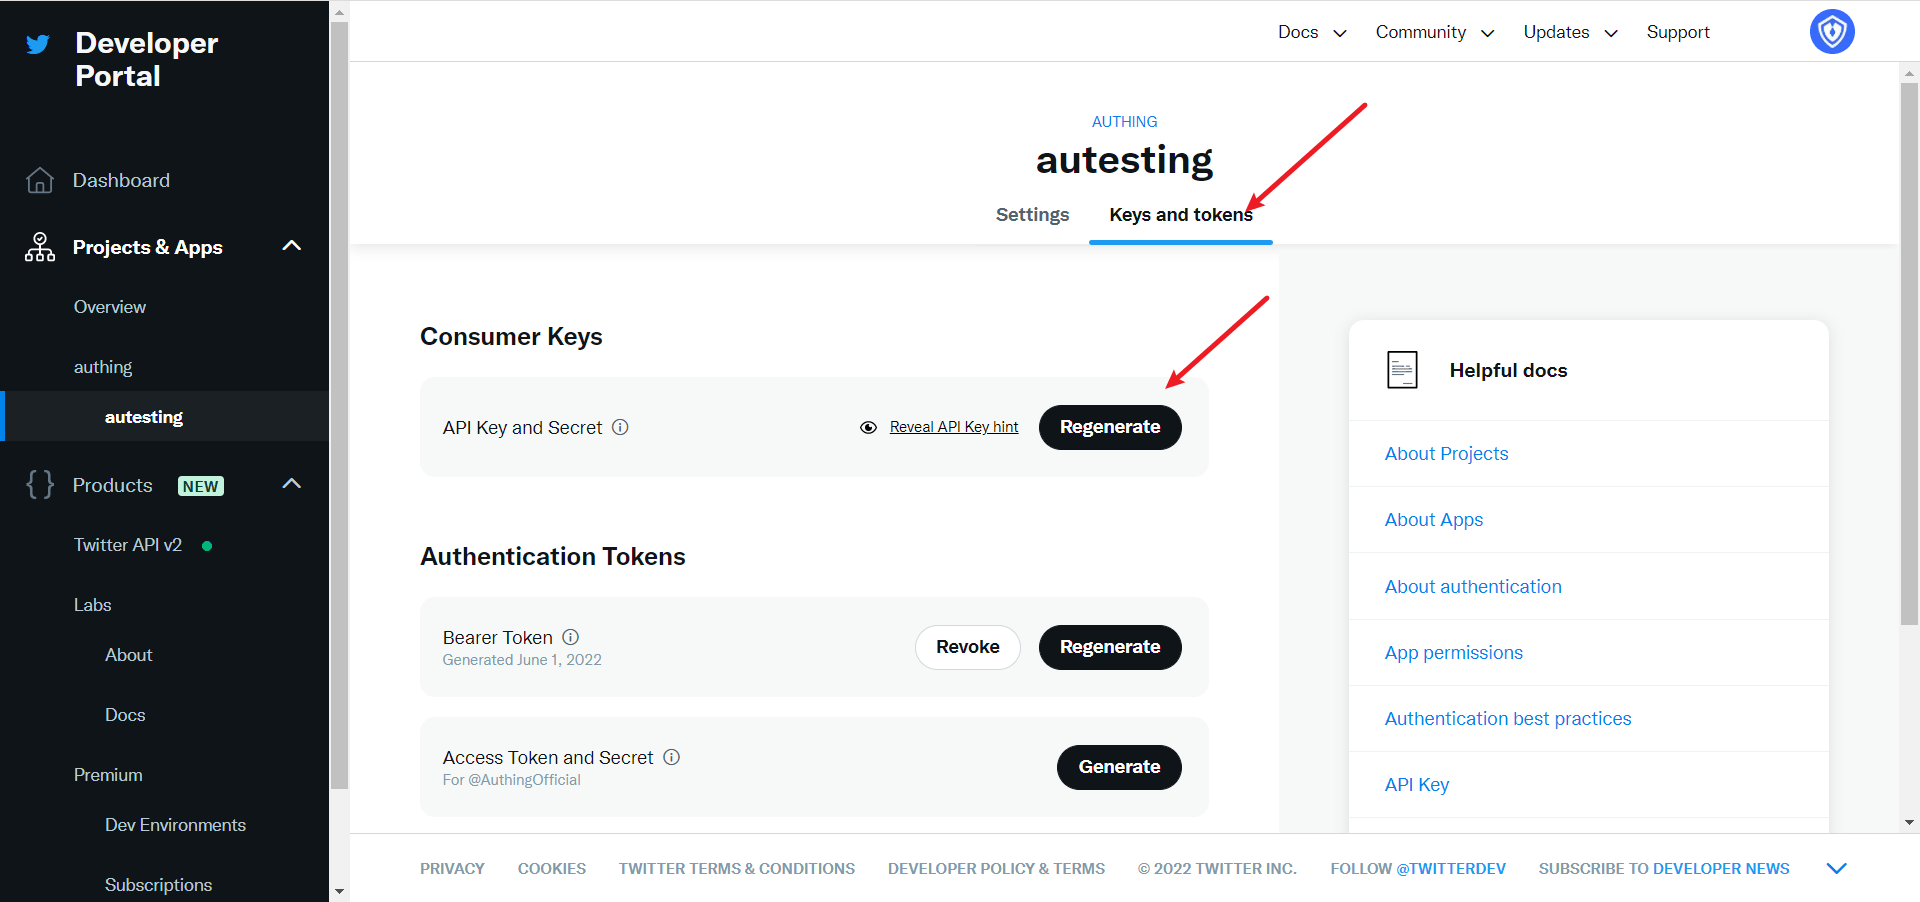
After completing the configuration, return to the application settings page, click Edit, and switch the application environment to Production. 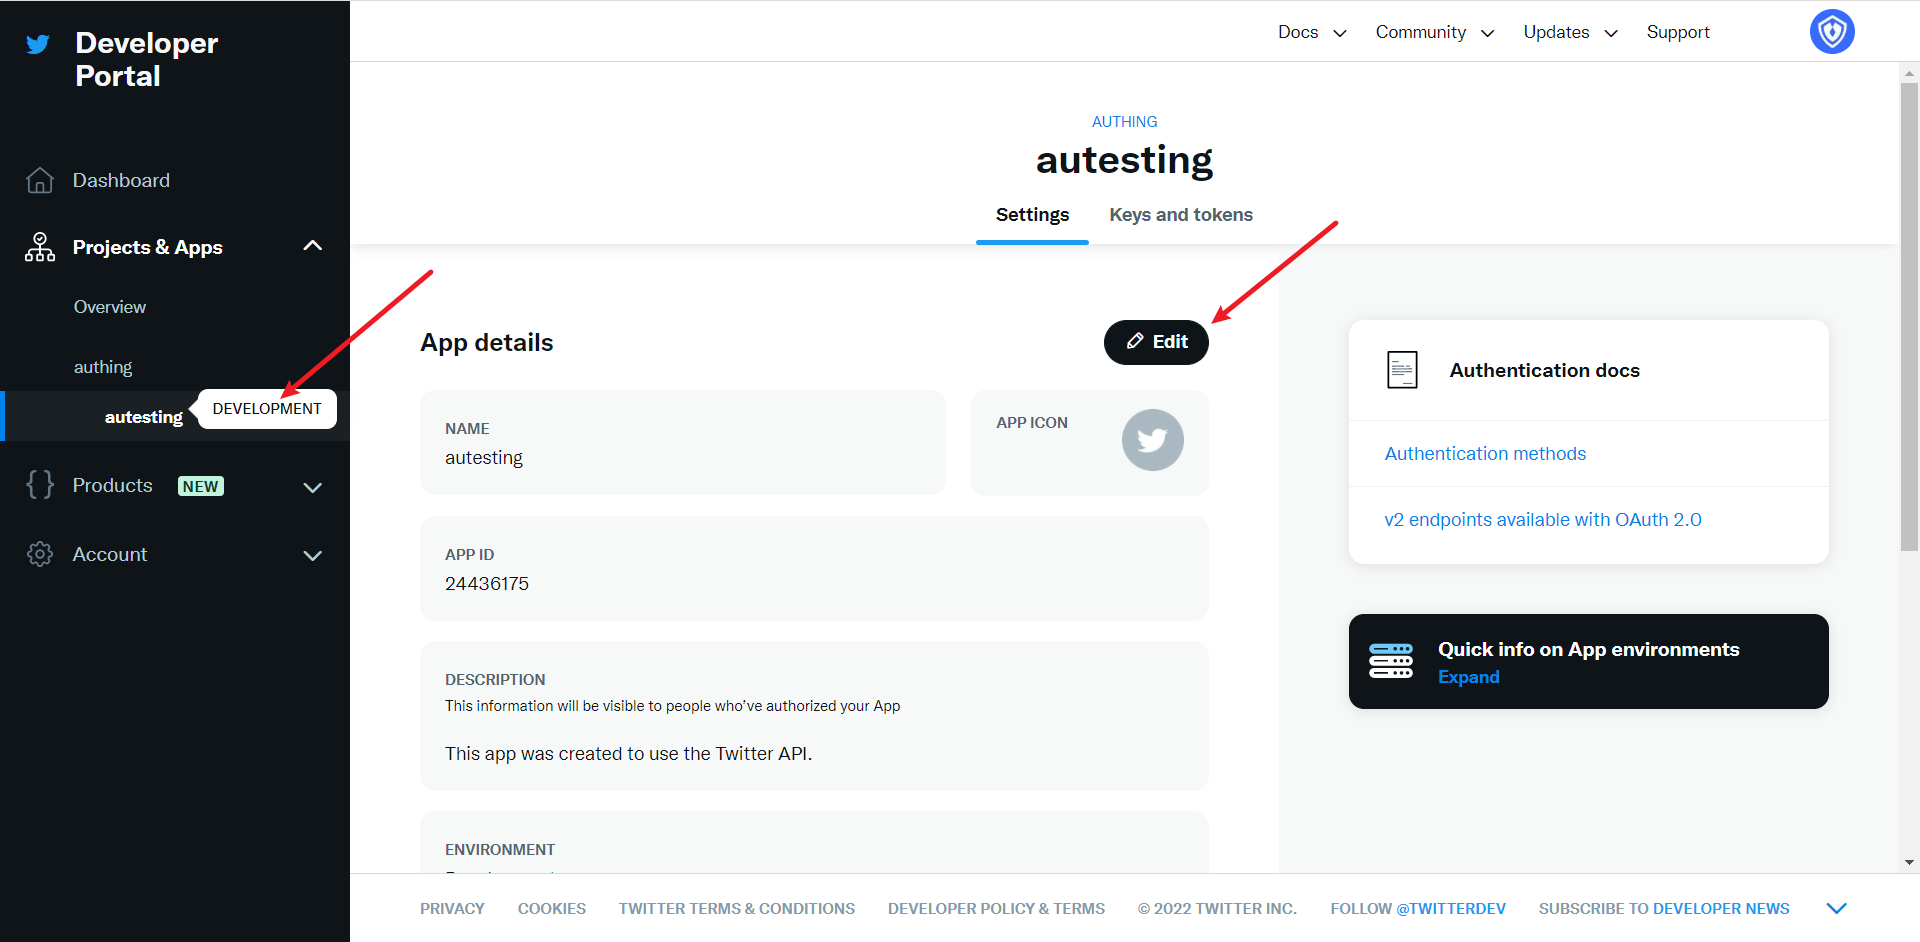
Step 3: Development access
Recommended development access method: SDK
Advantages and disadvantages: Simple operation and maintenance, which is handled by GenAuth. Each user pool has an independent secondary domain name; if you need to embed it in your application, you need to log in using the pop-up mode, that is: after clicking the login button, a window will pop up with the login page hosted by GenAuth, or redirect the browser to the login page hosted by GenAuth.
Detailed access method:
3.1 Create an application in the GenAuth console. For details, see: How to create an application in GenAuth
3.2 On the created Twitter mobile identity source connection details page, open and associate an application created in the GenAuth console
Original image 152 (in section "Step 3: Development access"; Chinese UI)
3.3 Experience Twitter third-party login on the login page (as shown in end user preview image).
Google
Scenario Introduction
- Overview: Google social login allows users to log in to third-party applications or websites securely using Google as the identity source. Configure and enable Google social login in GenAuth to quickly obtain basic open information from Google and help users log in without passwords.
- Application scenario: Web end
- End user preview image:
Original image 153 (in section "Scenario Introduction"; Chinese UI)
Notes
- If you have not opened a Google account, please go to the Google Developer Console to register an email address.
- If you have not opened a GenAuth console account, please go to the GenAuth console to register a developer account.
Step 1: Create an OAuth application in the Google Developer Console
- Open the Google API Console Credentials console.
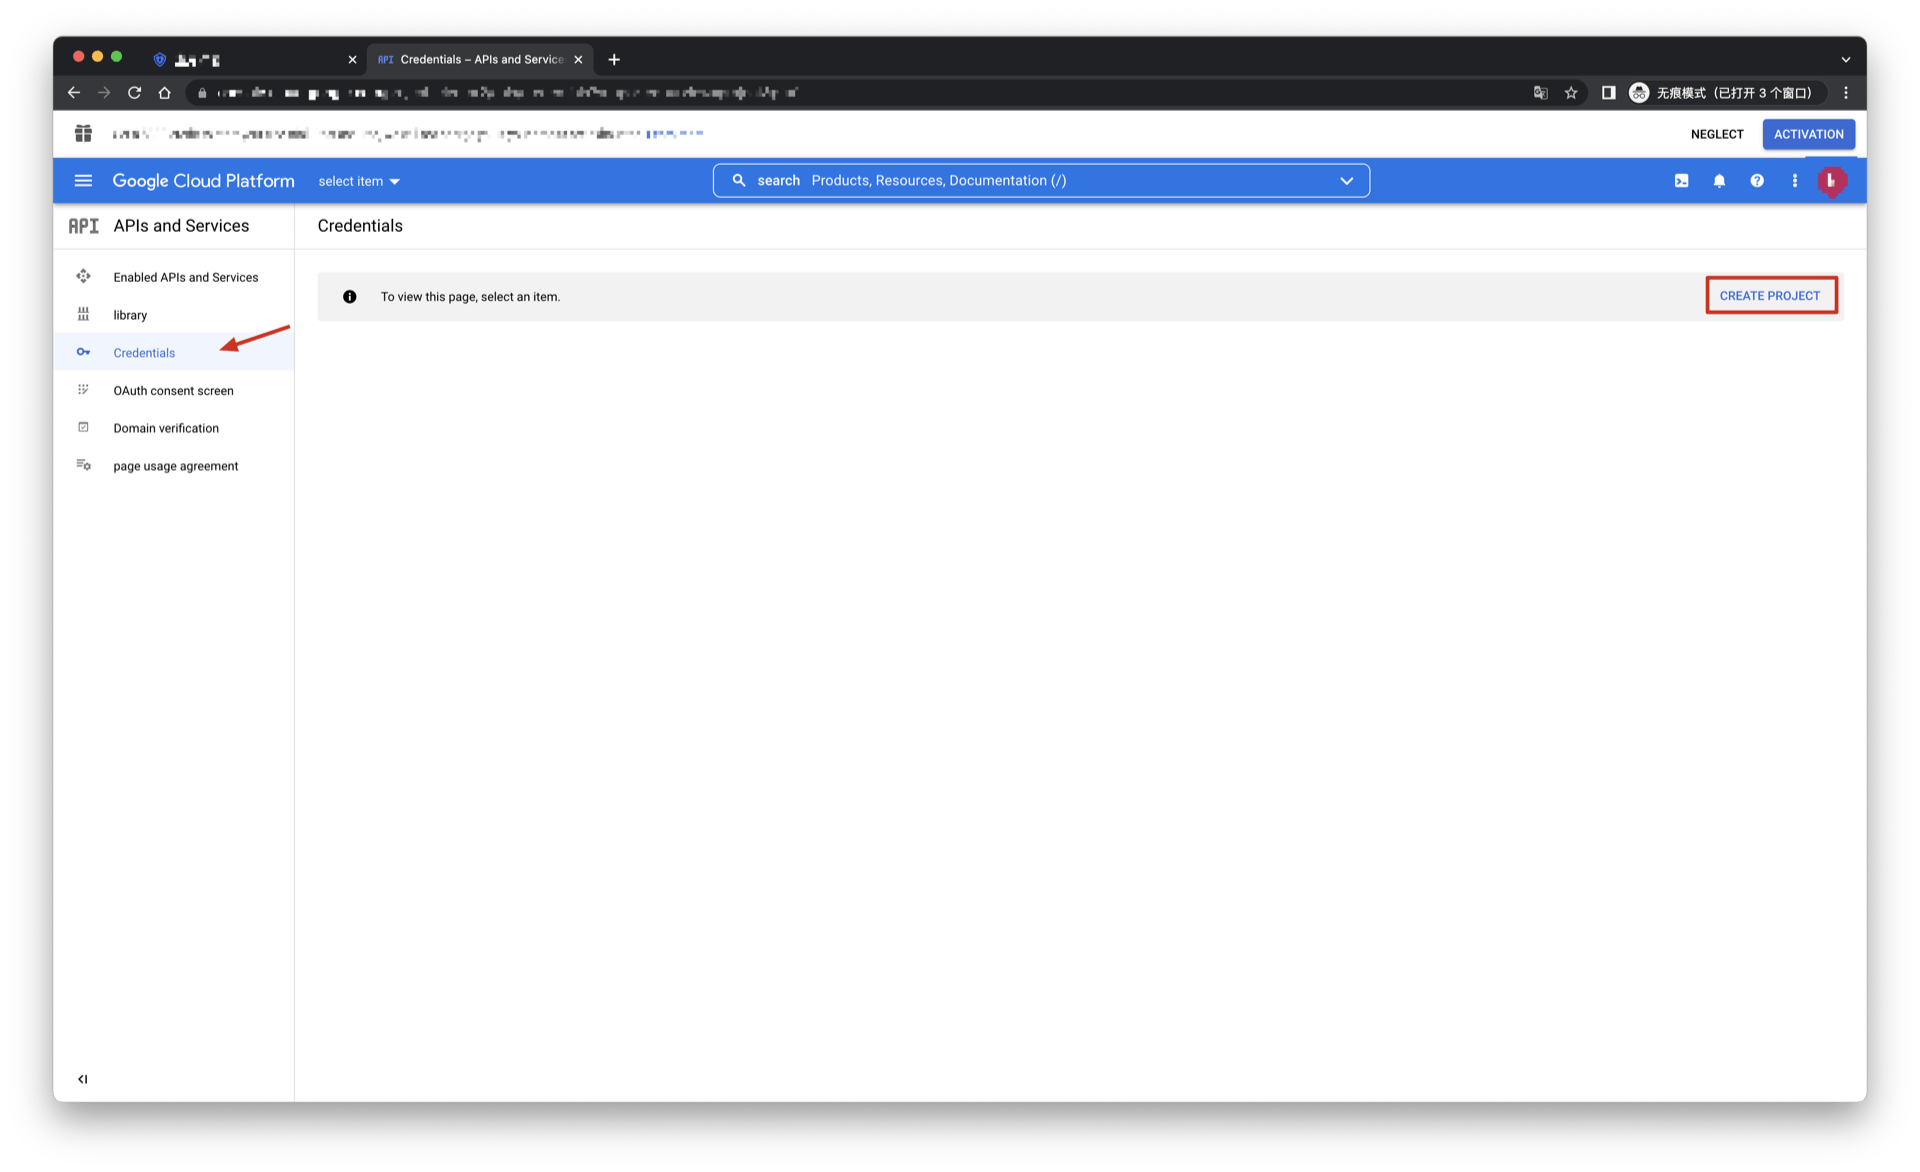
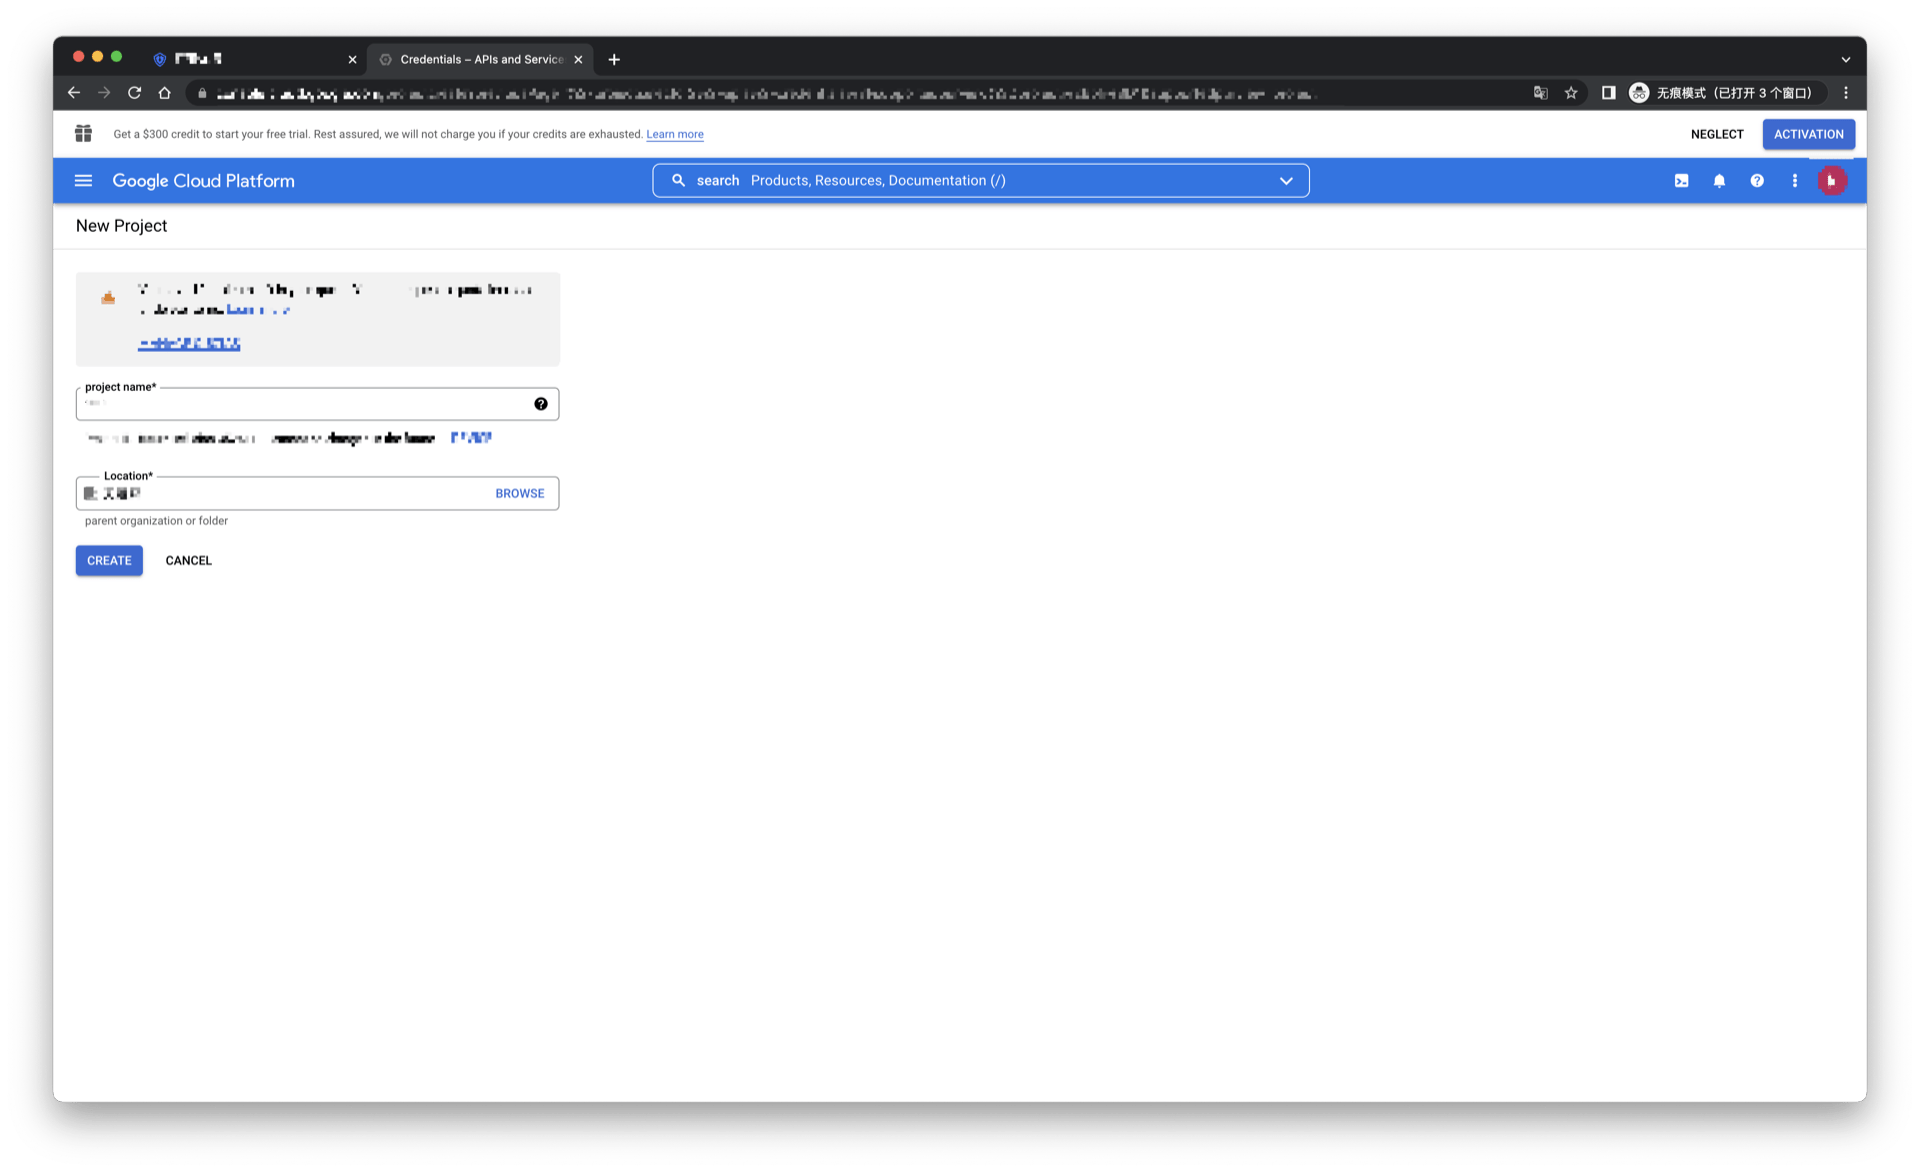
- On the Credentials page, click Create credentials, and then select OAuth client ID.
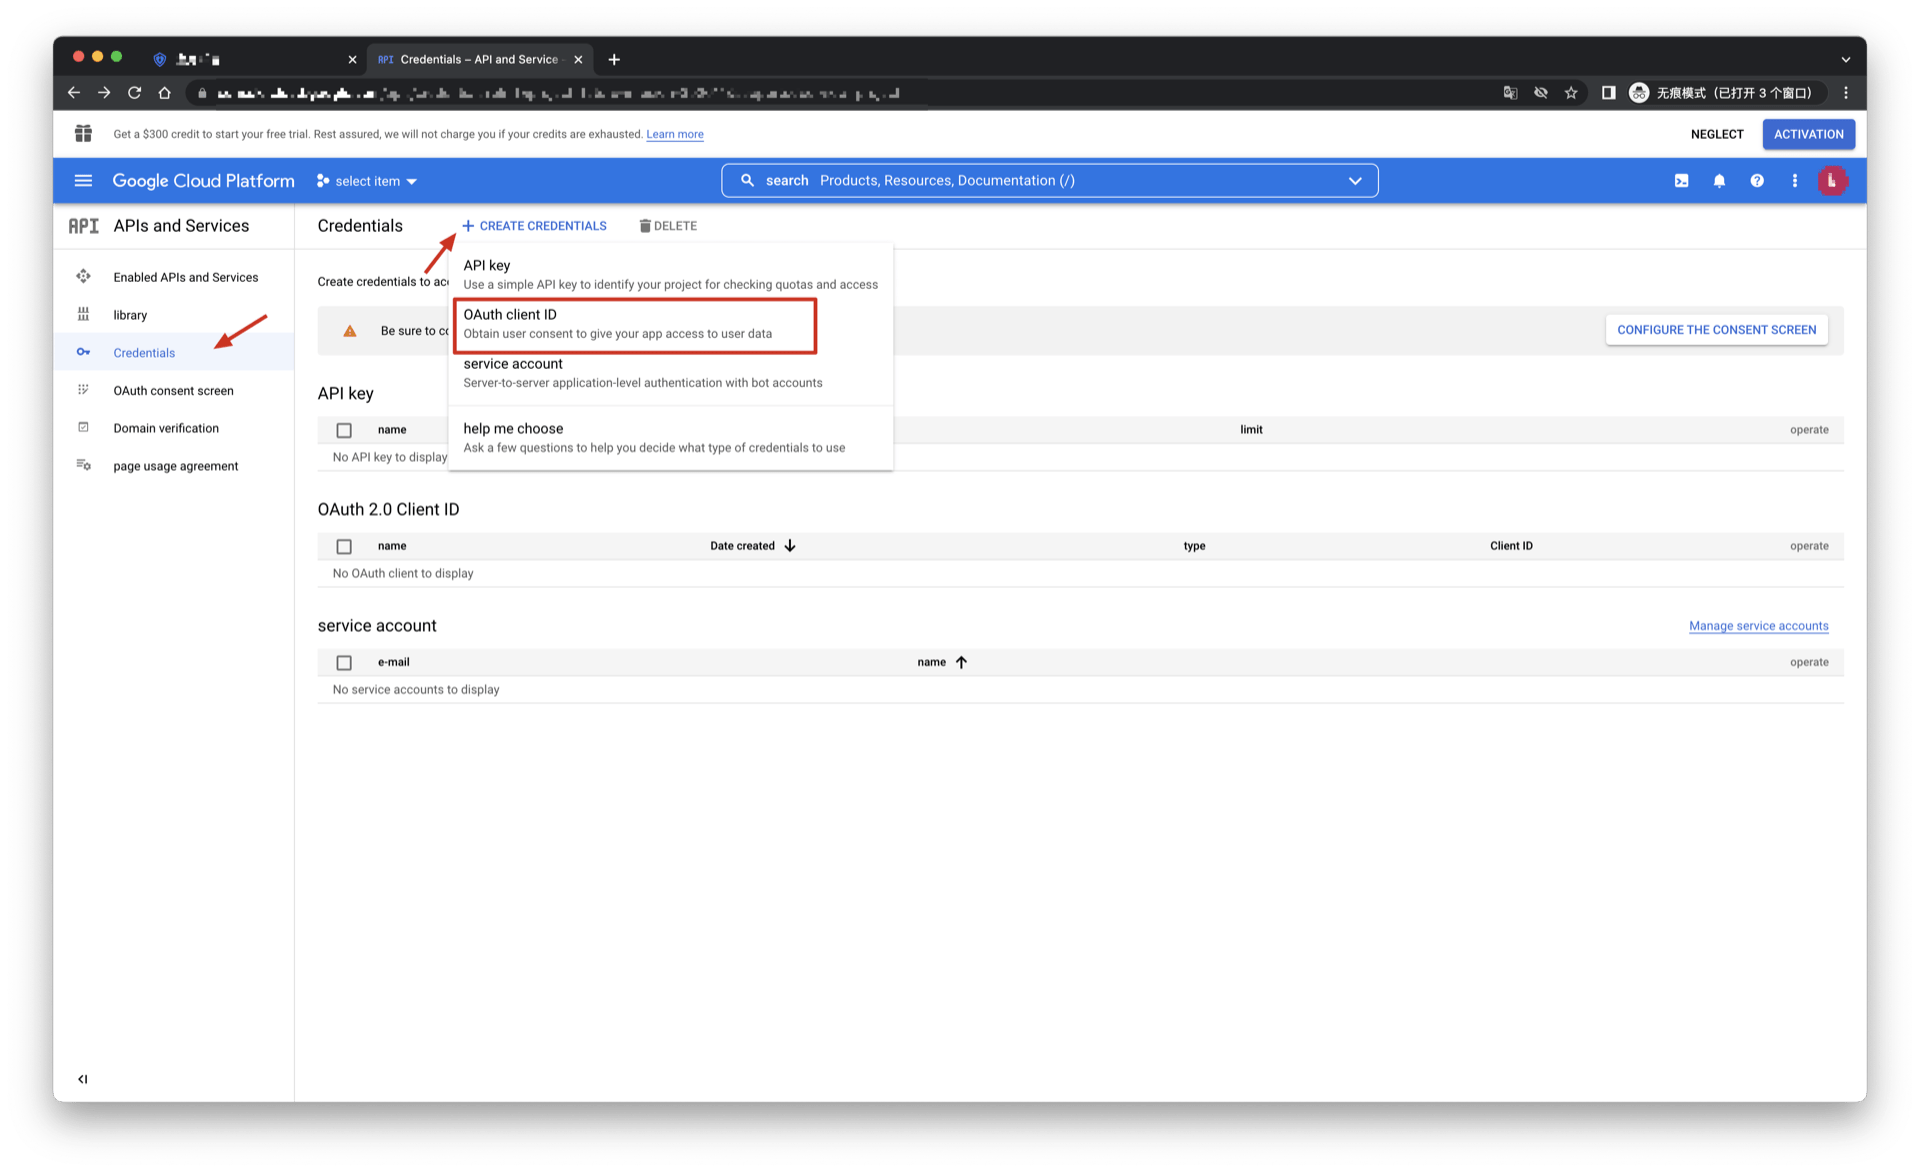
- Select the application type as Web Application, and fill in Authorized redirect URIs.
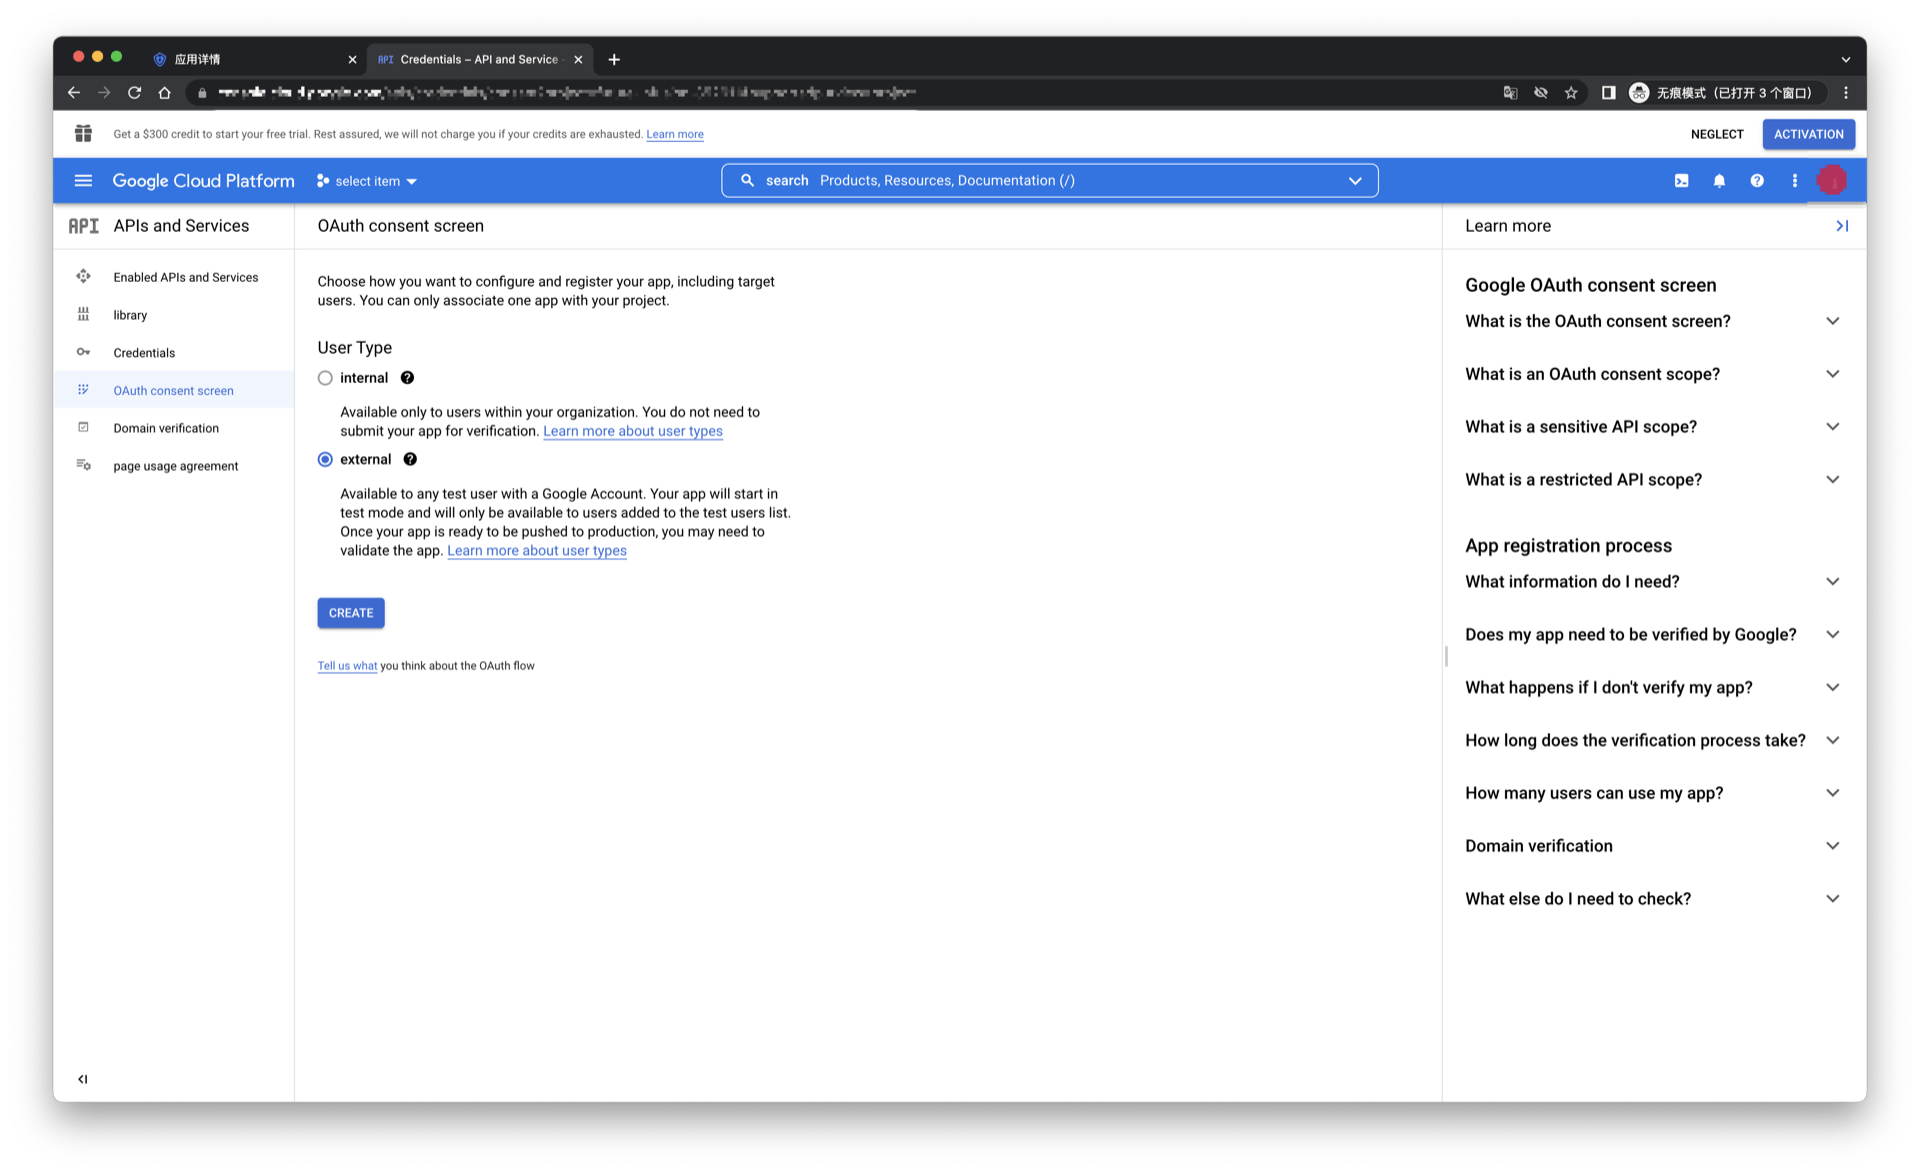
Click the [Create] button;
After the creation is successful, you can get the Client ID and Client Secret of this application on the next page, which you need to record.
Step 2: Configure Google in the GenAuth console
2.1 On the GenAuth console's "Social Identity Source" page, click the "Create Social Identity Source" button to go to the "Select Social Identity Source" page.
Original image 155 (in section "Step 2: Configure Google in the GenAuth console"; Chinese UI)
2.2 On the GenAuth console's "Social Identity Source" - "Select Social Identity Source" page, click the "Google" identity source button to go to the "Google Sign-in Mode" page.
Original image 156 (in section "Step 2: Configure Google in the GenAuth console"; Chinese UI)
2.3 On the GenAuth console's "Social Identity Source" - "Google" page, configure the relevant field information.
Original image 157 (in section "Step 2: Configure Google in the GenAuth console"; Chinese UI)
| Field/Function | Description |
|---|---|
| Unique ID | a. The unique ID consists of lowercase letters, numbers, and -, and is less than 32 bits long. b. This is the unique ID of this connection and cannot be modified after setting. |
| Display Name | This name will be displayed on the button of the end user's login interface. |
| Client ID | Google ID, which needs to be obtained on the Google Open Platform. |
| Client secrets | Google key, which needs to be obtained on the Google Open Platform. |
| Domain Verification File Name | Google domain verification HTML file name, such as xxxx.html |
| Domain Verification File Content | Google domain verification HTML file content |
| Callback URL | You can fill in your business callback address. After the user completes the login, the browser will jump to this address. |
| Scopes | By default, GenAuth will only request authorization for basic user information (such as avatar, nickname, etc.) from users. If you need more advanced permissions, you can check the corresponding options. |
| Callback address | Google valid redirect URI. This URL needs to be configured on the Google Open Platform. |
| Login mode | After turning on "Login-only mode", you can only log in to existing accounts, and cannot create new accounts. Please choose carefully. |
| Account identity association | When "Account identity association" is not turned on, a new user is created by default when a user logs in through an identity source. After turning on "Account identity association", users can be allowed to log in directly to an existing account through "Field matching" or "Ask Binding". |
After the configuration is completed, click the "Create" or "Save" button to complete the creation.
After creating the Google identity source on the GenAuth console, you need to configure the callback address to the Authorized redirect URI on the Google Open Platform.
Original image 158 (in section "Step 2: Configure Google in the GenAuth console"; Chinese UI)
Step 3: Development access
Recommended development access method: Use a hosted login page
Pros and cons description: Simple operation and maintenance, GenAuth is responsible for operation and maintenance. Each user pool has an independent secondary domain name; if you need to embed it in your application, you need to log in using the pop-up mode, that is: after clicking the login button, a window will pop up with the content of the GenAuth hosted login page, or redirect the browser to the GenAuth hosted login page.
Detailed access method:
3.1 Create an application in the GenAuth console. For details, see: How to create an application in GenAuth
3.2 On the created Google identity source connection details page, open and associate an application created in the GenAuth console
Original image 159 (in section "Step 3: Development access"; Chinese UI)
3.3 Experience Google third-party login on the login page
Original image 160 (in section "Step 3: Development access"; Chinese UI)
Google Mobile
Scenario Introduction
Overview
GenAuth provides developers with a way to quickly jump to Google login to obtain user information in mobile (iOS or Android) applications. Google account access can be completed by simply calling the GenAuth mobile SDK.
Application Scenario
Mobile APP
End User Preview
Pull up the Google page in the mobile application to log in.
Original image 161 (in section "End User Preview"; Chinese UI)
Preparation
If you don't have a Google account, please go to Google to register.
If you don't have a GenAuth console account, please go to GenAuth Console to register a developer account.
Configuration steps
Step 1: Create three OAuth client IDs in Google Open Platform
Web application
Open the Google API Console Credentials console.
On the Credentials page, select CREATE CREDENTIALS->OAuth client ID at the top.
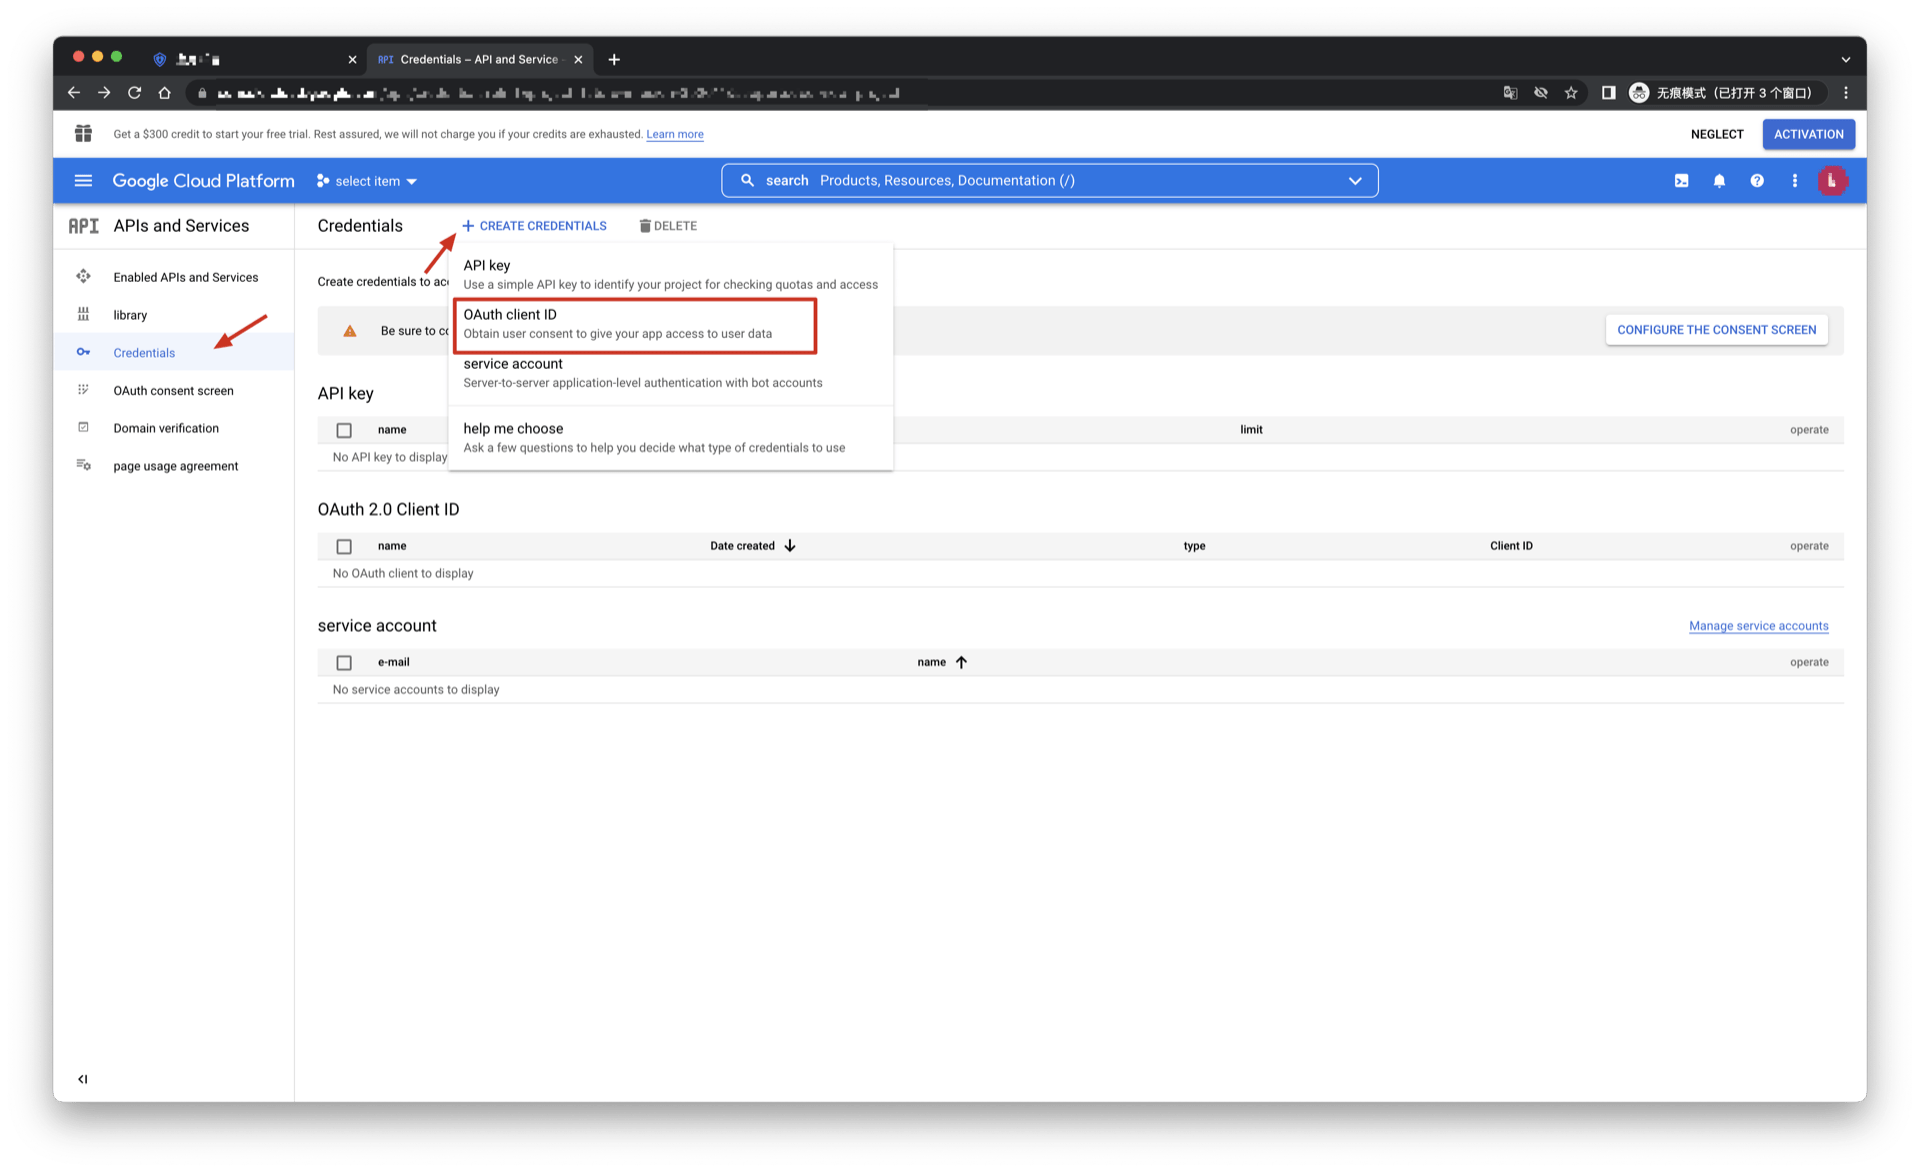
- Select Application type as Web application, fill in Name and Authorized redirect URIs (temporarily write a valid address), and click the CREATE button.
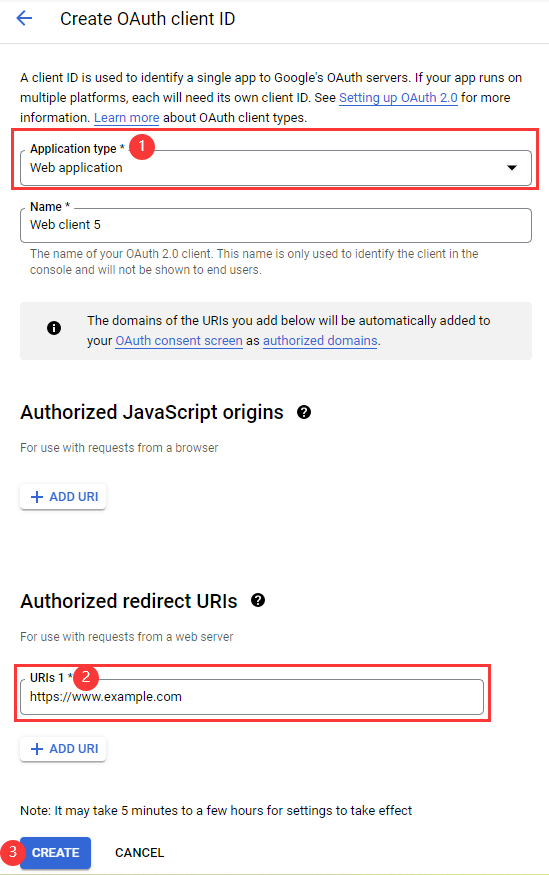
- After the creation is successful, you can get Your Client ID and Your Client Secret of this application on the next page, record them.
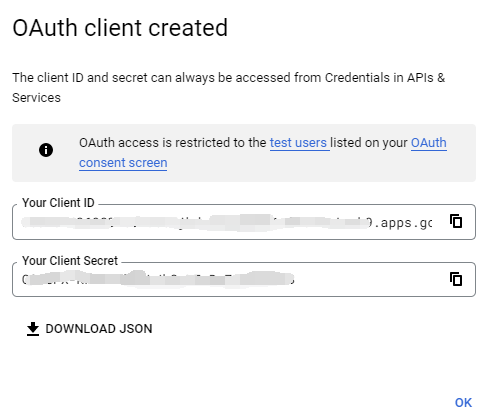
Android
Open the Google API Console Credentials console.
On the Credentials page, select CREATE CREDENTIALS->OAuth client ID at the top.
Select Application type as Android, fill in Name, Package name and SHA-1 certificate fingerprint, and click the CREATE button.
INFO
- You need to log in to your mobile app backend to obtain Package name (Android app package name) and SHA-1 certificate fingerprint (Android app's SHA-1).
- It takes some time for the settings to take effect after being saved, please wait patiently.
- Download and save the JSON file on the viewing page and hand it over to the Android development engineer (for subsequent detailed operations, please refer to Google Mobile Developer Documentation - Android).
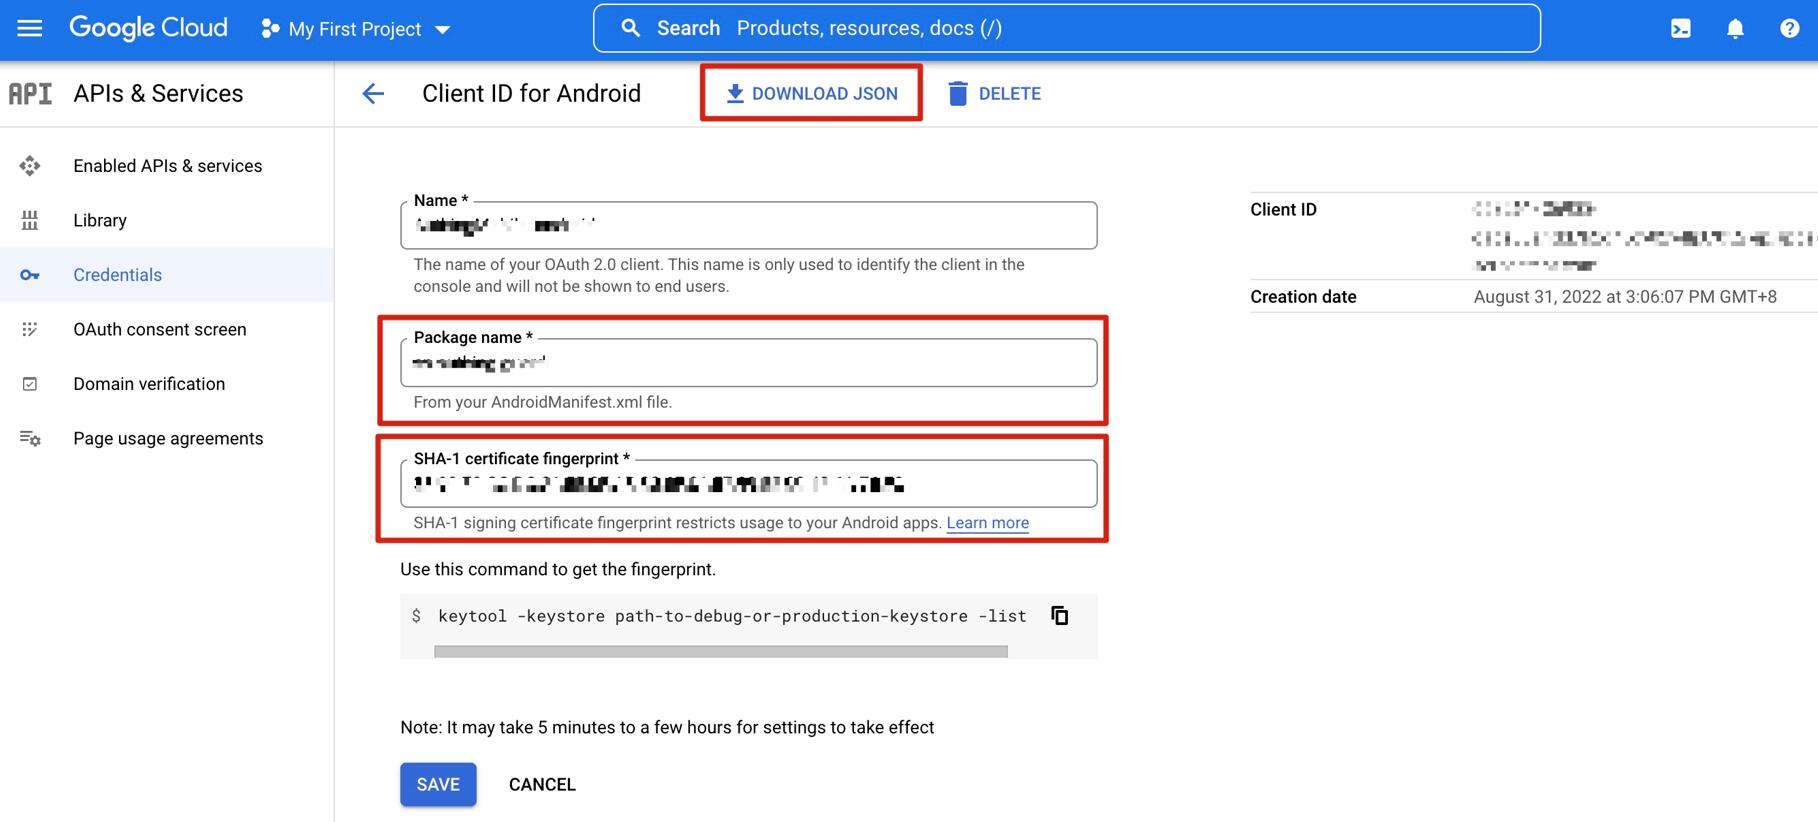
iOS
Open the Google API Console Credentials console.
On the Credentials page, select CREATE CREDENTIALS->OAuth client ID at the top.
Select Application type as iOS, fill in Bundle ID, App Store ID and Team ID, and click CREATE button.
Original image 162 (in section "iOS"; Chinese UI)
INFO
Bundle ID and App Store ID
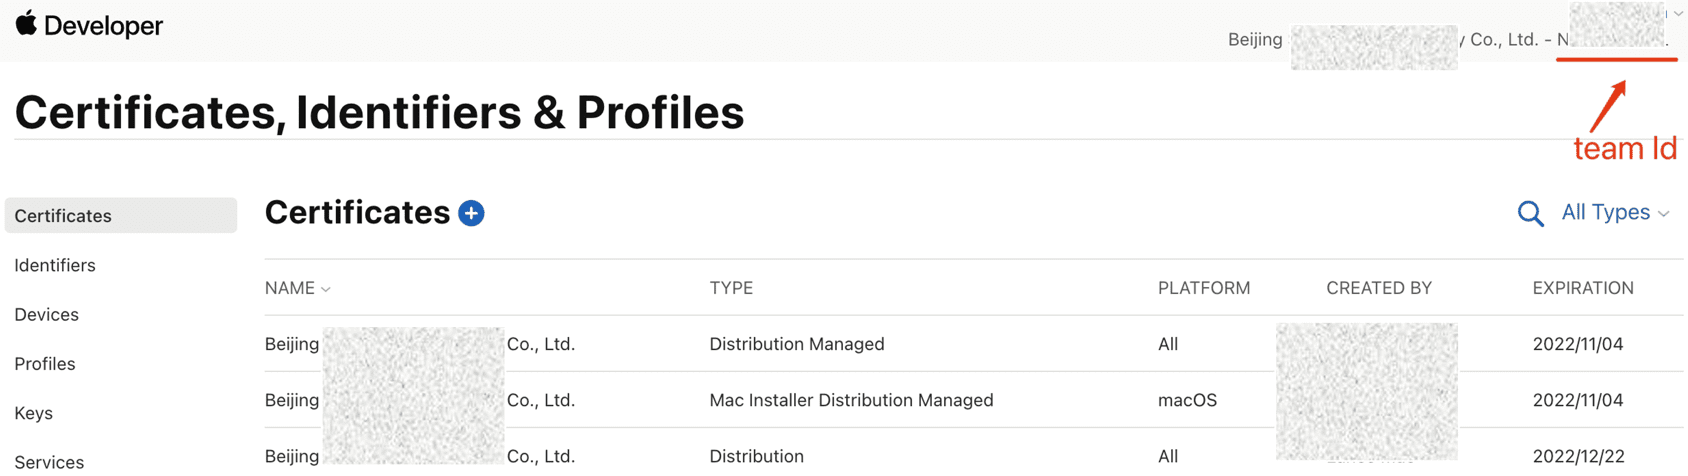
INFO
Team ID
INFO
- You can get Bundle ID and App Store ID at Apple Store Connect.
- You can get the Team ID in the Apple Developer Backend.
- It will take some time for the settings to take effect after being saved, please wait patiently.
- Download and save the corresponding PLIST file and hand it over to the iOS development engineer (for subsequent detailed operations, please refer to the Google Mobile Developer Documentation - iOS).
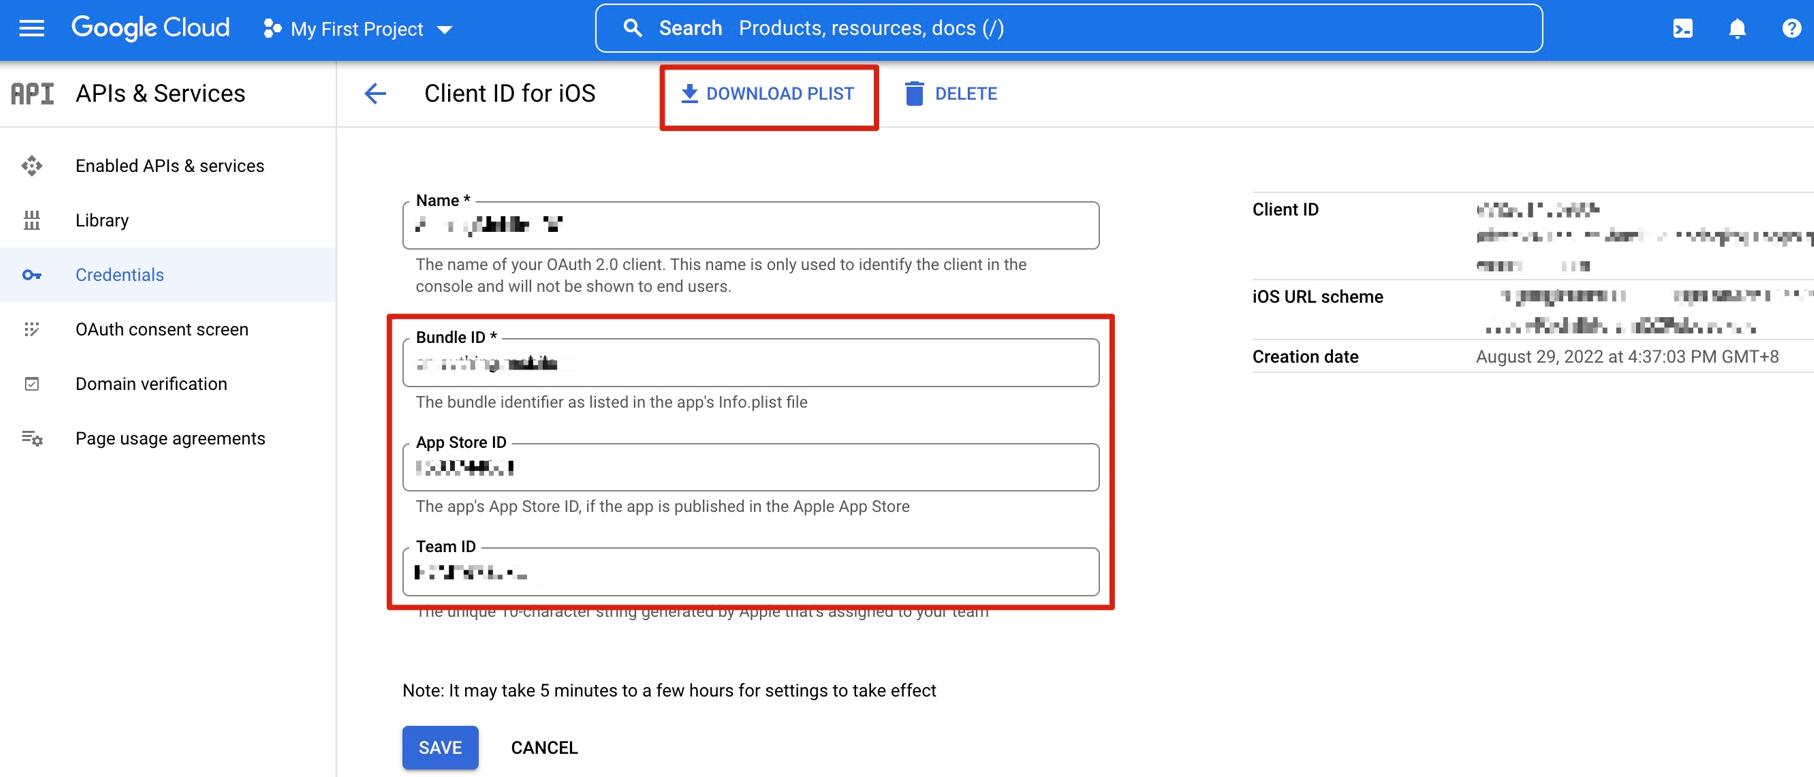
Step 2: Configure Google Mobile Login in the GenAuth Console
- On the Social Identity Source page of the Atuhing console, click the Create Social Identity Source button to enter the Select Social Identity Source page.
- On the Identity Source Management->Social Identity Source->Select Social Identity page of the GenAuth console, click the "Google" identity source card to enter the Google login mode selection page.
- Select Google Mobile to enter.
- On the Google Mobile page of the GenAuth console, configure the relevant field information.
Field Description Unique ID
- The unique ID consists of lowercase letters, numbers, and -, and is less than 32 bits long.
- This is the unique ID of this connection and cannot be modified after setting. Display Name This name will be displayed on the button of the terminal user's login interface. Client ID Fill in Your Client ID obtained when Application type is Web application on the Google Open Platform. Client Secret Fill in the Client Secret obtained when Application type is Web application on the Google Open Platform. Callback URL You can fill in your business callback address. After the user completes the login, the browser will jump to this address. Callback address Google valid jump URI. This URL needs to be configured on the Google Open Platform. Login mode After turning on Login only mode, you can only log in to existing accounts, and cannot create new accounts. Please choose carefully. Account Identity Association When Account Identity Association is not enabled, a new user is created by default when a user logs in through an identity source; when Account Identity Association is enabled, users can be allowed to log in directly to an existing account through Field Matching or Query Binding.
- After the configuration is complete, click the Create or Save button to complete the creation.
INFO
After creating the Google identity source on the GenAuth console, you need to configure the callback address to the Authorized redirect URI on the Google Open Platform.
Step 3: Development access
Recommended development access method
SDK
Advantages and disadvantages
Simple operation and maintenance, which is handled by GenAuth. Each user pool has an independent secondary domain name; if you need to embed it in your application, you need to log in using the pop-up mode, that is: after clicking the login button, a window will pop up with the login page hosted by GenAuth, or redirect the browser to the login page hosted by GenAuth.
Detailed access method
Create an application in the GenAuth console. For details, see: How to create an application in GenAuth.
On the created Google identity source connection details page, open and associate an application created in the GenAuth console.
Original image 168 (in section "Detailed access method"; Chinese UI)
- Experience Google third-party login on the login page (as shown in the end-user preview image).
Apple Mobile
Scenario Introduction
- Overview: Apple social login allows users to log in to third-party applications or websites securely using Apple as the identity source. Configure and enable Apple's social login in GenAuth to quickly obtain Apple's basic open information and help users log in without passwords through GenAuth.
- Application scenario: iOS mobile
- Terminal user preview image:
Original image 169 (in section "Scenario Introduction"; Chinese UI)
Notes
- Please make sure you have applied for an Apple developer account, otherwise you will not be able to perform the following operations. Apply for personal and company account addresses, Apply for enterprise account addresses;
- If you have not opened a GenAuth console account, please go to the GenAuth console to register a developer account;
Step 1: Configure in the Apple Developer Center
1.1 Get Team ID
Go to the Membership page of the Apple Developer Portal and record the Team ID: 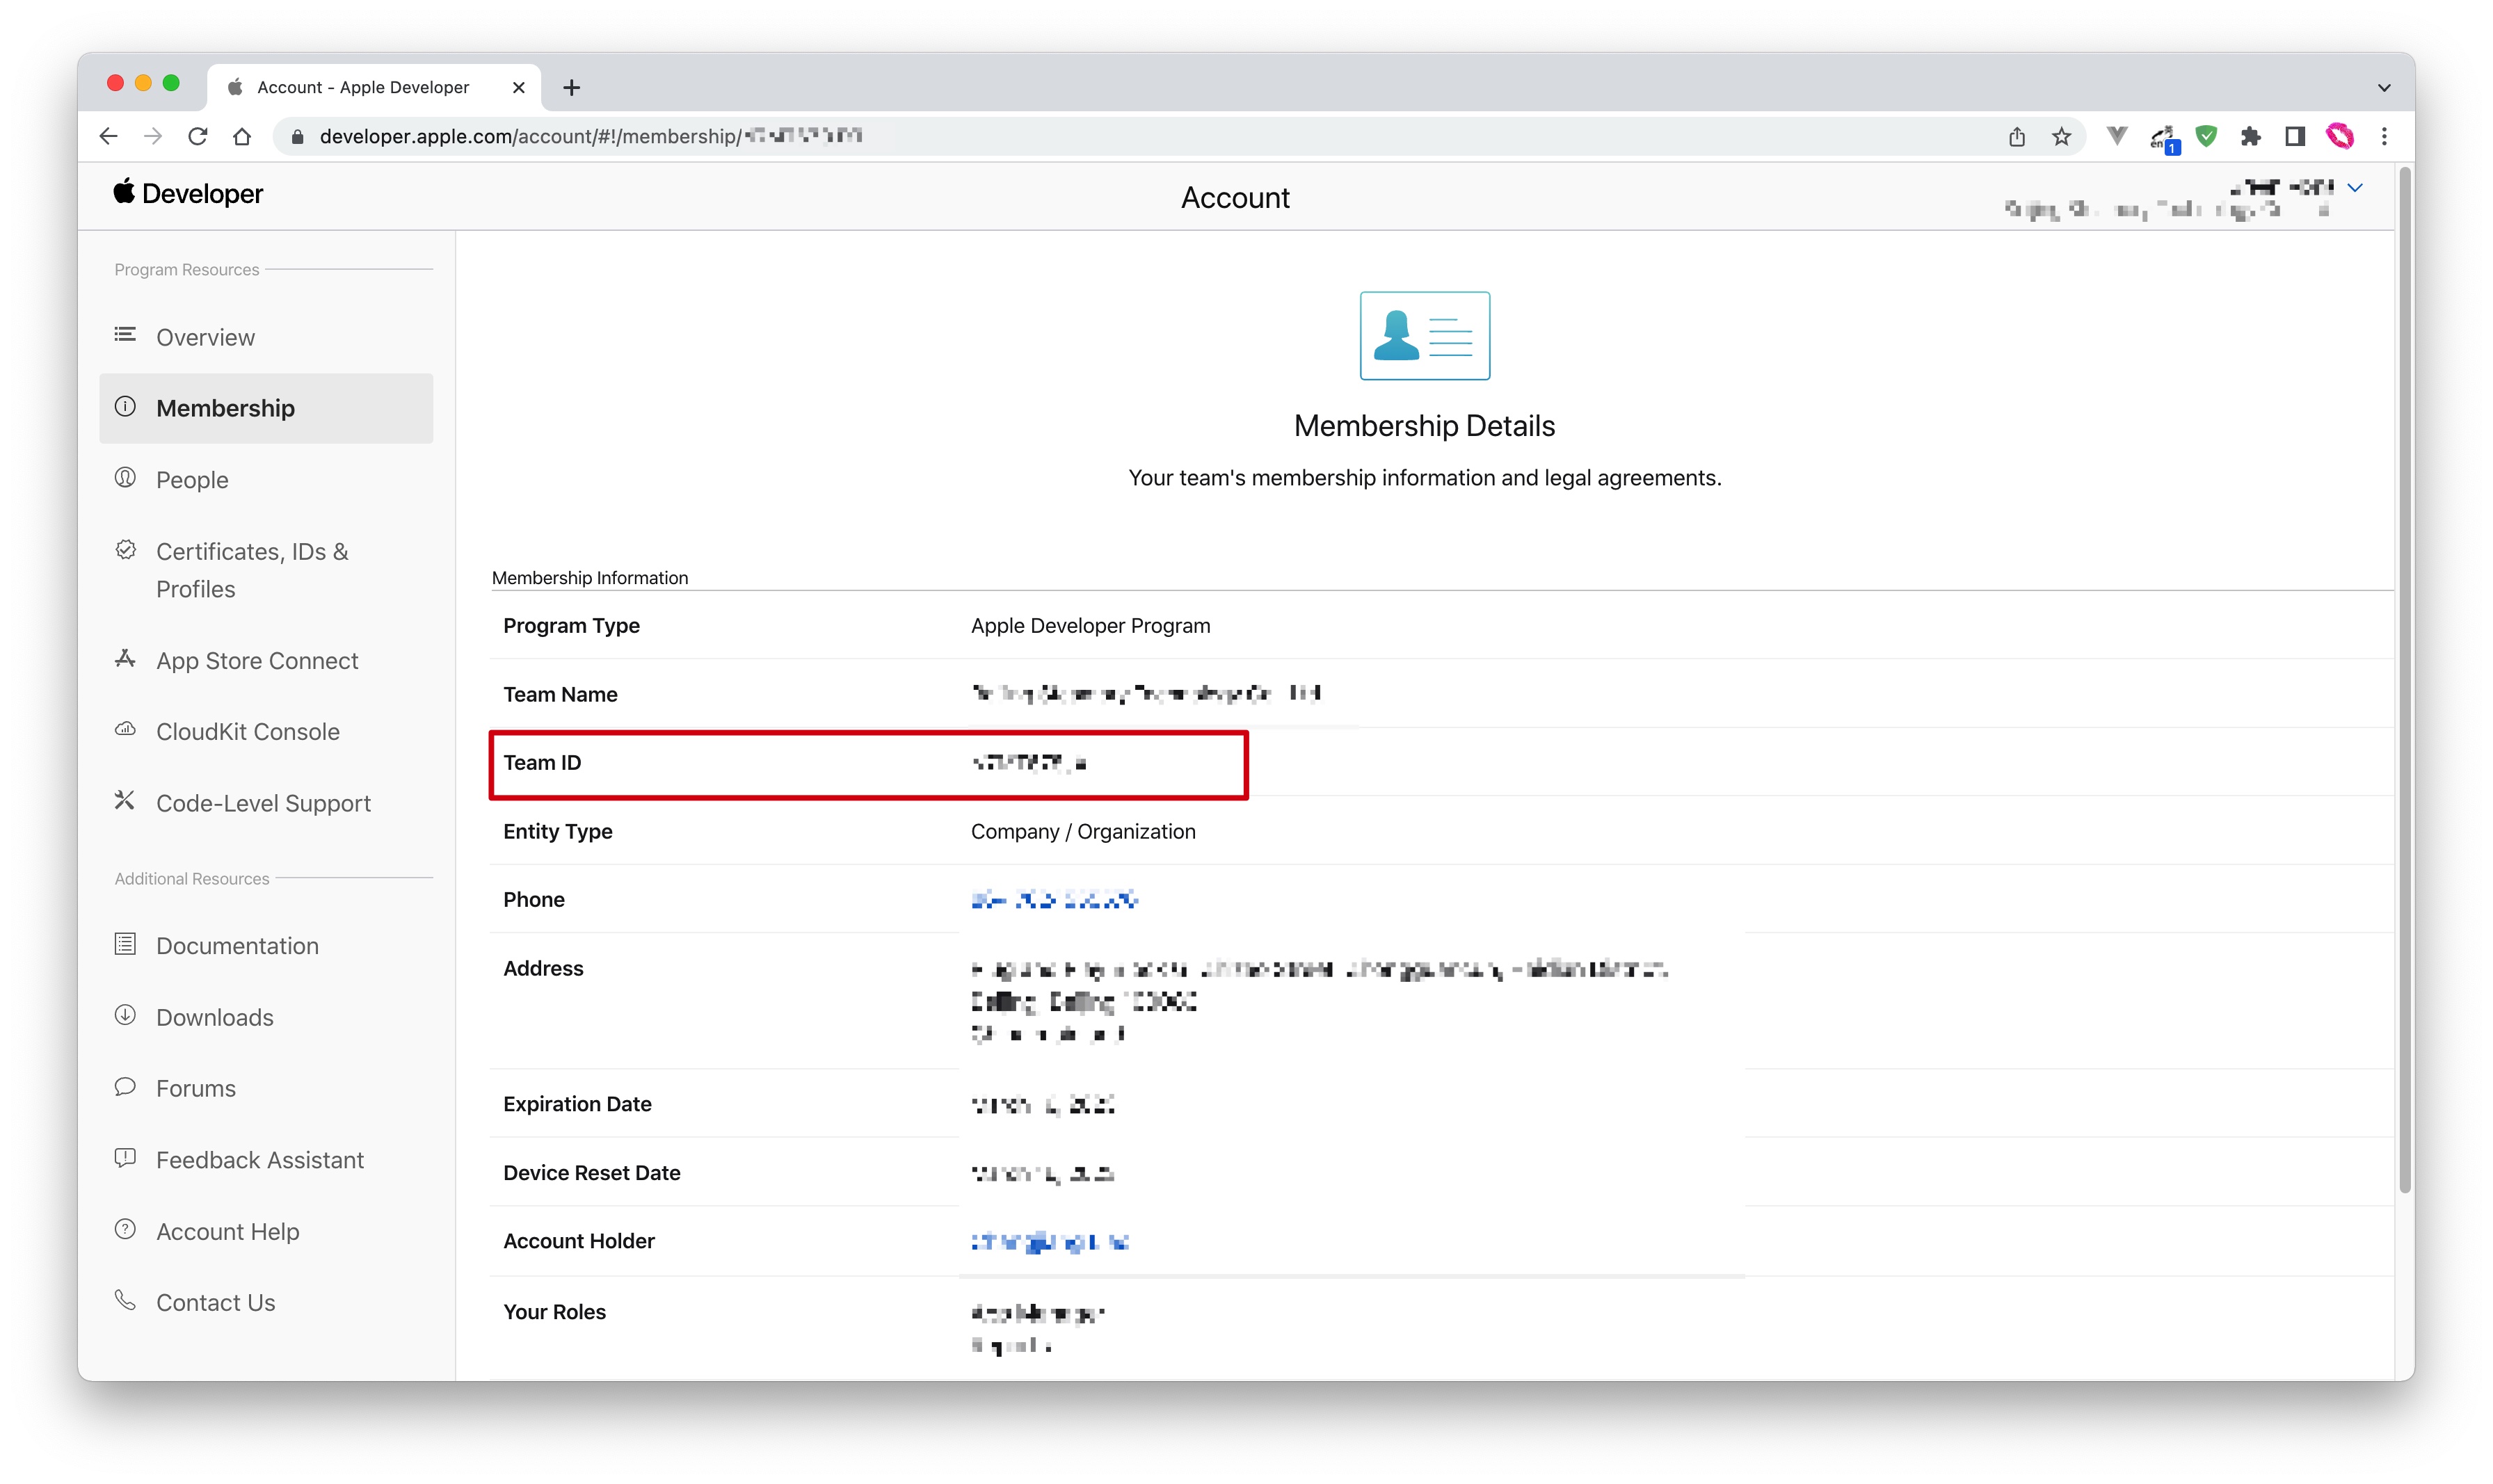
1.2 Create an App ID
- In Apple Developer Portal, Certificates, Identifiers & Profiles > Identifiers page, click the ➕ icon to create an app:
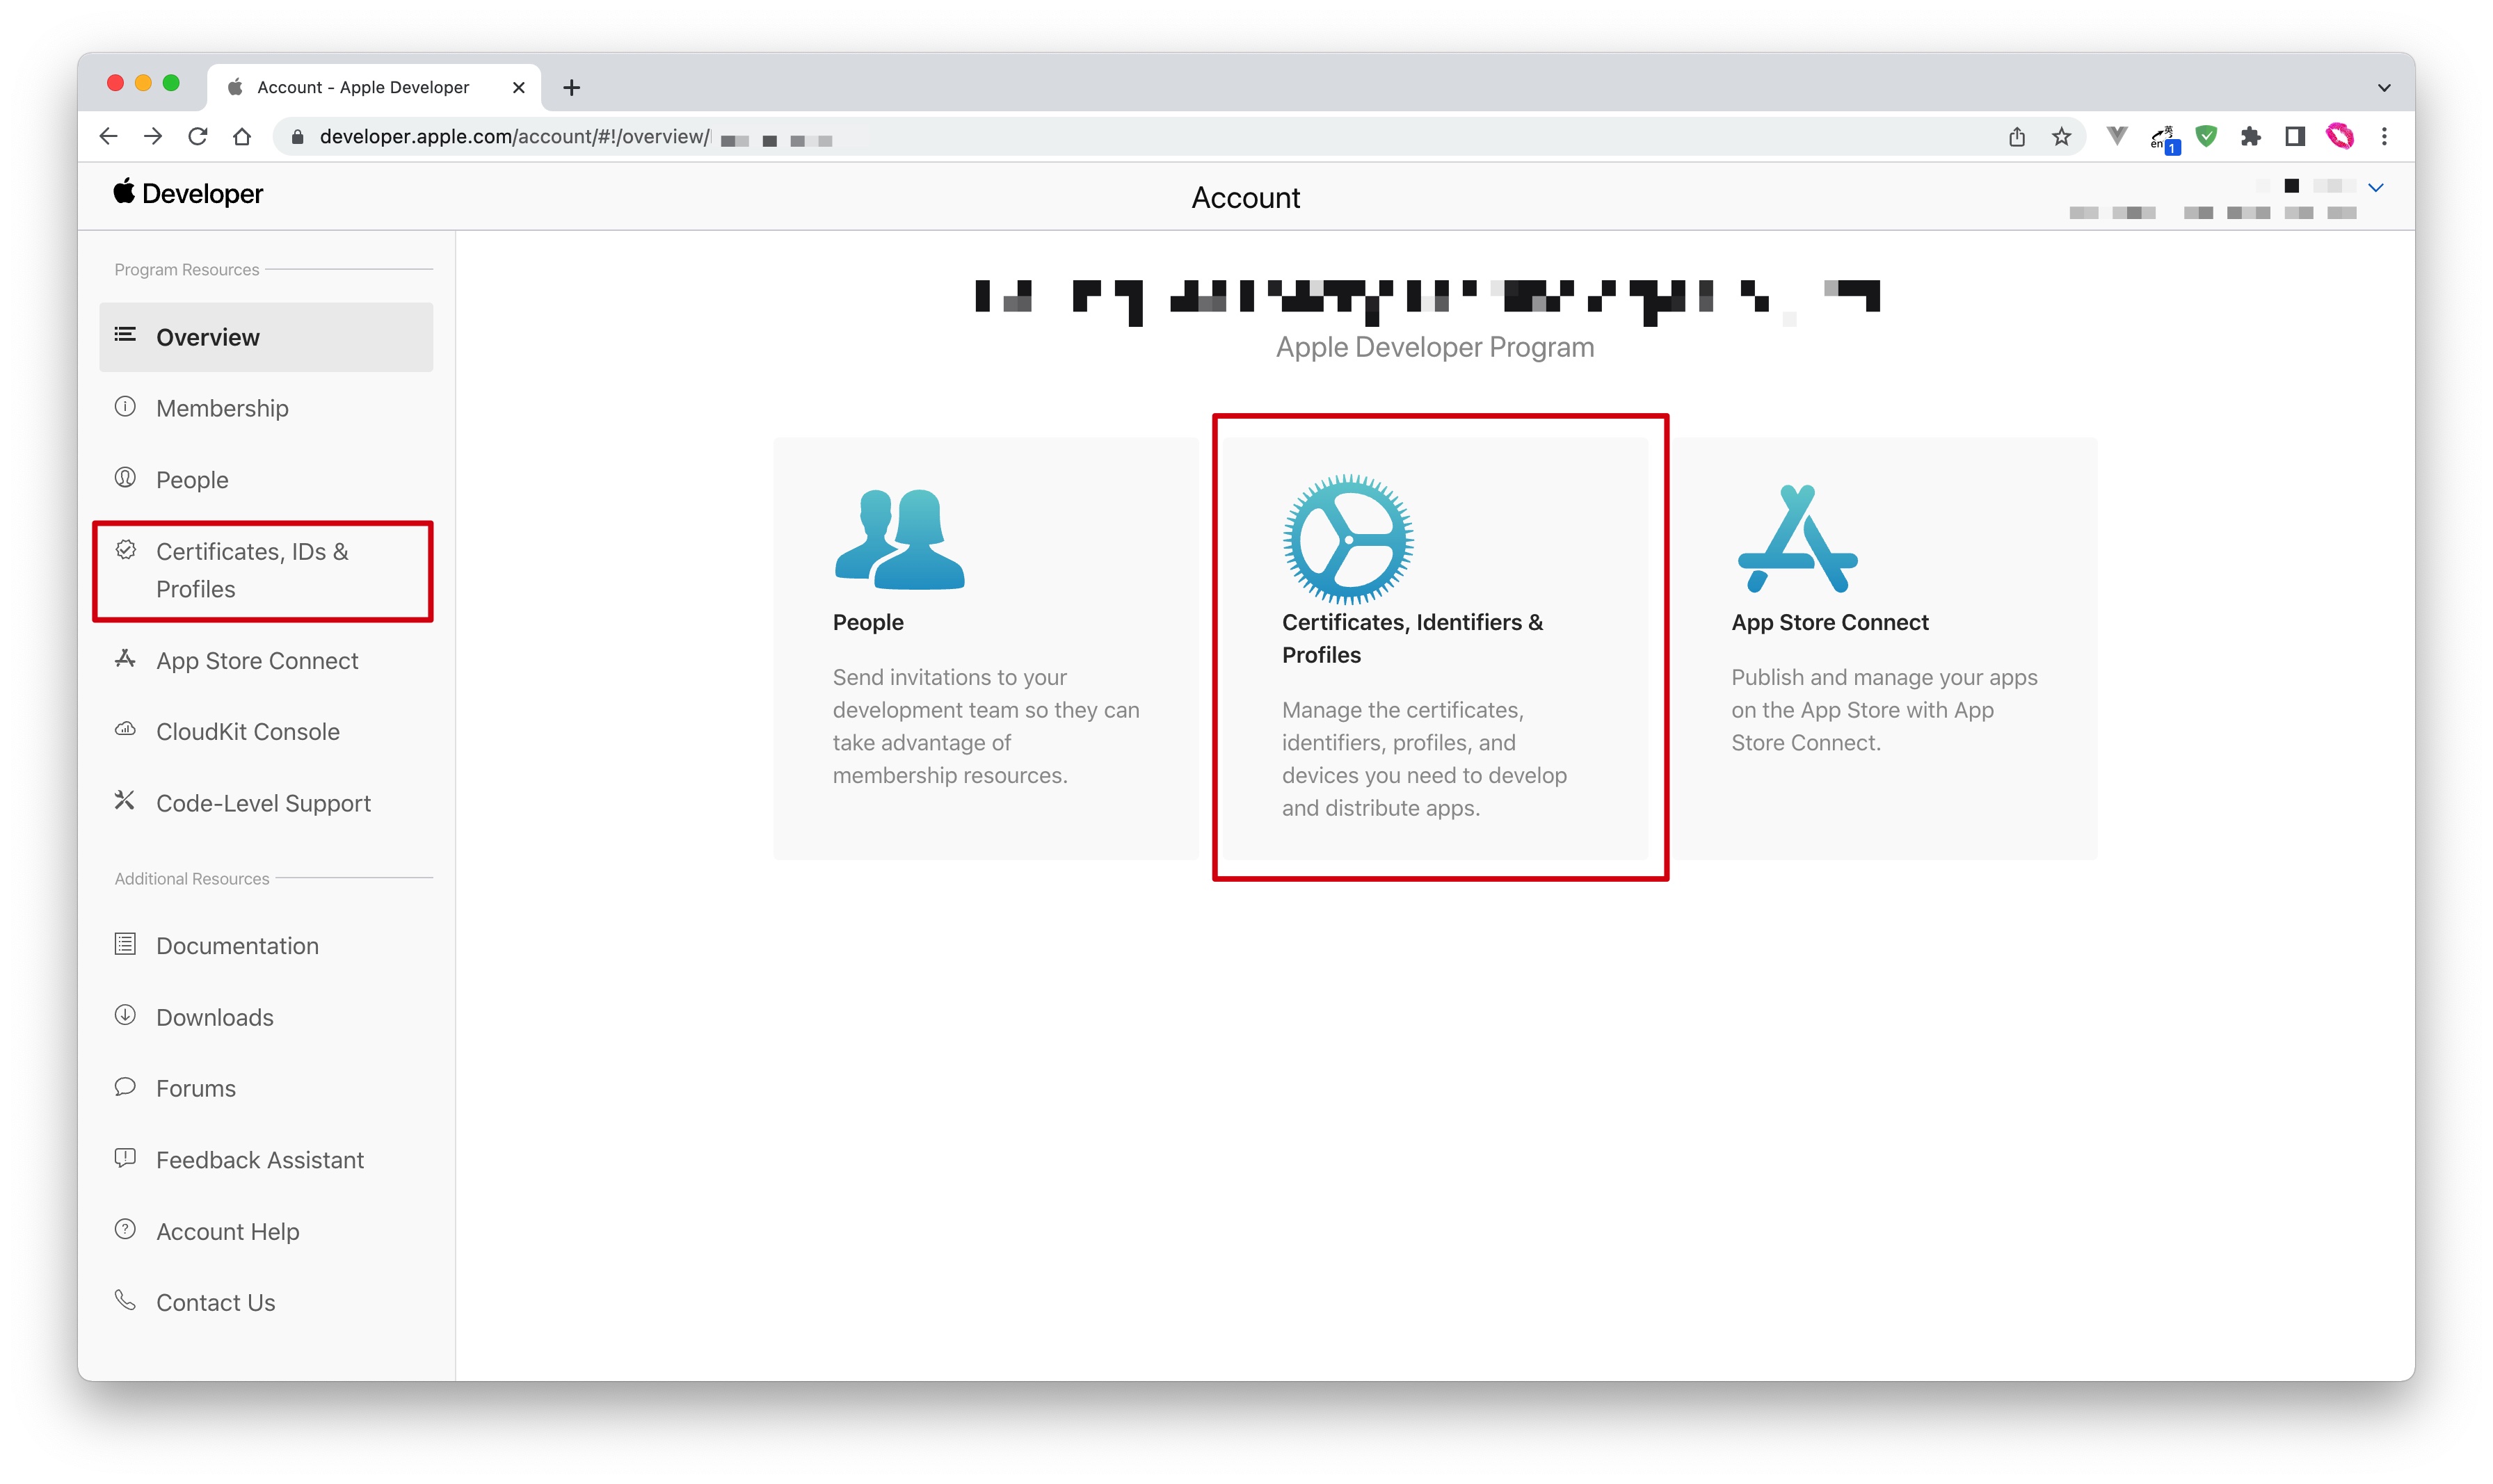
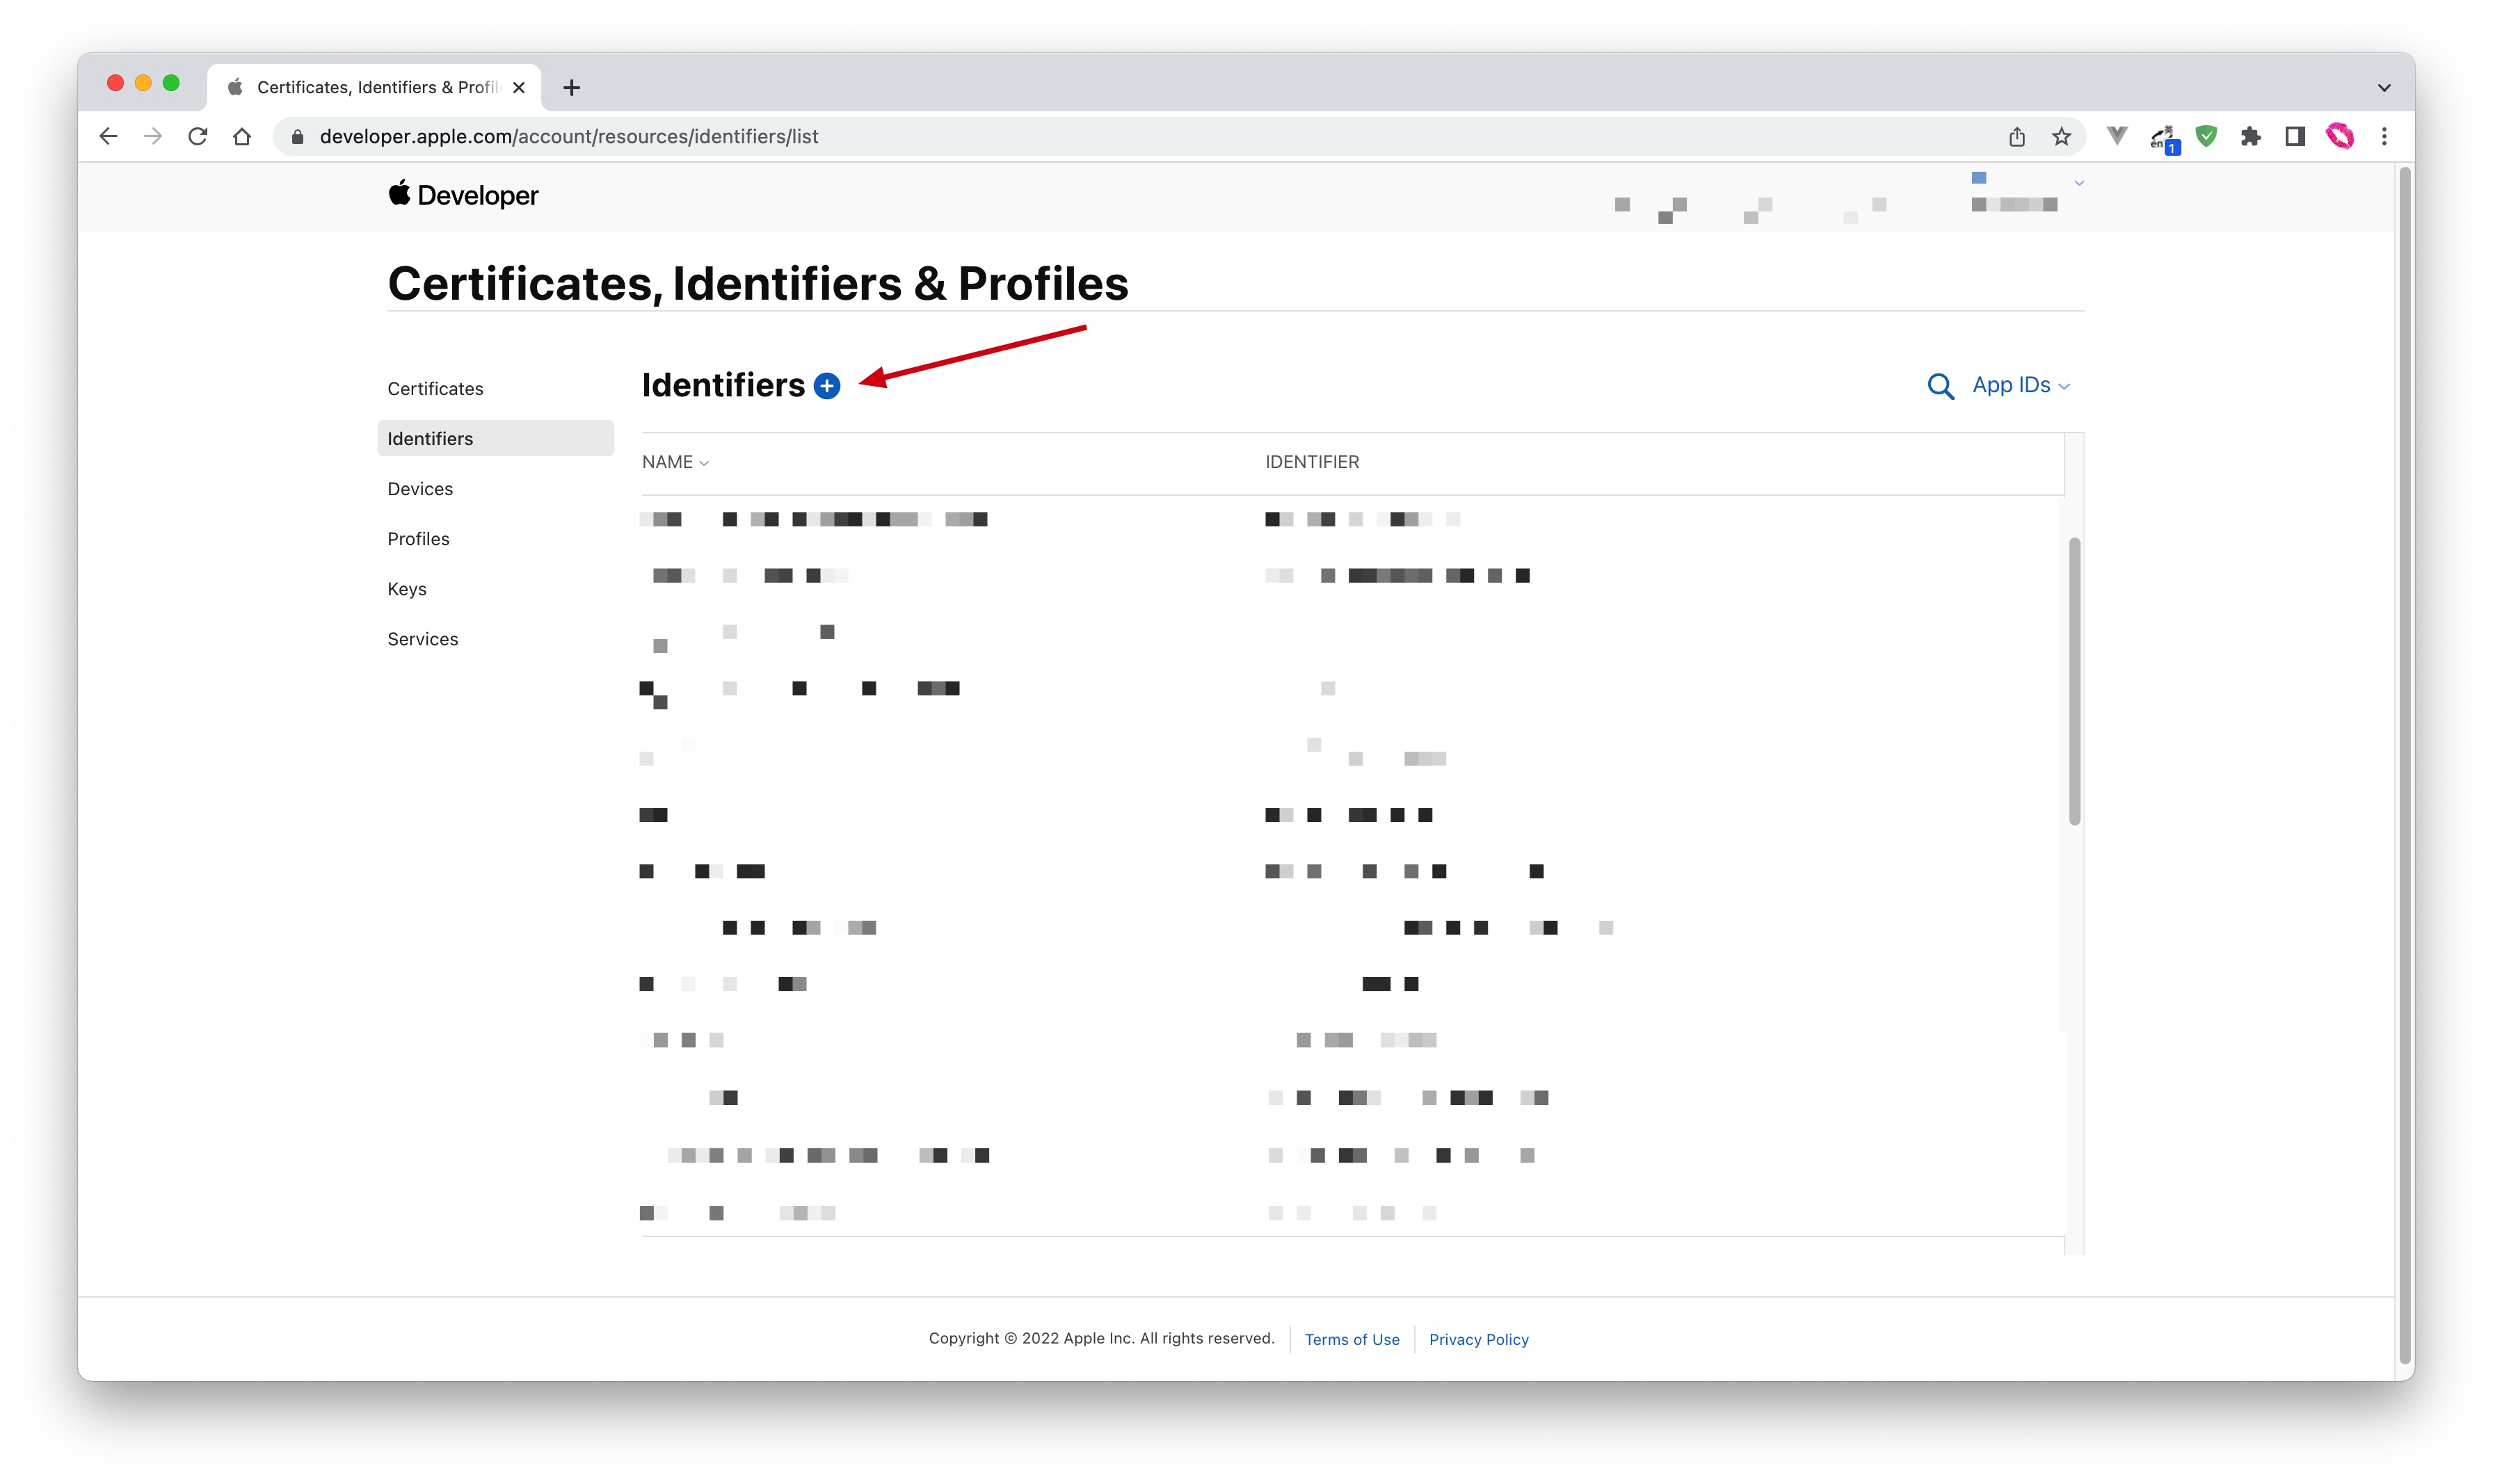
- Select App IDs and click the Continue button to continue:
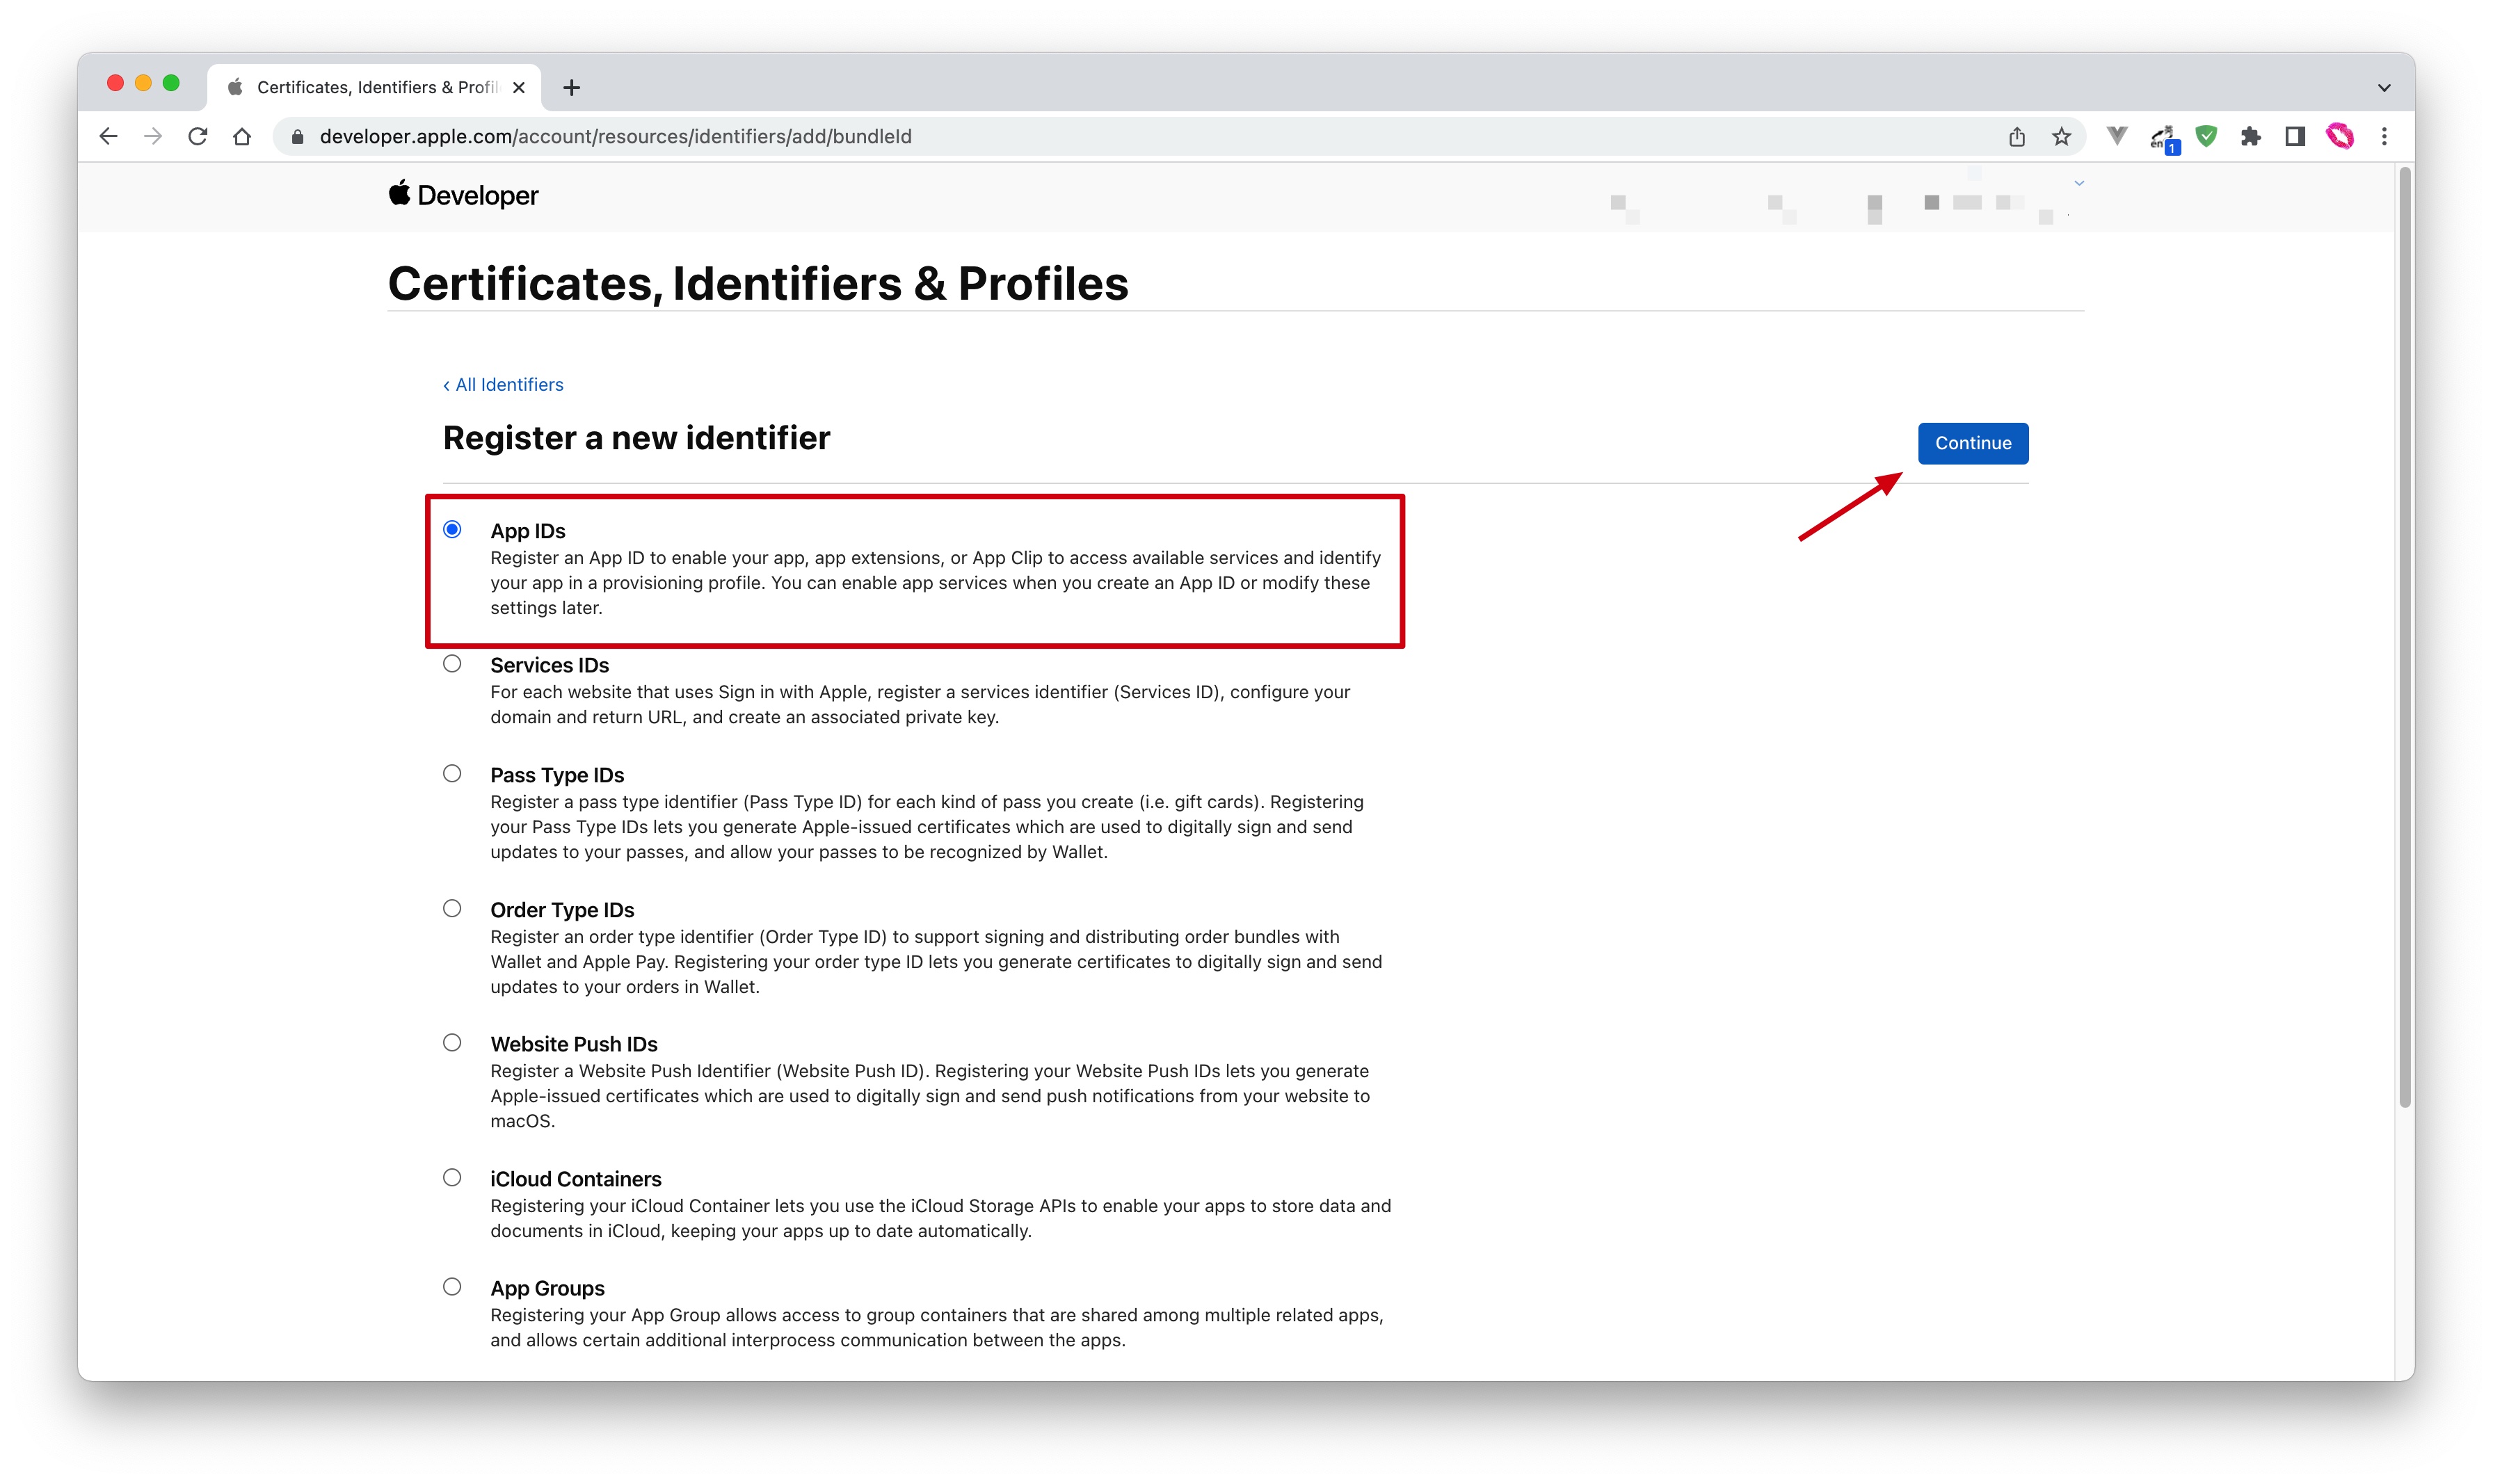
- Select the application type and click the Continue button to continue:
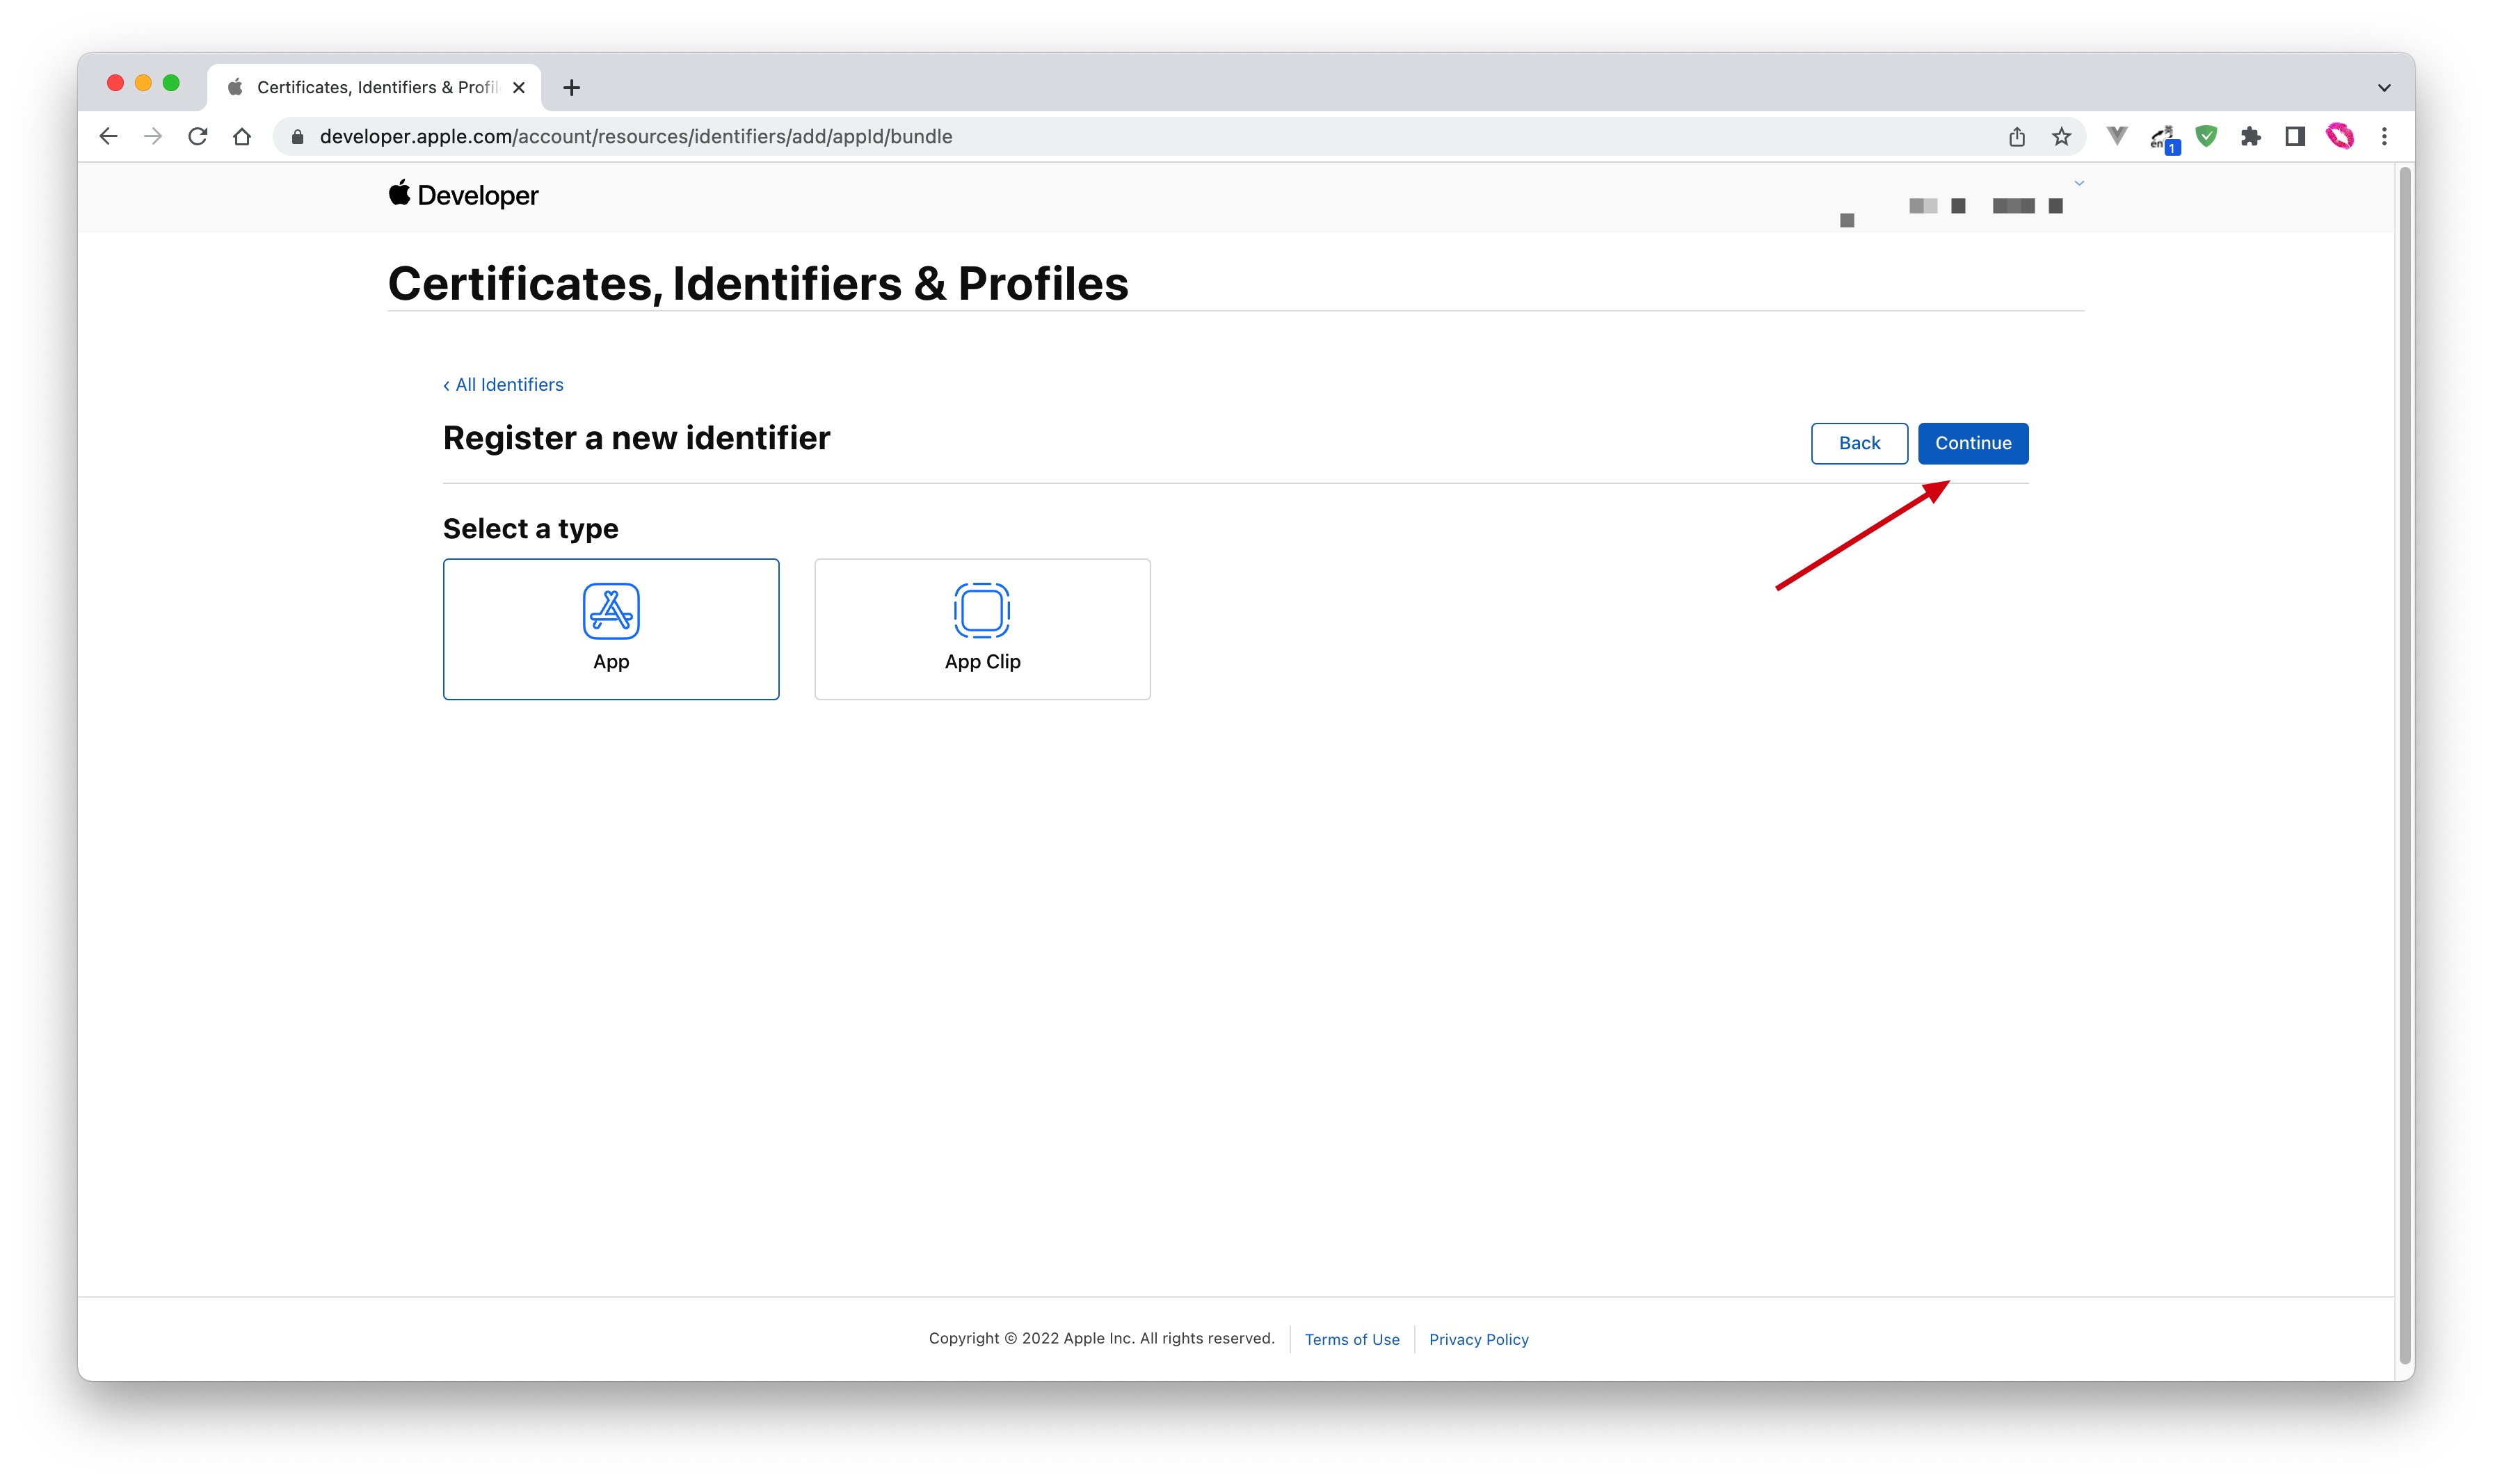
- Fill in Description and Bundle ID, and find Sign in with Apple below and check it. Please record this Bundle ID:
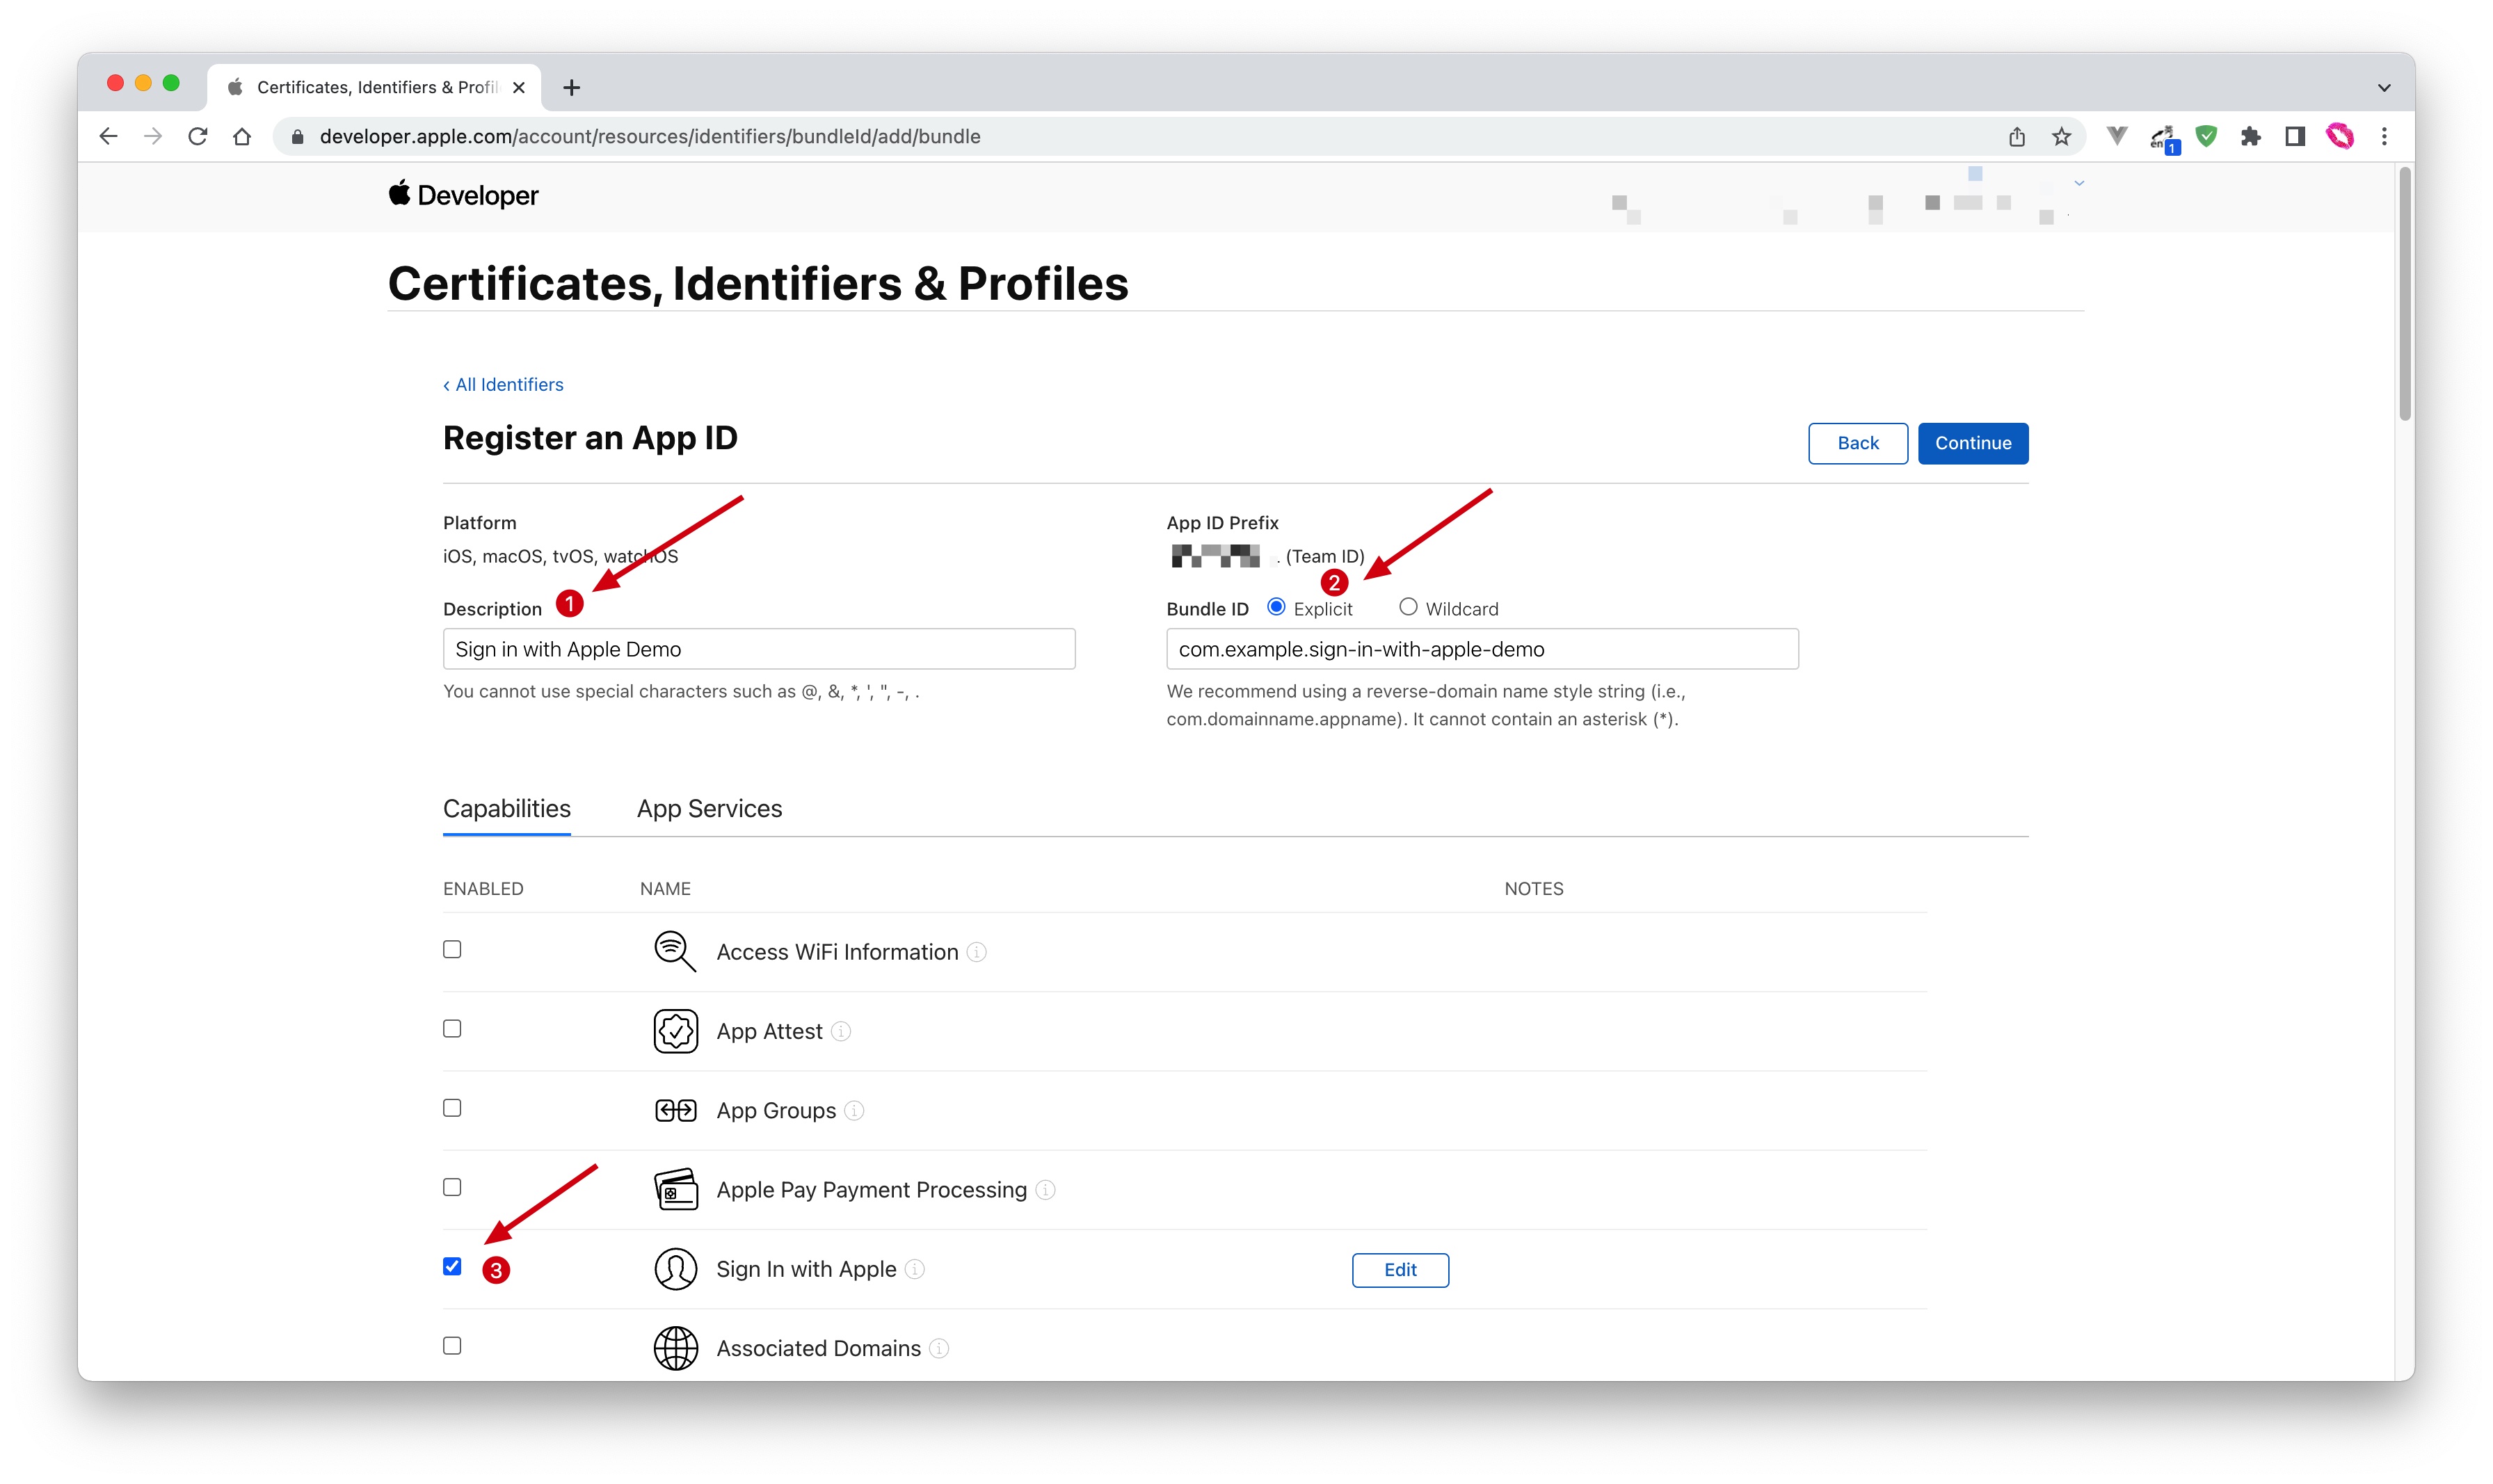
- Finally, click the Continue button, confirm the information on the page that opens, and click the Register button to create the application.
1.3 Create a Service ID
- Go back to the Certificates, Identifiers & Profiles > Identifiers page, click the ➕ icon, select Services IDs and then click the Continue button to continue:
- Fill in Description and Identifier, then click the Continue button, and on the confirmation page that opens, click the Register button to create the Service:
- Find the Service you just created, select Sign In with Apple, click Configure:
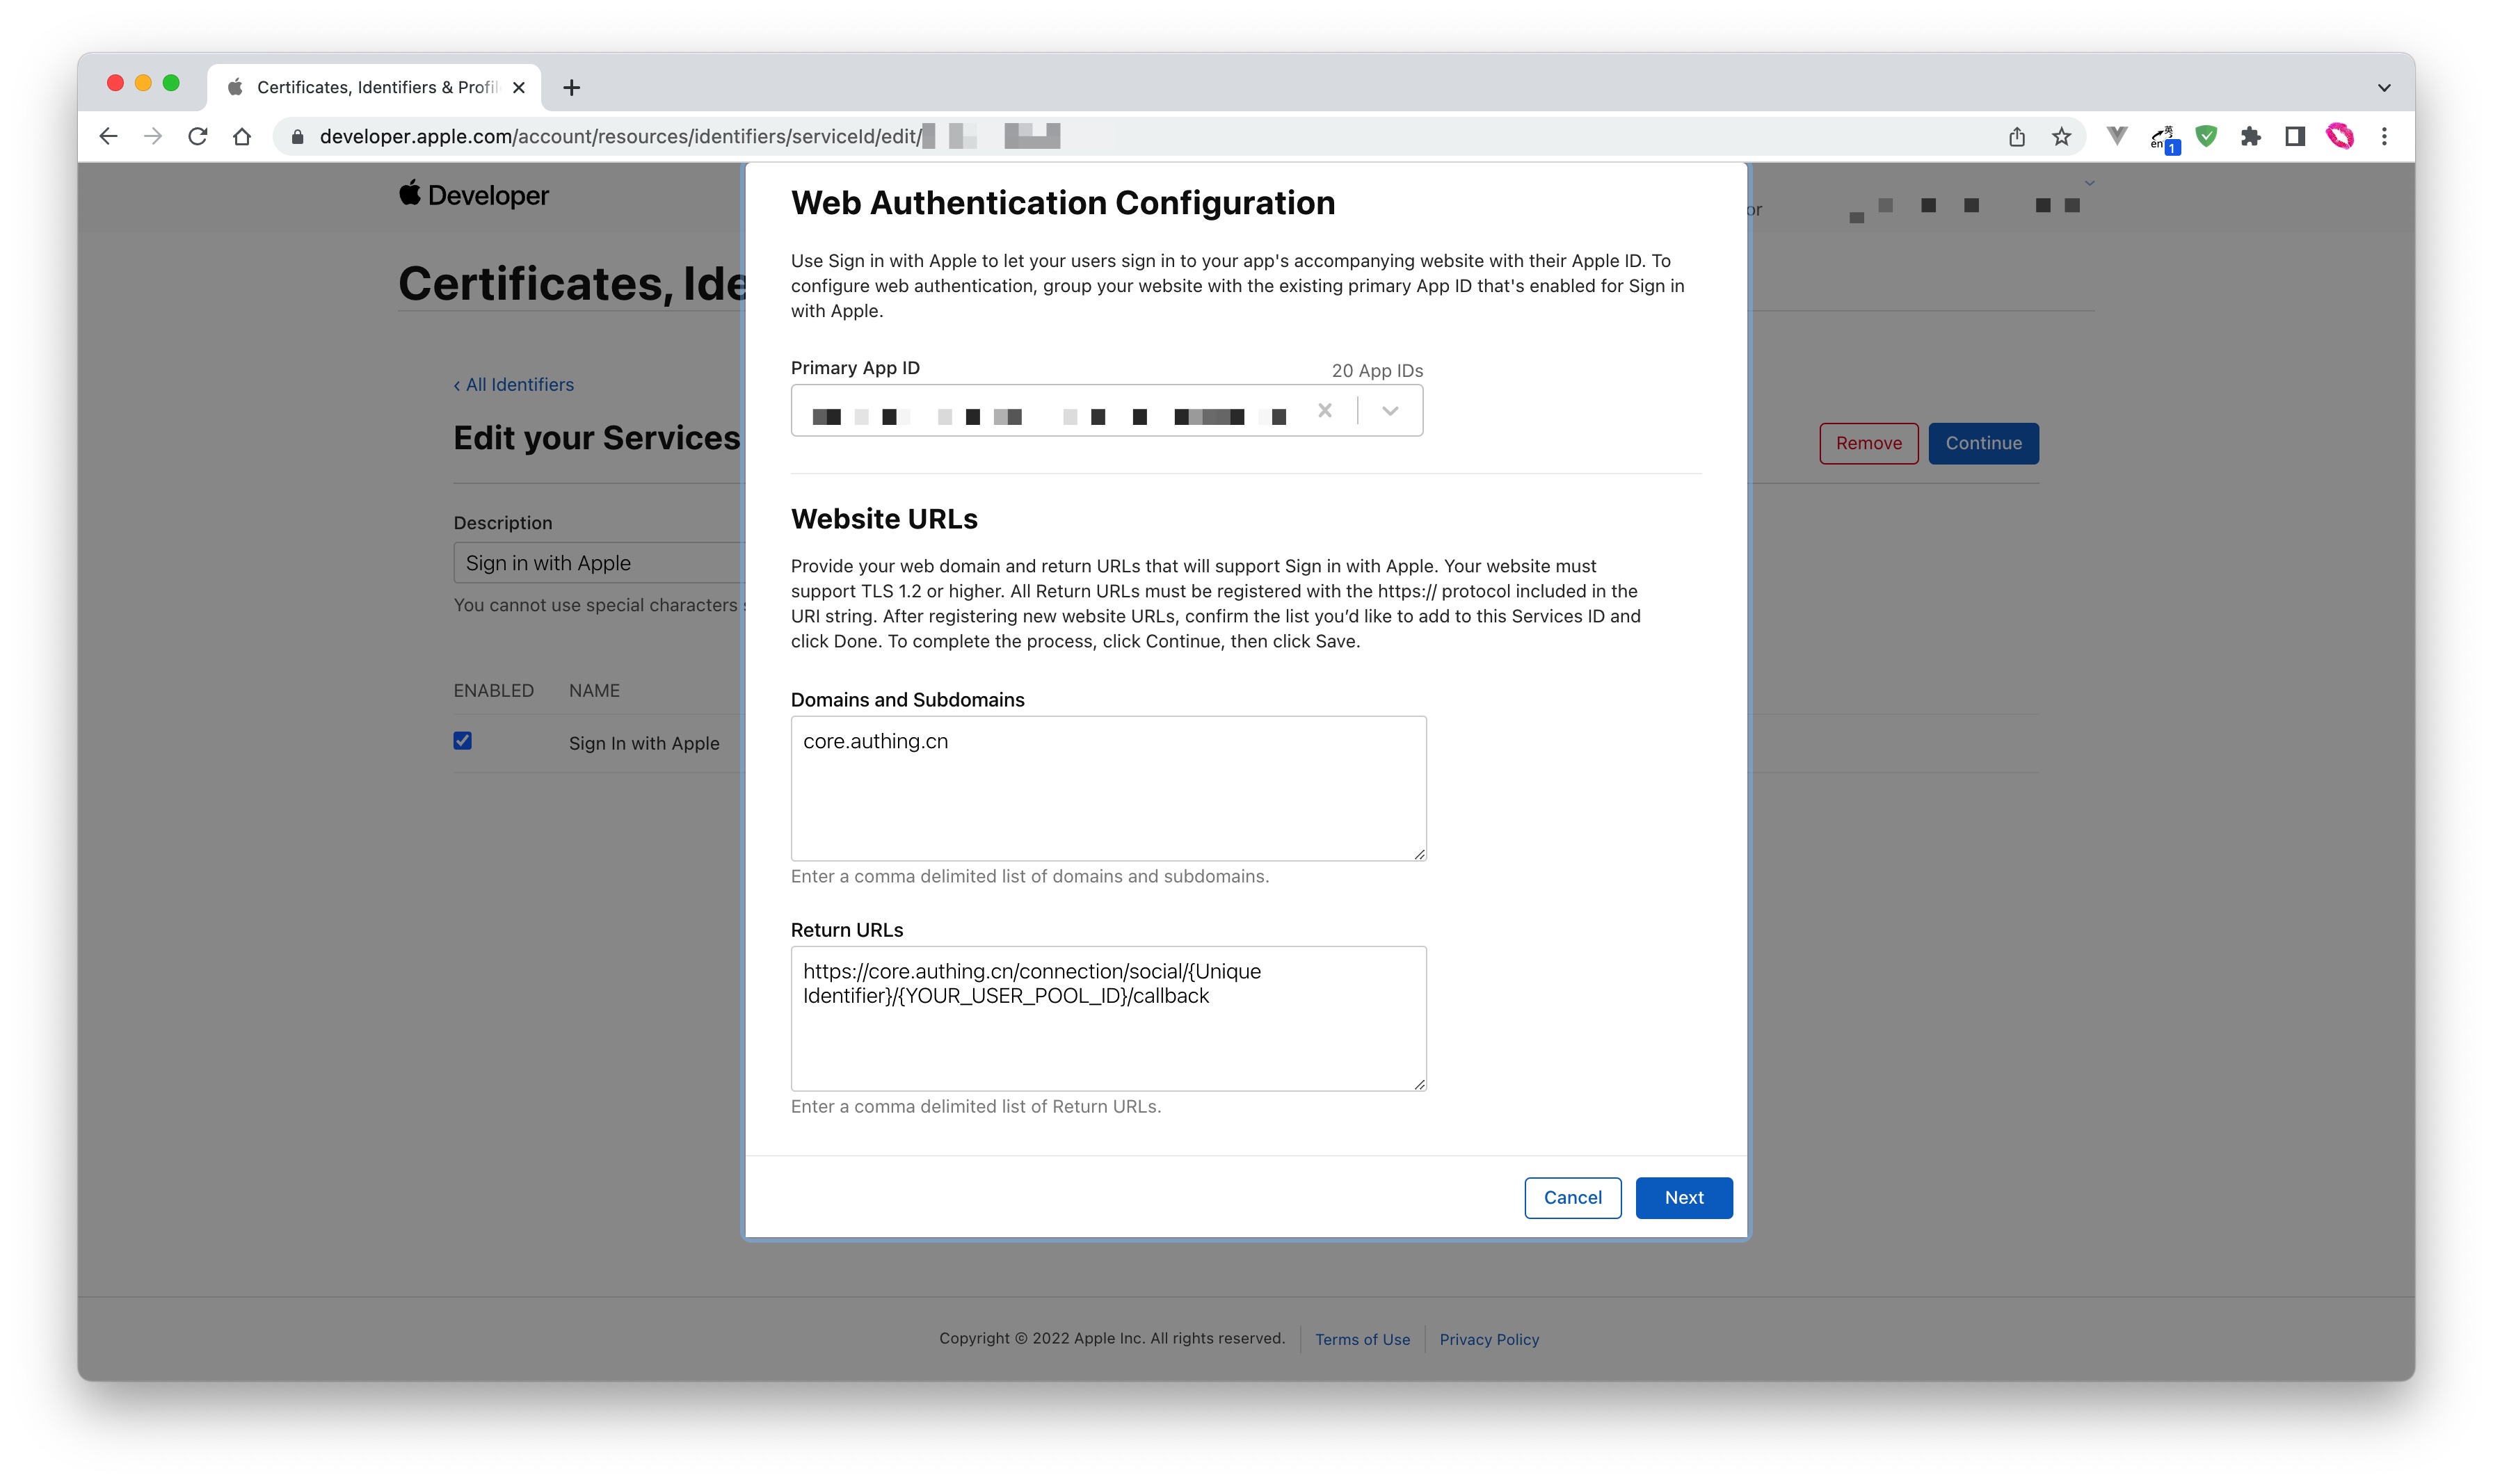
- Fill in Domains and Subdomains and Return URLs:
- Domains and Subdomains: Please fill in
core.genauth.ai - Return URLs: Please fill in the Callback Address field information obtained on the GenAuth console: Original image 170 (in section "1.3 Create a Service ID"; Chinese UI)
- Click Save, Continue, and finally click Register, and record the Service ID.
1.4 Configure Signing Key
- Go back to the Certificates, Identifiers & Profiles page, switch to the Keys tab, and click the ➕ icon:
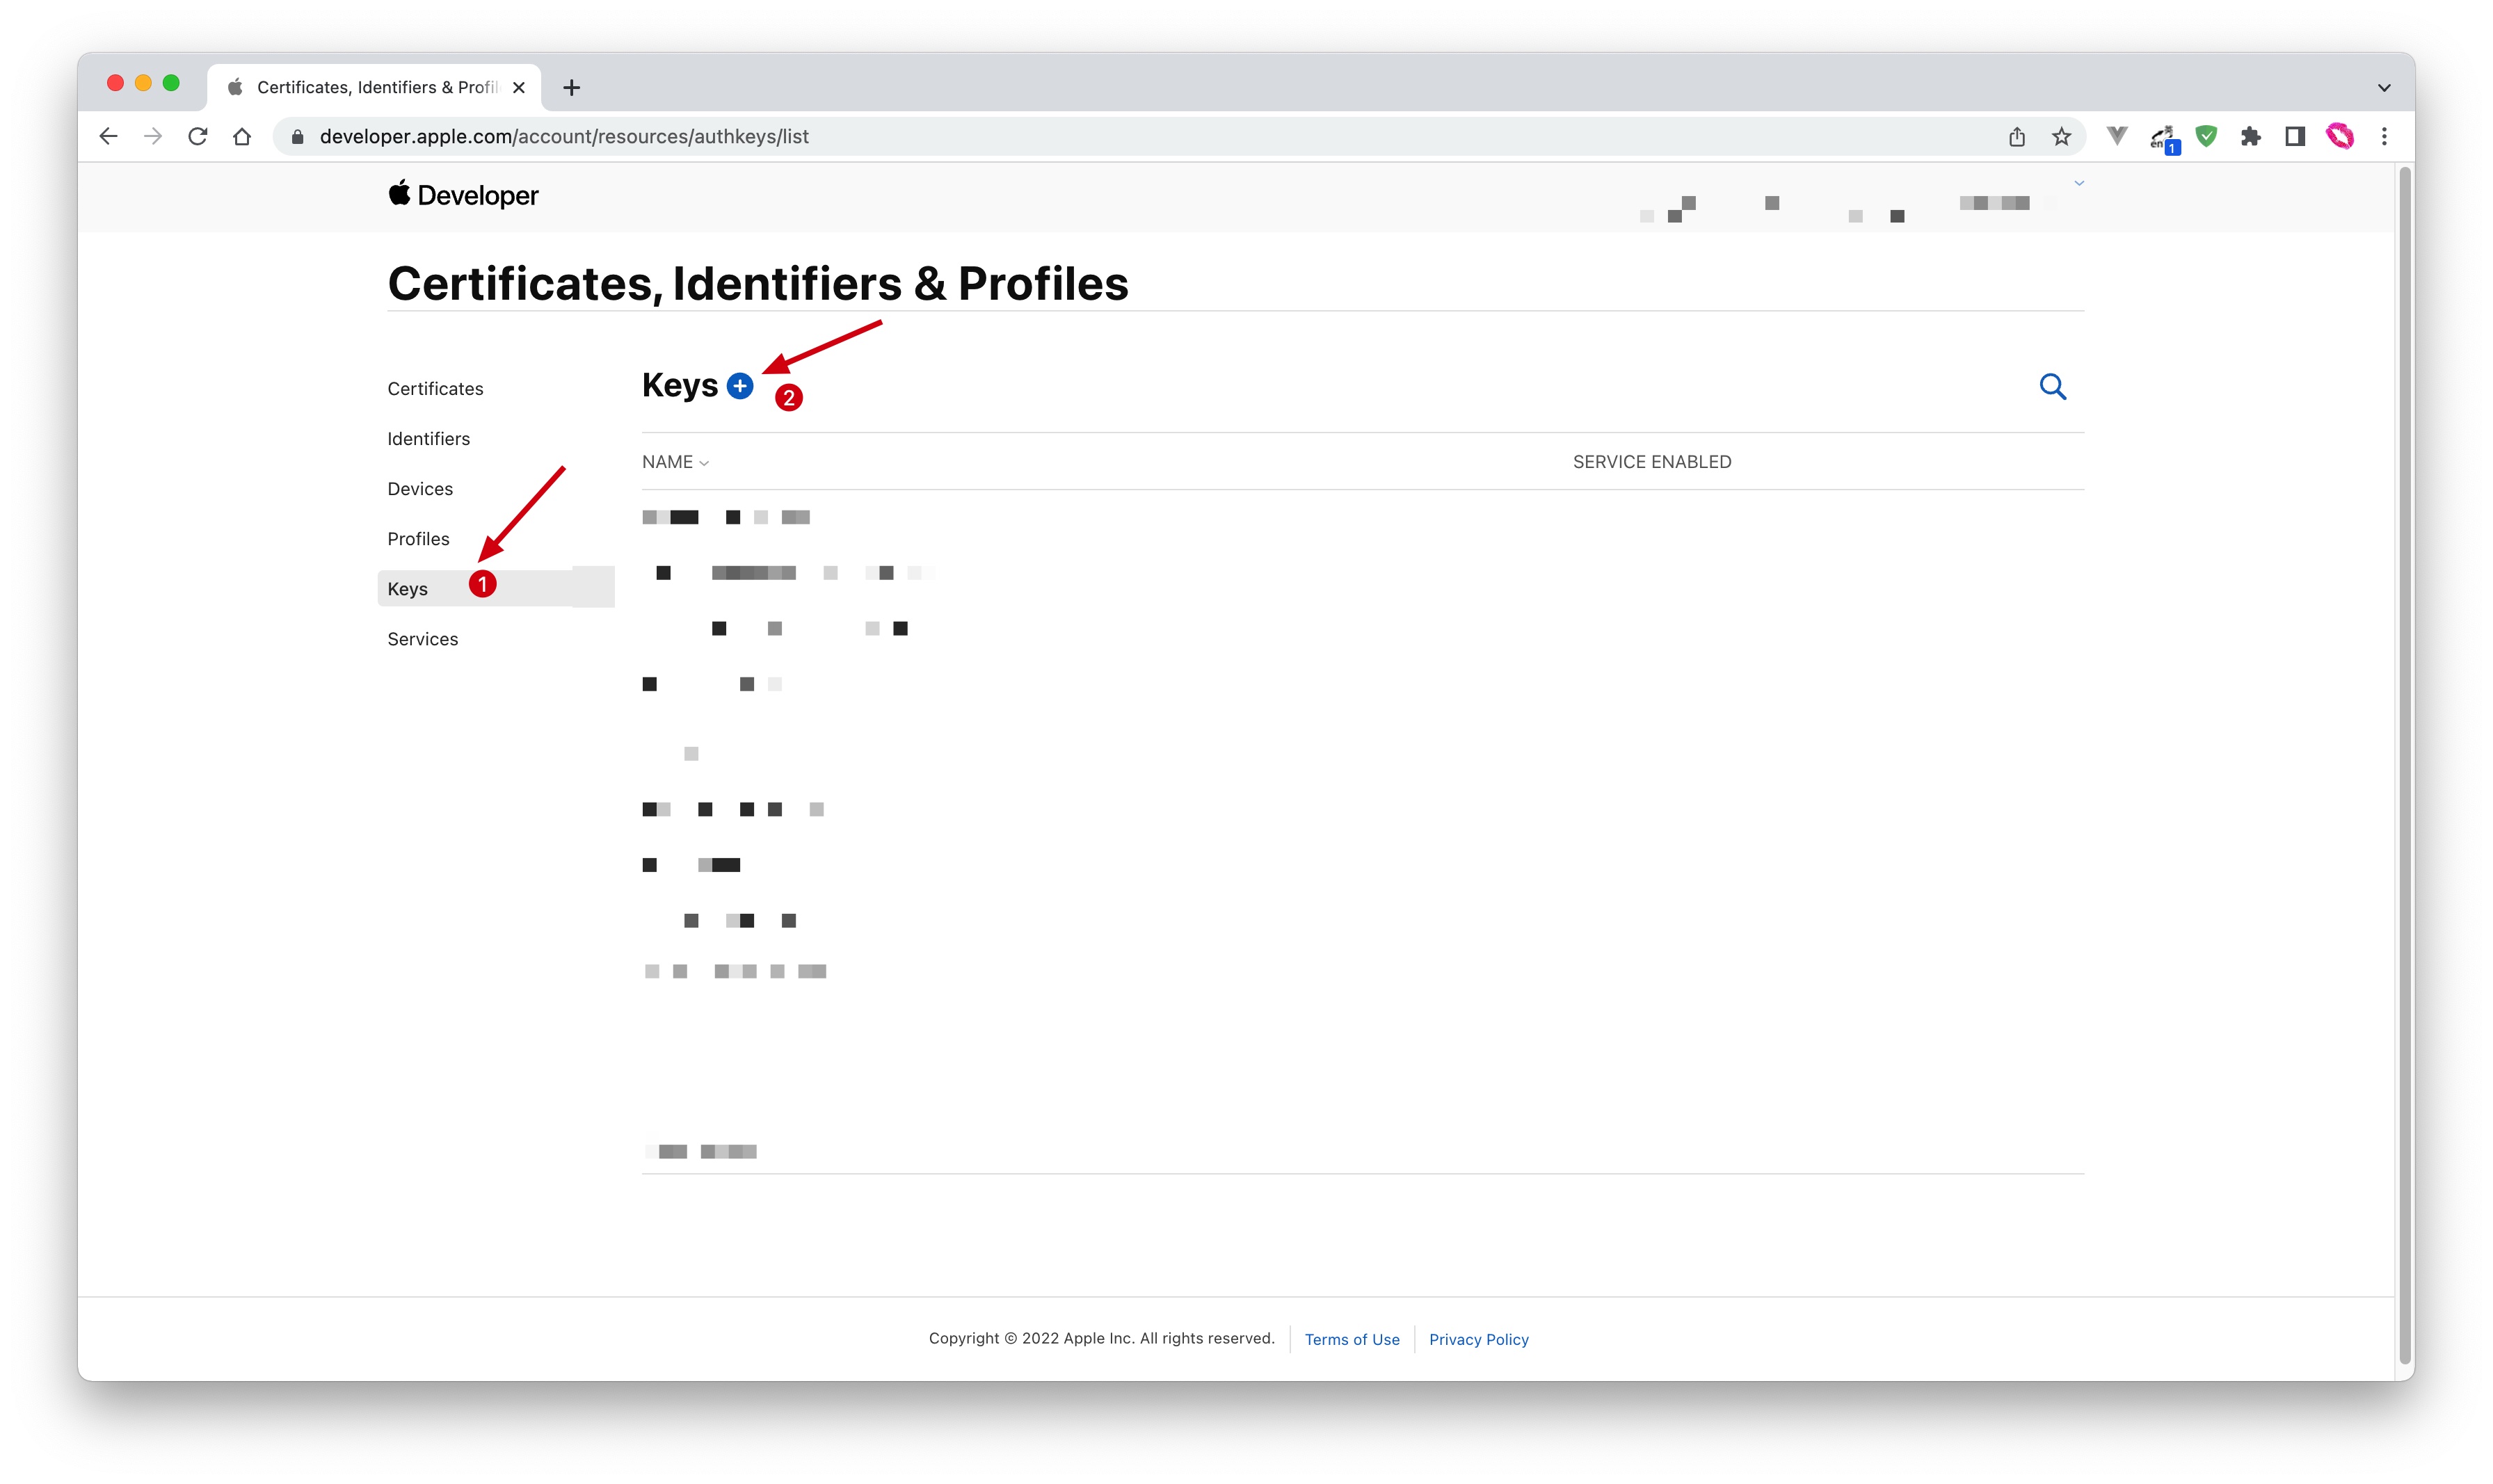
- Enter a name and check Sign in with Apple, click Configure, and make sure the selected Primary App ID is the one you just created:
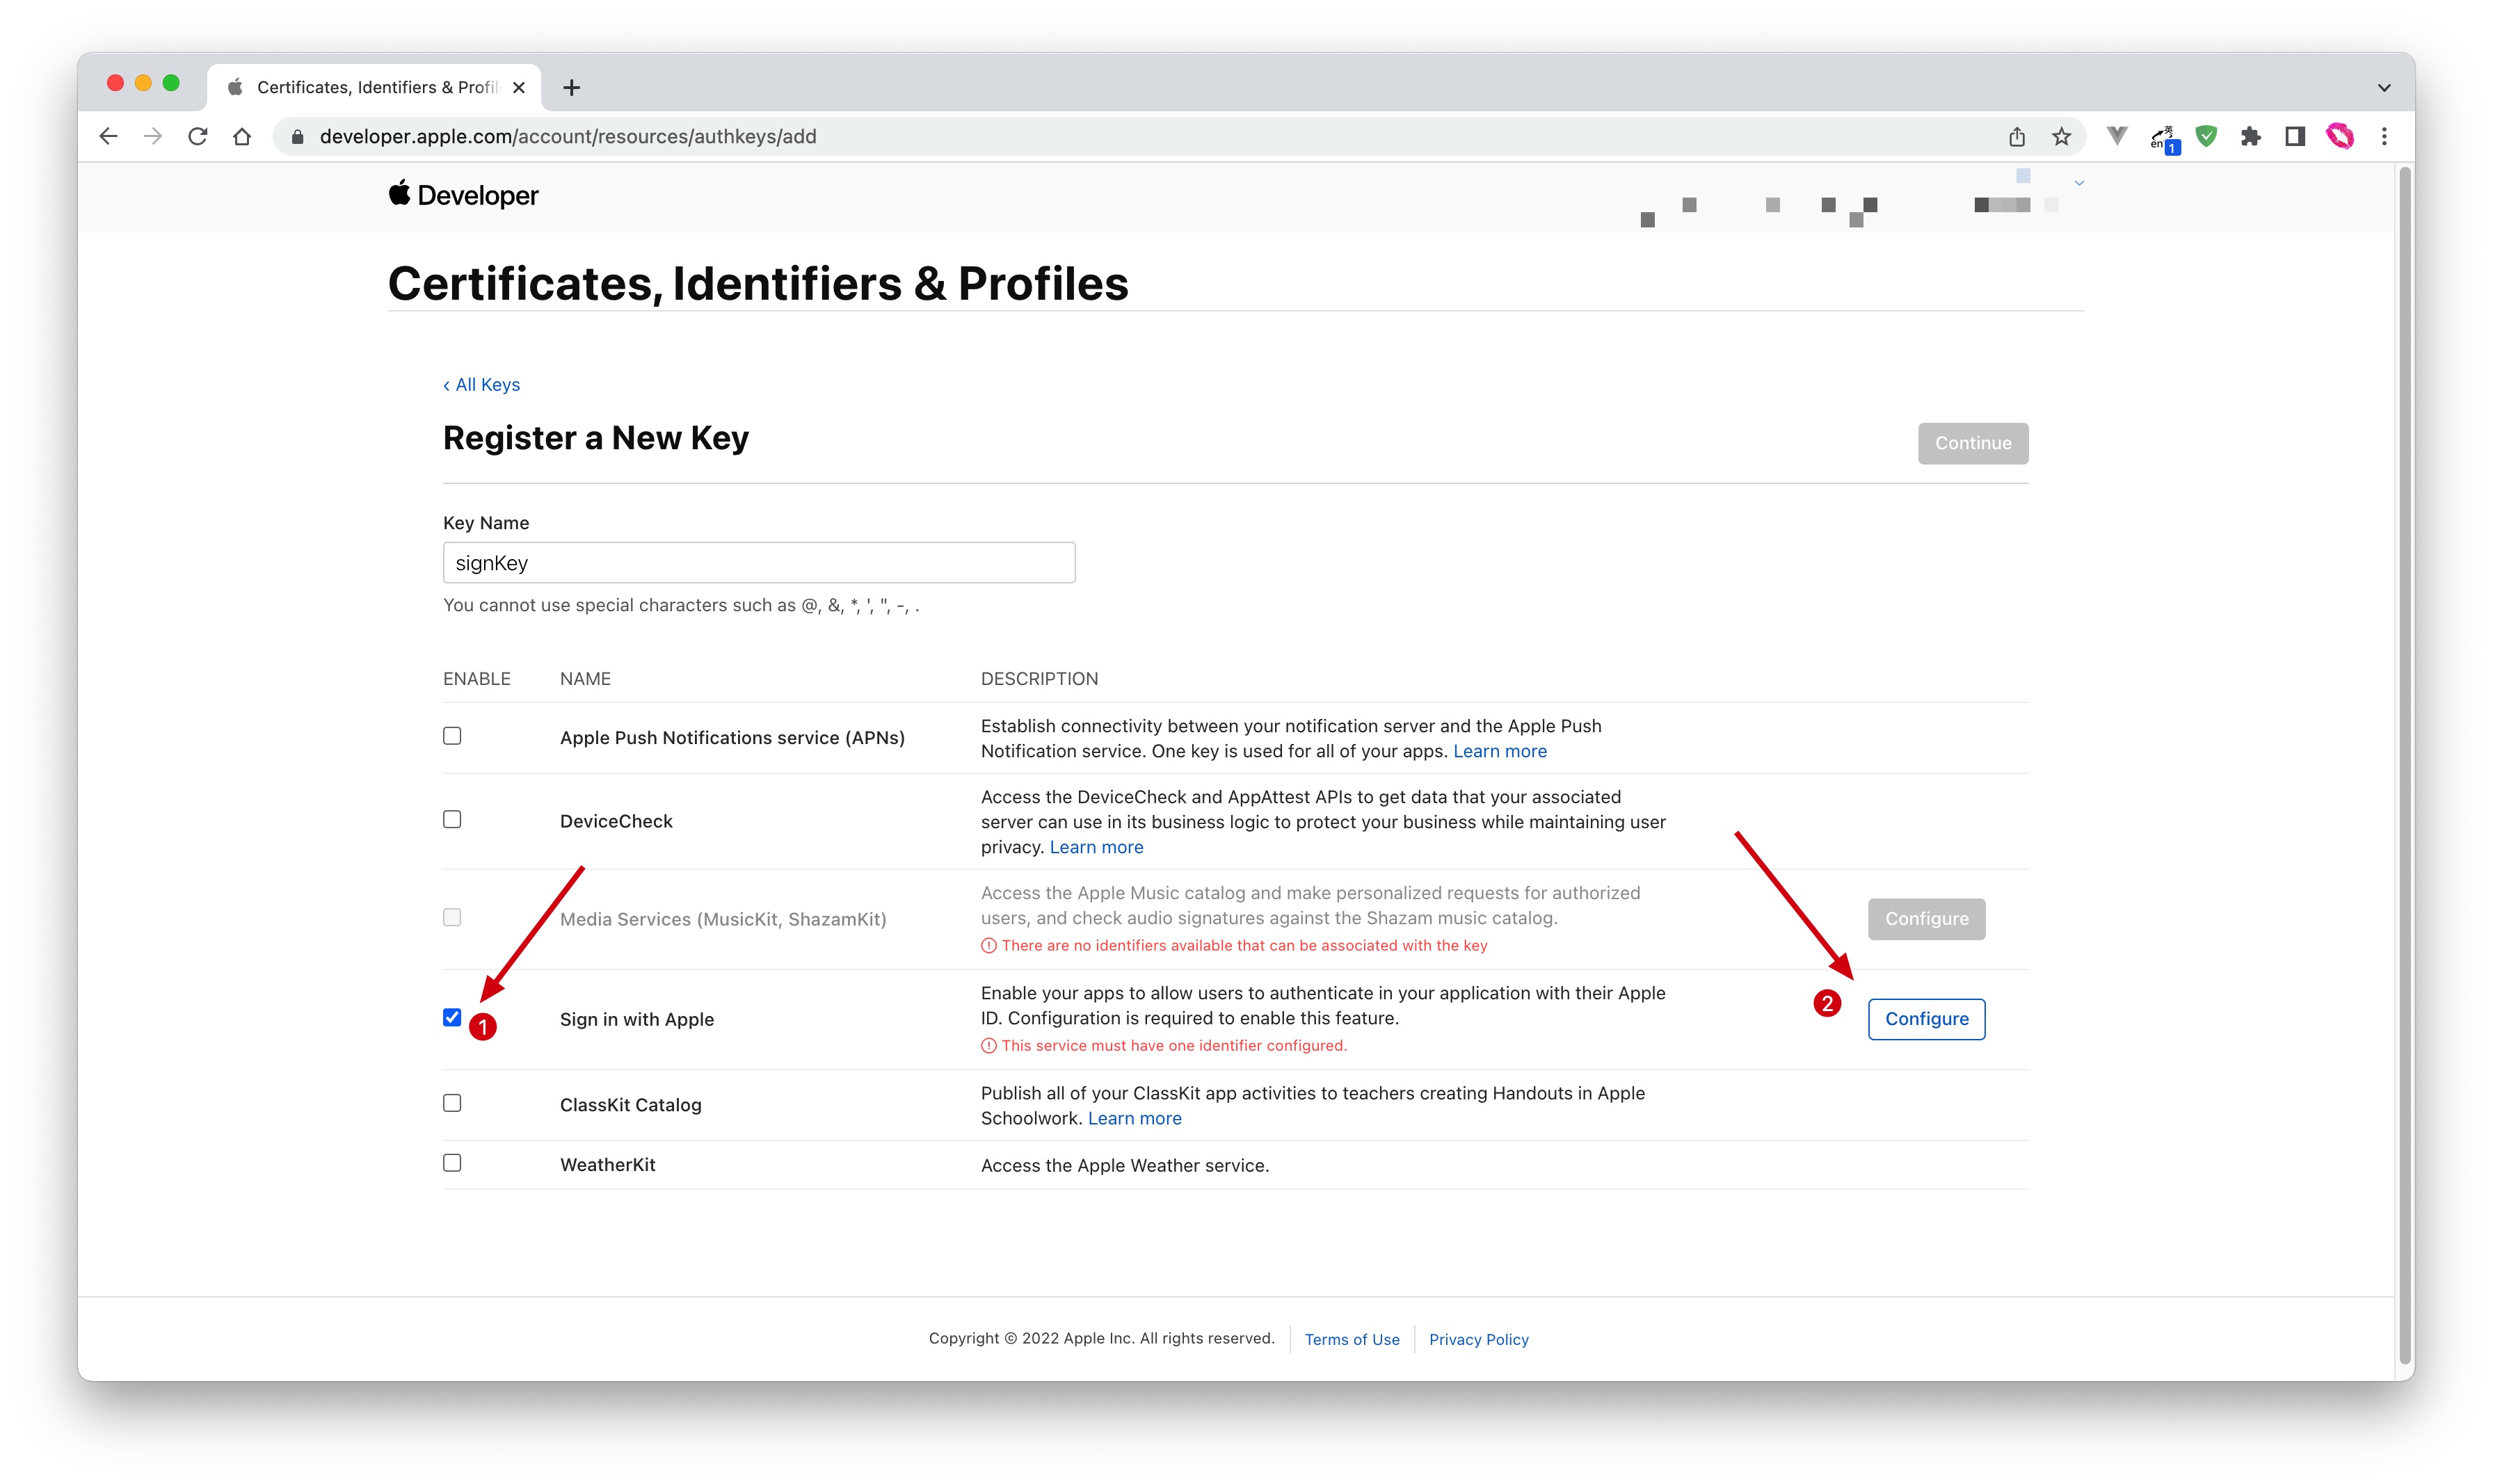
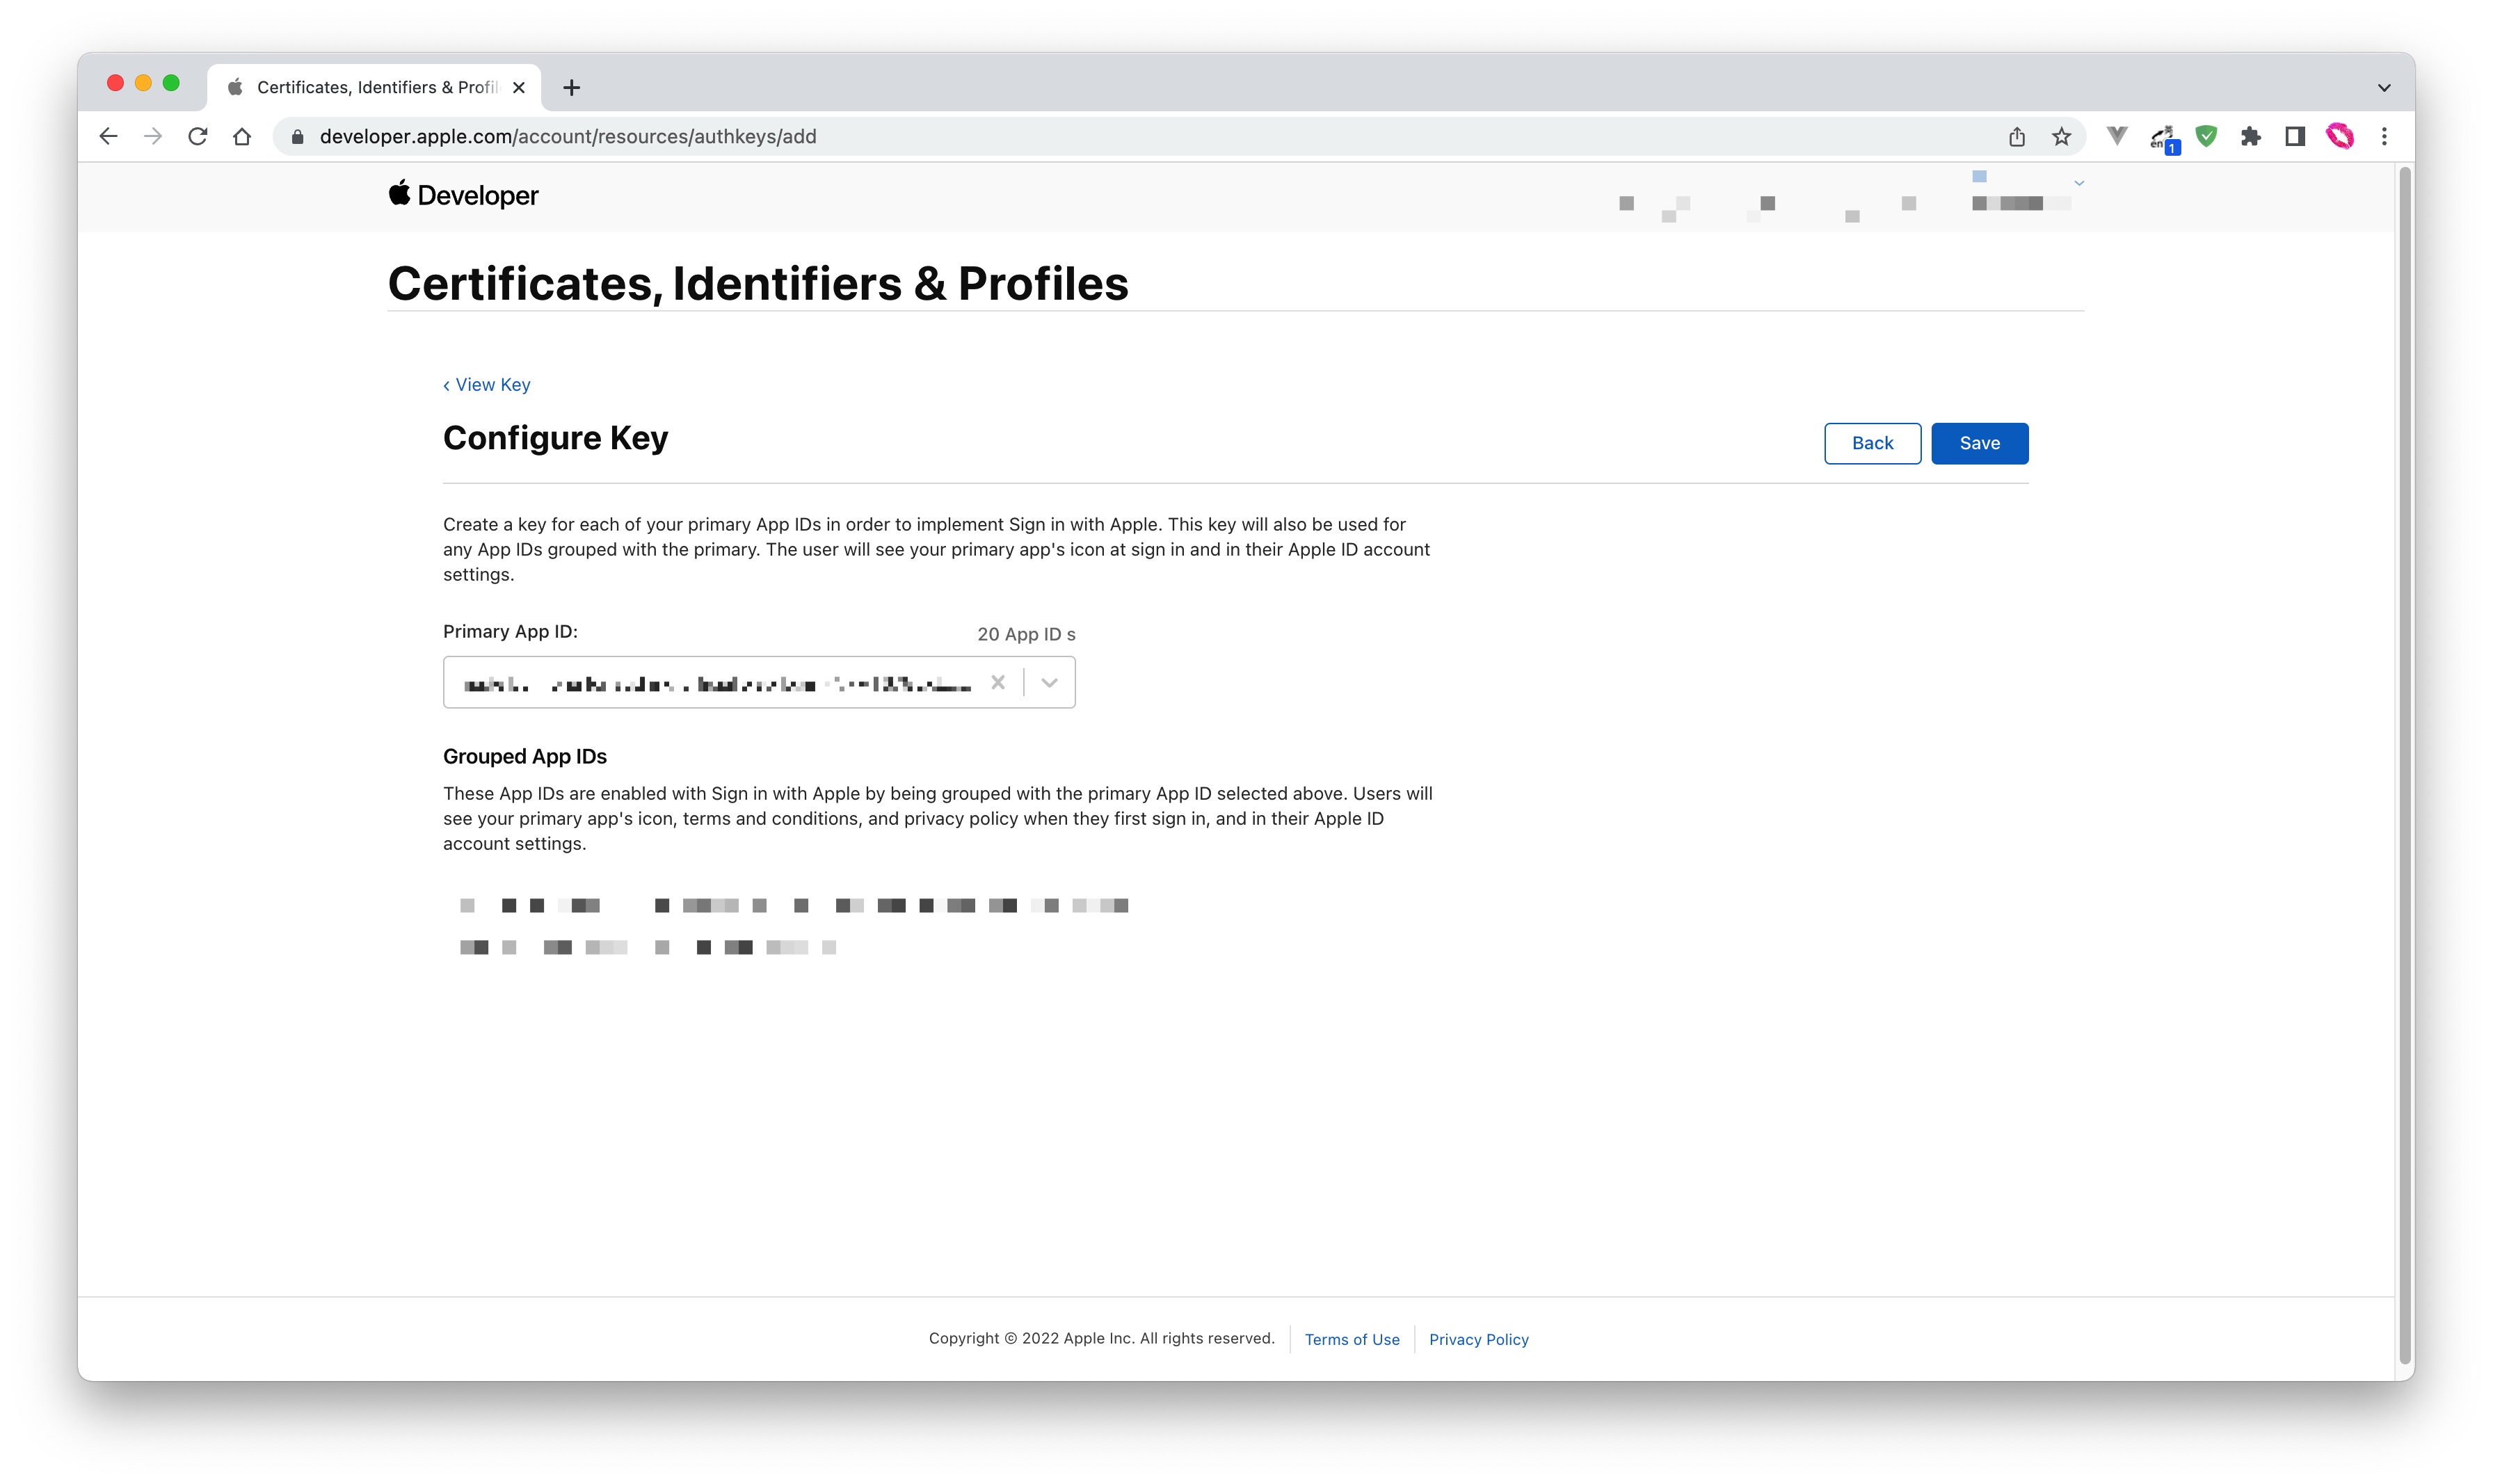
- Click Save, Continue, and finally click Register.
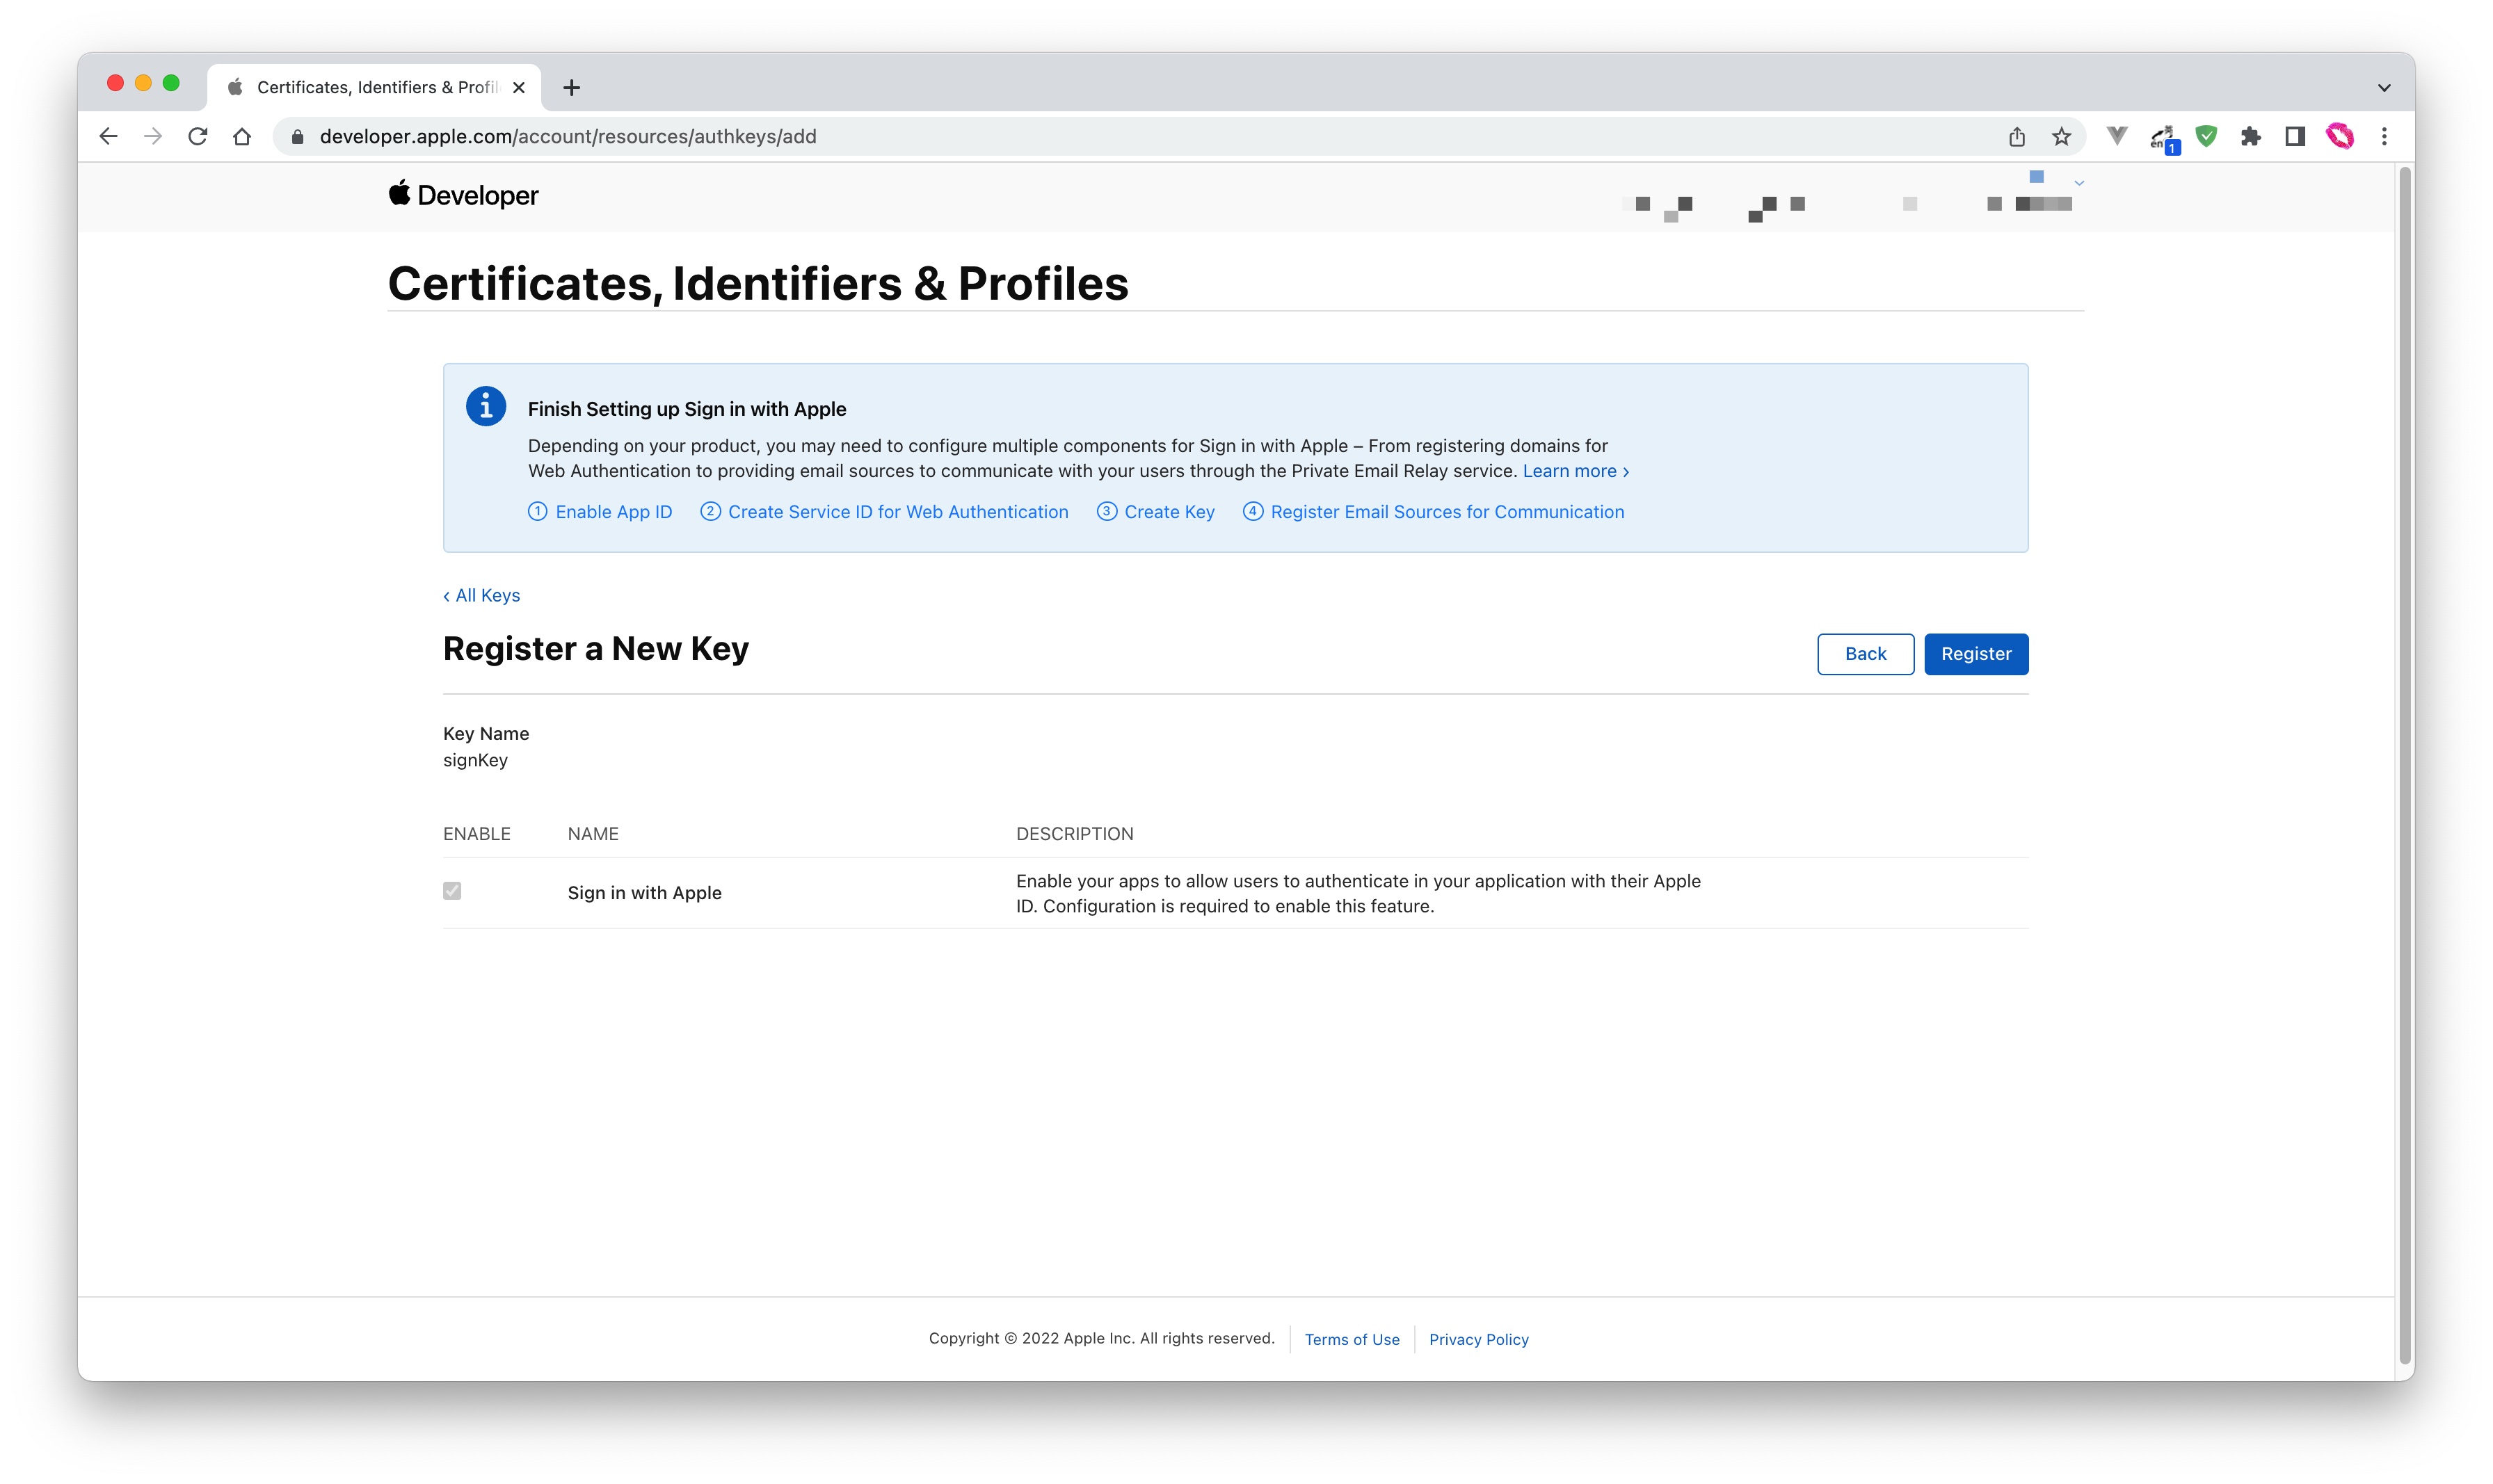
- After creation, record the Key ID and click Download to download the key:
Original image 171 (in section "1.4 Configure Signing Key"; Chinese UI)
Step 2: Configure Apple apps in the GenAuth console
2.1 On the GenAuth console's "Social Identity Source" page, click the "Create Social Identity Source" button to enter the "Select Social Identity Source" page.
Original image 172 (in section "Step 2: Configure Apple apps in the GenAuth console"; Chinese UI)
2.2 On the Select Social Identity Source page, click the Apple card. Original image 173 (in section "Step 2: Configure Apple apps in the GenAuth console"; Chinese UI)
2.3 Continue to click the Apple Mobile login mode, or click … Add to open the Apple Mobile configuration page. Original image 174 (in section "Step 2: Configure Apple apps in the GenAuth console"; Chinese UI)
2.4 On the Apple Mobile configuration page, fill in the relevant fields. Original image 175 (in section "Step 2: Configure Apple apps in the GenAuth console"; Chinese UI)
| Field | Description | | ---------------------------- | --------------------------------------------------------------------------------------------------------------------------------------------------------------------------------------------------------------------------------------------------------------------------------------------------- | --- | | Unique ID | a. The unique ID consists of lowercase letters, numbers, and -, and its length is less than 32 bits.
b. This is the unique ID of this connection and cannot be modified after setting. | | Display Name | This name will be displayed on the button of the end user's login interface. | | Bundle ID | Please enter Apple's Bundle ID. | | Team ID | Apple developer team ID. | | Key ID | The ID of the Apple Signing Key. | | Key | The content of the Apple Signing Key. | | Callback Address | a. Paste the callback address on the Create App page of the Apple Developer Platform;
b. Make sure that the unique identifier in the callback address is consistent with the unique identifier in the created identity source; | | | Scopes | You can check Name and Email Address. | | Login Mode | After turning on "Login Only Mode", you can only log in to existing accounts, not create new accounts. Please choose carefully. | | Account Identity Association | When "Account Identity Association" is not turned on, a new user is created by default when a user logs in through an identity source. After turning on "Account Identity Association", users can be allowed to log in directly to an existing account through "Field Matching" or "Query Binding". |
2.5 After the configuration is completed, click the "Create" or "Save" button to complete the creation.
Step 3: Development access
Recommended development access method: SDK
Pros and cons description: Access is simple, only a few lines of code are needed. Highest degree of customizability.
Detailed access method:
3.1 Please access your iOS app according to Apple Login SDK Access Document;
3.2 Create an app in the GenAuth console. For details, see: How to create an app in GenAuth
3.3 On the created "Apple" identity source connection details page, open and associate a mobile app created in the GenAuth console; Original image 176 (in section "Step 3: Development access"; Chinese UI)
3.4 Go to the associated mobile APP to experience the APP login function.
Original image 177 (in section "Step 3: Development access"; Chinese UI)
Apple Web
Scenario Introduction
- Overview: Apple social login allows users to log in to third-party applications or websites securely using Apple as the identity source. Configure and enable Apple's social login in GenAuth to quickly obtain Apple's basic open information and help users log in without passwords through GenAuth.
- Application scenario: PC website
- Terminal user preview image:
Original image 178 (in section "Scenario Introduction"; Chinese UI)
Notes
- Please make sure you have applied for an Apple developer account, otherwise you will not be able to perform the following operations. Apply for personal and company accounts at: https://developer.apple.com/programs/enroll/, apply for enterprise accounts at: https://developer.apple.com/programs/enterprise/
- If you have not opened a GenAuth console account, please go to the GenAuth console to register a developer account
Step 1: Configure in the Apple Developer Center
Get Team ID
Go to the Membership page of the Apple Developer Portal and record Team ID:
Create an App ID
- In the Apple Developer Portal, Certificates, Identifiers & Profiles > Identifiers page, click the ➕ icon to create an app:
- Select App IDs and click the Continue button to continue:
- Select the application type and click Continue button to continue:
- Fill in Description and Bundle ID, and find Sign in with Apple below and check it. Please record this Bundle ID:
- Finally, click the Continue button, confirm the information on the page that opens, and click the Register button to create the app.
Create a Service ID
- Go back to the Certificates, Identifiers & Profiles > Identifiers page, click the ➕ icon, select Services IDs and then click the Continue button to continue:
- Fill in Description and Identifier, then click the Continue button. On the confirmation page that opens, click the Register button to create the Service:
- Find the Service you just created and select Sign In with Apple, click Configure:
- Fill in Domains and Subdomains and Return URLs:
- Domains and Subdomains: Please fill in
core.genauth.ai - Return URLs: Please fill in
https://core.genauth.ai/connection/social/{Unique Identifier}/{YOUR_USER_POOL_ID}/callback, and replace{Unique Identifier}with theUnique Identifierfilled in the identity source you are creating in GenAuth, and replace{YOUR_USER_POOL_ID}with your User Pool ID
- Click Save, Continue, and finally click Register, and record the Service ID.
Configure Signing Key
- Go back to the Certificates, Identifiers & Profiles page, switch to the Keys tab, and click the ➕ icon:
- Enter a name and check Sign in with Apple, click Configure, and make sure the Primary App ID selected is the one you just created:
- Click Save, Continue, and finally Register.
- After creation, record the Key ID, and then click Download to download the key:
Original image 179 (in section "Configure Signing Key"; Chinese UI)
Step 2: Configure Apple applications in the GenAuth console
2.1 On the "Social Identity Source" page of the GenAuth console, click the "Create Social Identity Source" button to enter the "Select Social Identity Source" page.
2.2 On the "Select Social Identity Source" page, click the "Apple" card. Original image 181 (in section "Step 2: Configure Apple applications in the GenAuth console"; Chinese UI)
2.3 Continue to click the "Apple Web" login mode, or click "… Add" to open the "Apple Web" configuration page. Original image 182 (in section "Step 2: Configure Apple applications in the GenAuth console"; Chinese UI)
2.4 On the "Apple Web" configuration page, fill in the relevant field information. Original image 183 (in section "Step 2: Configure Apple applications in the GenAuth console"; Chinese UI)
| Field | Description |
|---|---|
| Unique ID | a. The unique ID consists of lowercase letters, numbers, and -, and its length is less than 32 bits. b. This is the unique ID of this connection and cannot be modified after setting. |
| Display Name | This name will be displayed on the button of the end user's login interface. |
| Services Identifier | The ID of the Apple Service. |
| Team ID | The ID of the Apple Developer Team. |
| Key ID | The ID of the Apple Signing Key. |
| Key | The content of the Apple Signing Key. |
| Scopes | You can check Name and Email Address. |
| Login Mode | After turning on "Login Only Mode", you can only log in to existing accounts, and cannot create new accounts. Please choose carefully. |
| Account Identity Association | When "Account Identity Association" is not turned on, a new user is created by default when a user logs in through an identity source. After turning on "Account Identity Association", users can be allowed to log in directly to an existing account through "Field Matching" or "Query Binding". |
2.5 After the configuration is completed, click the "Create" or "Save" button to complete the creation.
Step 3: Development Access
Recommended Development Access Method: Use Hosted Login Page
Pros and Cons Description: Simple operation and maintenance, which is handled by GenAuth. Each user pool has an independent secondary domain name; if you need to embed it into your application, you need to use the pop-up mode to log in, that is: after clicking the login button, a window will pop up with the content of the GenAuth hosted login page, or redirect the browser to the GenAuth hosted login page.
Detailed access method:
3.1 Create an application in the GenAuth console. For details, see: How to create an application in GenAuth
3.2 On the created "Apple" identity source connection details page, open and associate an application created in the GenAuth console Original image 184 (in section "Step 3: Development Access"; Chinese UI)
3.3 Click the "Experience Login" button of the GenAuth console application to experience the "Apple" login in the pop-up login window Original image 185 (in section "Step 3: Development Access"; Chinese UI)
Original image 186 (in section "Step 3: Development Access"; Chinese UI)
AWS
Scenario Introduction
- Overview: AWS social login allows users to log in to third-party applications or websites securely using AWS as the identity source. Configure and enable AWS social login in GenAuth to quickly obtain basic AWS information and help users log in without passwords.
- Application scenario: PC website
- End user preview image:
Original image 187 (in section "Scenario Introduction"; Chinese UI)
Notes
- If you don't have an AWS account yet, please go to the AWS console to register as a developer.
- If you have not opened a GenAuth console account, please go to the GenAuth console to register a developer account
Step 1: Create a server application in AWS
Go to the Amazon Cognito console and click Create User Pool: Original image 188 (in section "Step 1: Create a server application in AWS"; Chinese UI)
On the Configure Experience Login page, check the boxes as needed User Login Options: Original image 189 (in section "Step 1: Create a server application in AWS"; Chinese UI)
On the Configure Security Requirements page, select the Login Security Configuration as needed and click Next: Original image 190 (in section "Step 1: Create a server application in AWS"; Chinese UI)
On the Configure Registration Experience page, select the Registration Experience Configuration as needed and click Next: Original image 191 (in section "Step 1: Create a server application in AWS"; Chinese UI)
On the Configure Messaging page, select the Messaging Configuration as needed and click Next: Original image 192 (in section "Step 1: Create a server application in AWS"; Chinese UI)
On the Integrate Your App page, fill in the User Pool Name Original image 193 (in section "Step 1: Create a server application in AWS"; Chinese UI)
Scroll down, check Use Cognito Hosted UI, and fill in a custom Cognito domain Original image 194 (in section "Step 1: Create a server application in AWS"; Chinese UI)
Scroll down, Initialize App Client, select Confidential Client, and define the application client name;
Application callback address: fill in https://core.genauth.ai/connection/social/{Unique ID}/{User Pool ID}/callback, you need to replace {Unique ID} with the Unique ID filled in the identity source you are creating in GenAuth, and {User Pool ID} with your User Pool IDOriginal image 195 (in section "Step 1: Create a server application in AWS"; Chinese UI)
On the Review and Create page, confirm the configuration and create the user pool:
Original image 196 (in section "Step 1: Create a server application in AWS"; Chinese UI)
After the creation is completed, on the User Pool page, get the Cognito domain
Original image 197 (in section "Step 1: Create a server application in AWS"; Chinese UI)
Swipe down to enter the application details page and record the Client ID and Client secret, which will be needed in the next step.
Original image 198 (in section "Step 1: Create a server application in AWS"; Chinese UI)
Original image 199 (in section "Step 1: Create a server application in AWS"; Chinese UI)
Step 2: Configure AWS application configuration in the GenAuth console
2.1 On the "Social Identity Source" page of the GenAuth console, click the "Create Social Identity Source" button to enter the "Select Social Identity Source" page.
2.2 On the "Select Social Identity Source" page, click the "AWS" card. Original image 201 (in section "Step 2: Configure AWS application configuration in the GenAuth console"; Chinese UI)
2.3 On the "AWS" configuration page, fill in the relevant field information. Original image 202 (in section "Step 2: Configure AWS application configuration in the GenAuth console"; Chinese UI)
| Field | Description |
|---|---|
| Unique ID | a. The unique ID consists of lowercase letters, numbers, and -, and is less than 32 bits long. b. This is the unique ID for this connection and cannot be modified after it is set. |
| Display Name | This name will be displayed on the button on the end user's login interface. |
| Authentication Domain | The Cognito domain name configured in the AWS User Pool console. |
| Client ID | The AWS client ID obtained in the previous step. |
| Client Secret | The AWS client secret obtained in the previous step. |
| Login Mode | After turning on "Login Only Mode", you can only log in to existing accounts, not create new accounts. Please choose carefully. |
| Account Identity Association | When "Account Identity Association" is not turned on, a new user is created by default when a user logs in through an identity source. After turning on "Account Identity Association", users can be allowed to log in directly to an existing account through "Field Matching" or "Query Binding". |
2.4 After the configuration is completed, click the "Create" or "Save" button to complete the creation.
Step 3: Development Access
Recommended Development Access Method: Use Hosted Login Page
Pros and Cons Description: Simple operation and maintenance, which is handled by GenAuth. Each user pool has an independent secondary domain name; if you need to embed it into your application, you need to use the pop-up mode to log in, that is: after clicking the login button, a window will pop up with the content of the GenAuth hosted login page, or redirect the browser to the GenAuth hosted login page.
Detailed access method:
3.1 Create an application in the GenAuth console. For details, see: How to create an application in GenAuth
3.2 On the created "AWS" identity source connection details page, open and associate an application created in the GenAuth console
Original image 203 (in section "Step 3: Development Access"; Chinese UI)
3.3 Click the "Experience Login" button of the GenAuth console application to experience "AWS" login in the pop-up login window
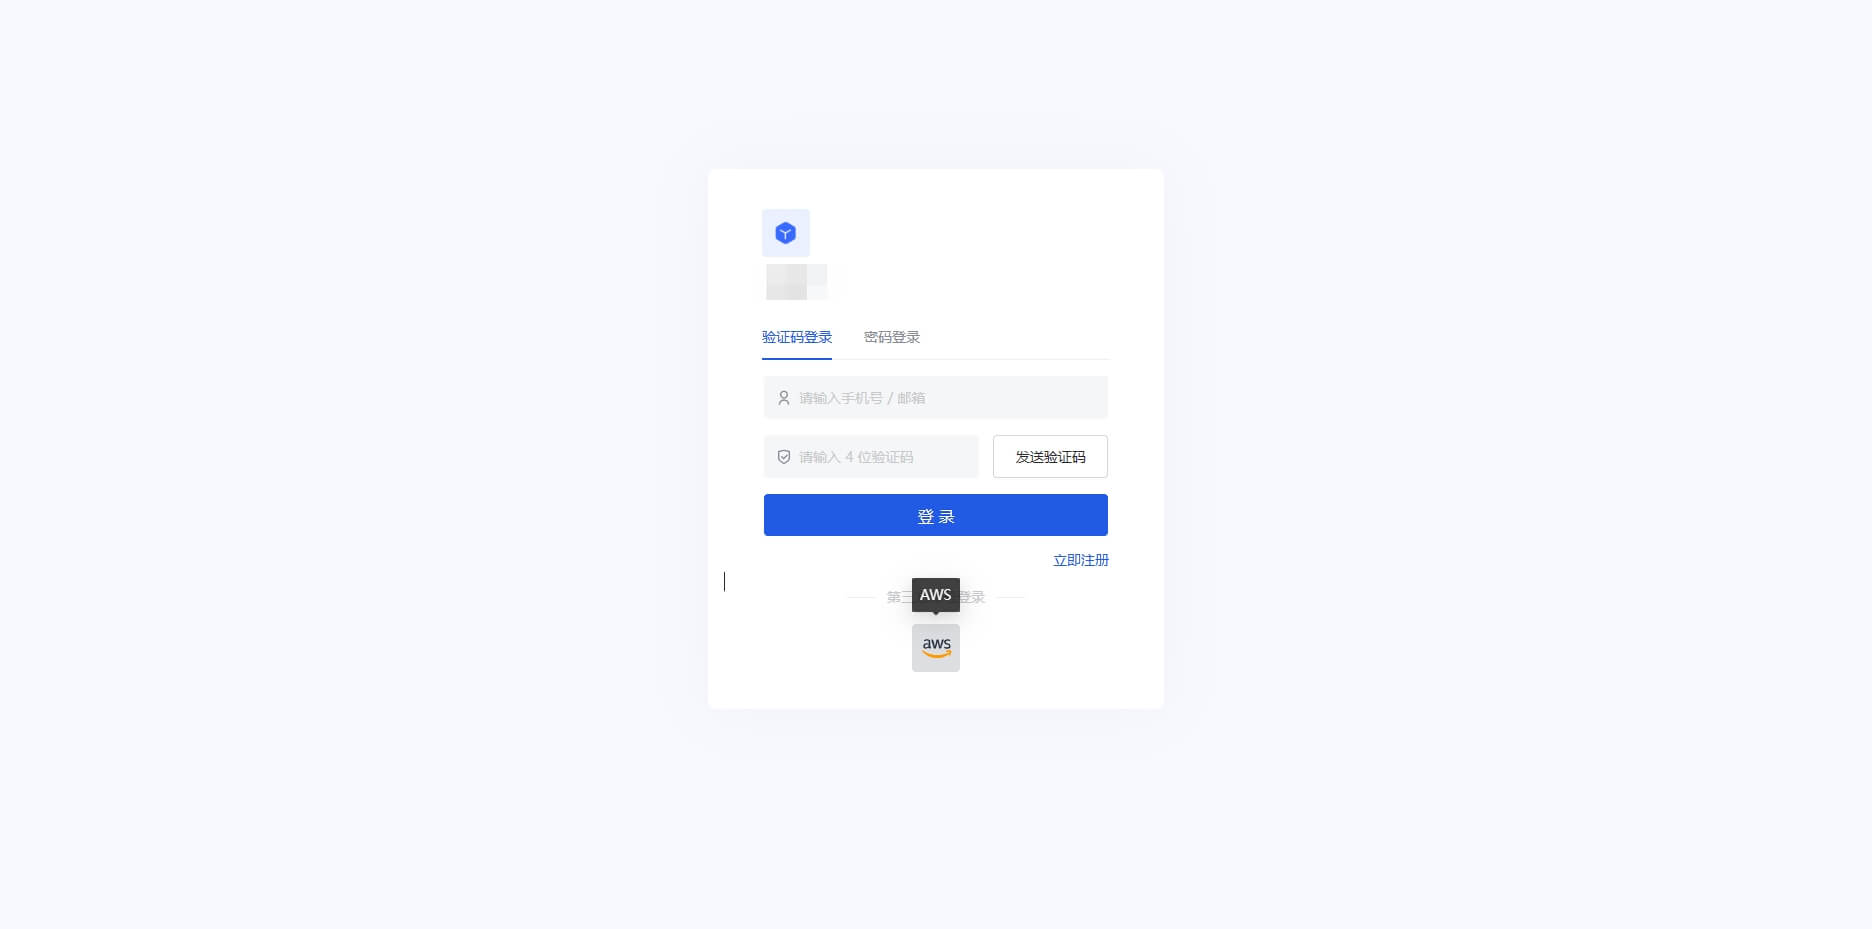
Alipay
Scenario Introduction
- Overview: Alipay social login is a user's secure login to a third-party application or website using Alipay as the identity source. Configure and enable Alipay social login in GenAuth to quickly obtain basic open information of Alipay through GenAuth and help users achieve password-free login.
- Application scenario: PC website, mobile terminal
- Terminal user preview image:
Original image 204 (in section "Scenario Introduction"; Chinese UI)
Notes
- Go to Alipay Open Platform to register an Alipay open account;
- Go to Developer Center Console and follow the instructions to create a Website Application. Please make sure that your application has obtained the Get Member Information capability, otherwise you will not be able to log in with Alipay;
- If you have not opened a GenAuth console account, please go to GenAuth Console to register a developer account;
Step 1: Create an Alipay application
1.1 Log in to the Alipay Open Platform, enter the console, click the Create Application button in My Applications>Web & Mobile Applications to create a new application.
Original image 205 (in section "Step 1: Create an Alipay application"; Chinese UI)
1.2 Enter the console of the created application, under the capability list, add capabilities, and add the "Get Member Information" capability.
Original image 206 (in section "Step 1: Create an Alipay application"; Chinese UI)
Original image 207 (in section "Step 1: Create an Alipay application"; Chinese UI)
1.3 Configure the development settings of the application. Under the development information under the development settings, set the interface signing method (key/method). You can generate a key using the Alipay Key Generator or OpenSSL (third-party tool) provided by Alipay. For detailed information on how to obtain the key, please refer to the Alipay Key Generation Instructions. For the key length, select RSA2, and for the key format, select PKCS1.
You need to save the application private key and application public key. Configure the application public key in Alipay and configure the application private key in the identity source of the GenAuth console.
Original image 208 (in section "Step 1: Create an Alipay application"; Chinese UI)
For the interface signing method (key/method), select the signing mode "public key", enter the application public key and save it, then click Save Settings.
Original image 209 (in section "Step 1: Create an Alipay application"; Chinese UI)
Step 2: Configure Alipay in the GenAuth console
2.1 On the "Social Identity Source" page of the GenAuth Console, click the "Create Social Identity Source" button to enter the "Select Social Identity Source" page.
Original image 210 (in section "Step 2: Configure Alipay in the GenAuth console"; Chinese UI)
2.2 On the "Social Identity Source"-"Select Social Identity Source" page of the GenAuth Console, click the "Alipay" identity source button to enter the "Alipay Login Mode" page.
Original image 211 (in section "Step 2: Configure Alipay in the GenAuth console"; Chinese UI)
2.3 On the "Social Identity Source"-"Alipay" page of the GenAuth Console, configure the relevant field information.
Original image 212 (in section "Step 2: Configure Alipay in the GenAuth console"; Chinese UI)
| Field/Function | Description |
|---|---|
| Unique ID | a. The unique ID consists of lowercase letters, numbers, and -, and its length is less than 32 bits. b. This is the unique ID of this connection and cannot be modified after setting. |
| Display Name | This name will be displayed on the button of the terminal user's login interface. |
| APPID | APPID, Alipay application ID. |
| Account ID | Account ID, Alipay main account ID, usually a number starting with 2088. |
| Application Private Key | Application private key, generated when setting up the Alipay application interface signature. |
| Callback Address | Alipay valid OAuth jump URI. This URL needs to be configured to the Alipay application authorization callback address. |
| Login Mode | After turning on "Login Only Mode", you can only log in to existing accounts and cannot create new accounts. Please choose carefully. |
After the configuration is completed, click the "Create" or "Save" button to complete the creation.
2.4 After creating the Alipay identity source on the GenAuth console, you need to configure the callback address to the authorization callback address of the application on the Alipay open platform.
Original image 213 (in section "Step 2: Configure Alipay in the GenAuth console"; Chinese UI)
Step 3: Development access
Recommended development access method: Use a hosted login page
Advantages and disadvantages description: Simple operation and maintenance, GenAuth is responsible for operation and maintenance. Each user pool has an independent secondary domain name; if you need to embed it into your application, you need to log in using the pop-up mode, that is: after clicking the login button, a window will pop up with the content of the login page hosted by GenAuth, or redirect the browser to the login page hosted by GenAuth.
Detailed access method:
3.1 Create an application in the GenAuth console. For details, see: How to create an application in GenAuth.
3.2 On the created Alipay identity source connection details page, open and associate an application created in the GenAuth console.
Original image 214 (in section "Step 3: Development access"; Chinese UI)
3.3 Experience Alipay third-party login on the login page.
Original image 215 (in section "Step 3: Development access"; Chinese UI)
Slack
Scenario Introduction
- Overview: Slack social login allows users to log in to third-party applications or websites securely using Slack as the identity source. Configure and enable Slack social login in GenAuth to quickly obtain Slack's basic open information and help users log in without passwords.
- Application scenario: PC website
- End user preview image:
Original image 216 (in section "Scenario Introduction"; Chinese UI)
Notes
- If you don't have a Slack account yet, please go to slack.com to register an account
- If you don't have a GenAuth console account, please go to GenAuth console to register a developer account
Step 1: Create an application on the Slack API platform
Please follow the Slack API documentation to create an application. You need to record the application's App ID, Client ID, Client Secret, and Signing Secret, which will be used later. You can also refer to the following process.
First, create an app through the Slack API: Your Apps and click “Create New App”. 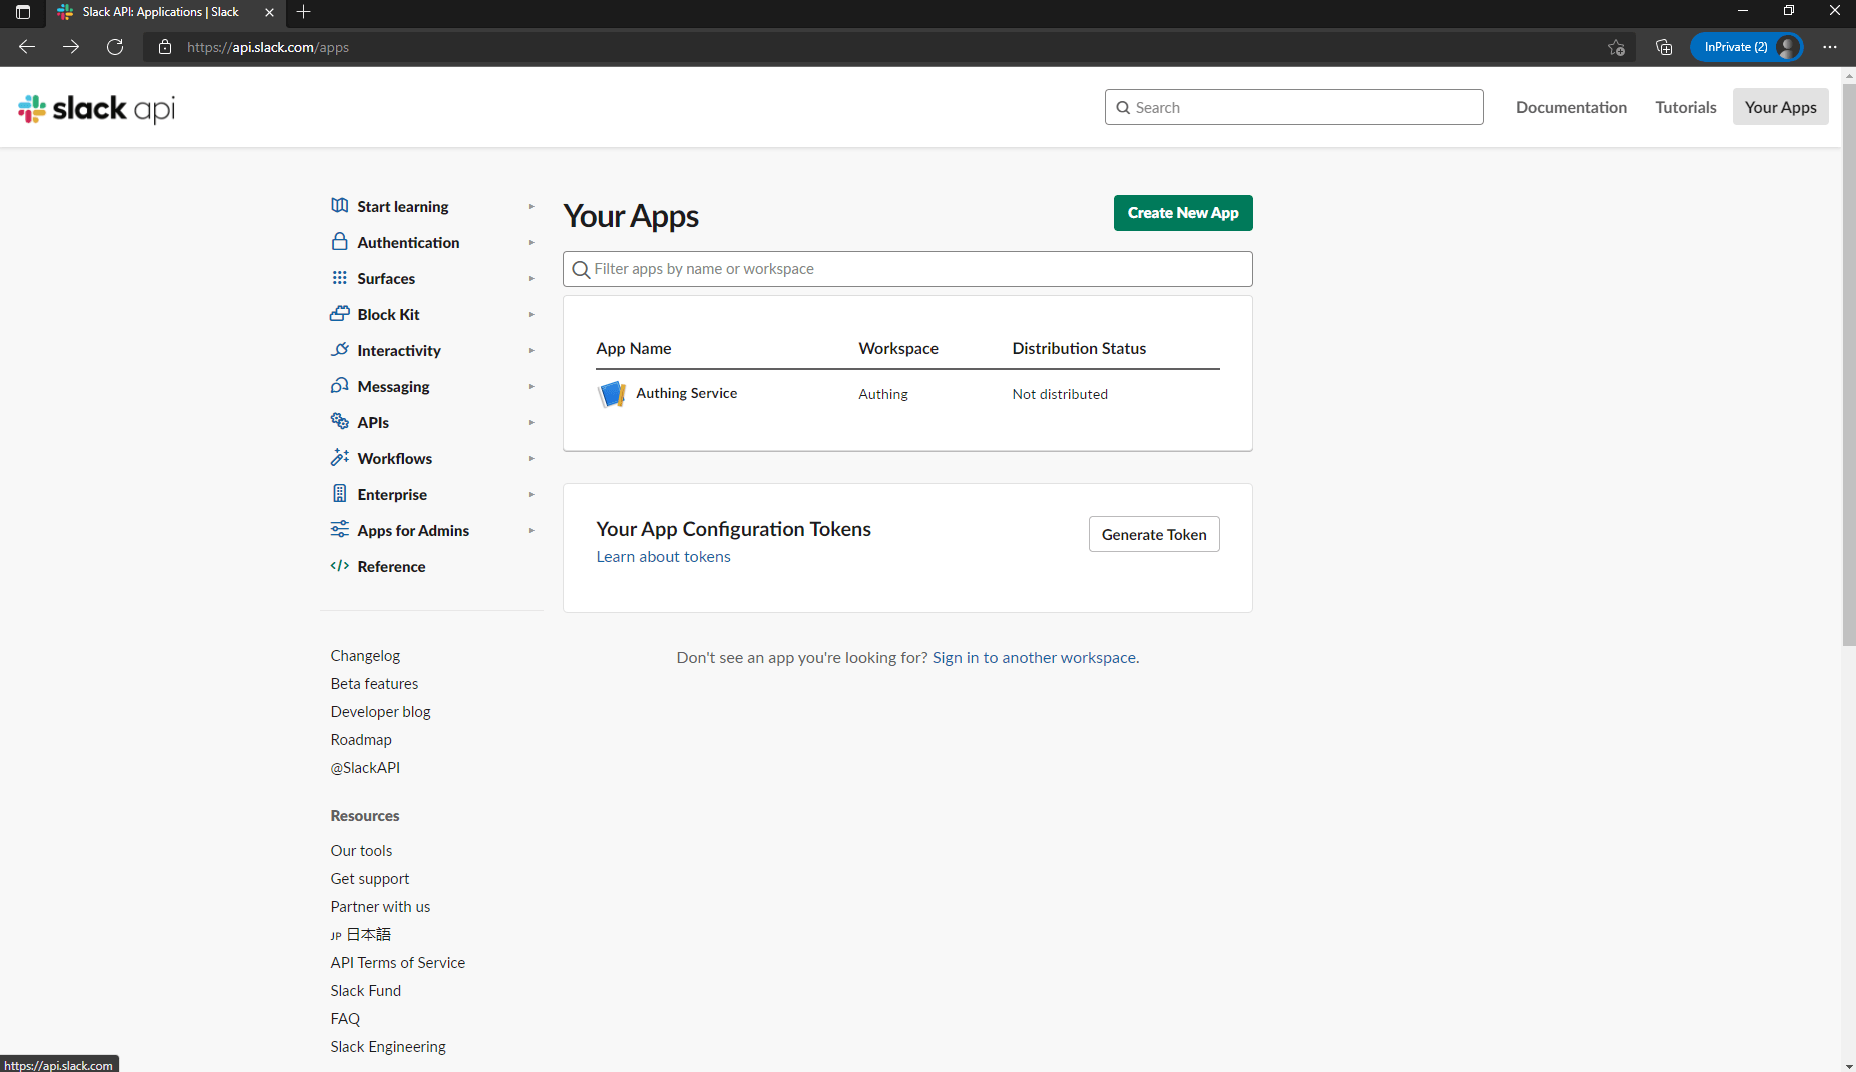
If you have never used Slack before, you may need to create a workspace first: click “Create Another Workplace” and complete the creation. 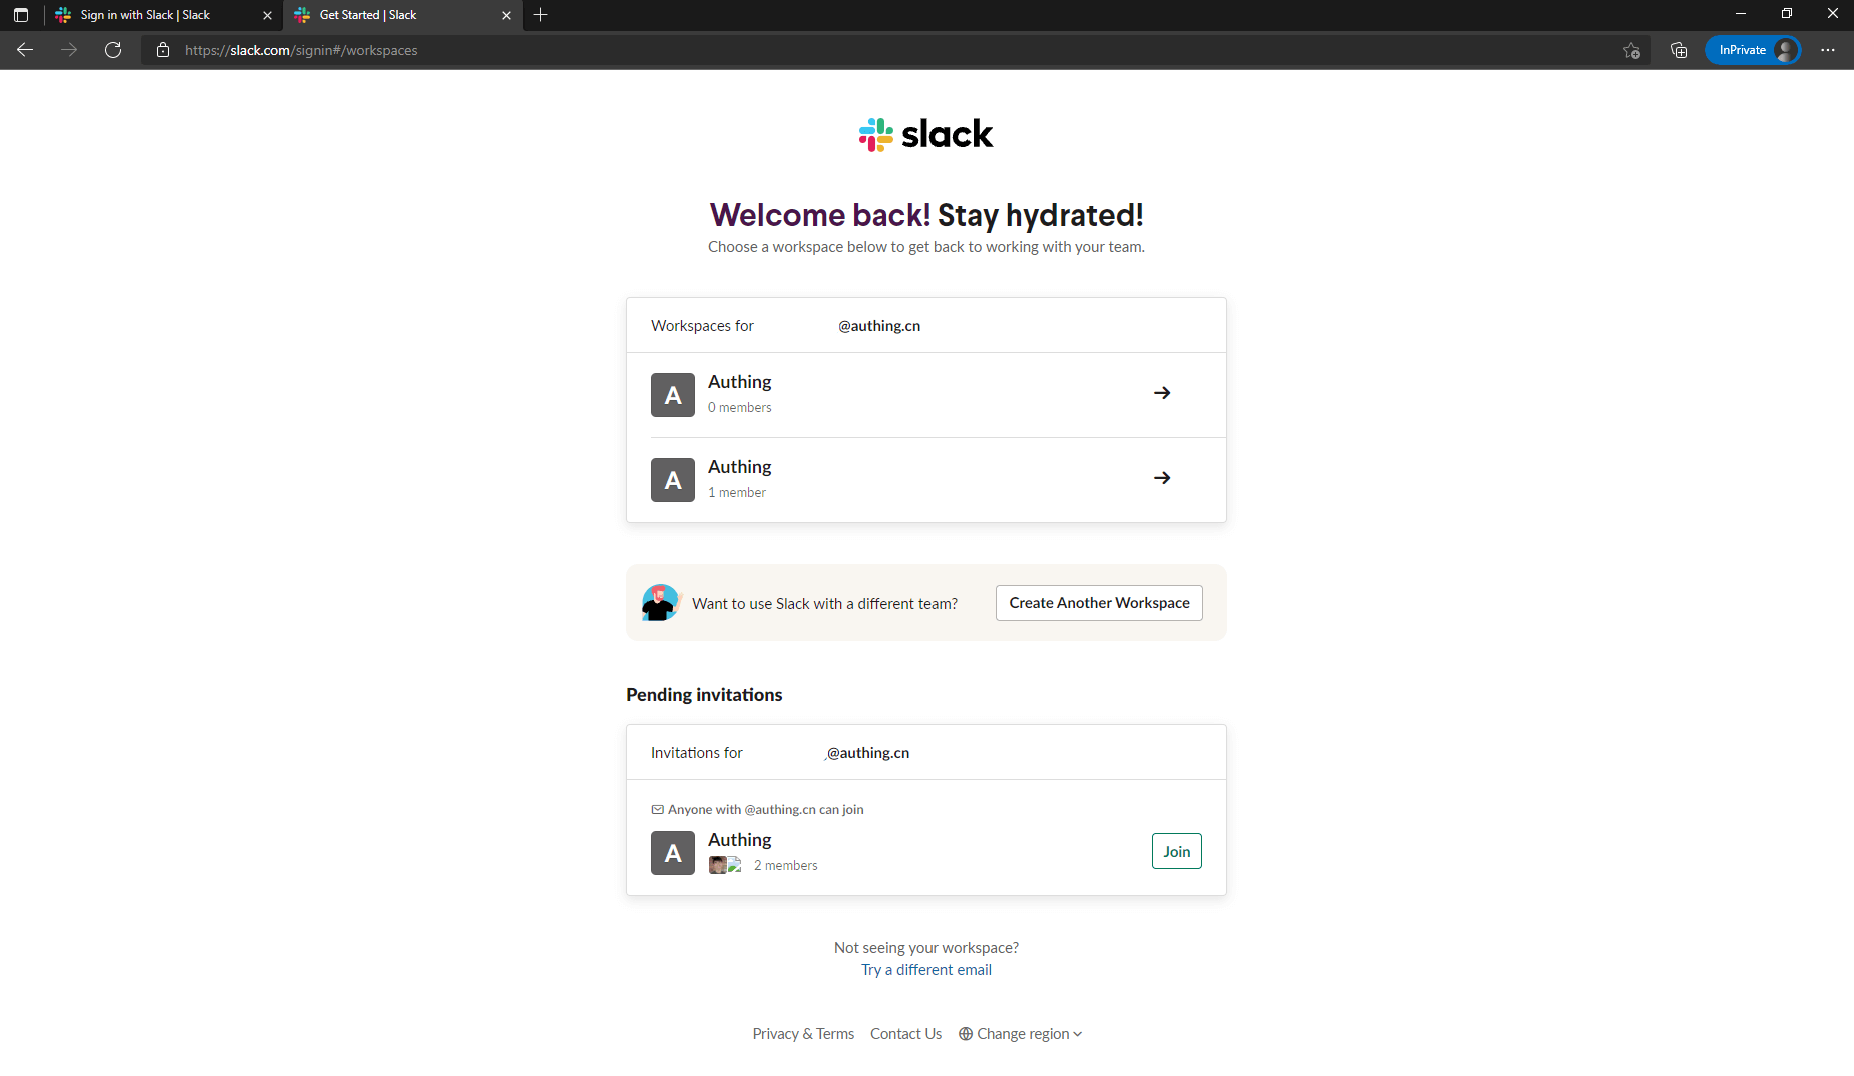
Once you have a workspace, return to the Slack API: Your Apps and click “Create New App” to continue creating the app. If prompted to select a creation method, select From scratch. After entering the App Name and selecting the Workspace, click “Create App” to complete the creation. 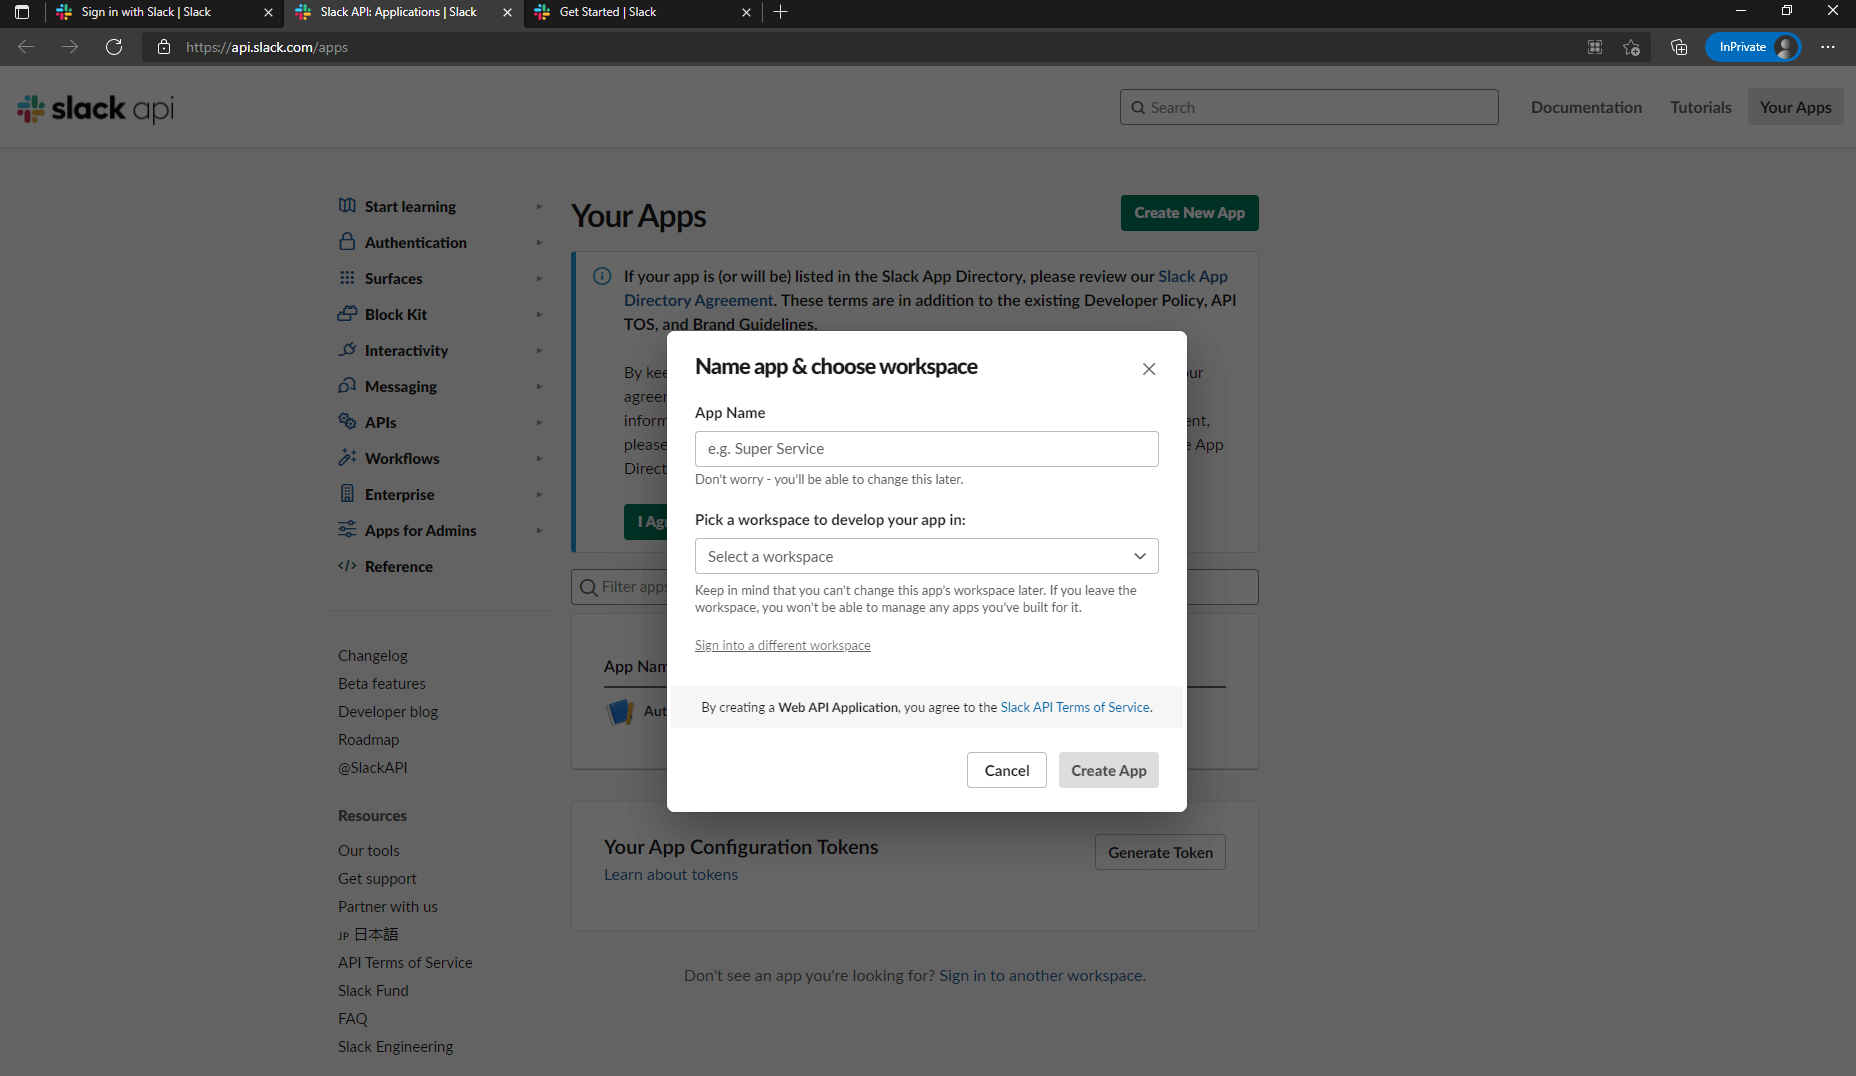
After the creation is completed, you will see the basic information about this app. Scroll down to App Credentials, where App ID, Client ID, Client Secret, Signing Secret are recorded. You may need them later. 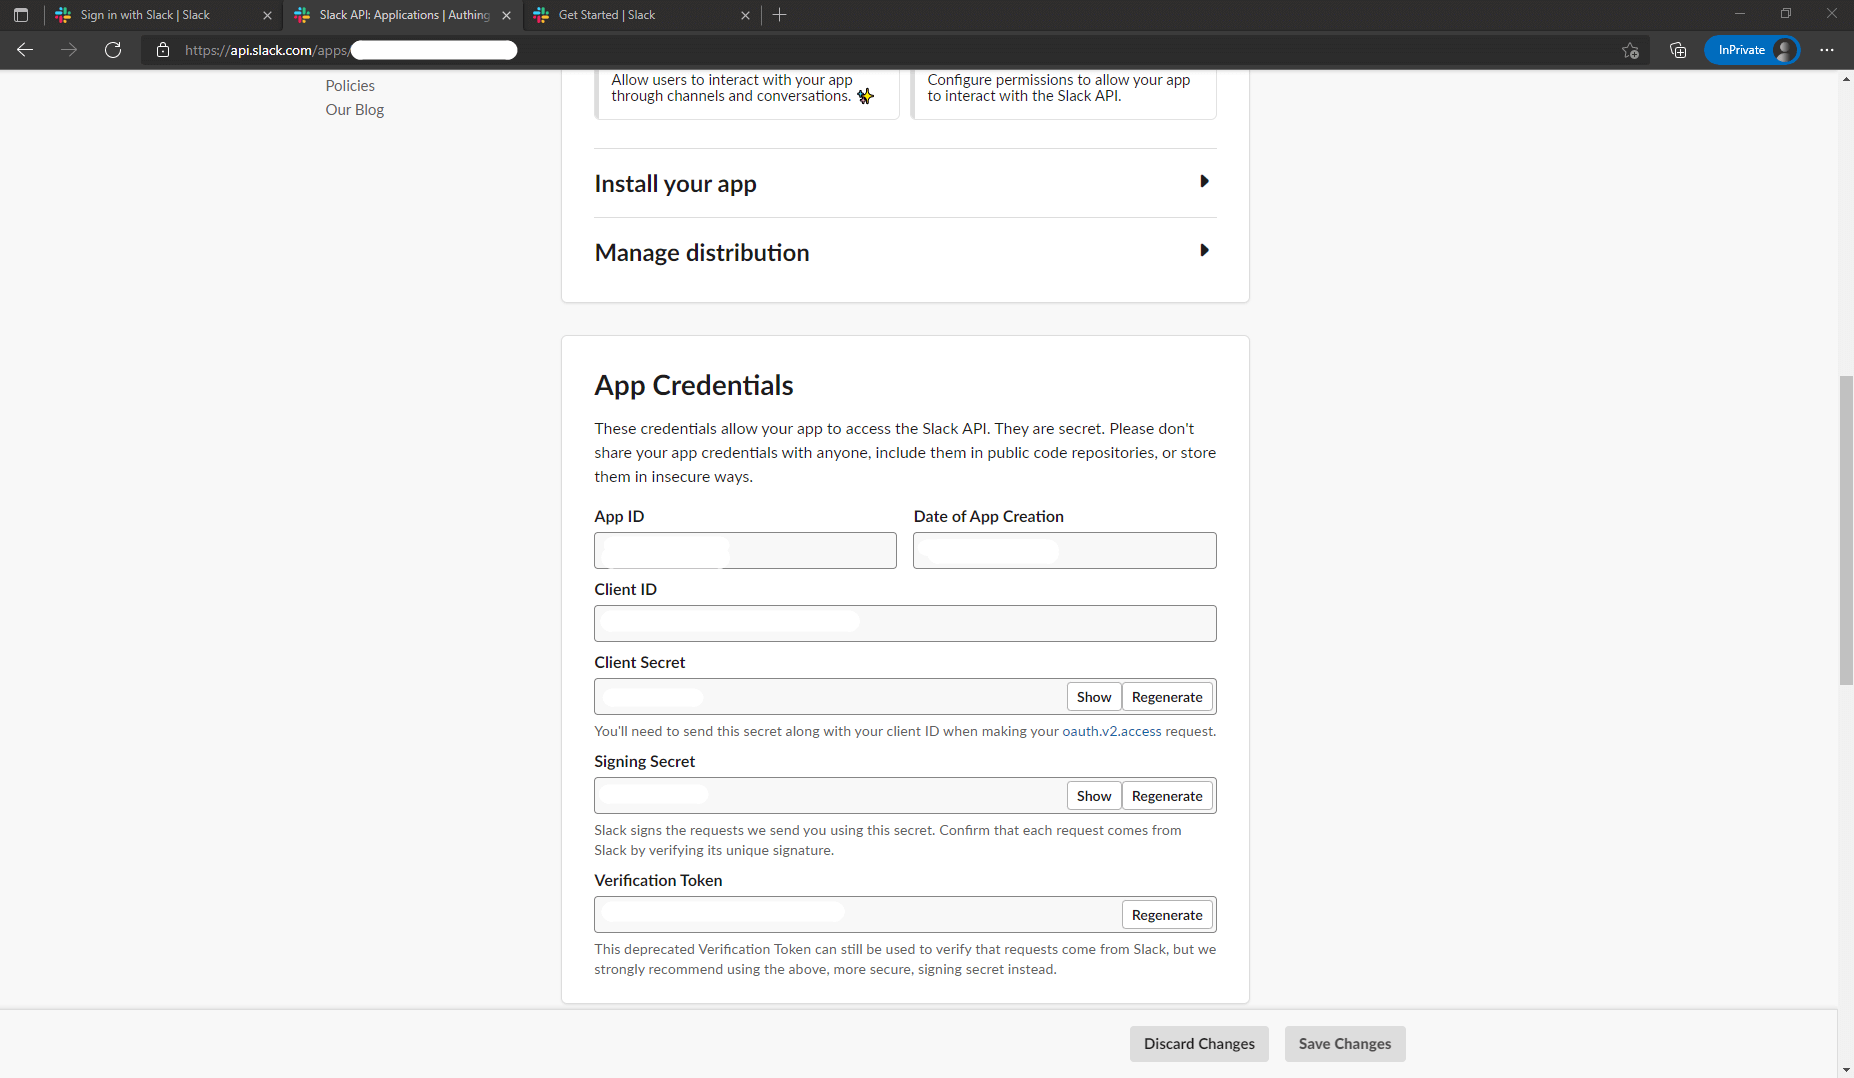
Finally, click "OAuth & Permissions" in the sidebar, find the "Redirect URLs" setting area on the page, click "Add New Redirect URL" to add the following callback address: https://core.genauth.ai/connection/social/{ YOUR_IDENTITYSOURCE_ID }/{ GEN_AUTH_USERPOOL_ID }/callback, you need to replace { YOUR_IDENTITYSOURCE_ID } with the Unique ID filled in the identity source you are creating in GenAuth, and { GEN_AUTH_USERPOOL_ID } with your User Pool ID. After adding, click "Save URLs" to save the settings. 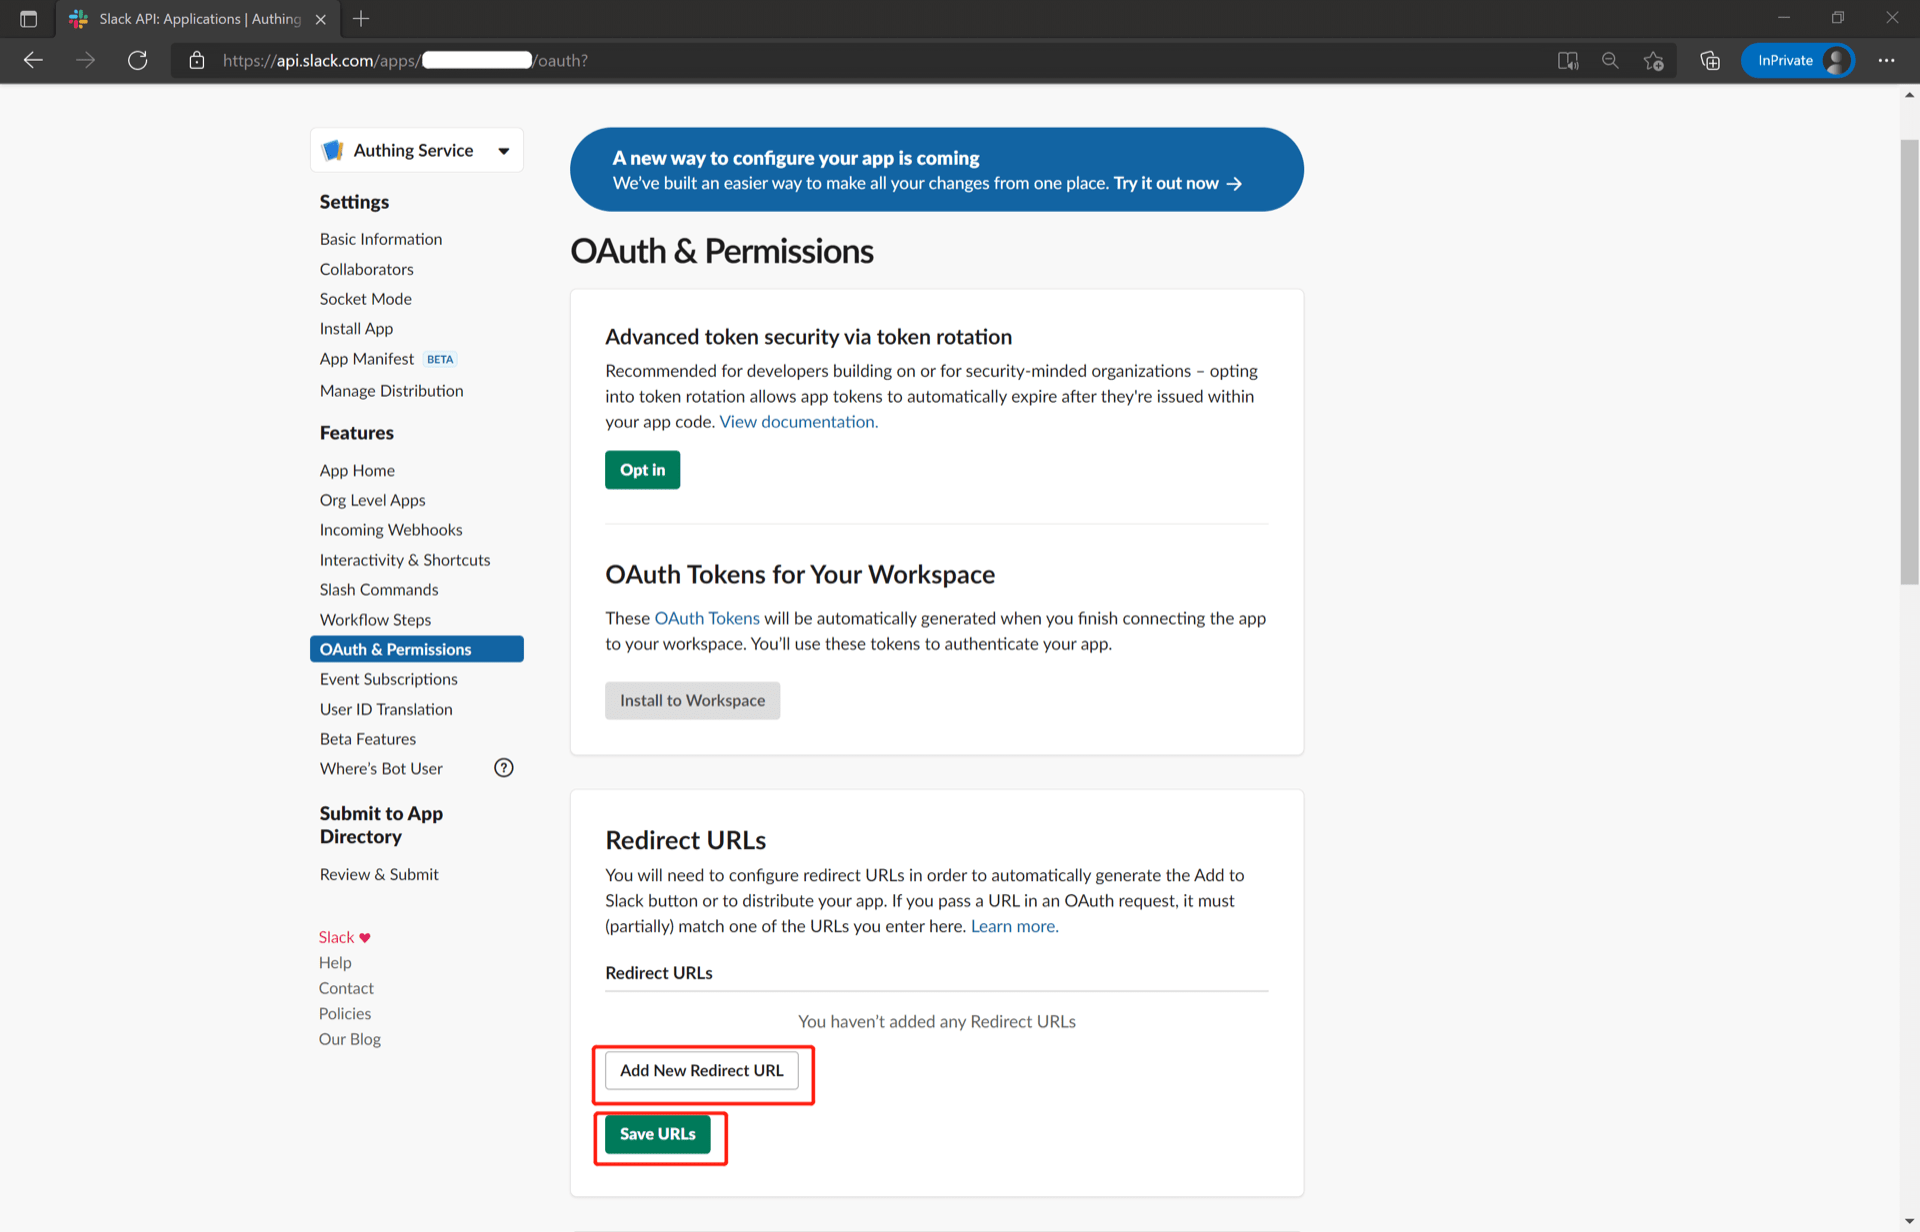
Step 2: Configure the Slack API application in the GenAuth console
2.1 On the "Social Identity Source" page of the GenAuth console, click the "Create Social Identity Source" button to enter the "Select Social Identity Source" page.
2.2 On the "Select Social Identity Source" page, click the "Slack" card. Original image 218 (in section "Step 2: Configure the Slack API application in the GenAuth console"; Chinese UI)
2.3 On the "Slack" configuration page, fill in the relevant field information. Original image 219 (in section "Step 2: Configure the Slack API application in the GenAuth console"; Chinese UI)
| Field | Description |
|---|---|
| Unique ID | a. The unique ID consists of lowercase letters, numbers, and -, and its length is less than 32 bits. b. This is the unique ID of this connection and cannot be modified after setting. |
| Display Name | This name will be displayed on the button of the end user's login interface. |
| Client ID | The Slack API application ID obtained in the previous step. |
| Client Secret | The Slack API application Secret obtained in the previous step. |
| Callback URL | You can fill in your business callback address. After the user completes the login, the browser will jump to this address. |
| Login Mode | After turning on "Login Only Mode", you can only log in to existing accounts, and you cannot create new accounts. Please choose carefully. |
| Account Identity Association | When "Account Identity Association" is not enabled, a new user is created by default when the user logs in through the identity source. After turning on "Account Identity Association", users can be allowed to log in directly to an existing account through "Field Matching" or "Query Binding". |
2.4 After the configuration is completed, click the "Create" or "Save" button to complete the creation.
Step 3: Development Access
Recommended Development Access Method: Use Hosted Login Page
Pros and Cons Description: Simple operation and maintenance, which is handled by GenAuth. Each user pool has an independent secondary domain name; if you need to embed it into your application, you need to use the pop-up mode to log in, that is: after clicking the login button, a window will pop up with the content of the GenAuth hosted login page, or redirect the browser to the GenAuth hosted login page.
Detailed access method:
3.1 Create an application in the GenAuth console. For details, see: How to create an application in GenAuth
3.2 On the created "Slack" identity source connection details page, open and associate an application created in the GenAuth console Original image 220 (in section "Step 3: Development Access"; Chinese UI)
3.3 Click the "Experience Login" button of the GenAuth console application, and experience the "Slack" login in the pop-up login window Original image 221 (in section "Step 3: Development Access"; Chinese UI)
Original image 222 (in section "Step 3: Development Access"; Chinese UI)
Slack mobile
Scenario Introduction
Overview
Slack social login allows users to log in to third-party applications or websites securely using Slack as the identity source. Configure and enable Slack social login in GenAuth to quickly obtain Slack's basic open information and help users log in without passwords.
Application scenarios
Mobile
End-user preview
Original image 223 (in section "End-user preview"; Chinese UI)
Notes
- If you don't have a Slack account, please go to slack.com to register an account
- If you don't have a GenAuth console account, please go to GenAuth console to register a developer account
Step 1: Create an application on the Slack API platform
Please follow the Slack API documentation to create an application. You need to record the application's App ID, Client ID, Client Secret, Signing Secret, which will be needed later. You can also refer to the following process.
First, create an app through Slack API: Your Apps and click "Create New App".
If you have never used Slack before, you may need to create a workspace first: click "Create Another Workplace" and complete the creation.
Once you have a workspace, return to Slack API: Your Apps and click "Create New App" to continue creating the app. If prompted to select a creation method, select From scratch. After entering the App Name and selecting the Workspace, click "Create App" to complete the creation.
After the creation is completed, you will see the basic information about this app. Scroll down to App Credentials, where App ID, Client ID, Client Secret, Signing Secret are recorded. You may need them later.
Finally, click "OAuth & Permissions" in the sidebar, find the "Redirect URLs" setting area on the page, click "Add New Redirect URL" to add the following callback address: https://core.genauth.ai/connection/social/{ YOUR_IDENTITYSOURCE_ID }/{ GEN_AUTH_USERPOOL_ID }/callback, you need to replace { YOUR_IDENTITYSOURCE_ID } with the Unique ID filled in the identity source you are creating in GenAuth, and { GEN_AUTH_USERPOOL_ID } with your User Pool ID. After adding, click "Save URLs" to save the settings.
Step 2: Configure Slack Mobile in the GenAuth console
2.1 On the "Social Identity Source" page of the GenAuth console, click the "Create Social Identity Source" button to enter the "Select Social Identity Source" page.
Original image 224 (in section "Step 2: Configure Slack Mobile in the GenAuth console"; Chinese UI)
2.2 On the "Select Social Identity Source" page, click the "Slack" card to enter the "Slack Mobile Login Mode" page. Original image 225 (in section "Step 2: Configure Slack Mobile in the GenAuth console"; Chinese UI)
2.3 On the "Slack Mobile" configuration page, fill in the relevant field information. Original image 226 (in section "Step 2: Configure Slack Mobile in the GenAuth console"; Chinese UI)
| Field | Description |
|---|---|
| Unique ID | a. The unique ID consists of lowercase letters, numbers, and -, and is less than 32 bits long. b. This is the unique ID for this connection and cannot be modified after it is set. |
| Display Name | This name will be displayed on the button on the end user's login interface. |
| Client ID | The Slack Client ID obtained in the previous step. |
| Client Secret | The Slack Client Secret obtained in the previous step. |
| Login Mode | After enabling "Login Only Mode", you can only log in to existing accounts and cannot create new accounts. Please choose carefully. |
| Account Identity Association | When "Account Identity Association" is not enabled, a new user is created by default when a user logs in through an identity source. After enabling "Account Identity Association", users can be allowed to log in to existing accounts directly through "Field Matching". |
2.4 After the configuration is completed, click the "Create" or "Save" button to complete the creation.
Step 3: Development Access
Recommended development access method: SDK
Advantages and disadvantages: Simple operation and maintenance, which is responsible for operation and maintenance by GenAuth. Each user pool has an independent secondary domain name; if you need to embed it in your application, you need to log in using the pop-up mode, that is: after clicking the login button, a window will pop up with the content of the login page hosted by GenAuth, or redirect the browser to the login page hosted by GenAuth.
Detailed access method:
3.1 Create an application in the GenAuth console. For details, see: How to create an application in GenAuth
3.2 On the created "Slack Mobile" identity source connection details page, open and associate an application created in the GenAuth console Original image 227 (in section "Step 3: Development Access"; Chinese UI)
3.3 Experience Slack third-party login on the login page (as shown in the end user preview).
Gitee
Scenario Introduction
- Overview: Gitee social login allows users to log in to third-party applications or websites securely using Gitee as the identity source. Configure and enable Gitee social login in GenAuth to quickly obtain Gitee's basic open information and help users log in without passwords.
- Application scenario: PC website
- End user preview:
Original image 228 (in section "Scenario Introduction"; Chinese UI)
Notes
- If you don’t have a Gitee account yet, please go to gitee.com to register an account
- If you haven’t opened a GenAuth console account, please go to GenAuth console to register a developer account
Step 1: Create an OAuth application in Gitee
Go to Gitee’s application management page and click "Create an application": Original image 229 (in section "Step 1: Create an OAuth application in Gitee"; Chinese UI)
On the Create an application page, configure the following information:
- Application callback address: Fill in
https://core.genauth.ai/connection/social/{Unique ID}/{User Pool ID}/callback, you need to replace{Unique ID}with the one you are using Fill in theUnique Identifierof the identity source created by GenAuth, and replace{User Pool ID}with your User Pool ID
Original image 230 (in section "Step 1: Create an OAuth application in Gitee"; Chinese UI)
Finally, click "Create Application". After the creation is completed, you need to record the Client ID and Client Secret, which will be used in the next step. Original image 231 (in section "Step 1: Create an OAuth application in Gitee"; Chinese UI)
Step 2: Configure Gitee application configuration in the GenAuth console
2.1 Please click the "Create Social Identity Source" button on the "Social Identity Source" page of the GenAuth console to enter the "Select Social Identity Source" page.
2.2 On the "Select Social Identity Source" page, click the "Gitee" card. Original image 233 (in section "Step 2: Configure Gitee application configuration in the GenAuth console"; Chinese UI)
2.3 On the "Gitee" configuration page, fill in the relevant field information. Original image 234 (in section "Step 2: Configure Gitee application configuration in the GenAuth console"; Chinese UI)
| Field | Description |
|---|---|
| Unique ID | a. The unique ID consists of lowercase letters, numbers, and -, and its length is less than 32 bits. b. This is the unique ID of this connection and cannot be modified after setting. |
| Display Name | This name will be displayed on the button of the terminal user's login interface. |
| Client ID | The Gitee application ID obtained in the previous step. |
| Client Secret | The Gitee application Secret obtained in the previous step. |
| Callback URL | You can fill in your business callback address. After the user completes the login, the browser will jump to this address. |
| Scopes | By default, GenAuth will only apply for authorization of basic user information (such as avatar, nickname, etc.) from the user. If you need more advanced permissions, you can check the corresponding options. |
| Login mode | After turning on "Login only mode", you can only log in to existing accounts, and you cannot create new accounts. Please choose carefully. |
| Account identity association | When "Account identity association" is not turned on, a new user is created by default when the user logs in through the identity source. After turning on "Account identity association", users can be allowed to log in directly to existing accounts through "field matching" or "query binding". |
2.4 After the configuration is completed, click the "Create" or "Save" button to complete the creation.
Step 3: Development access
Recommended development access method: Use hosted login page
Advantages and disadvantages description: Simple operation and maintenance, GenAuth is responsible for operation and maintenance. Each user pool has an independent secondary domain name; if you need to embed it in your application, you need to use the pop-up mode to log in, that is: after clicking the login button, a window will pop up with the login page hosted by GenAuth, or redirect the browser to the login page hosted by GenAuth.
Detailed access method:
3.1 Create an application in the GenAuth console. For details, see: How to create an application in GenAuth
3.2 On the created "Gitee" identity source connection details page, open and associate an application created in the GenAuth console
Original image 235 (in section "Step 3: Development access"; Chinese UI)
3.3 Click the "Experience Login" button of the GenAuth console application to experience the "Gitee" login in the pop-up login window
Original image 236 (in section "Step 3: Development access"; Chinese UI)
Original image 237 (in section "Step 3: Development access"; Chinese UI)
Gitee Mobile
Scenario Introduction
Overview
Gitee social login allows users to log in to third-party applications or websites securely using Gitee as the identity source. Configure and enable Gitee social login in GenAuth to quickly obtain Gitee's basic open information and help users log in without passwords.
Application scenarios
Mobile
Preview image for terminal users:
Original image 238 (in section "Preview image for terminal users"; Chinese UI)
Notes
- If you don't have a Gitee account, please go to gitee.com to register an account
- If you haven't opened a GenAuth console account, please go to GenAuth console to register a developer account
Step 1: Create an OAuth application in Gitee
Enter Gitee's application management page and click "Create application": Original image 239 (in section "Step 1: Create an OAuth application in Gitee"; Chinese UI)
On the Create application page, configure the following information:
- Application callback address: Fill in
https://core.genauth.ai/connection/social/{Unique ID}/{User Pool ID}/callback. You need to replace{Unique ID}with theUnique IDfilled in the identity source you are creating in GenAuth, and replace{User Pool ID}with your User Pool ID
Original image 240 (in section "Step 1: Create an OAuth application in Gitee"; Chinese UI)
Finally, click "Create Application". After the creation is completed, you need to record the Client ID and Client Secret, which will be used in the next step. Original image 241 (in section "Step 1: Create an OAuth application in Gitee"; Chinese UI)
Step 2: Configure Gitee application configuration in the GenAuth console
2.1 On the "Social Identity Source" page of the GenAuth console, click the "Create Social Identity Source" button to enter the "Select Social Identity Source" page.
2.2 On the "Select Social Identity Source" page, click the "Gitee"-"Gitee Mobile" card. Original image 243 (in section "Step 2: Configure Gitee application configuration in the GenAuth console"; Chinese UI)
2.3 On the "Gitee Mobile" configuration page, fill in the relevant field information. Original image 244 (in section "Step 2: Configure Gitee application configuration in the GenAuth console"; Chinese UI)
| Field | Description |
|---|---|
| Unique ID | a. The unique ID consists of lowercase letters, numbers, and -, and its length is less than 32 bits. b. This is the unique ID of this connection and cannot be modified after setting. |
| Display Name | This name will be displayed on the button of the terminal user's login interface. |
| Client ID | The Gitee application ID obtained in the previous step. |
| Client Secret | The Gitee application Secret obtained in the previous step. |
| Login Mode | After turning on "Login Only Mode", you can only log in to existing accounts and cannot create new accounts. Please choose carefully. |
| Account Identity Association | When "Account Identity Association" is not turned on, a new user is created by default when a user logs in through an identity source. After turning on "Account Identity Association", users can be allowed to log in directly to existing accounts through "Field Matching" or "Query Binding". |
2.4 After the configuration is completed, click the "Create" or "Save" button to complete the creation.
Step 3: Development Access
Recommended development access method: SDK
Advantages and disadvantages: Simple operation and maintenance, which is responsible for operation and maintenance by GenAuth. Each user pool has an independent secondary domain name; if you need to embed it in your application, you need to log in using the pop-up mode, that is: after clicking the login button, a window will pop up with the content of the login page hosted by GenAuth, or redirect the browser to the login page hosted by GenAuth.
Detailed access method:
3.1 Create an application in the GenAuth console. For details, see: How to create an application in GenAuth
3.2 On the created "Gitee Mobile" identity source connection details page, open and associate an application created in the GenAuth console
Original image 245 (in section "Step 3: Development Access"; Chinese UI)
3.3 Experience Gitee third-party login on the login page (as shown in the end user preview).
GitLab
Scenario Introduction
Overview
GitLab social login allows users to log in to third-party applications or websites securely using GitLab as the identity source. Configure and enable GitLab social login in GenAuth to quickly obtain basic public information of GitLab and help users log in without passwords.
Application Scenario
PC Website
Terminal User Preview
Original image 246 (in section "Terminal User Preview"; Chinese UI)
Preparation
- If you don't have a GitLab account yet, please go to GitLab.com to register an account.
- If you have not opened a GenAuth console account, please go to the GenAuth console to register a developer account.
Configuration steps
Step 1: Configure GitLab's unique identifier in the GenAuth console
- In the GenAuth console, in Identity Source Management->Social Identity Source, click the Create Social Identity Source button to enter the Select Social Identity Source page.
- Click the "GitLab" card.
- Set the unique identifier on the GitLab configuration page.
- Record the callback address that is automatically generated based on the unique identifier. You will need it later. Leave this page aside for now and configure other information later.
Step 2: Create an application on GitLab (or your GitLab instance)
- Click your profile picture in the upper right corner and click Edit Profile.
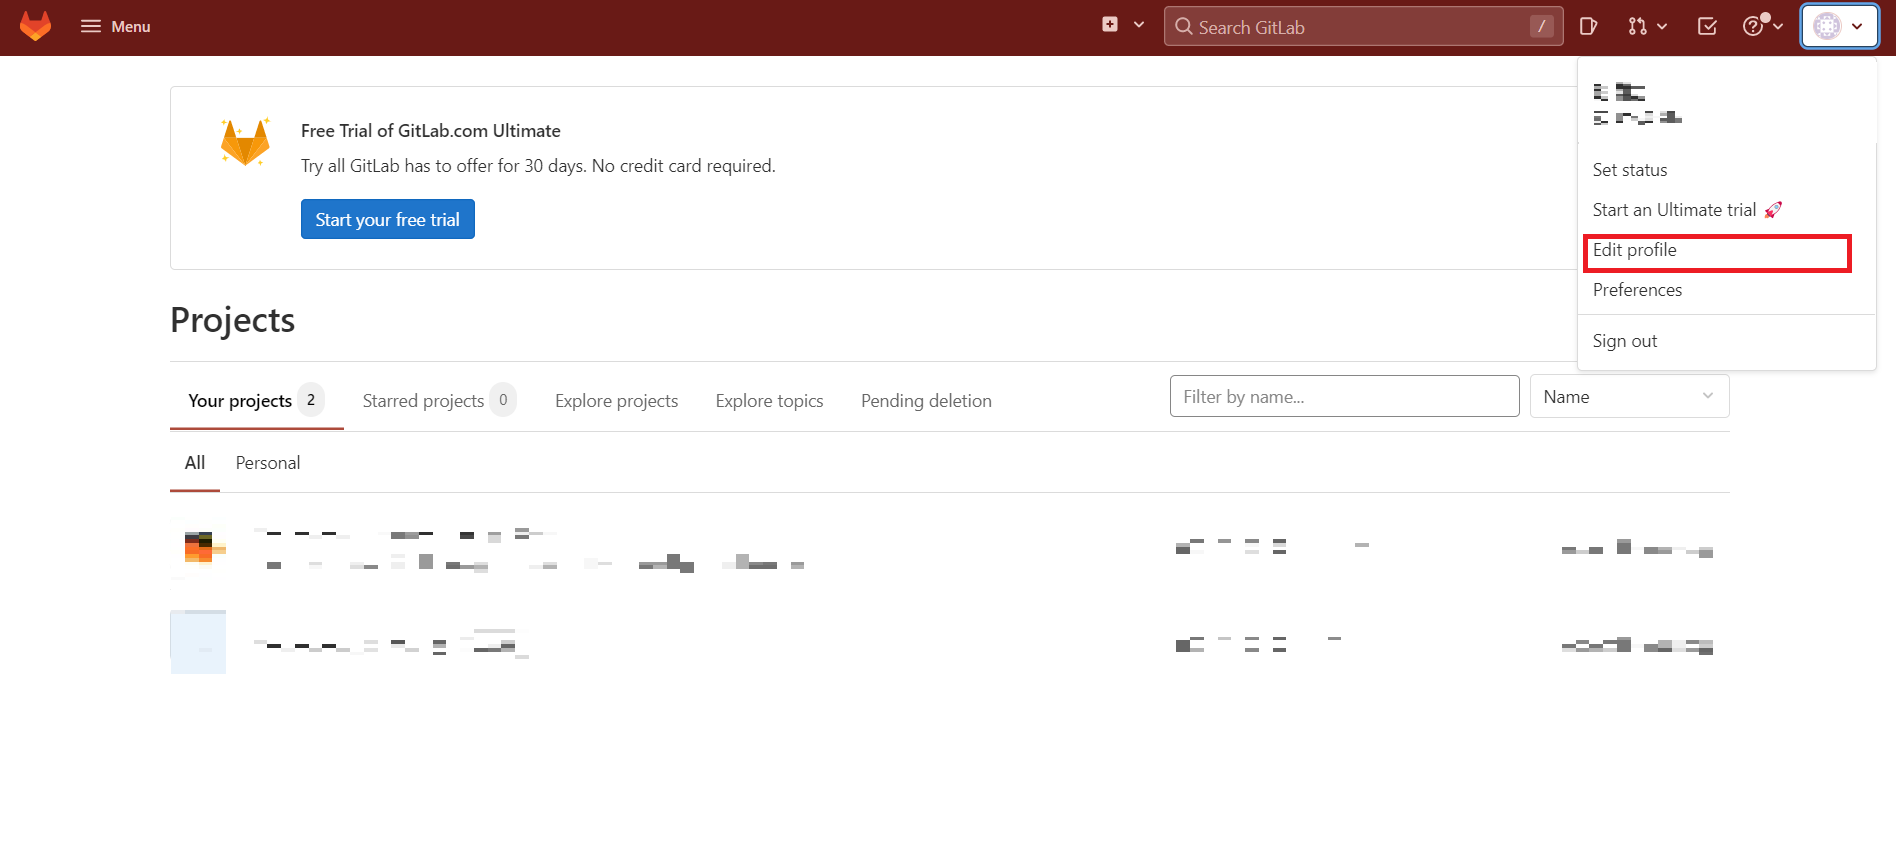
- Click Applications in the left navigation bar.
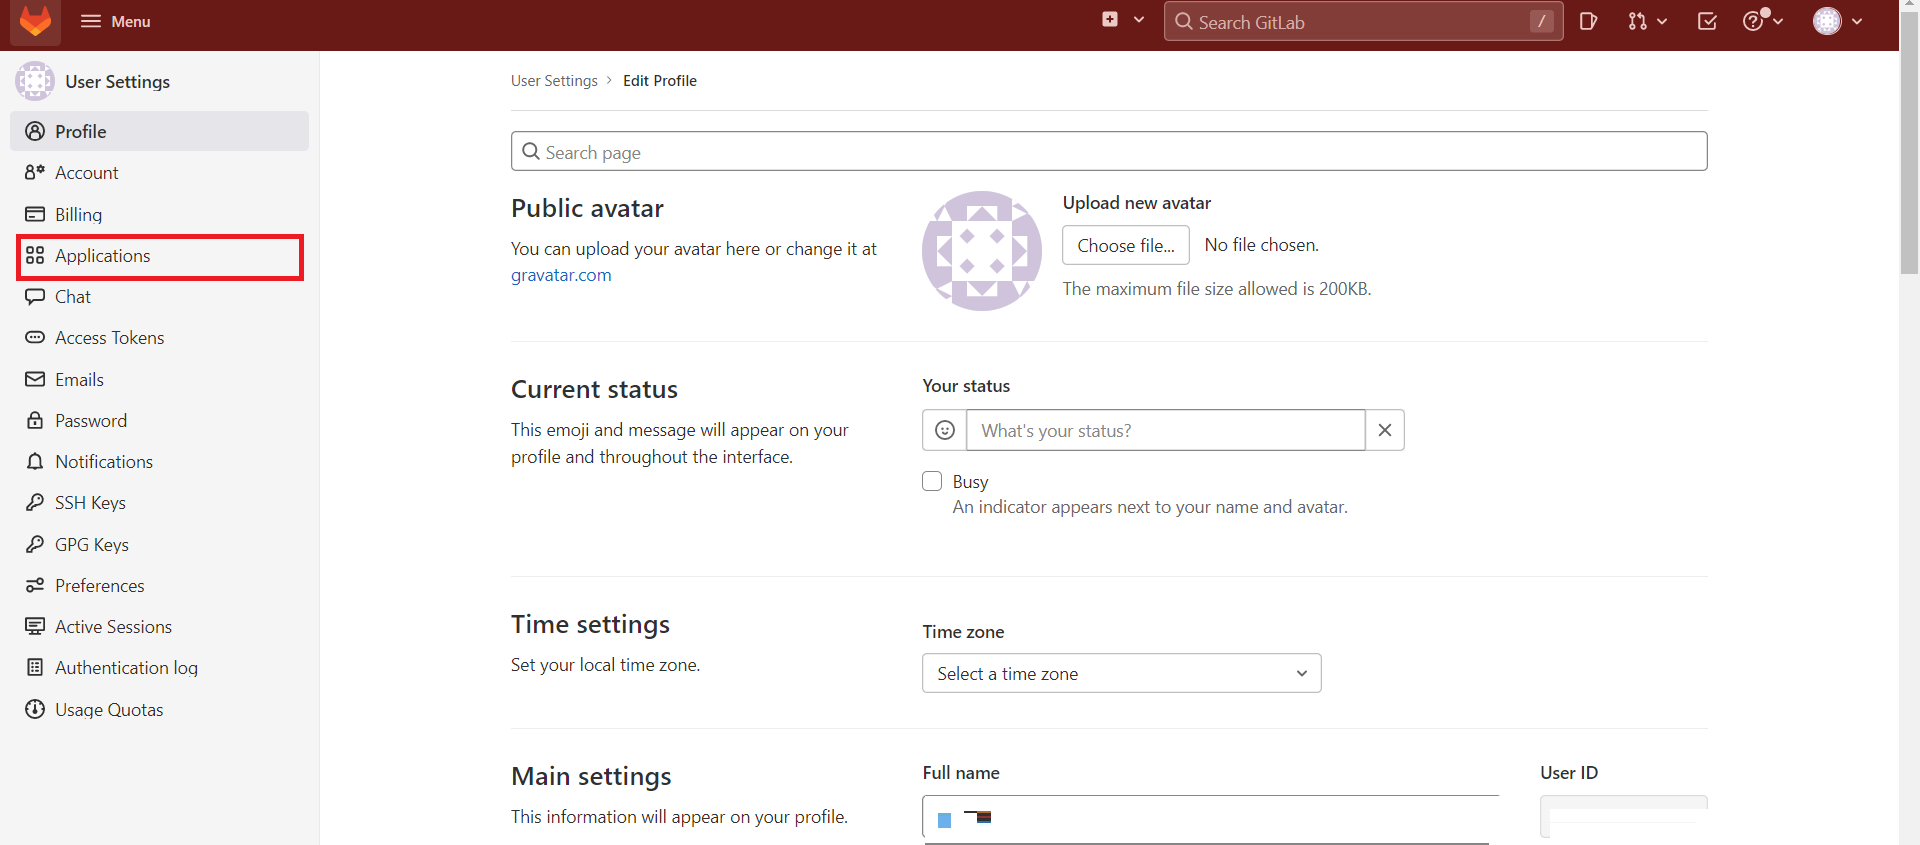
- Configure the application name.
- Configure Redirect URI and fill in the callback address you just recorded.
- Add Scopes: Check
apiandread_user.
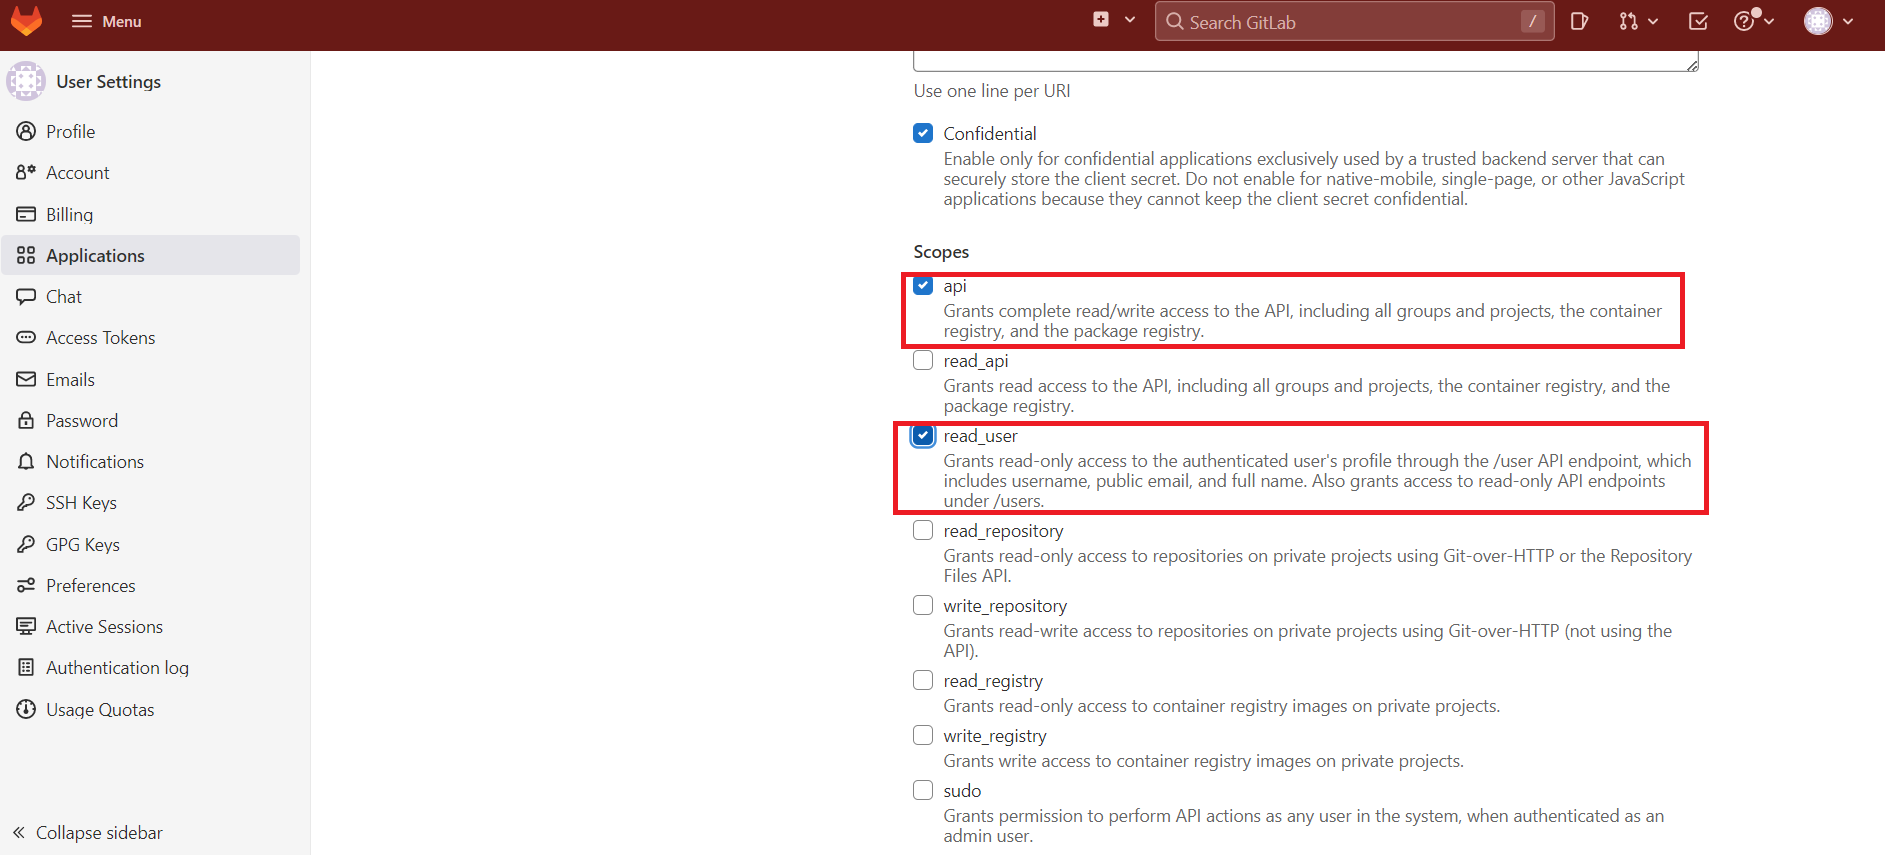
Click Save Application.
After the creation is complete, record the Application ID and Secret, which will be used in the next step.
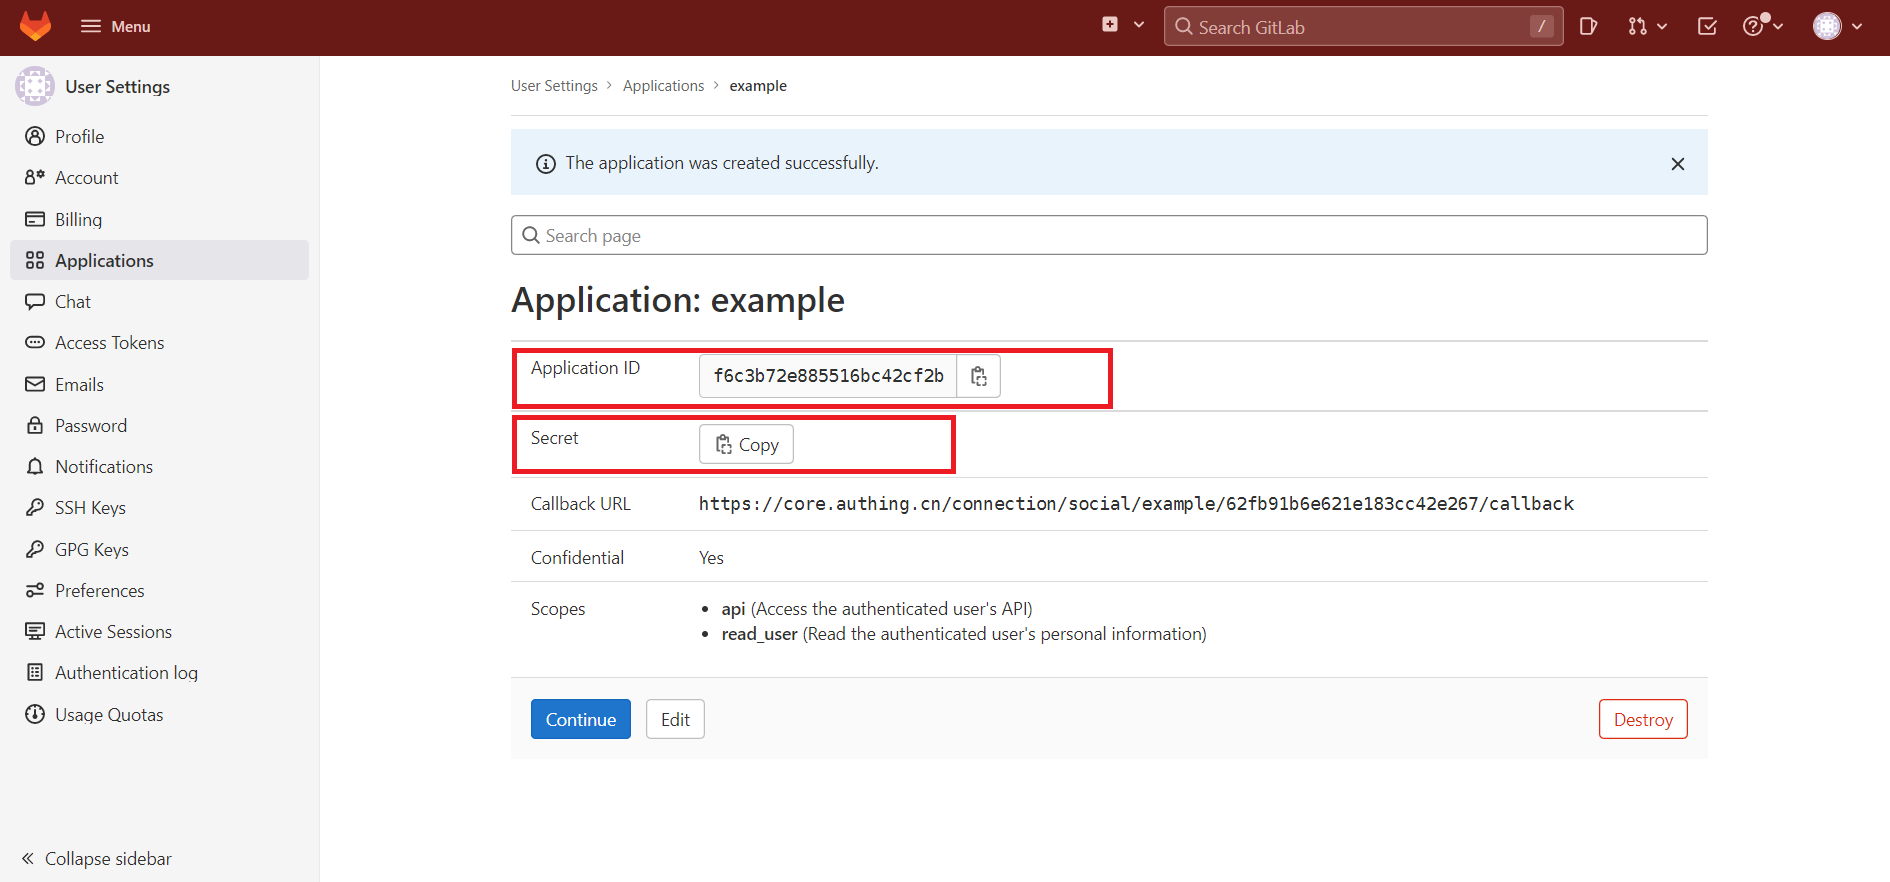
Step 3: Complete the configuration of Gitlab other information in the console
- Fill in the Application ID and Secret just recorded.
- Choose to modify other information. If you do not modify, use the default option (this step is optional).
| Field | Description |
|---|---|
| Unique ID | _ The unique ID consists of lowercase letters, numbers, and -, and is less than 32 characters long. _ This is the unique ID for this connection and cannot be modified after setting. |
| Display Name | This name will be displayed on the button of the end user's login interface. |
| Base URL | By default, GitLab.com is used as the authentication endpoint. You can also specify any private GitLab instance, such as https://gitlab.example.com/. |
| Application ID | The GitLab application ID obtained in the previous step. |
| Secret | The GitLab application key obtained in the previous step. |
| Login Mode | After turning on Login-only mode, you can only log in to existing accounts, and cannot create new accounts. Please choose carefully. |
| Account Identity Association | When Account Identity Association is not enabled, a new user is created by default when a user logs in through an identity source; when Account Identity Association is enabled, users can log in directly to an existing account through Field Match or Query Binding. |
- After the configuration is complete, click Create or Save to complete the creation.
Step 4: Development Access
Recommended Development Access Method
Use a hosted login page.
Advantages and Disadvantages
Operation and maintenance are simple, and GenAuth is responsible for operation and maintenance. Each user pool has an independent second-level domain name. If you need to embed it into your application, you need to log in using the pop-up mode, that is: after clicking the Login button, a window will pop up with the login page hosted by GenAuth, or redirect the browser to the login page hosted by GenAuth.
Detailed access method
Create an application in the GenAuth console. For details, see: How to create an application in GenAuth.
On the created "GitLab" identity source connection details page, open and associate an application created in the GenAuth console.
Original image 255 (in section "Detailed access method"; Chinese UI)
- Click the GenAuth console application Experience login button to experience GitLab login in the pop-up login window.
Original image 256 (in section "Detailed access method"; Chinese UI)
GitLab Mobile
Scenario Introduction
Overview
GitLab social login allows users to log in to third-party applications or websites securely using GitLab as the identity source. Configure and enable GitLab social login in GenAuth to quickly obtain GitLab's basic open information and help users log in without passwords.
Application Scenarios
Mobile
End User Preview
Original image 257 (in section "End User Preview"; Chinese UI)
Notes
- If you don't have a GitLab account yet, please go to GitLab.com to register an account.
- If you don't have a GenAuth console account, please go to the GenAuth console to register a developer account.
Step 1: Create an application on GitLab (or your GitLab instance)
- Click your profile picture in the upper right corner and click Edit Profile.
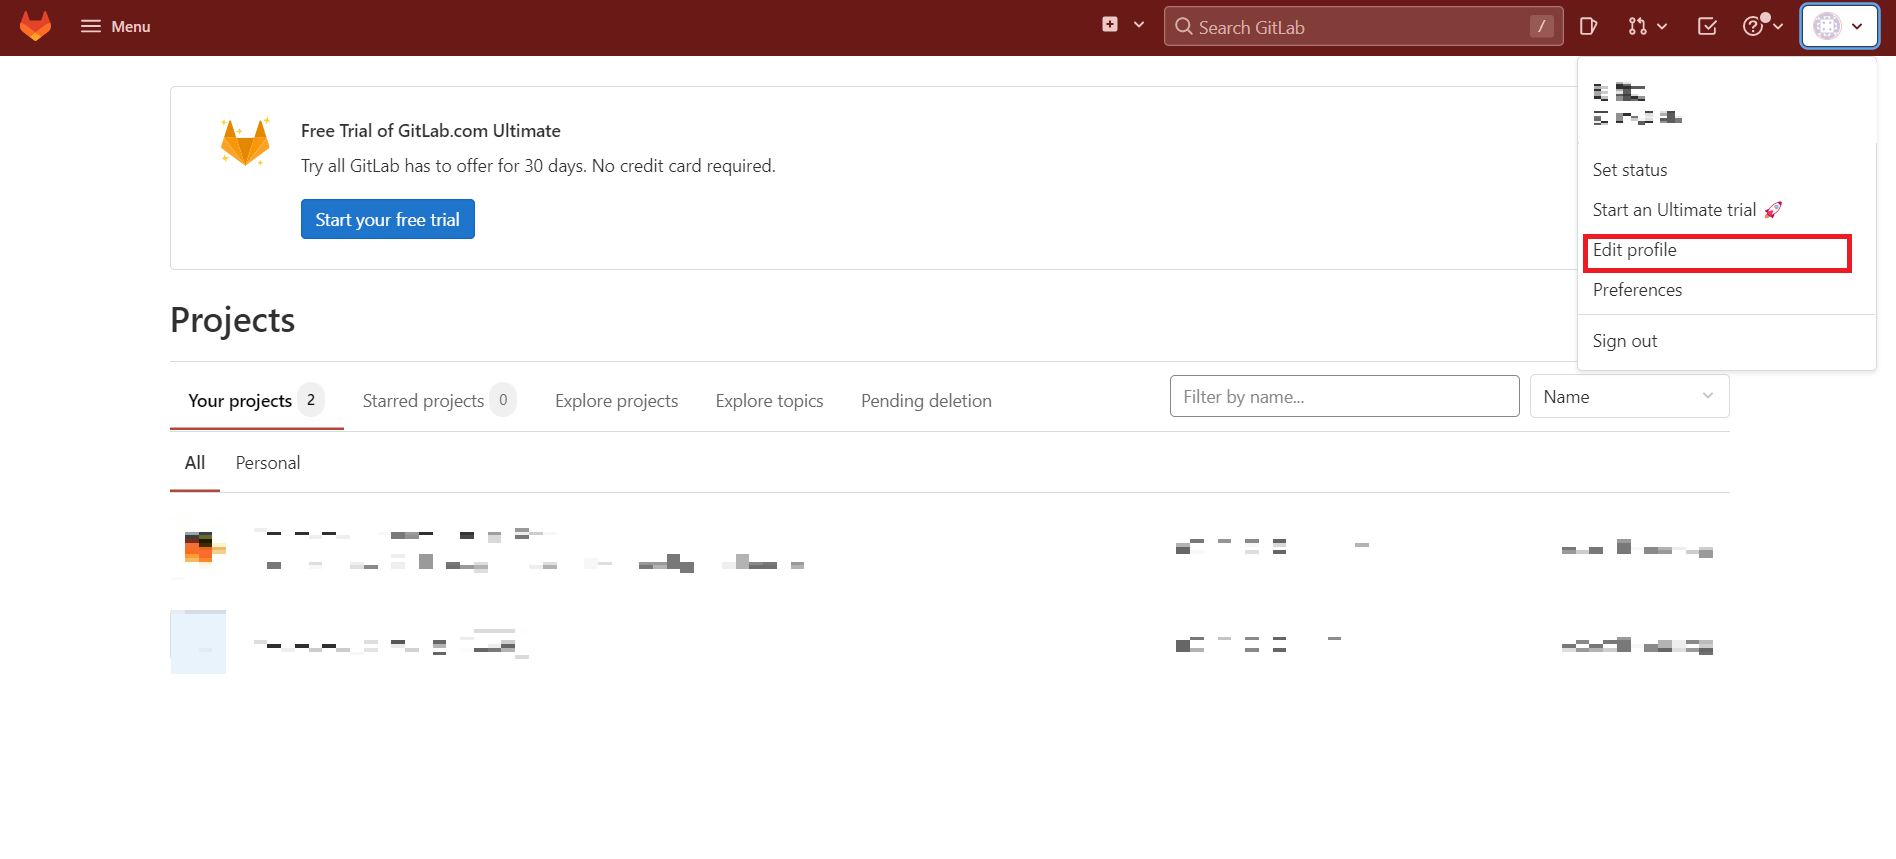
- Click Applications in the left navigation bar.
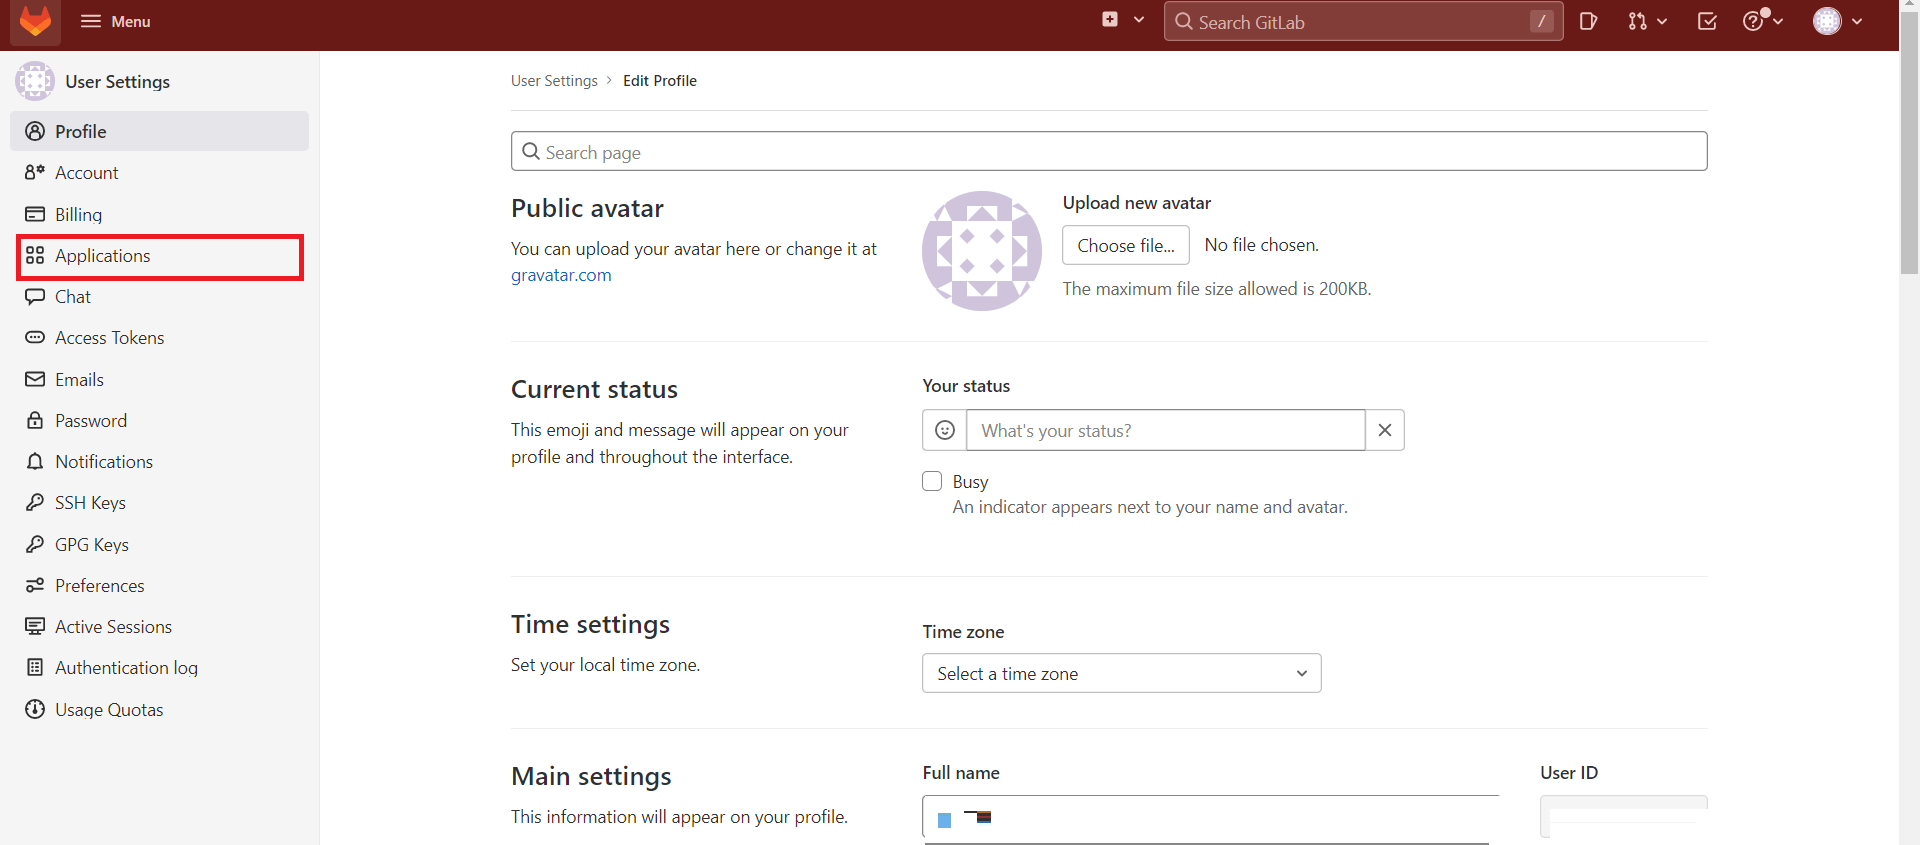
- Create an application, edit the application information Name, Redirect URI, add Scopes: check
api,read_user.
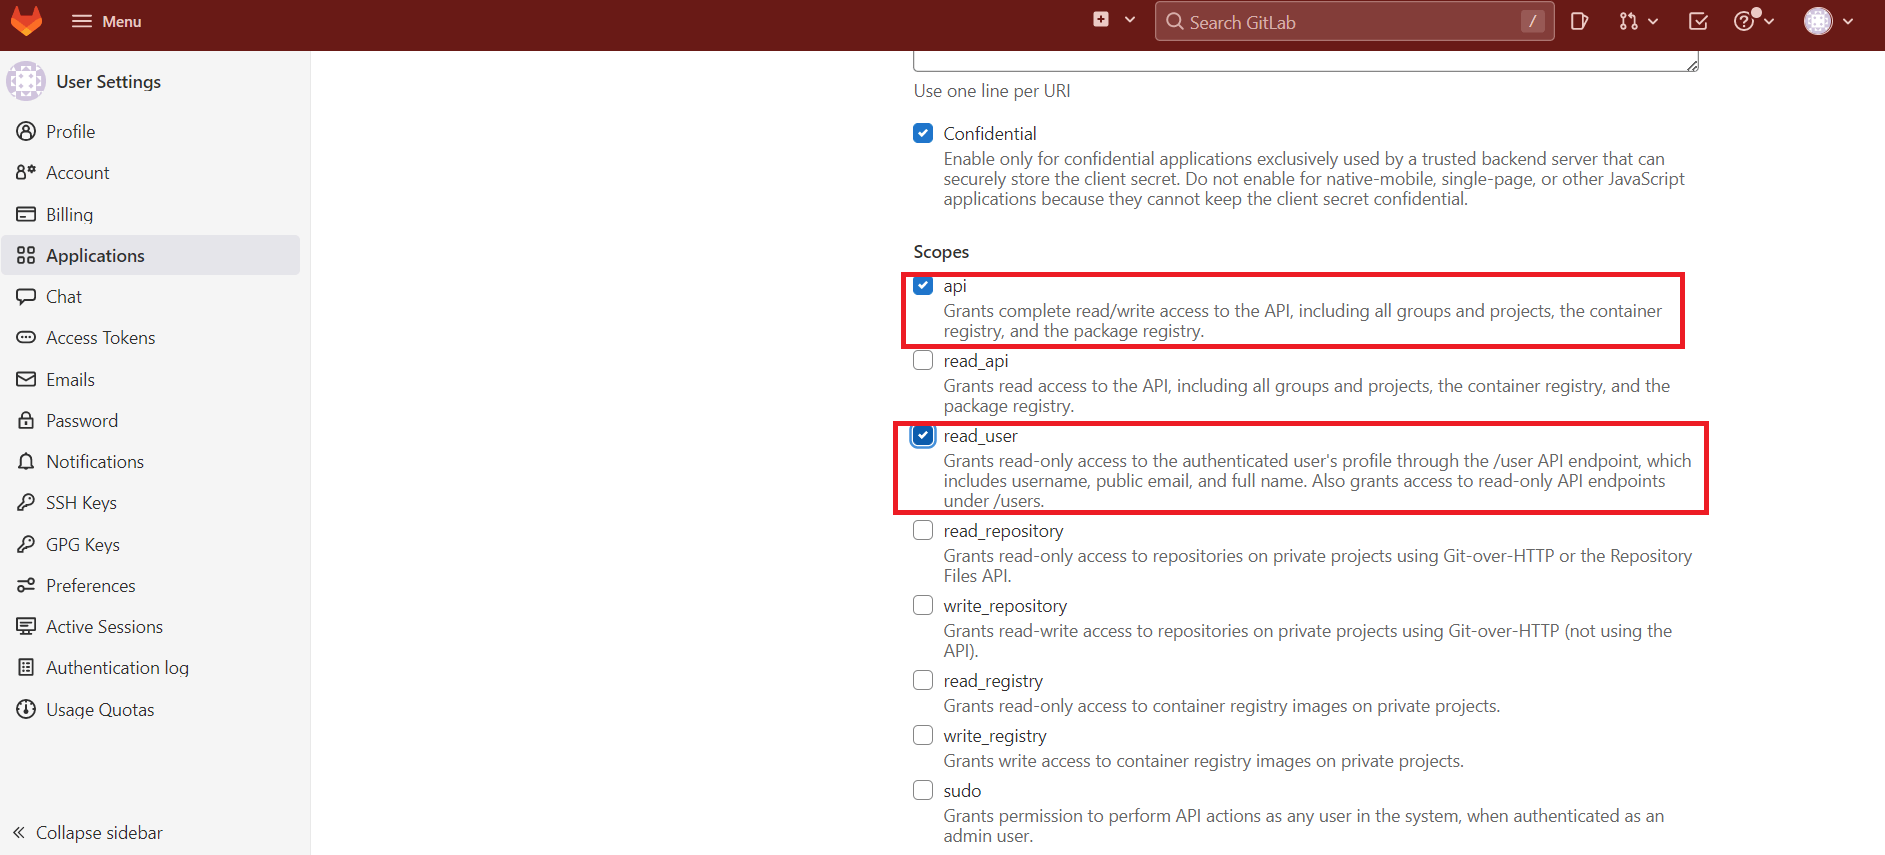
Click Save Application.
After the creation is complete, record the Application ID and Secret, which will be needed in the next step.
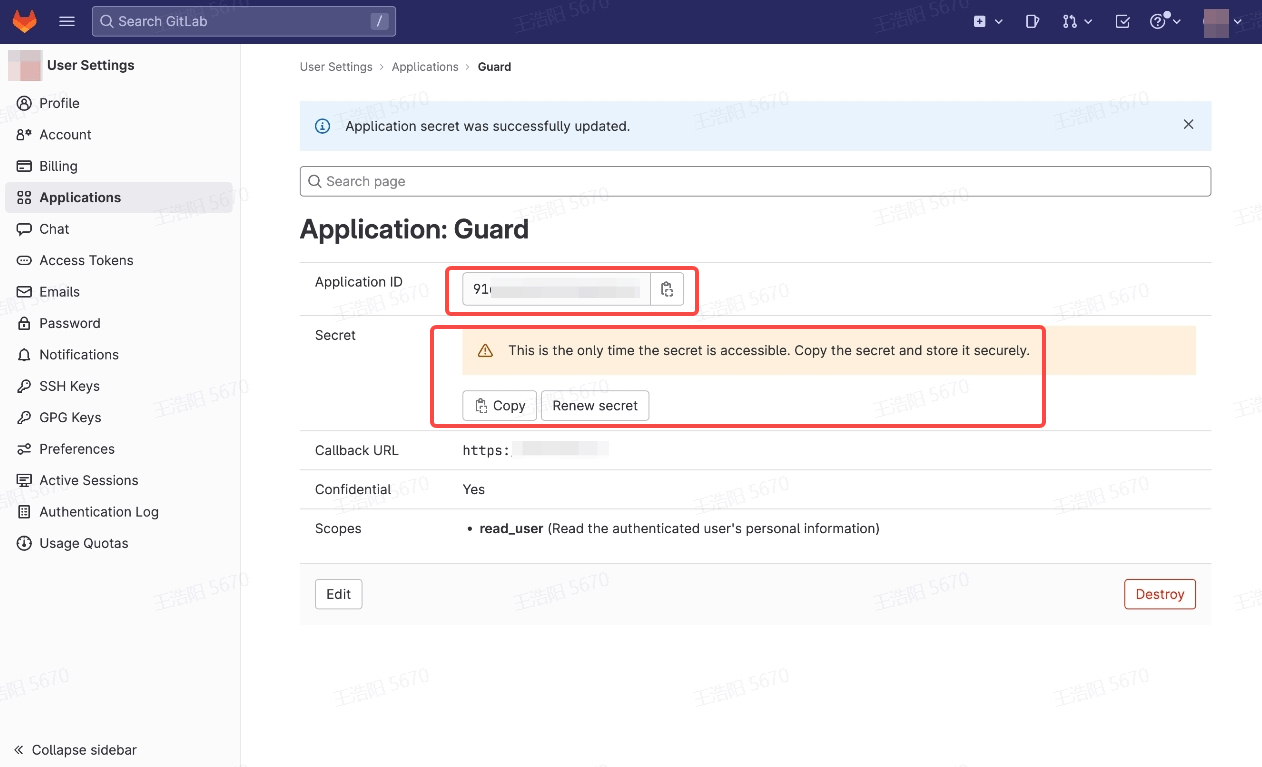
During the application creation process, you need to configure the allowed callback address. Please use the following settings: https://core.genauth.ai/connection/social/<Unique Identifier>/<USERPOOL_ID>/callback. You need to replace <Unique Identifier> with your Unique Identifier and <USERPOOL_ID> with your User Pool ID
Step 2: Configure GitLab Mobile in the GenAuth console
2.1 Please click the "Create Social Identity Source" button on the "Social Identity Source" page of the GenAuth console to enter the "Select Social Identity Source" page.
Original image 258 (in section "Step 2: Configure GitLab Mobile in the GenAuth console"; Chinese UI)
2.2 In the GenAuth console, go to "Social Identity Source" - "Select Social Identity Source", click the "GitLab" identity source card, and enter the "GitLab Mobile Login Mode" page.
Original image 259 (in section "Step 2: Configure GitLab Mobile in the GenAuth console"; Chinese UI)
2.3 In the GenAuth console, go to "Social Identity Source" - "GitLab Mobile" page, and configure the relevant field information.
Original image 260 (in section "Step 2: Configure GitLab Mobile in the GenAuth console"; Chinese UI)
| Field/Function | Description |
|---|---|
| Unique ID | a. The unique ID consists of lowercase letters, numbers, and -, and is less than 32 characters long. b. This is the unique ID for this connection and cannot be modified after setting. |
| Display Name | This name will be displayed on the button of the end user's login interface. |
| Base URL | By default, GitLab.com is used as the authentication endpoint. You can also specify any private GitLab instance, such as https://gitlab.example.com/. |
| Application ID | The GitLab application ID obtained in the previous step. |
| Secret | The GitLab application key obtained in the previous step. |
| Callback URL | GitLab valid redirect URI. This URL needs to be configured on the Redirect URI of the GitLab application. |
| Login Mode | After turning on "Login Only Mode", you can only log in to existing accounts, not create new accounts. Please choose carefully. |
| Account Identity Association | When "Account Identity Association" is not enabled, a new user is created by default when a user logs in through an identity source. After turning on "Account Identity Association", users can be allowed to log in directly to an existing account through "Field Matching". |
After the configuration is completed, click the "Create" or "Save" button to complete the creation.
After creating the "GitLab Mobile" identity source on the GenAuth console, you need to configure the callback address to the Callback URL on GitLab.
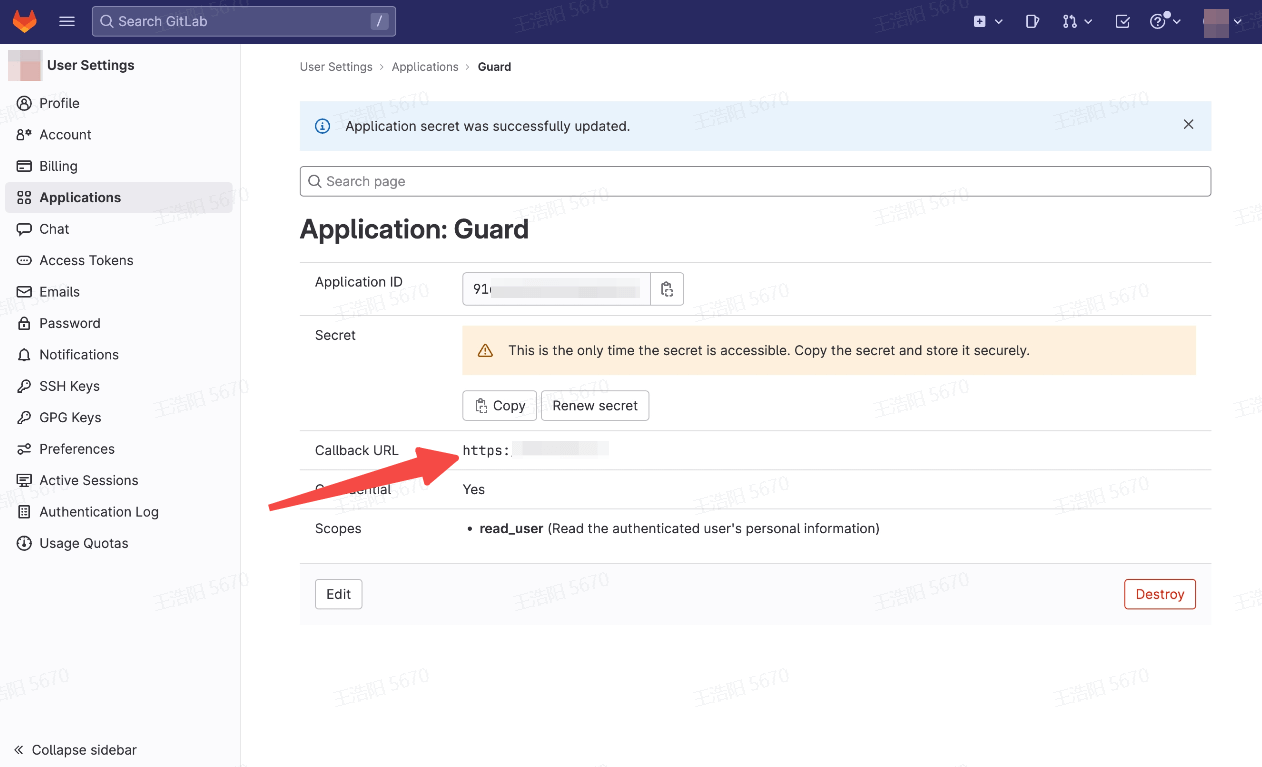
Step 3: Development Access
Recommended development access method: SDK
Pros and cons description: Simple operation and maintenance, GenAuth is responsible for operation and maintenance. Each user pool has an independent secondary domain name; if you need to embed it in your application, you need to log in using the pop-up mode, that is: after clicking the login button, a window will pop up with the content of the login page hosted by GenAuth, or redirect the browser to the login page hosted by GenAuth.
Detailed access method:
3.1 Create an application in the GenAuth console. For details, see: How to create an application in GenAuth
3.2 On the created GitLab mobile identity source connection details page, enable and associate an application created in the GenAuth console
Original image 261 (in section "Step 3: Development Access"; Chinese UI)
3.3 Experience GitLab third-party login on the login page (as shown in the end user preview).
Baidu
Scenario Introduction
- Overview: Baidu social login is a user's secure login to a third-party application or website using Baidu as the identity source. Configure and enable Baidu's social login in GenAuth to quickly obtain Baidu's basic open information and help users achieve password-free login through GenAuth.
- Application scenario: PC side
- Terminal user preview image:
Original image 262 (in section "Scenario Introduction"; Chinese UI)
Notes
- If you have not registered a Baidu developer account, please go to Baidu Developer Center to register a developer account first.
- Baidu Developer Center - User Center
- If you have not opened a GenAuth console account, please go to GenAuth console to register a developer account.
Step 1: Create a website application on Baidu Open Platform
- Register Baidu Developer Center, log in and go to Baidu Developer Service Management Console, fill in the developer information, and create a project (application):
 Original image 263 (in section "Step 1: Create a website application on Baidu Open Platform"; Chinese UI)
- After the creation is complete, you need to record the API Key (Client ID) and Secret Key (Client Secret) of the application, which will be used later.
On the security settings page, set the authorization callback page address to: https://core.genauth.ai/connection/social/<Unique Identifier>/<USERPOOL_ID>/callback, you need to replace <Unique Identifier> with your Unique Identifier, and <USERPOOL_ID> with your User Pool ID
Step 2: Configure Baidu in the GenAuth console
2.1 Please click the "Create Social Identity Source" button on the "Social Identity Source" page of the GenAuth console to enter the "Select Social Identity Source" page.
Original image 266 (in section "Step 2: Configure Baidu in the GenAuth console"; Chinese UI)
2.2 Please go to the GenAuth console's "Social Identity Source" - "Select Social Identity Source" page, click the "Baidu" identity source button to enter the "Baidu Login Mode" page.
Original image 267 (in section "Step 2: Configure Baidu in the GenAuth console"; Chinese UI)
2.3 Please go to the GenAuth console's "Social Identity Source" - "Baidu" page to configure the relevant field information.
Original image 268 (in section "Step 2: Configure Baidu in the GenAuth console"; Chinese UI)
| Field/Function | Description |
|---|---|
| Unique ID | a. The unique ID consists of lowercase letters, numbers, and -, and its length is less than 32 bits. b. This is the unique ID of this connection and cannot be modified after setting. |
| Display Name | This name will be displayed on the button of the terminal user's login interface. |
| API Key | Baidu application ID, which needs to be obtained on the Baidu Developer Center. |
| Secret Key | Baidu application secret key, which needs to be obtained on the Baidu Developer Center. |
| Callback Address | Baidu Developer Center valid jump URI. This URL needs to be configured on the Baidu Developer Center. |
| Login Mode | After turning on "Login Only Mode", you can only log in to existing accounts, and cannot create new accounts. Please choose carefully. |
After the configuration is completed, click the "Create" or "Save" button to complete the creation.
After creating the Baidu identity source on the GenAuth console, you need to configure the callback address to the authorization callback page on Baidu.
Original image 269 (in section "Step 2: Configure Baidu in the GenAuth console"; Chinese UI)
Step 3: Development Access
Recommended Development Access Method: Use Hosted Login Page
Pros and Cons: Simple operation and maintenance, which is responsible for GenAuth. Each user pool has an independent secondary domain name; if you need to embed it in your application, you need to log in using the pop-up mode, that is, after clicking the login button, a window will pop up with the login page hosted by GenAuth, or redirect the browser to the login page hosted by GenAuth.
Detailed access method:
3.1 Create an application in the GenAuth console. For details, see: How to create an application in GenAuth
3.2 On the created Baidu identity source connection details page, open and associate an application created in the GenAuth console
Original image 270 (in section "Step 3: Development Access"; Chinese UI)
3.3 Experience Baidu third-party login on the login page
Original image 271 (in section "Step 3: Development Access"; Chinese UI)
Baidu Mobile
Scenario Introduction
Overview
Baidu social login is a user's secure login to a third-party application or website using Baidu as the identity source. Configure and enable Baidu's social login in GenAuth to quickly obtain Baidu's basic open information and help users achieve password-free login through GenAuth.
Application Scenario
Mobile
Terminal User Preview
Original image 272 (in section "Terminal User Preview"; Chinese UI)
Notes
- If you have not registered a Baidu developer account, please go to Baidu Developer Center to register a developer account first.
- Baidu Developer Center - User Center
- If you have not opened a GenAuth console account, please go to GenAuth console to register a developer account.
Step 1: Create a mobile application on Baidu Open Platform
- Register Baidu Developer Center, log in and go to Baidu Developer Service Management Console, fill in the developer information, and create a project (application):
 Original image 273 (in section "Step 1: Create a mobile application on Baidu Open Platform"; Chinese UI)
- After the creation is complete, you need to record the API Key (Client ID) and Secret Key (Client Secret) of the application, which will be used later.
On the security settings page, set the authorization callback page address to: https://core.genauth.ai/connection/social/<Unique Identifier>/<USERPOOL_ID>/callback, you need to replace <Unique Identifier> with your Unique Identifier, and <USERPOOL_ID> with your User Pool ID
Step 2: Configure Baidu in the GenAuth console
2.1 Please click the "Create Social Identity Source" button on the "Social Identity Source" page of the GenAuth console to enter the "Select Social Identity Source" page.
Original image 276 (in section "Step 2: Configure Baidu in the GenAuth console"; Chinese UI)
2.2 Please go to the GenAuth console's "Social Identity Source" - "Select Social Identity Source" page, click the "Baidu" identity source button to enter the "Baidu Login Mode" page.
Original image 277 (in section "Step 2: Configure Baidu in the GenAuth console"; Chinese UI)
2.3 Please go to the GenAuth console's "Social Identity Source" - "Baidu Mobile" page to configure the relevant field information.
Original image 278 (in section "Step 2: Configure Baidu in the GenAuth console"; Chinese UI)
| Field/Function | Description |
|---|---|
| Unique ID | a. The unique ID consists of lowercase letters, numbers, and -, and its length is less than 32 bits. b. This is the unique ID of this connection and cannot be modified after setting. |
| Display Name | This name will be displayed on the button of the terminal user's login interface. |
| API Key | Baidu application ID, which needs to be obtained on the Baidu Developer Center. |
| Secret Key | Baidu application secret key, which needs to be obtained on the Baidu Developer Center. |
| Do you need to obtain unionid? | After enabling, you can obtain the Baidu user unified ID, which is unique to the current developer account. |
| Callback address | Baidu Developer Center valid jump URI. This URL needs to be configured on the Baidu Developer Center. |
| Login mode | After enabling "Login-only mode", you can only log in to existing accounts, and cannot create new accounts. Please choose carefully. |
After the configuration is completed, click the "Create" or "Save" button to complete the creation.
After creating the Baidu identity source on the GenAuth console, you need to configure the callback address to the authorization callback page on Baidu.
Original image 279 (in section "Step 2: Configure Baidu in the GenAuth console"; Chinese UI)
Step 3: Development access
Recommended development access method: SDK
Advantages and disadvantages: Simple operation and maintenance, which is handled by GenAuth. Each user pool has an independent secondary domain name; if you need to embed it in your application, you need to log in using the pop-up mode, that is: after clicking the login button, a window will pop up with the login page hosted by GenAuth, or redirect the browser to the login page hosted by GenAuth.
Detailed access method:
3.1 Create an application in the GenAuth console. For details, see: How to create an application in GenAuth
3.2 On the created Baidu identity source connection details page, open and associate an application created in the GenAuth console
Original image 280 (in section "Step 3: Development access"; Chinese UI)
3.3 Experience Baidu third-party login on the login page. (As shown in the End User Preview).
NetEase Yidun (One-click login)
Scenario Introduction
- Overview: One-click login with mobile phone number is an extremely convenient authentication method provided by the three major operators. Currently, GenAuth supports access to this capability through NetEase Yidun. NetEase Yidun integrates the one-click login SDK of the three major operators and provides a unified mobile application interface. You can configure the Yidun identity source on the GenAuth console to quickly complete the password-free login function on the mobile phone through GenAuth.
- Application scenario: Mobile
- Terminal user preview image:
Original image 281 (in section "Scenario Introduction"; Chinese UI)
Notes
- Go to NetEase Yidun to register an open account.
- Go to Yidun Service Management Backend and follow the instructions to create a website application.
- If you have not opened a GenAuth console account, please go to GenAuth Console to register a developer account.
Step 1: Create an application
Log in to the Yidun Service Management Backend and create a business; then log in to the Application Management Backend and create an application; finally, bind the business. For detailed Yidun operations, please refer to Yidun Number Authentication Console User Guide.
After creating the application, setting the package name, uploading the signature, etc., you need to record the business ID (business Id) and the product key SecretId and SecretKey of the number authentication service access credential. This data will be required when configuring the Yidun identity source in the GenAuth console later.
Original image 282 (in section "Step 1: Create an application"; Chinese UI)
Original image 283 (in section "Step 1: Create an application"; Chinese UI)
Step 2: Configure Yidun in the GenAuth console
2.1 Please click the "Create Social Identity Source" button on the "Social Identity Source" page of the GenAuth Console to enter the "Select Social Identity Source" page.
Original image 284 (in section "Step 2: Configure Yidun in the GenAuth console"; Chinese UI)
2.2 Please click the "Yidun" identity source button on the "Social Identity Source"-"Select Social Identity Source" page of the GenAuth Console to enter the "Yidun Login Mode" page.
Original image 285 (in section "Step 2: Configure Yidun in the GenAuth console"; Chinese UI)
2.3 Please configure the relevant field information on the "Social Identity Source"-"Yidun" page of the GenAuth console.
Original image 286 (in section "Step 2: Configure Yidun in the GenAuth console"; Chinese UI)
| Field/Function | Description |
|---|---|
| Unique ID | a. The unique ID consists of lowercase letters, numbers, and -, and its length is less than 32 bits. b. This is the unique ID of this connection and cannot be modified after setting. |
| Display Name | This name will be displayed on the button of the terminal user's login interface. |
| Business ID | Business ID, the business ID (bussinessId) created on Yidun. |
| SecretId | SecretId, the product key SecretId of the number authentication service access certificate. |
| SecretKey | SecretKey, the product key SecretKey of the number authentication service access certificate. |
| Login Mode | After turning on "Login Only Mode", you can only log in to existing accounts and cannot create new accounts. Please choose carefully. |
| Account Identity Association | When "Account Identity Association" is not turned on, a new user is created by default when a user logs in through an identity source. After enabling "Account Identity Association", users can be allowed to log in directly to an existing account through "Field Matching" or "Query Binding". |
After configuration is complete, click the "Create" or "Save" button to complete the creation.
Step 3: Development Access
Recommended Development Access Method: SDK Integration
Pros and Cons: Easy access, only a few lines of code are required. Highest degree of customization.
Detailed Access Method:
3.1 Create an application in the GenAuth console. For details, see: How to create an application in GenAuth.
3.2 On the created EasyShield Identity Source Connection Details page, open and associate an application created in the GenAuth console.
Original image 287 (in section "Step 3: Development Access"; Chinese UI)
3.3 Refer to the integration guide provided by GenAuth to complete the integration work, and then experience one-click login with mobile phone number on the mobile terminal.
Original image 288 (in section "Step 3: Development Access"; Chinese UI)
Original image 289 (in section "Step 3: Development Access"; Chinese UI)
QingCloud
Scenario Introduction
- Overview: QingCloud is a technology-leading enterprise-level full-stack cloud ICT service provider and solution provider. QingCloud social login is a user's secure login to a third-party application or website with QingCloud as the identity source. Configure and enable QingCloud's social login in GenAuth to quickly obtain QingCloud's basic open information and help users achieve password-free login through GenAuth.
- Application scenario: PC website
- End user preview image:
Original image 290 (in section "Scenario Introduction"; Chinese UI)
Notes
- If you have not opened a QingCloud account, please go to the QingCloud platform to register an account.
- You need to create an application that supports protocol authentication in Application Development on QingCloud.
- If you have not opened a GenAuth console account, please go to GenAuth Console to register a developer account.
Step 1: Create a QingCloud application
Go to QingCloud's AppCenter Application Development Platform. If you can't find it, you can follow the QingCloud Document (opens new window) to create an application. You need to record the application's App ID and App Secret, which will be used later.
Enter the console, click the avatar in the upper right corner, click Application Development, and click "here" under Application Development to enter the application list.
Original image 291 (in section "Step 1: Create a QingCloud application"; Chinese UI)
Click the "+" sign in the application list to create an application. Select the application type, fill in the application name, and click "Create Application".
Original image 292 (in section "Step 1: Create a QingCloud application"; Chinese UI)
Record the Key ID (i.e. application ID) and Key of the QingCloud application.
Original image 293 (in section "Step 1: Create a QingCloud application"; Chinese UI)
Step 2: Configure QingCloud in the GenAuth console
2.1 In the GenAuth console, enter the "Social Identity Source" configuration page, and click "Create Social Identity Source" to start selecting and creating.
Original image 294 (in section "Step 2: Configure QingCloud in the GenAuth console"; Chinese UI)
2.2 Find and enter QingCloud Social Login among all social identity source icons.
Original image 295 (in section "Step 2: Configure QingCloud in the GenAuth console"; Chinese UI)
2.3 Please configure the relevant field information in the "Social Identity Source" - "QingCloud" page of the GenAuth Console.
App ID: QingCloud key ID;App Secret: QingCloud key;
Original image 296 (in section "Step 2: Configure QingCloud in the GenAuth console"; Chinese UI)
| Field/Function | Description |
|---|---|
| Unique ID | a. The unique ID consists of lowercase letters, numbers, and -, and its length is less than 32 bits. b. This is the unique ID of this connection and cannot be modified after setting. |
| Display Name | This name will be displayed on the button of the terminal user's login interface. |
| Key ID | The key ID needs to be obtained in the application created by the QingCloud Open Platform. |
| Key | The key needs to be obtained in the application created by the QingCloud Open Platform. |
| Callback address | QingCloud valid OAuth redirect URI. This URL needs to be configured on the QingCloud open platform. |
| Login mode | After turning on "Login only mode", you can only log in to existing accounts, and you cannot create new accounts. Please choose carefully. |
| Account identity association | When "Account identity association" is not turned on, a new user is created by default when a user logs in through an identity source. After turning on "Account identity association", users can be allowed to log in directly to an existing account through "field matching" or "query binding". |
2.4 After the configuration is completed, click the "Create" button to complete the creation.
Step 3: Development access
Recommended development access method: Use hosted login page
Pros and cons description: Simple operation and maintenance, which is handled by GenAuth. Each user pool has an independent secondary domain name; if you need to embed it in your application, you need to log in using the pop-up mode, that is: after clicking the login button, a window will pop up with the content of the login page hosted by GenAuth, or redirect the browser to the login page hosted by GenAuth.
Detailed access method:
3.1 Create an application in the GenAuth console. For details, see: How to create an application in GenAuth
3.2 On the created QingCloud identity source connection details page, open and associate an application created in the GenAuth console
Original image 297 (in section "Step 3: Development access"; Chinese UI)
3.3 Experience QingCloud third-party login on the login page
Original image 298 (in section "Step 3: Development access"; Chinese UI)
Instagram
Scenario Introduction
- Overview: Instagram social login allows users to log in to third-party applications or websites securely using Instagram as their identity source. Configure and enable Instagram social login in GenAuth to quickly obtain basic public information on Instagram and help users log in without a password.
- Application scenario: PC website
- End-user preview image:
Original image 299 (in section "Scenario Introduction"; Chinese UI)
Notes
- If you do not have an Instagram Open Platform account, please go to Instagram Open Platform to register a developer account. Since Instagram belongs to Facebook, the Instagram open platform mentioned here is Facebook's open platform;
- Open an Instagram account with multimedia materials;
- If you do not have a GenAuth console account, please go to the GenAuth Console to register a developer account;
Step 1: Create a Facebook application
Go to developers.facebook.com, click My Apps, then create a new application and select Consumer or No application type, and fill in the application name.
Original image 300 (in section "Step 1: Create a Facebook application"; Chinese UI)
Original image 301 (in section "Step 1: Create a Facebook application"; Chinese UI)
In the dashboard, find the Instagram Basic Display product, then click Settings to add it to your application.
Original image 302 (in section "Step 1: Create a Facebook application"; Chinese UI)
Scroll to the bottom of the page and click Create a new application.
Original image 303 (in section "Step 1: Create a Facebook application"; Chinese UI)
Step 2: Configure Instagram in the GenAuth console
2.1 On the "Social Identity Source" page of the GenAuth Console, click the "Create Social Identity Source" button to go to the "Select Social Identity Source" page.
Original image 304 (in section "Step 2: Configure Instagram in the GenAuth console"; Chinese UI)
2.2 On the "Social Identity Source" - "Select Social Identity Source" page of the GenAuth Console, click the "Instagram" identity source button to go to the "Instagram Login Mode" page.
Original image 305 (in section "Step 2: Configure Instagram in the GenAuth console"; Chinese UI)
2.3 On the "Social Identity Source" - "Instagram" page of the GenAuth Console, configure the relevant field information.
Original image 306 (in section "Step 2: Configure Instagram in the GenAuth console"; Chinese UI)
| Field/Function | Description |
|---|---|
| Unique ID | a. The unique ID consists of lowercase letters, numbers, and -, and its length is less than 32 bits. b. This is the unique ID of this connection and cannot be modified after setting. |
| Display Name | This name will be displayed on the button of the end user's login interface. |
| Application ID | Application ID, which needs to be obtained on the Instagram Open Platform. |
| Application Key | Application ID, which needs to be obtained on the Instagram Open Platform |
| Callback URL | Instagram valid OAuth jump URI. This URL needs to be configured on the Instagram Open Platform. |
| Login Mode | After turning on "Login Only Mode", you can only log in to existing accounts, and cannot create new accounts. Please choose carefully. |
| Account Identity Association | When "Account Identity Association" is not turned on, a new user is created by default when a user logs in through an identity source. After turning on "Account Identity Association", users can be allowed to log in directly to existing accounts through "Field Matching" or "Query Binding". |
After the configuration is completed, click the "Create" or "Save" button to complete the creation.
After creating the Instagram identity source on the GenAuth console, you need to configure the callback address to the OAuth Client Authorization Settings in the Instagram application on Instagram's open platform.
In the last step, Instagram needs to obtain permission to access instagram_graph_user_profile, so you need to add this permission. Then click and save the changes, and the Instagram application is successfully created.
Original image 307 (in section "Step 2: Configure Instagram in the GenAuth console"; Chinese UI)
Step 3: Development Access
Recommended Development Access Method: Use Hosted Login Page
Advantages and Disadvantages: Simple operation and maintenance, GenAuth is responsible for operation and maintenance. Each user pool has an independent secondary domain name; if you need to embed it in your application, you need to log in using the pop-up mode, that is, after clicking the login button, a window will pop up with the login page hosted by GenAuth, or redirect the browser to the login page hosted by GenAuth.
Detailed access method:
3.1 Create an application in the GenAuth console. For details, see: How to create an application in GenAuth
3.2 On the created Instagram identity source connection details page, open and associate an application created in the GenAuth console
Original image 308 (in section "Step 3: Development Access"; Chinese UI)
3.3 Experience Instagram third-party login on the login page
Original image 309 (in section "Step 3: Development Access"; Chinese UI)
LinkedIn
Scenario Introduction
- Overview: LinkedIn social login allows users to log in to third-party applications or websites securely using LinkedIn as the identity source. Configure and enable LinkedIn social login in GenAuth to quickly obtain basic open information on LinkedIn and help users log in without passwords.
- Application scenario: PC website
- End user preview image:
Original image 310 (in section "Scenario Introduction"; Chinese UI)
Notes
- Please follow the Microsoft documentation instructions to create an application.
- If you don't have a GenAuth console account, please go to the GenAuth console to register a developer account.
Step 1: Create an app on LinkedIn
- On LinkedIn Developers, click Create app to start creating your app.

- Enter the relevant information of your app and click Create app to complete the creation.
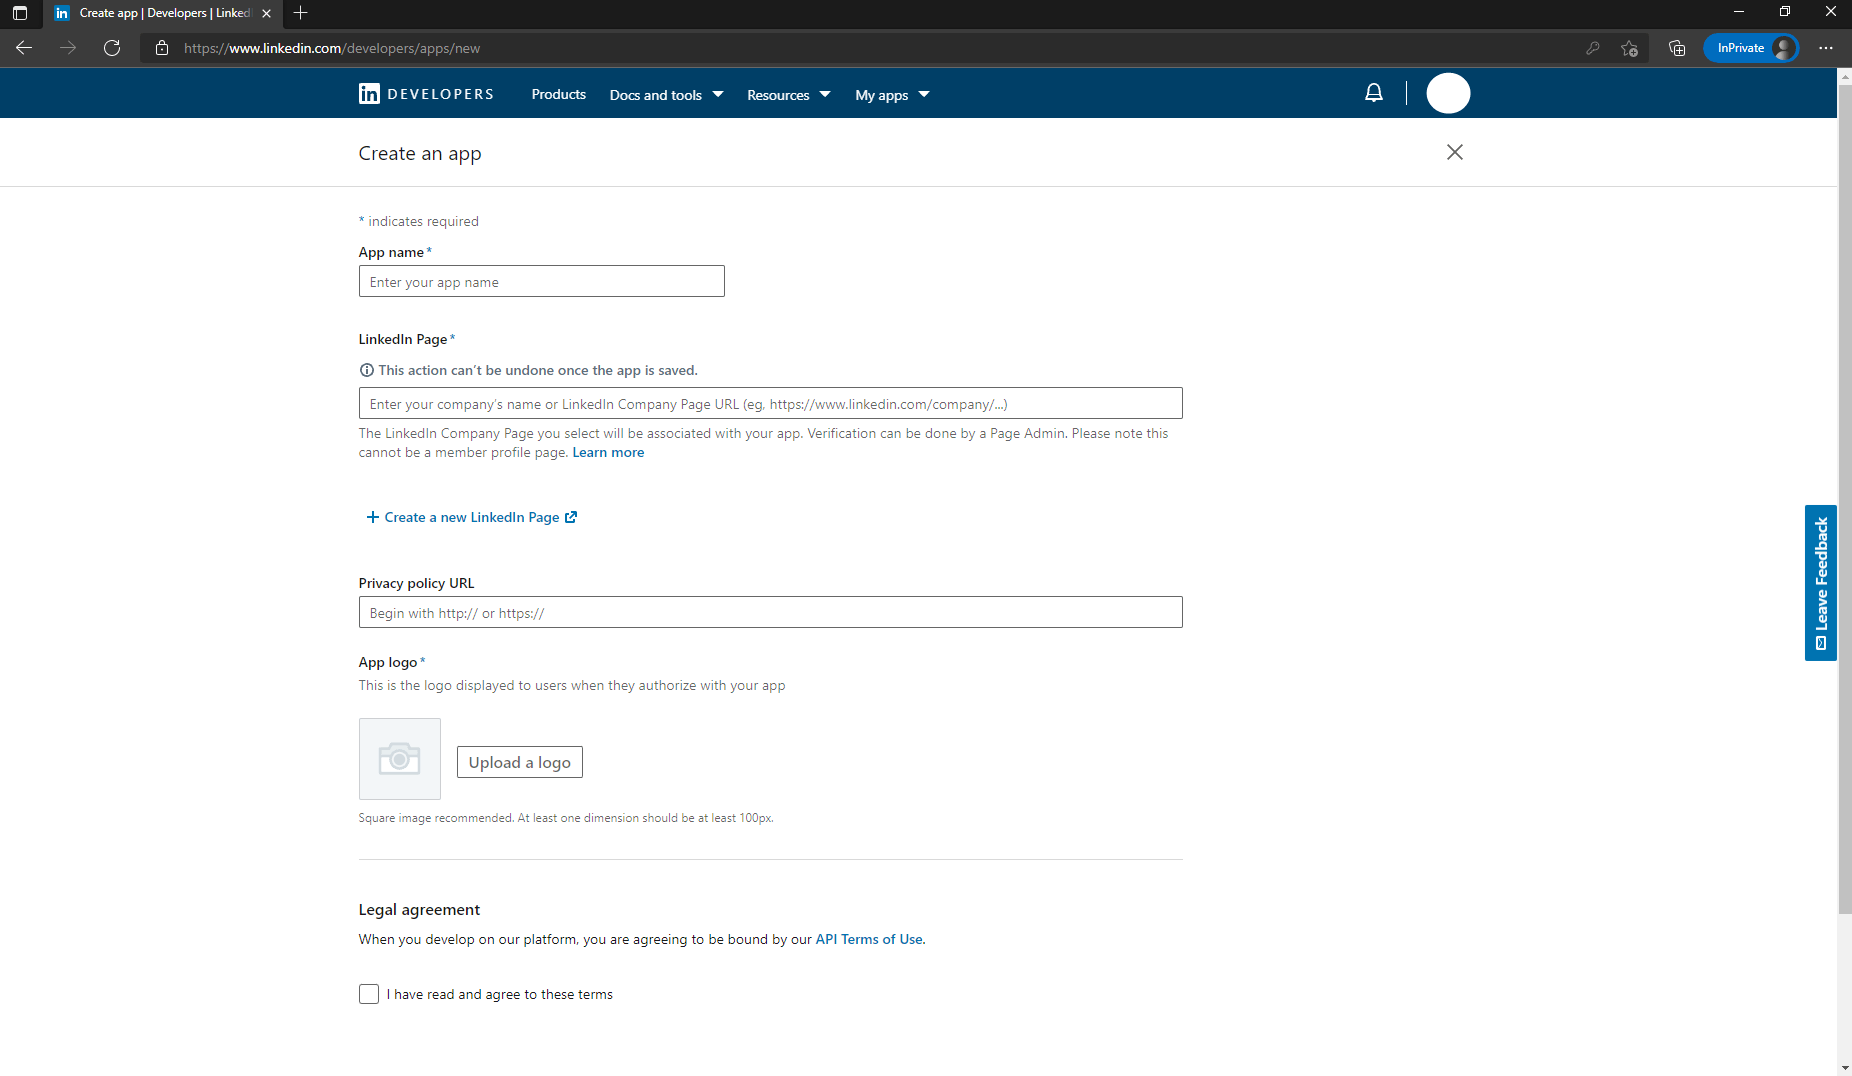
- After the creation is completed, check the application information under the Settings, Auth, Products and other tabs, and set the callback address by editing the Authorized redirect URLs for your app. The callback address is set to:
https://core.genauth.ai/connection/social/{Unique Identifier}/{YOUR_USERPOOL_ID}/callback.
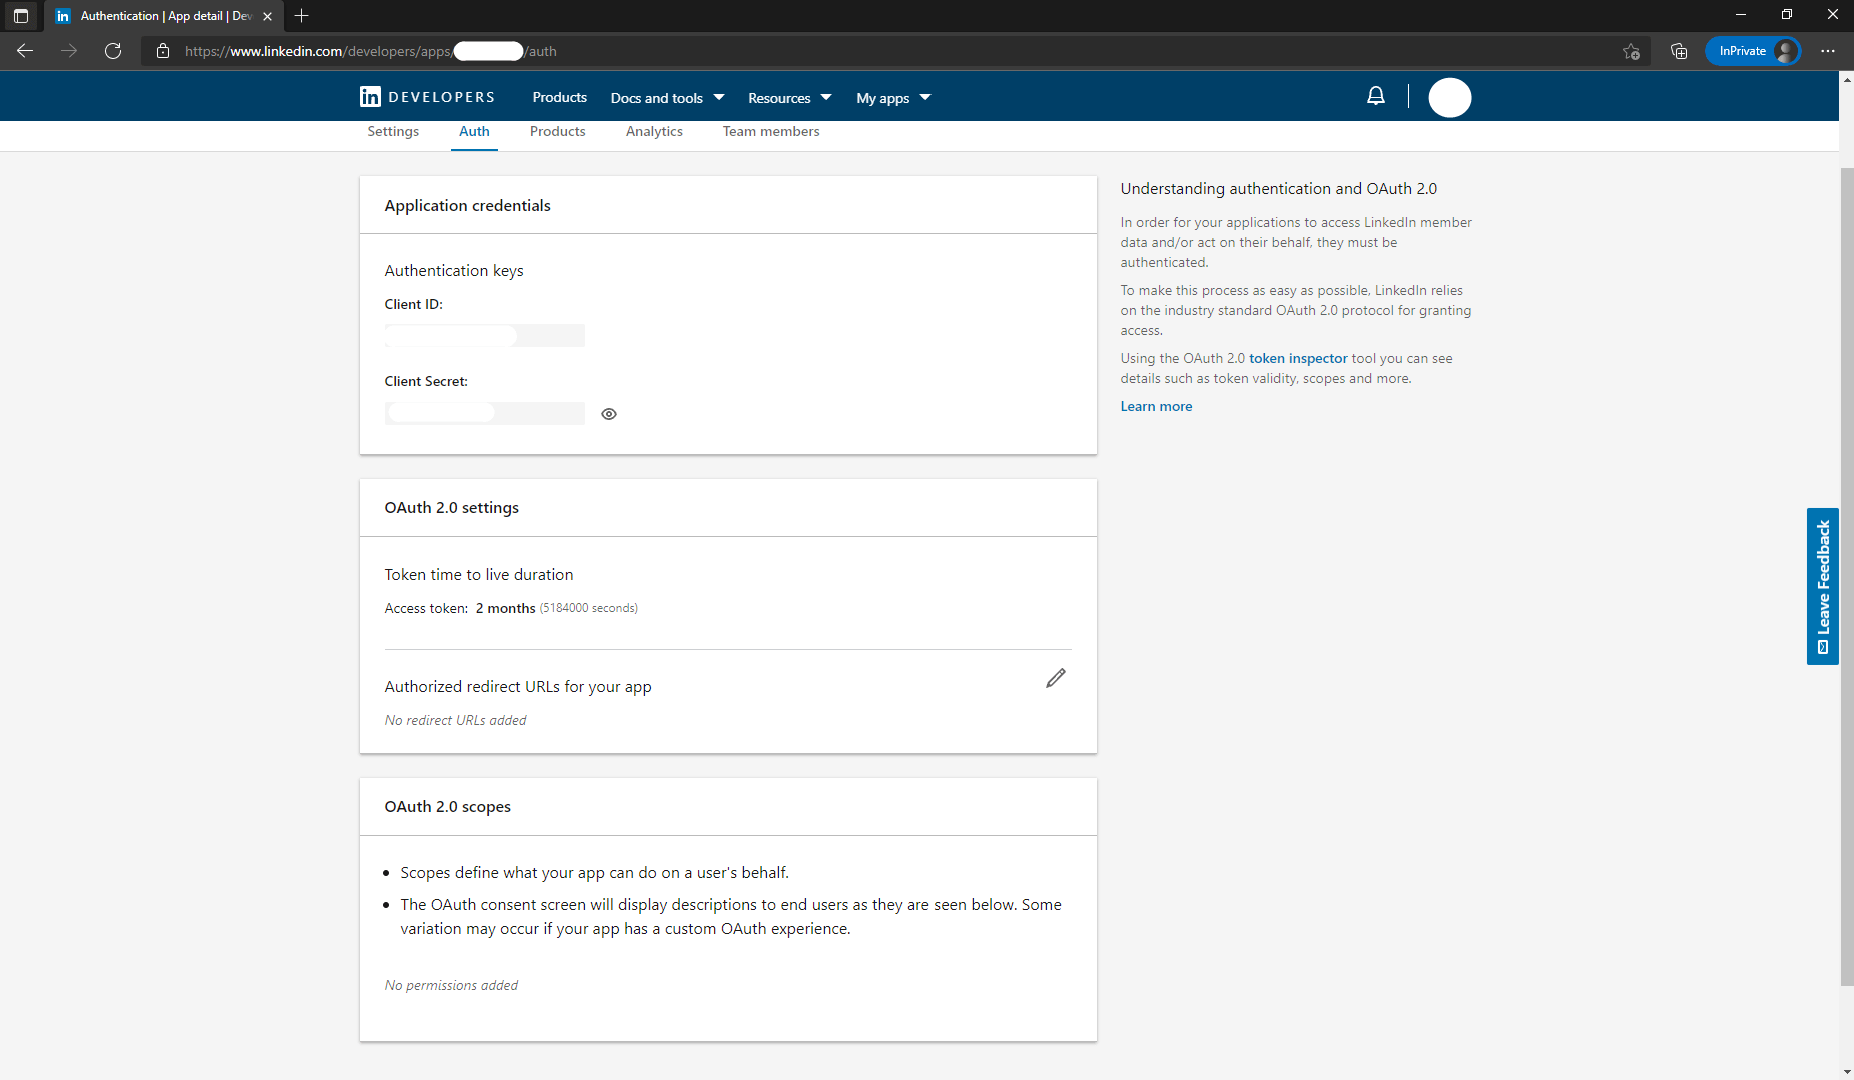
- As shown in the figure below, under the Products tab on this page, you will see all the products available for this app. Click the Select button to the right of Sign In with LinkedIn to select this feature and follow the subsequent prompts to complete the operation. Usually, LinkedIn will approve your app to use the Sign In with LinkedIn feature after a few minutes.
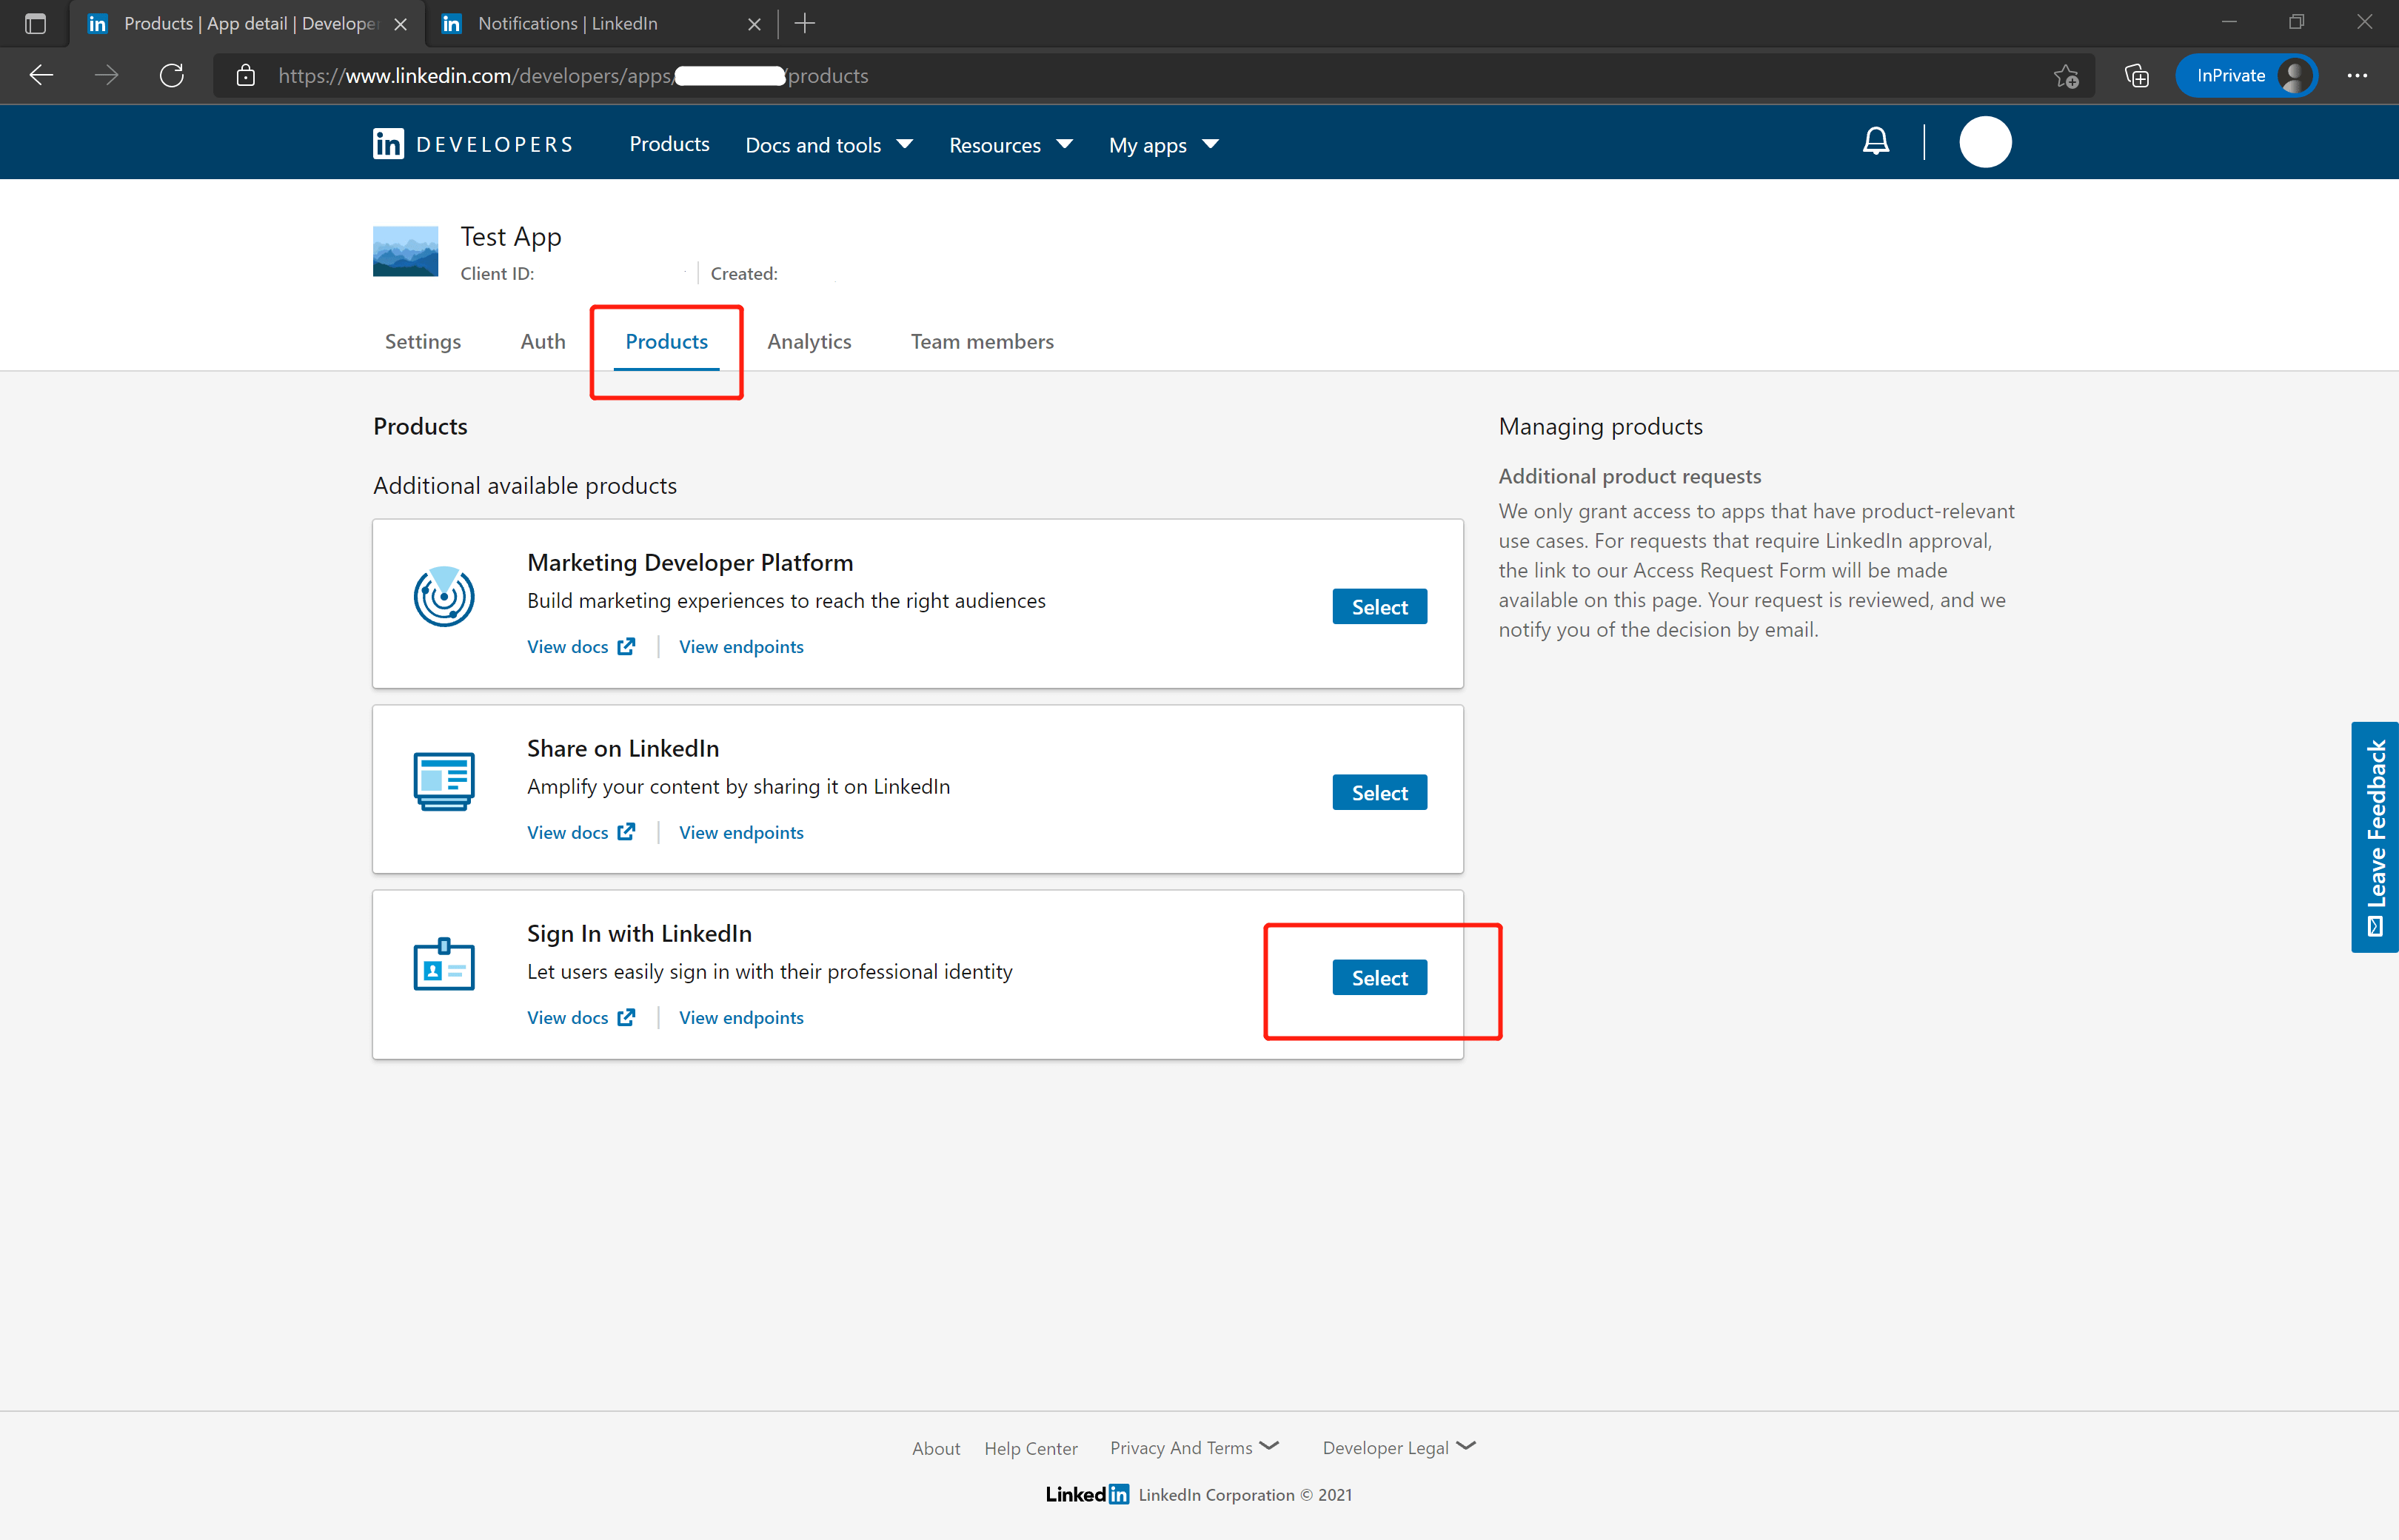
- Please use the following settings for the callback address:
https://core.genauth.ai/connection/social/{Unique Identifier}/{YOUR_USERPOOL_ID}/callback
Replace { unique identifier } with the unique identifier filled in the identity source you are creating in GenAuth, and replace {YOUR_USERPOOL_ID} with your user pool ID
Step 2: Configure LinkedIn in the GenAuth console
2.1 Please click the "Create Social Identity Source" button on the "Social Identity Source" page of the GenAuth console to enter the "Select Social Identity Source" page.
Original image 311 (in section "Step 2: Configure LinkedIn in the GenAuth console"; Chinese UI)
2.2 Please go to the "Social Identity Source" - "Select Social Identity Source" page in the GenAuth console, click the "LinkedIn" identity source button to enter the "LinkedIn Login Mode" page.
Original image 312 (in section "Step 2: Configure LinkedIn in the GenAuth console"; Chinese UI)
2.3 Please go to the "Social Identity Source" - "LinkedIn" page in the GenAuth console to configure the relevant field information.
Original image 313 (in section "Step 2: Configure LinkedIn in the GenAuth console"; Chinese UI)
| Field/Function | Description |
|---|---|
| Unique ID | a. The unique ID consists of lowercase letters, numbers, and -, and is less than 32 bits long. b. This is the unique ID of this connection and cannot be modified after setting. |
| Display name | This name will be displayed on the button of the end user's login interface. |
| Client ID | LinkedIn application ID, which needs to be obtained on linkedIn developers. |
| Client secrets | LinkedIn application key, which needs to be obtained on linkedIn developers. |
| Callback URL | You can fill in your business callback address, and the browser will jump to this address after the user completes the login. |
| Callback address | LinkedIn valid jump URI. This URL needs to be configured on linkedIn developers. |
| Login mode | After turning on "Login-only mode", you can only log in to existing accounts, not create new accounts, so please choose carefully. |
After the configuration is completed, click the "Create" or "Save" button to complete the creation.
After creating the LinkedIn identity source on the GenAuth console, you need to configure the callback address to the Authorized redirect URLs for your app on linkedIn developers.
Step 3: Development access
Recommended development access method: Use a hosted login page
Pros and cons description: Simple operation and maintenance, GenAuth is responsible for operation and maintenance. Each user pool has an independent secondary domain name; if you need to embed it into your application, you need to log in using the pop-up mode, that is: after clicking the login button, a window will pop up with the content of the GenAuth hosted login page, or redirect the browser to the GenAuth hosted login page.
Detailed access method:
3.1 Create an application in the GenAuth console. For details, see: How to create an application in GenAuth
3.2 On the created LinkedIn identity source connection details page, open and associate an application created in the GenAuth console
Original image 314 (in section "Step 3: Development access"; Chinese UI)
3.3 Experience LinkedIn third-party login on the login page
Original image 315 (in section "Step 3: Development access"; Chinese UI)
LinkedIn Mobile
Scenario Introduction
Overview
LinkedIn social login allows users to log in to third-party applications or websites securely using LinkedIn as the identity source. Configure and enable LinkedIn social login in GenAuth to quickly obtain basic open information on LinkedIn and help users log in without passwords.
Application scenarios
Mobile
End-user preview
Original image 316 (in section "End-user preview"; Chinese UI)
Notes
- Please follow the instructions in the Microsoft documentation or create an application through the LinkedIn Developer Platform.
- If you have not opened a GenAuth console account, please go to the GenAuth console to register a developer account.
Step 1: Create an app on LinkedIn
- On LinkedIn Developers, click Create app to start creating your app.

- Enter the relevant information of your app and click Create app to complete the creation.
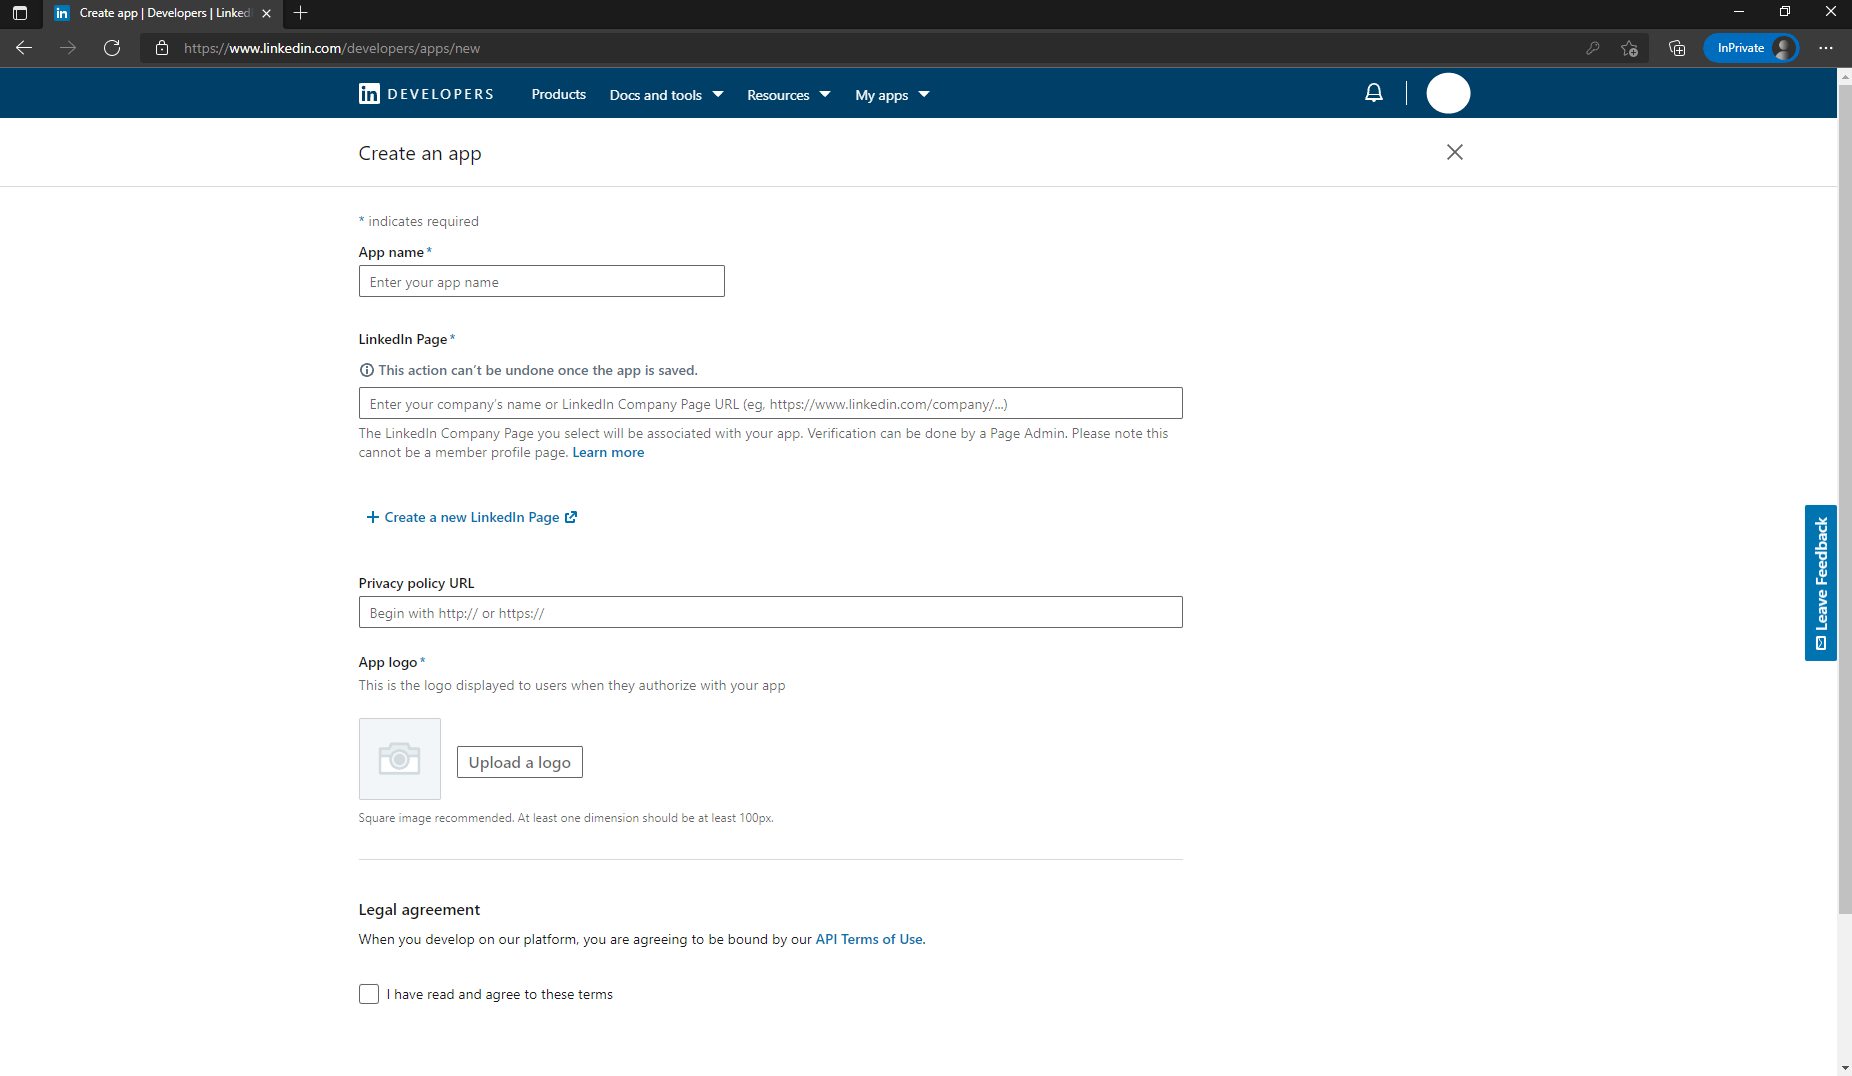
- After the creation is completed, view the application information under the Settings, Auth, Products and other tabs, and set the callback address by editing the Authorized redirect URLs for your app. The callback address is set to:
https://core.genauth.ai/connection/social/{Unique Identifier}/{YOUR_USERPOOL_ID}/callback.
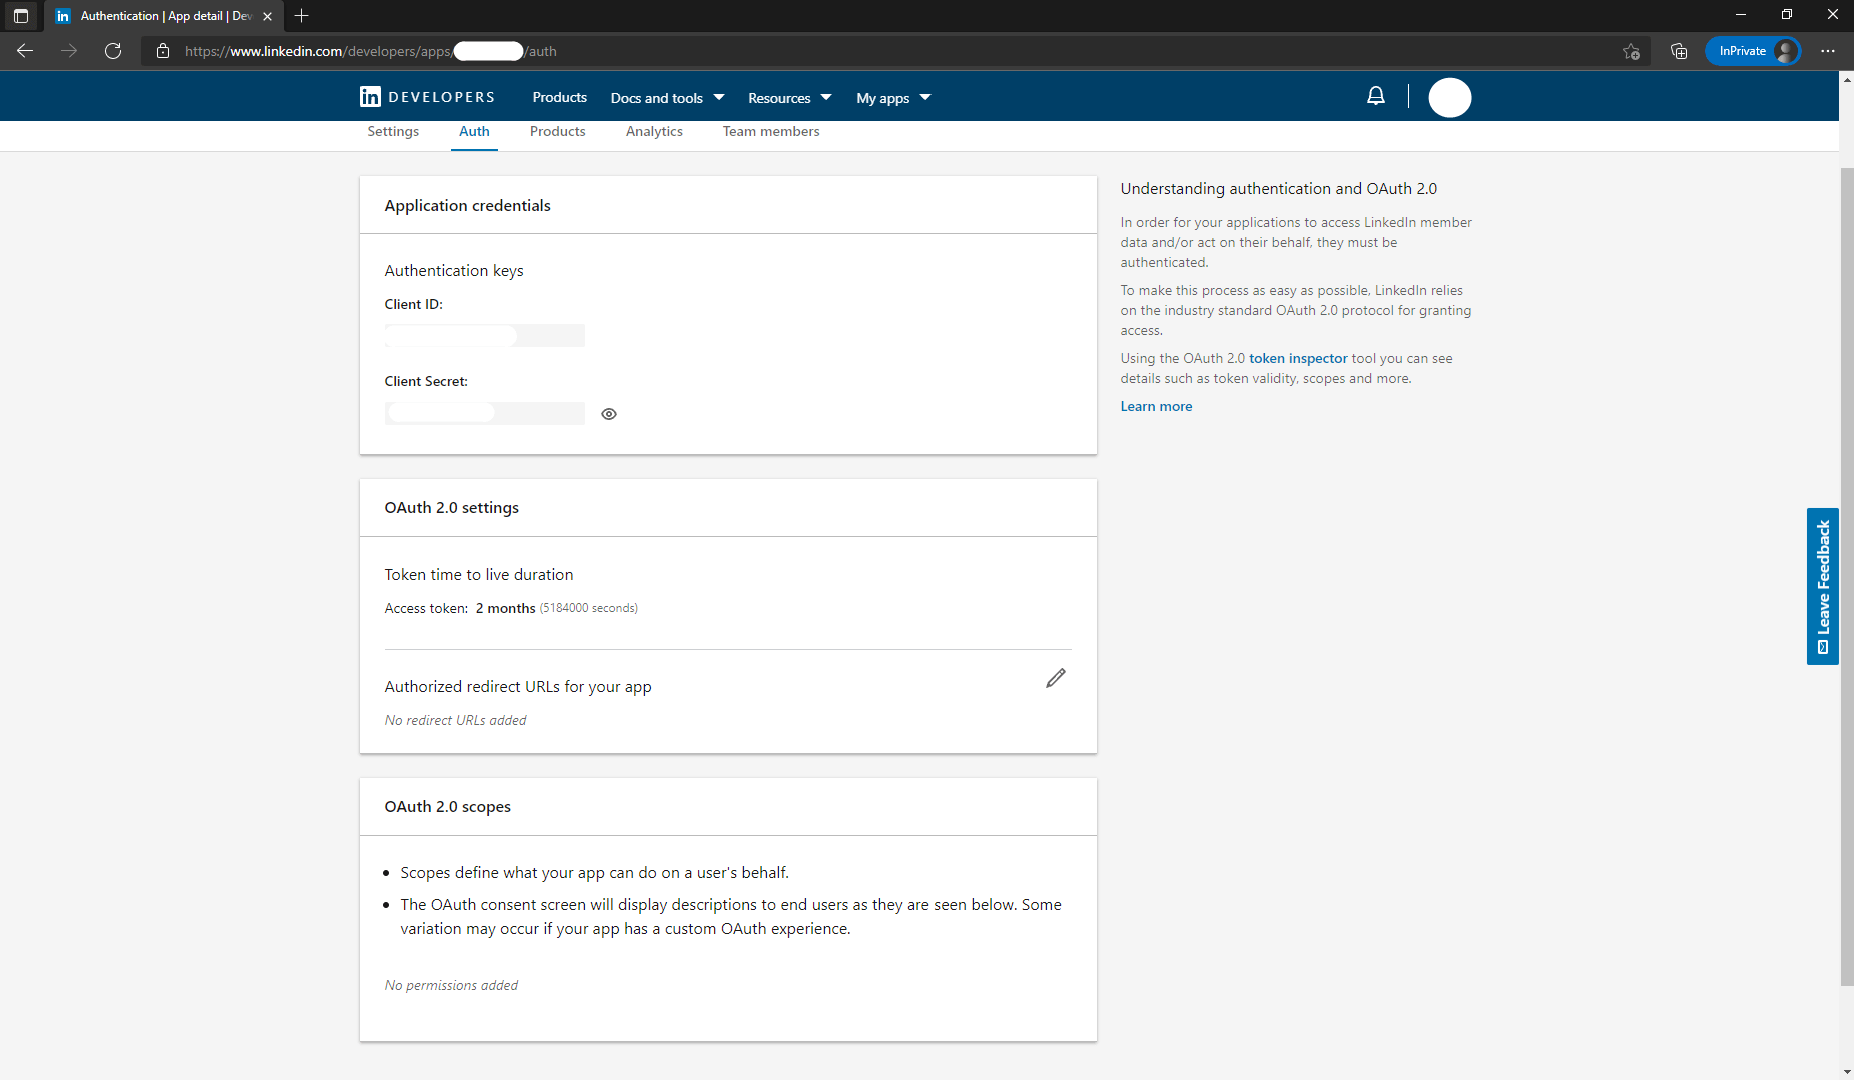
- As shown in the figure below, under the Products tab of this page, you will see all the products available for this app. Click the Select button to the right of Sign In with LinkedIn to select this feature and follow the subsequent prompts to complete the operation. Usually, LinkedIn will approve your app to use the Sign In with LinkedIn feature after a few minutes.
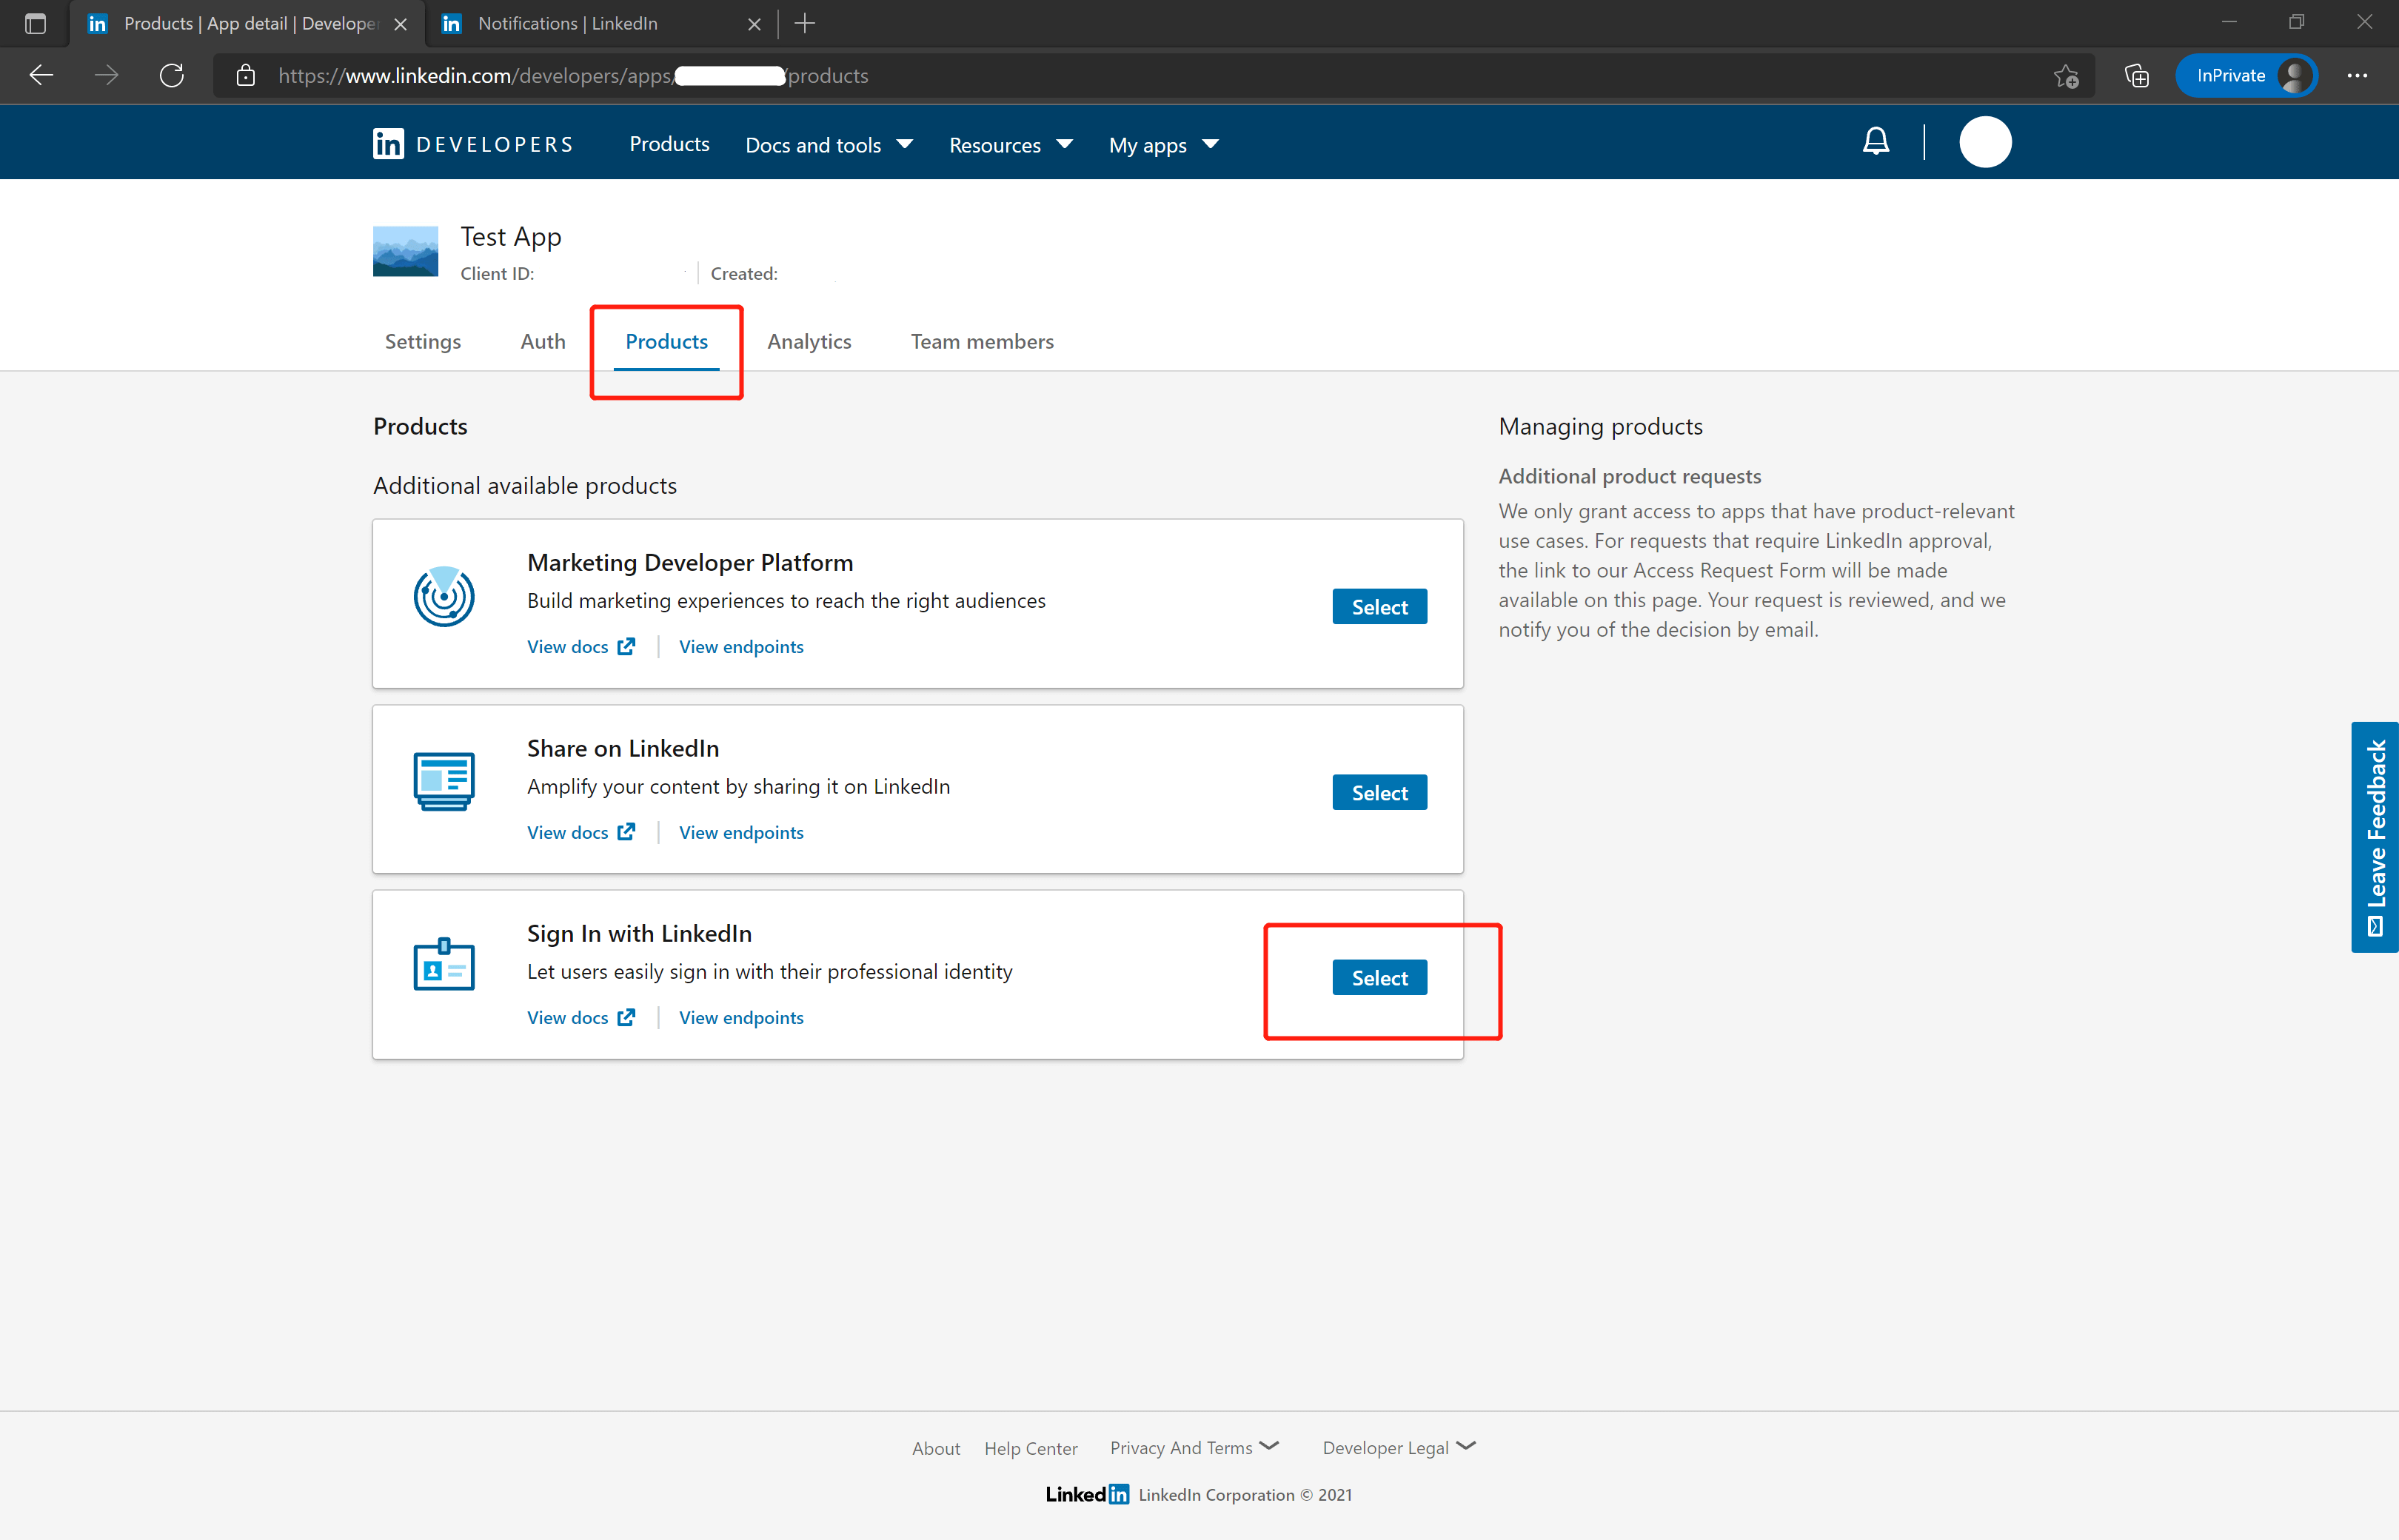
- Please use the following settings for the callback address:
https://core.genauth.ai/connection/social/{Unique Identifier}/{USERPOOL_ID}/callback, you need to replace{Unique Identifier}with yourUnique Identifier, and{USERPOOL_ID}with your User Pool ID
Step 2: Configure LinkedIn in the GenAuth console
2.1 Please click the "Create Social Identity Source" button on the "Social Identity Source" page of the GenAuth console to enter the "Select Social Identity Source" page.
Original image 317 (in section "Step 2: Configure LinkedIn in the GenAuth console"; Chinese UI)
2.2 Please go to the "Social Identity Source" - "Select Social Identity Source" page in the GenAuth console, click the "LinkedIn" identity source button to enter the "LinkedIn Login Mode" page.
Original image 318 (in section "Step 2: Configure LinkedIn in the GenAuth console"; Chinese UI)
2.3 Please go to the "Social Identity Source" - "LinkedIn" page in the GenAuth console to configure the relevant field information.
Original image 319 (in section "Step 2: Configure LinkedIn in the GenAuth console"; Chinese UI)
| Field/Function | Description |
|---|---|
| Unique ID | a. The unique ID consists of lowercase letters, numbers, and -, and is less than 32 bits long. b. This is the unique ID of this connection and cannot be modified after setting. |
| Display name | This name will be displayed on the button of the end user's login interface. |
| Client ID | LinkedIn application ID, which needs to be obtained on LinkedIn developers. |
| Client secrets | LinkedIn application key, which needs to be obtained on LinkedIn developers. |
| Callback address | LinkedIn valid redirect URI. This URL needs to be configured on LinkedIn developers. |
| Login mode | After turning on "Login-only mode", you can only log in to existing accounts, and cannot create new accounts. Please choose carefully. |
| Account identity association | When "Account identity association" is not turned on, a new user is created by default when a user logs in through an identity source. After turning on "Account identity association", users can be allowed to log in directly to existing accounts through "field matching". "Email" field matching is supported. To obtain the user's email, you need to apply for r_emailaddress permission. |
After the configuration is completed, click the "Create" or "Save" button to complete the creation.
After creating the LinkedIn identity source on the GenAuth console, you need to configure the callback address to the Authorized redirect URLs for your app on LinkedIn developers.
Step 3: Development access
Recommended development access method: Use a hosted login page
Pros and cons description: Simple operation and maintenance, GenAuth is responsible for operation and maintenance. Each user pool has an independent secondary domain name; if you need to embed it in your application, you need to use the pop-up mode to log in, that is: after clicking the login button, a window will pop up with the content of the GenAuth hosted login page, or redirect the browser to the GenAuth hosted login page.
Detailed access method:
3.1 Create an application in the GenAuth console. For details, see: How to create an application in GenAuth
3.2 On the created LinkedIn identity source connection details page, open and associate an application created in the GenAuth console
Original image 320 (in section "Step 3: Development access"; Chinese UI)
3.3 Experience LinkedIn third-party login on the login page (as shown in the end user preview).
LINE Mobile
Scenario Introduction
Overview
LINE social login allows users to log in to third-party applications or websites securely using LINE as the identity source. Configure and enable LINE social login in GenAuth to quickly obtain basic LINE information and help users log in without passwords.
Application Scenario
Mobile
End User Preview
Original image 321 (in section "End User Preview"; Chinese UI)
Notes
- If you do not have a LINE Developers account, please go to LINE Developers to register a developer account.
- If you have not opened a GenAuth console account, please go to the GenAuth console to register a developer account.
Step 1: Create a Mobile LINE Login Channel in LINE Developers
Go to LINE Developers and create a Channel.
1.1 Create a Provider.
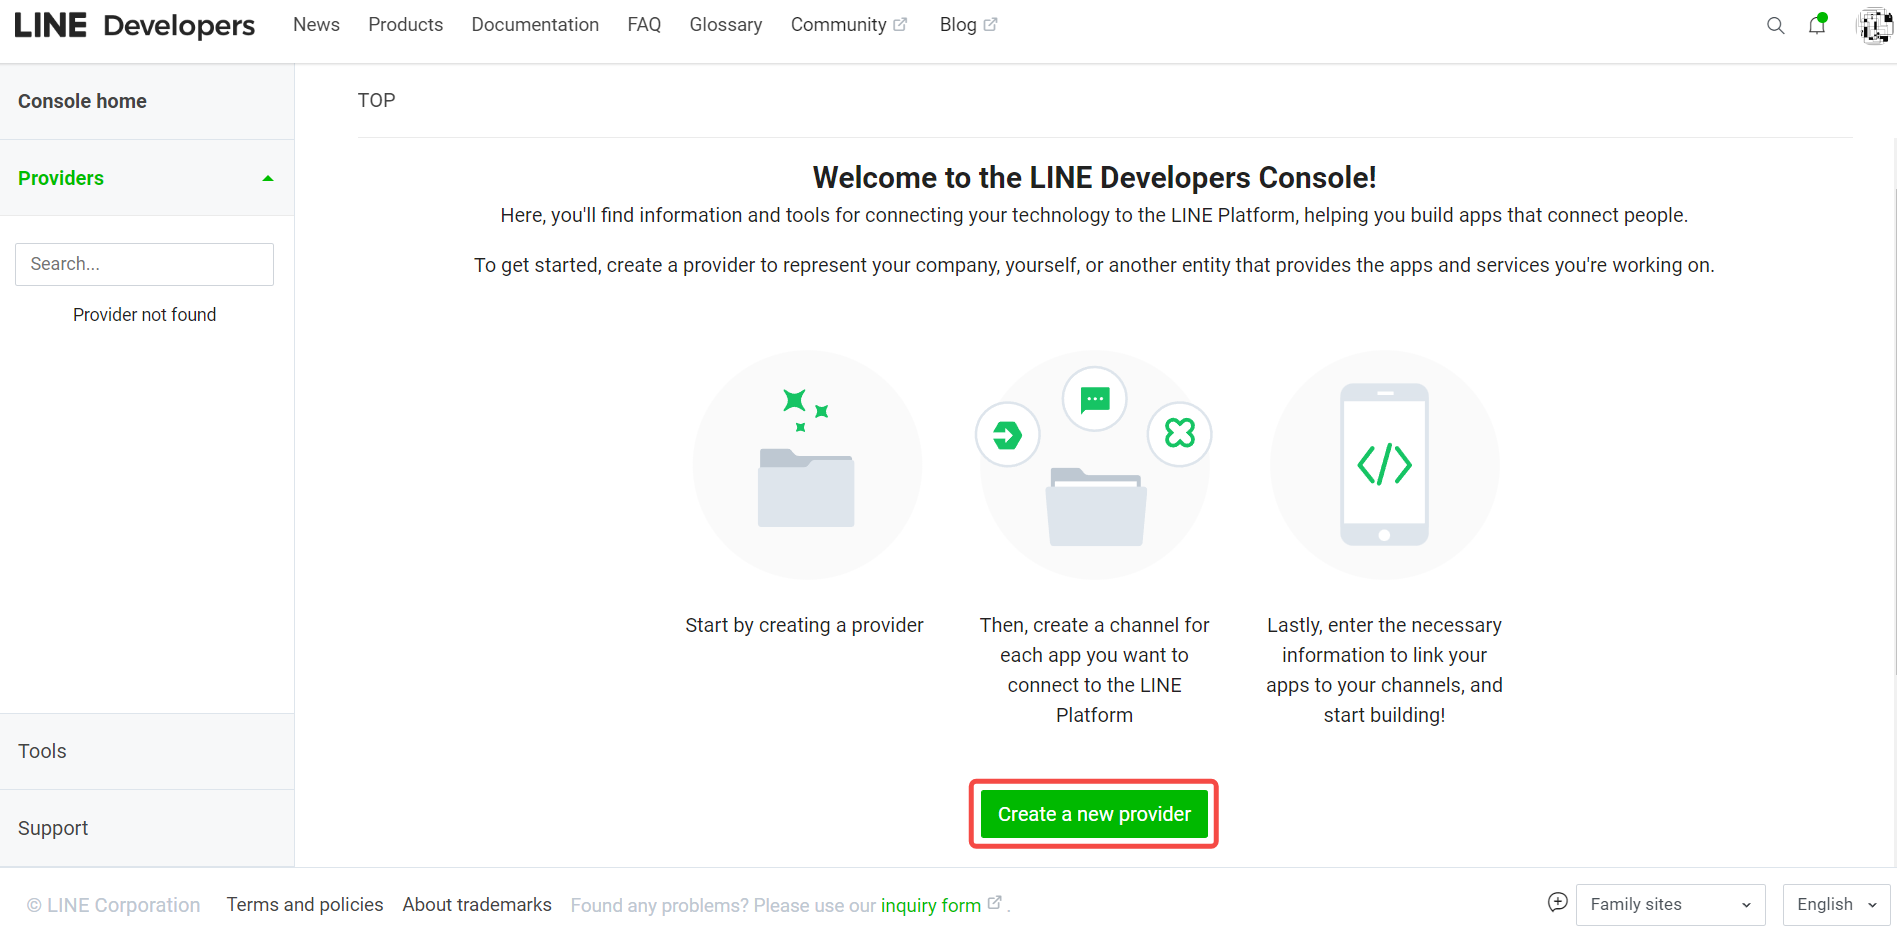
1.2 Complete the creation of the LINE Login Channel, fill in the Channel information, App types check Mobile APP, record Channel ID and Channel secret.

1.3 Switch to the "LINE Login" TAB item and complete the iOS/Android APP information.
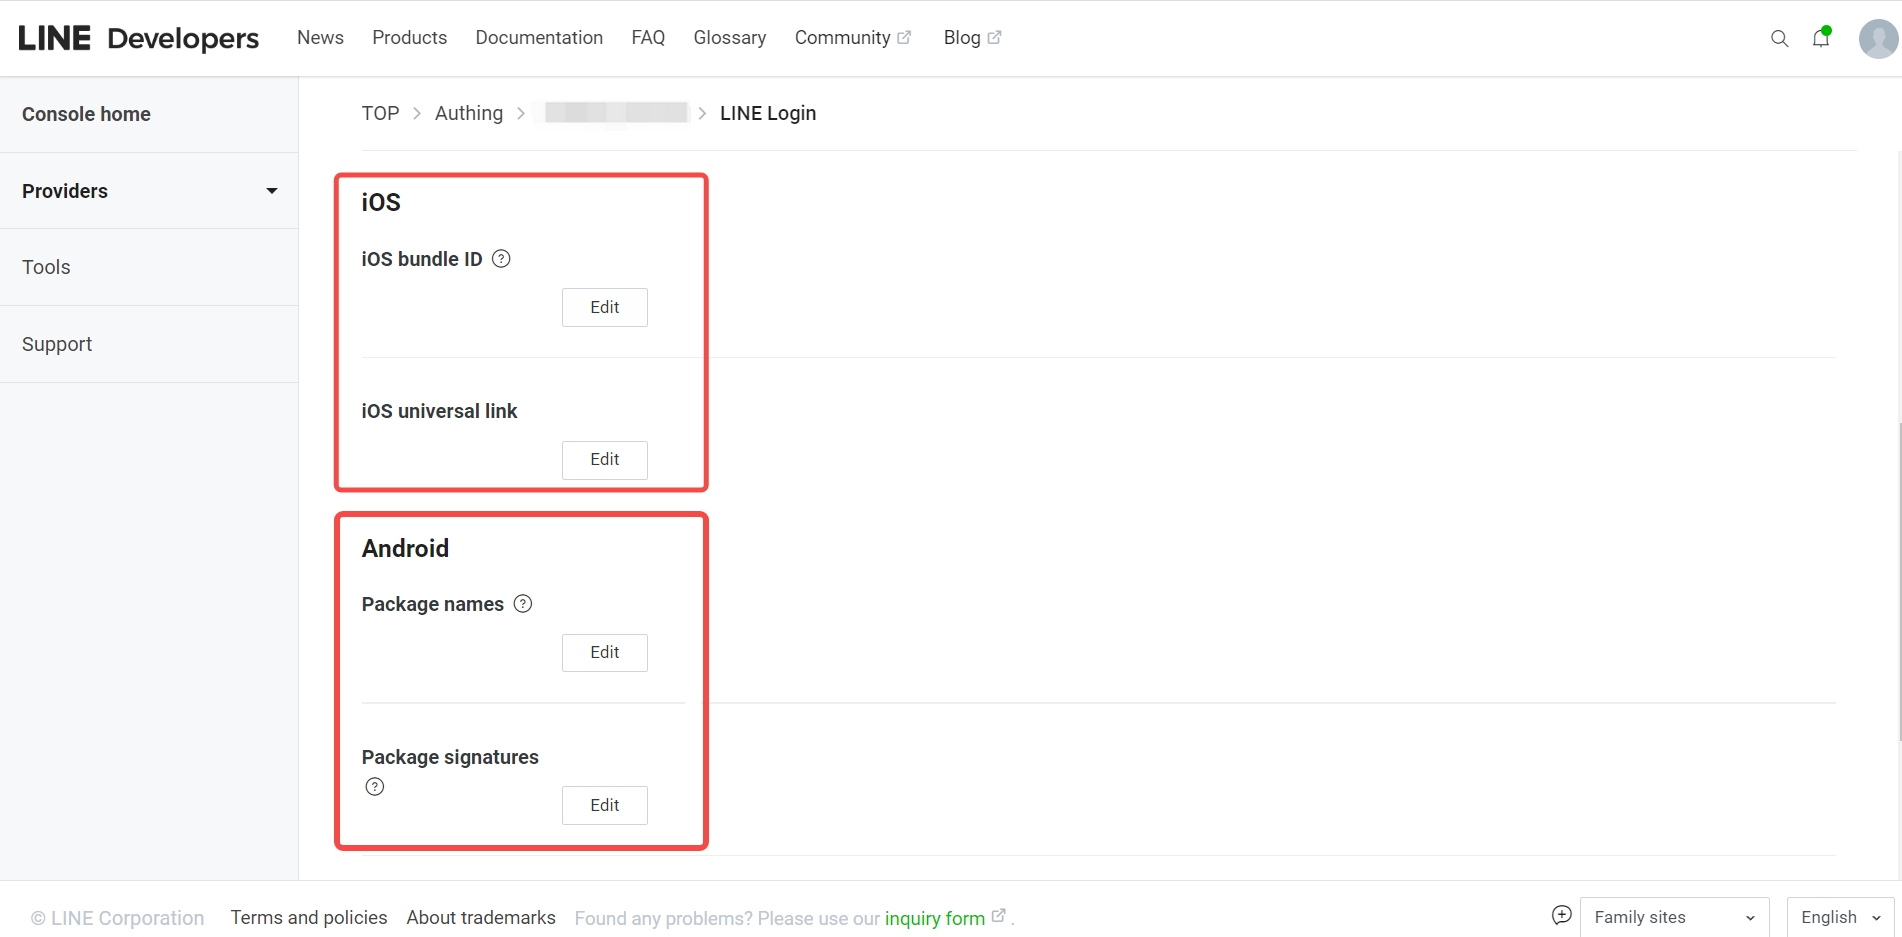
Step 2: Configure LINE mobile terminal in the GenAuth console
2.1 Please click the "Create social identity source" button on the "Social identity source" page of the GenAuth console to enter the "Select social identity source" page.
2.2 Please click the "LINE" identity source button on the "Social identity source"-"Select social identity source" page of the GenAuth console to enter the "LINE mobile terminal login mode" page.
2.3 Please configure the relevant field information in the "Social Identity Source" - "LINE Mobile" page of the GenAuth console.
| Field/Function | Description |
|---|---|
| Unique ID | a. The unique ID consists of lowercase letters, numbers, and -, and its length is less than 32 bits. b. This is the unique ID of this connection and cannot be modified after setting. |
| Display Name | This name will be displayed on the button of the terminal user's login interface. |
| Channel ID | Previous step LINE Developers - Channel ID of LINE Login Channel. |
| Channel secret | Previous step LINE Developers - Channel secret of LINE Login Channel. |
| Login mode | After turning on "Login only mode", you can only log in to existing accounts, and cannot create new accounts. Please choose carefully. |
| Account identity association | When "Account identity association" is not turned on, a new user is created by default when a user logs in through an identity source. After turning on "Account identity association", users can be allowed to log in directly to an existing account through "field matching". |
After the configuration is completed, click the "Create" or "Save" button to complete the creation.
Step 3: Development access
Recommended development access method: SDK
Pros and cons description: Simple operation and maintenance, which is responsible for GenAuth. Each user pool has an independent secondary domain name; if you need to embed it in your application, you need to log in using the pop-up mode, that is, after clicking the login button, a window will pop up with the login page hosted by GenAuth, or redirect the browser to the login page hosted by GenAuth.
Detailed access method:
3.1 Create an application in the GenAuth console. For details, see: How to create an application in GenAuth
3.2 On the created "LINE Mobile" identity source connection details page, open and associate an application created in the GenAuth console
Original image 326 (in section "Step 3: Development access"; Chinese UI)
3.3 Experience LINE third-party login on the login page (as shown in the end user preview).
Amazon
Scenario Introduction
- Overview: Amazon social login allows users to log in to third-party applications or websites securely using Amazon as the identity source. Configure and enable Amazon social login in GenAuth to quickly obtain Amazon's basic open information and help users log in without passwords through GenAuth.
- Application scenario: PC website
- Terminal user preview image:
Original image 327 (in section "Scenario Introduction"; Chinese UI)
Notes
- If you have not opened an Amazon Open Platform account, please go to Amazon Open Platform to register a developer account.
- If you have not opened a GenAuth console account, please go to GenAuth console to register a developer account.
Step 1: Create a security profile on Amazon Open Platform
1.1 Go to Amazon Open Platform to create a security profile.
Click "Developer Console" -> "Login With Amazon" at the top of the page to create a security profile. If you encounter any problems during the process, please refer to Amazon's official Documentation Login with Amazon at the top of the page.
1.2 Configure Web Settings, record Client ID and Client Secret, which will be used in the next step 
- Allowed Origin: Fill in
https://core.genauth.ai - Allowed Return URL: Fill in
https://core.genauth.ai/connection/social/{Unique Identifier}/{User Pool ID}/callback, you need to replace{Unique Identifier}with theUnique Identifierfilled in the identity source you are creating in GenAuth, and{User Pool ID}with your User Pool ID
Step 2: Configure Amazon in the GenAuth console
2.1 On the GenAuth console's "Social Identity Source" page, click the "Create Social Identity Source" button to go to the "Select Social Identity Source" page.
Original image 329 (in section "Step 2: Configure Amazon in the GenAuth console"; Chinese UI)
2.2 On the GenAuth console's "Social Identity Source" - "Select Social Identity Source" page, click the "Amazon" identity source button to go to the "Amazon Login Mode" page.
Original image 330 (in section "Step 2: Configure Amazon in the GenAuth console"; Chinese UI)
Original image 331 (in section "Step 2: Configure Amazon in the GenAuth console"; Chinese UI)
2.3 Please configure the relevant field information in the "Social Identity Source" - "Amazon" page of the GenAuth console.
Original image 332 (in section "Step 2: Configure Amazon in the GenAuth console"; Chinese UI)
| Field/Function | Description |
|---|---|
| Unique ID | a. The unique ID consists of lowercase letters, numbers, and -, and its length is less than 32 bits. b. This is the unique ID of this connection and cannot be modified after setting. |
| Display Name | This name will be displayed on the button of the end user's login interface. |
| Client ID | The client ID of Amazon "Security Profile" - "Web Settings" needs to be obtained on the Amazon Open Platform. |
| Client key | The client key of Amazon's "Security Profile" - "Web Settings" needs to be obtained on the Amazon Open Platform. |
| Callback address | Github valid jump URI. This URL needs to be configured to the Allowed Return URLs under Amazon Web Settings. |
| Login mode | After turning on "Login-only mode", you can only log in to existing accounts, and cannot create new accounts. Please choose carefully. |
| Account identity association | When "Account identity association" is not turned on, a new user is created by default when a user logs in through an identity source. After turning on "Account identity association", users can be allowed to log in directly to an existing account through "Field Matching" or "Query Binding". |
After the configuration is completed, click the "Create" or "Save" button to complete the creation.
After creating the Amazon identity source on the GenAuth console, you need to configure the callback address to the Allowed Return URLs in the Web Settings information on the Amazon Open Platform.
Original image 333 (in section "Step 2: Configure Amazon in the GenAuth console"; Chinese UI)
Step 3: Development access
Recommended development access method: Use a hosted login page
Pros and cons description: Simple operation and maintenance, GenAuth is responsible for operation and maintenance. Each user pool has an independent secondary domain name; if you need to embed it in your application, you need to log in using the pop-up mode, that is: after clicking the login button, a window will pop up with the login page hosted by GenAuth, or redirect the browser to the login page hosted by GenAuth.
Detailed access method:
3.1 Create an application in the GenAuth console. For details, see: How to create an application in GenAuth
3.2 On the created "Amazon" identity source connection details page, open and associate an application created in the GenAuth console
Original image 334 (in section "Step 3: Development access"; Chinese UI)
3.3 Click the "Experience Login" button of the GenAuth console application to experience the "Amazon" login in the pop-up login window
Original image 335 (in section "Step 3: Development access"; Chinese UI)
Amazon Mobile
Scenario Introduction
Overview
Amazon social login is a user's secure login to a third-party application or website using Amazon as the identity source. Configure and enable Amazon's social login in GenAuth to quickly obtain Amazon's basic open information and help users achieve password-free login through GenAuth.
Application Scenario
Mobile
End User Preview
Original image 336 (in section "End User Preview"; Chinese UI)
Notes
- If you do not have an Amazon Open Platform account, please go to Amazon Open Platform to register a developer account.
- If you have not opened a GenAuth console account, please go to the GenAuth console to register a developer account.
Step 1: Create a security profile on the Amazon Open Platform
1.1 Go to the Amazon Open Platform to create a security profile.
Click "Developer Console" -> "Login With Amazon" at the top of the page to create a security profile. If you encounter any problems during the process, please refer to the Amazon official Documentation Login with Amazon at the top of the page.
1.2 Record the Security Profile ID, and configure Android and iOS settings separately
1.2.1 Configure Android
Fill in the information, generate the API Key and record the generated API Key
1.2.2 Configure iOS
Fill in the information, generate API Key and record the generated API Key
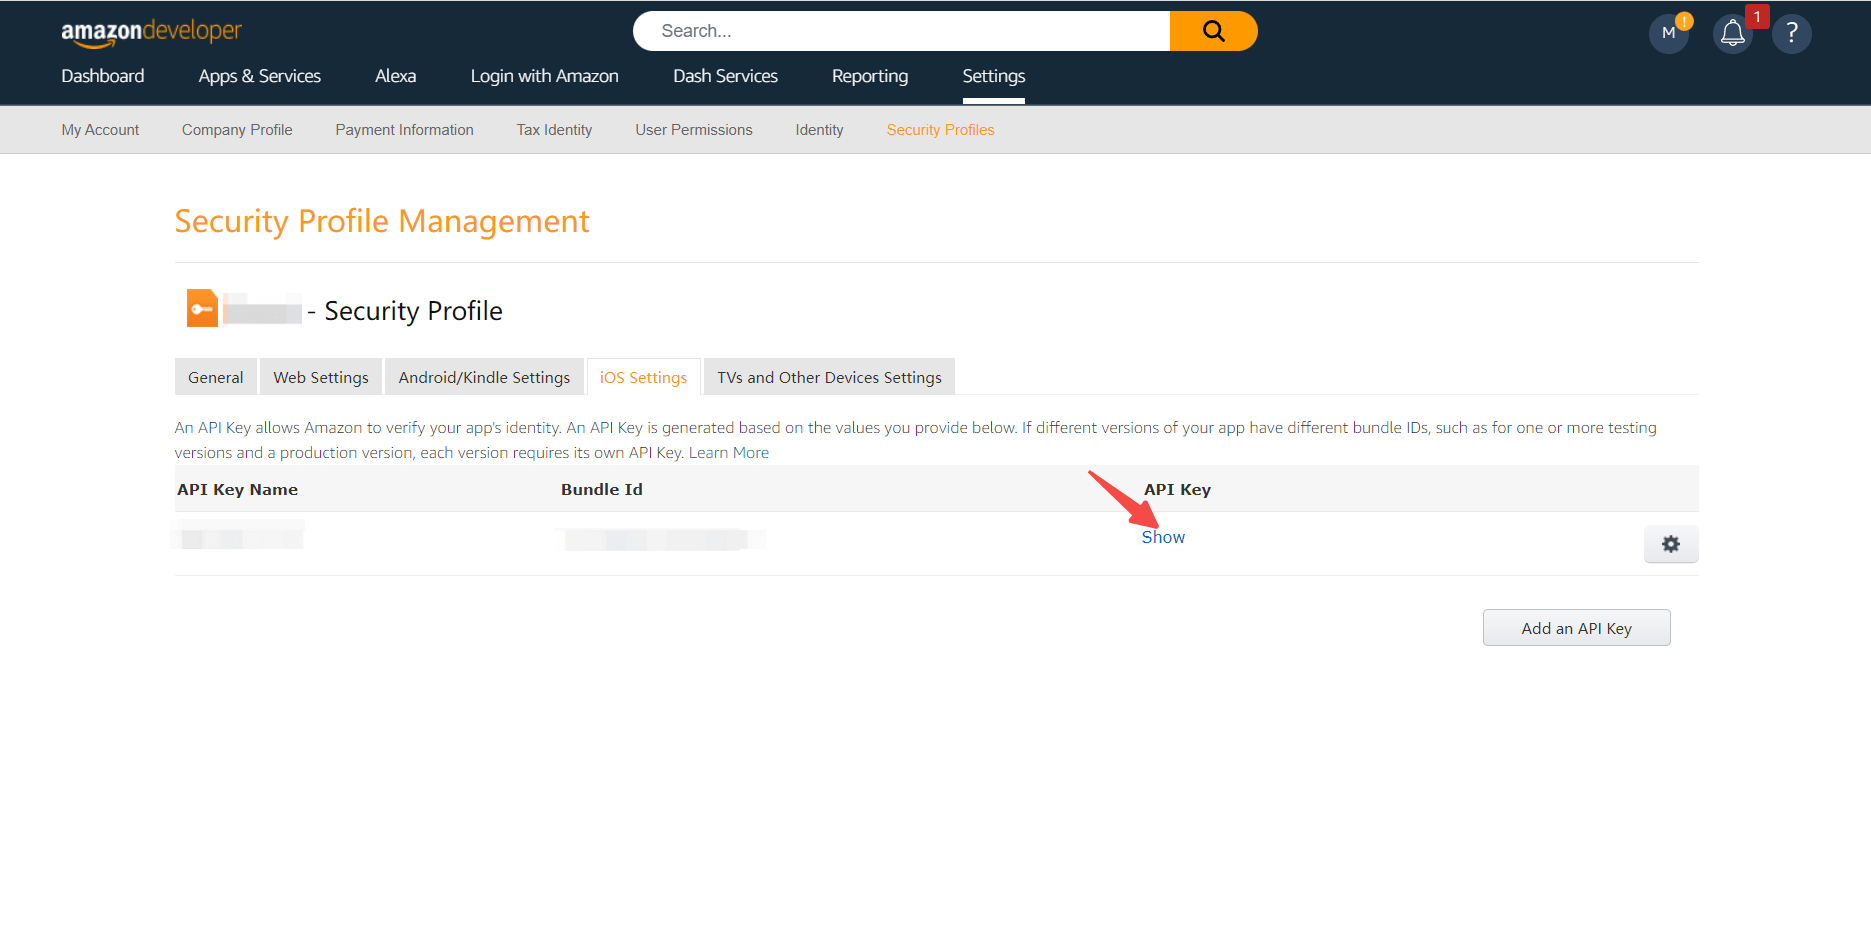
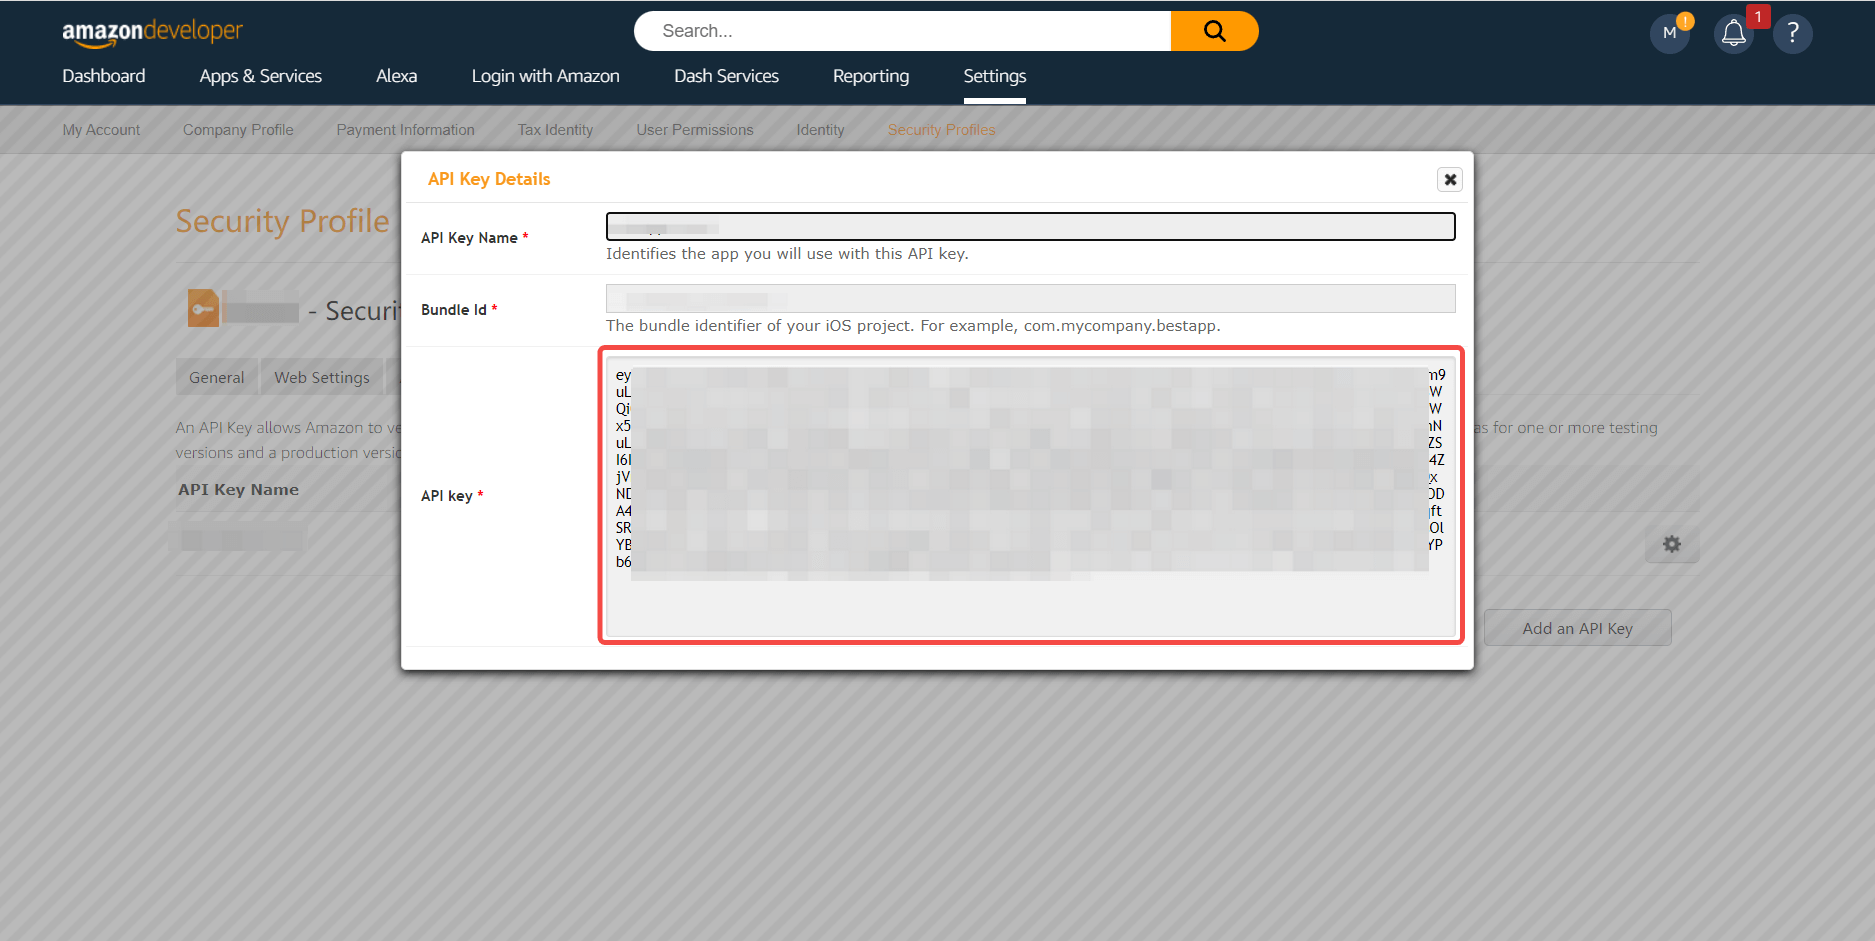
Step 2: Configure Amazon Mobile in the GenAuth console
2.1 Please click the "Create Social Identity Source" button on the "Social Identity Source" page of the GenAuth console to enter the "Select Social Identity Source" page.
Original image 337 (in section "Step 2: Configure Amazon Mobile in the GenAuth console"; Chinese UI)
2.2 Please go to the GenAuth console's "Social Identity Source" - "Select Social Identity Source" page, click the "Amazon" identity source button to enter the "Amazon Mobile Login Mode" page.
Original image 338 (in section "Step 2: Configure Amazon Mobile in the GenAuth console"; Chinese UI)
Original image 339 (in section "Step 2: Configure Amazon Mobile in the GenAuth console"; Chinese UI)
2.3 Please go to the GenAuth console's "Social Identity Source" - "Amazon Mobile" page to configure the relevant field information.
Original image 340 (in section "Step 2: Configure Amazon Mobile in the GenAuth console"; Chinese UI)
| Field/Function | Description |
|---|---|
| Unique ID | a. The unique ID consists of lowercase letters, numbers, and -, and is less than 32 bits long. b. This is the unique identifier of this connection and cannot be modified after setting. |
| Display Name | This name will be displayed on the button of the end user's login interface. |
| Security Profile ID | Amazon's "Security Profile ID" needs to be obtained on the Amazon Open Platform. |
| API Key (Android) | Amazon's "Security Profile" - "Android Settings" API Key needs to be obtained on the Amazon Open Platform. |
| API Key (iOS) | Amazon's "Security Profile" - "iOS Settings" API Key needs to be obtained on the Amazon Open Platform. |
| Login Mode | After turning on "Login Only Mode", you can only log in to existing accounts and cannot create new accounts. Please choose carefully. |
| Account Identity Association | When "Account Identity Association" is not turned on, a new user is created by default when a user logs in through an identity source. After turning on "Account Identity Association", users can be allowed to log in directly to an existing account through "Field Matching". |
After the configuration is completed, click the "Create" or "Save" button to complete the creation.
Step 3: Development access
Recommended development access method: SDK
Pros and cons description: Simple operation and maintenance, which is handled by GenAuth. Each user pool has an independent secondary domain name; if you need to embed it in your application, you need to log in using the pop-up mode, that is: after clicking the login button, a window will pop up with the login page hosted by GenAuth, or redirect the browser to the login page hosted by GenAuth.
Detailed access method:
3.1 Create an application in the GenAuth console. For details, see: How to create an application in GenAuth
3.2 On the created "Amazon Mobile" identity source connection details page, open and associate an application created in the GenAuth console
Original image 341 (in section "Step 3: Development access"; Chinese UI)
3.3 Experience Amazon third-party login on the login page (as shown in the end-user preview).
OPPO Mobile
Scenario Introduction
Overview
OPPO social login allows users to log in to third-party applications or websites securely using OPPO as the identity source. Configure and enable OPPO social login in GenAuth to quickly obtain OPPO's basic open information and help users log in without passwords.
Application Scenario
Mobile
Terminal User Preview
Original image 342 (in section "Terminal User Preview"; Chinese UI)
Notes
- If you don't have an OPPO account yet, please go to OPPO Open Platform to register as a developer.
- If you have not opened a GenAuth console account, please go to GenAuth console to register a developer account
Step 1: Create an app on OPPO
Log in to OPPO Open Platform, click Management Center: Original image 343 (in section "Step 1: Create an app on OPPO"; Chinese UI)
On the Management Center page, click Account Services: Original image 344 (in section "Step 1: Create an app on OPPO"; Chinese UI)
On the Account Services page, click Create a new app and select Create an application: Original image 345 (in section "Step 1: Create an app on OPPO"; Chinese UI)
On the Create a new application page, fill in the application information and click Submit: Original image 346 (in section "Step 1: Create an app on OPPO"; Chinese UI)
Connect the newly created application to the "Account Service", activate the account and enable capabilities:
Original image 347 (in section "Step 1: Create an app on OPPO"; Chinese UI)
After the creation is complete, view the application details and record the AppID, AppKey and AppSecret, which will be used in the next step. Original image 348 (in section "Step 1: Create an app on OPPO"; Chinese UI)
Step 2: Configure OPPO application configuration in the GenAuth console
2.1 Please click the "Create Social Identity Source" button on the "Social Identity Source" page of the GenAuth console to enter the "Select Social Identity Source" page.
2.2 Please go to the GenAuth console's "Social Identity Source" - "Select Social Identity Source" page, click the "OPPO" identity source button to enter the "OPPO Mobile Login Mode" page.
2.3 Please go to the GenAuth console's "Social Identity Source" - "OPPO Mobile" page to configure the relevant field information. Original image 351 (in section "Step 2: Configure OPPO application configuration in the GenAuth console"; Chinese UI)
| Field | Description |
|---|---|
| Unique ID | a. The unique ID consists of lowercase letters, numbers, and -, and is less than 32 bits long. b. This is the unique ID for this connection and cannot be modified after setting. |
| Display Name | This name will be displayed on the button of the terminal user's login interface. |
| AppID | The OPPO application ID obtained in the previous step. |
| AppKey | The OPPO application key obtained in the previous step. |
| AppSecret | The OPPO application secret obtained in the previous step. |
| Login Mode | After turning on "Login Only Mode", you can only log in to existing accounts, and cannot create new accounts. Please choose carefully. |
2.4 After the configuration is completed, click the "Create" or "Save" button to complete the creation.
Step 3: Development Access
Recommended Development Access Method: SDK
Advantages and Disadvantages: Simple operation and maintenance, which is handled by GenAuth. Each user pool has an independent secondary domain name; if you need to embed it in your application, you need to log in using the pop-up mode, that is, after clicking the login button, a window will pop up with the login page hosted by GenAuth, or redirect the browser to the login page hosted by GenAuth.
Detailed access method:
3.1 Create an application in the GenAuth console. For details, see How to create an application in GenAuth
3.2 On the created "OPPO Mobile" identity source connection details page, open and associate an application created in the GenAuth console
Original image 352 (in section "Step 3: Development Access"; Chinese UI)
3.3 Experience OPPO third-party login on the login page (as shown in the End User Preview).
Custom database overview
INFO
For information about the GenAuth user pool version that supports the "Custom database" feature, please check the official website "Pricing" page. If your version does not support this benefit and you want to try it, you can activate the trial period. For an introduction to the trial period and how to activate it, please check Trial Period.
Using a custom database can meet the needs of the following scenarios:
- Use your own database to save user data: Use your own database to save user data. In this mode, GenAuth will not store any of your user information.
- Lazy migration of users to GenAuth: This mode of migrating users is called lazy migration. In simple terms, the principle is as follows: At the beginning, all the original user data is in your database. When the user tries to log in to GenAuth for the first time, GenAuth will use the custom database script you configured to find and verify the user in your database. If successful, the user will be migrated to GenAuth; when the user logs in for the second time, it will be verified using the GenAuth database; when all users have logged in at least once, it means that the migration task is completed. For details, please see: Use custom database to achieve lazy migration of users.
You can configure a custom database in the following way: Go to the GenAuth console Connect Identity Source - Custom Database page to enable a custom database connection. For details, see Configure a custom database:
Original image 353 (in section "Custom database overview"; Chinese UI)
How it Works
As shown in the figure below, you can customize the database in the GenAuth authentication flow to obtain the user's identity information from the Legacy Database. Depending on the scenario you are using, the process principle will be slightly different.
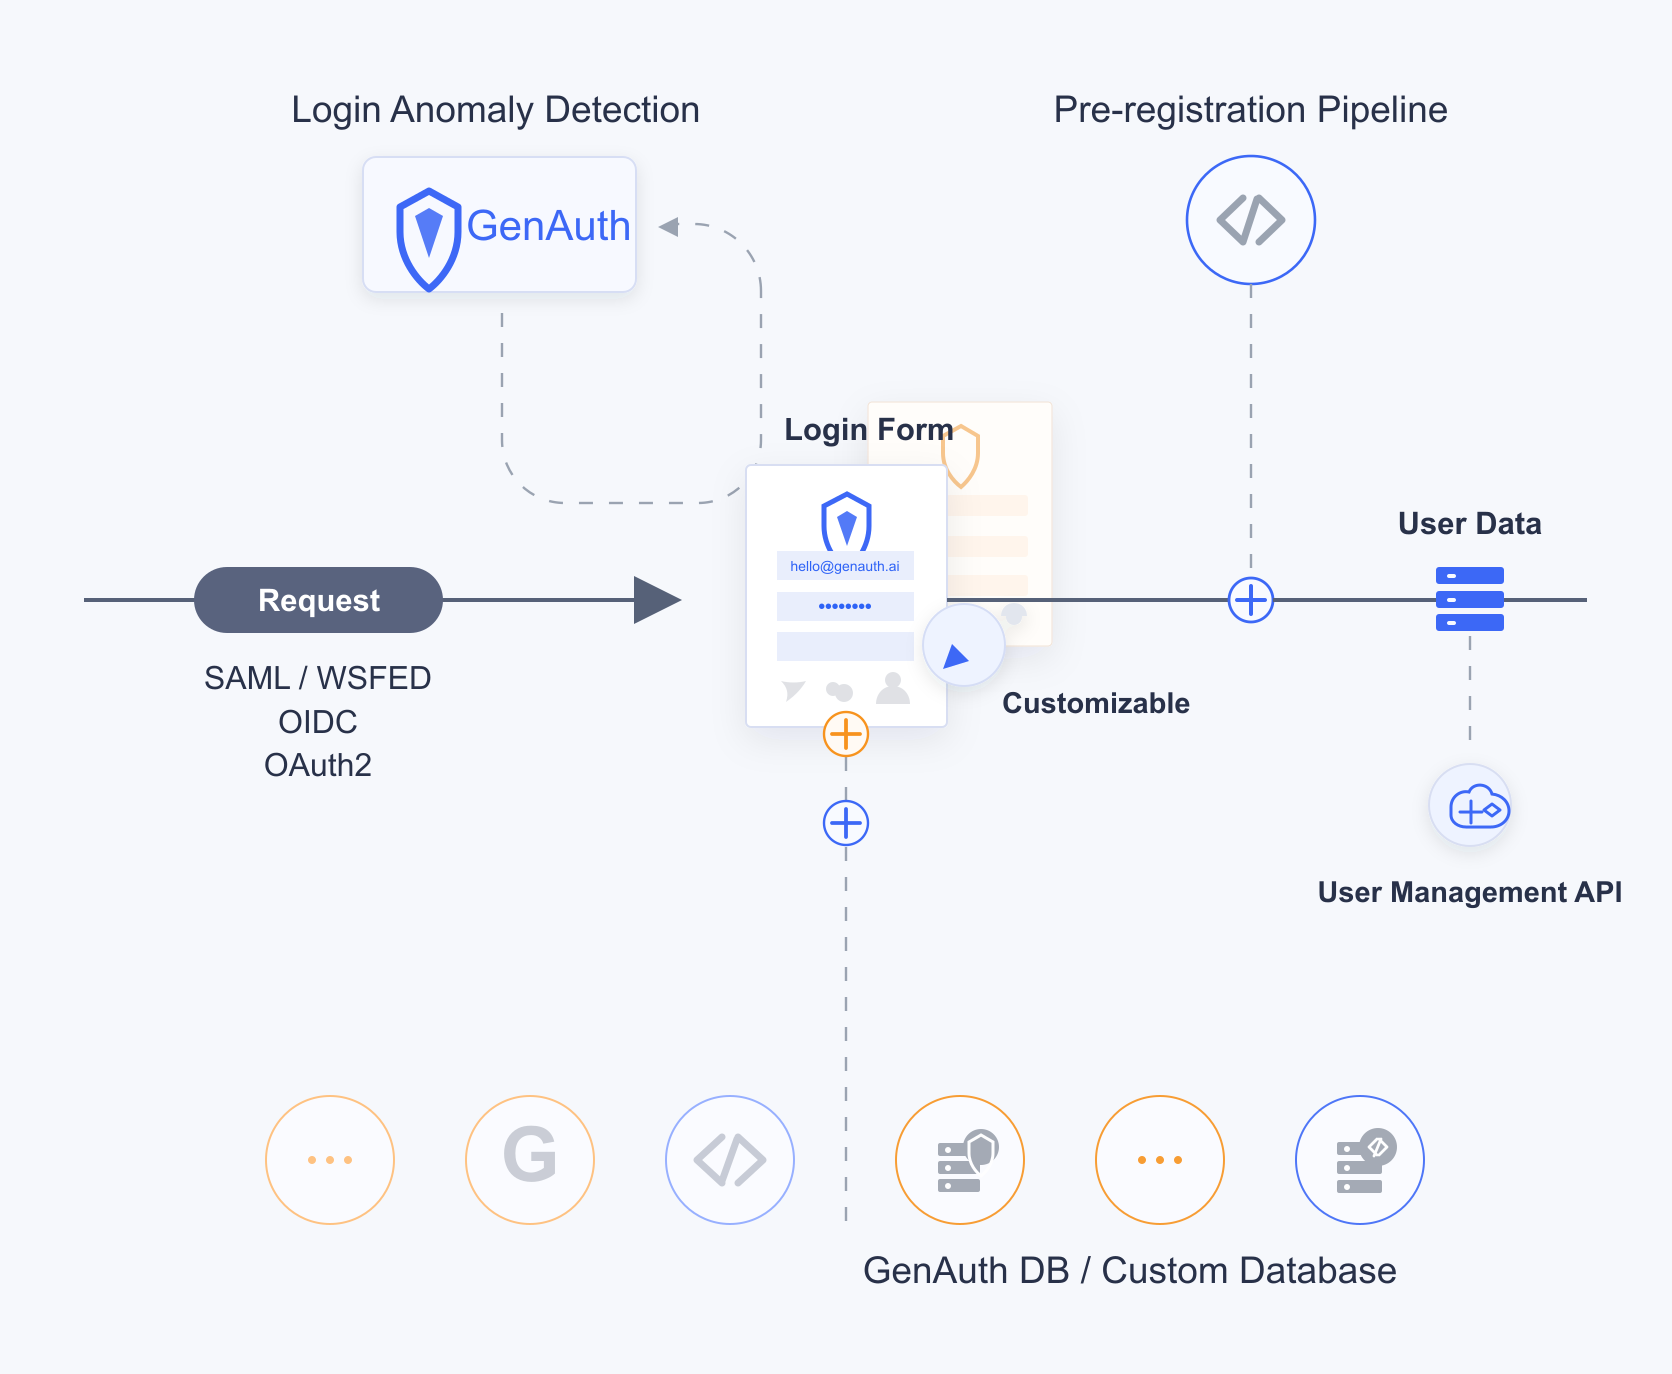
Custom databases have two different modes. You can choose the appropriate mode according to your business needs:
- Lazy migration of users: This mode of migrating users is called lazy migration. In short, the principle is as follows: At the beginning, all the original user data is in your database. When the user tries to log in to GenAuth for the first time, GenAuth will use the custom database script you configured to find and verify the user in your database. If successful, the user will be migrated to GenAuth; when the user logs in for the second time, it will be verified using the GenAuth database; when all users have logged in at least once, it means that the migration task is completed. For details, please see: Use custom database to achieve lazy migration of users.
- Use custom database completely: In this mode, user data is always saved in your database, and GenAuth will never save your user data. In order for the system to work properly, you need to implement a complete user add, delete, modify and query script.
Running environment
Currently, the running environment of GenAuth's custom database script is a fully isolated sandbox instance of the node 12 environment.
npm module
Includes various database connection clients, axios, bcrypt, lodash, etc.:
- bcrypt: It can be used to encrypt and verify passwords. This is also our recommended password encryption method, and it is also very simple to use. Example:
const isPasswordValid = await bcrypt.compare(password, user.password);
if (!isPasswordValid) {
  throw new Error("Password error");
}- axios: The most popular network request library for Node.JS.
- lodash v4.
- pg: Node PostgresQL Driver.
- mongodb: Node Mongodb Driver.
- mysql2: Node MySQL Driver.
- mssql: Node Sql Server Driver.
Add IP whitelist
If the service you access in the script is configured with a firewall, please make sure it is open to the following IP addresses: 140.179.19.50, 52.80.250.250. You can also dynamically obtain the external IP address of the GenAuth server through the following API:
INFO
https://core.genauth.ai/api/system/public-ips
Configure database connection and write scripts
You can customize database authentication users. To do this, you need to configure database connection, write database operation scripts, and configure environment variables (optional).
Please make sure that your database has some fields required for GenAuth user profiles, such as
id,photo,nickname,username,phone, etc. For details, please see GenAuth User Profile Detailed Fields and Their Interpretations to understand the GenAuth user profile Schema.
GenAuth supports direct connection to the following mainstream databases and custom Web Services:
- MySQL
- PostgreSQL
- MongoDB
- Web Services: You can encapsulate the database into a service without directly exposing the database connection. For example, you can encapsulate the authentication operation into an API:
https://mydomain.com/auth.
INFO
If the service you access in the script is configured with a firewall, please make sure it is open to the following IP addresses: 140.179.19.50, 52.80.250.250. You can also dynamically obtain the external IP address of the GenAuth server through the following API:
https://core.genauth.ai/api/system/public-ips
Enable custom database connection
WARNING
Once the custom database is enabled, it will take effect immediately. Before you write a custom script, users will be prompted with an error similar to Please implement the Login script for this database connection when trying to log in. This is an error prompted by the default script. Please modify the script or temporarily close the custom database connection.
Log in to the GenAuth console, and on the Connect Identity Source - Custom Database page, click the Open button:
Original image 354 (in section "Enable custom database connection"; unverified language)
Select scenario
Custom databases have two different modes, and you can choose the appropriate mode according to your business needs:
- Lazy migration of users: This mode of migrating users is called lazy migration. In simple terms, the principle is as follows: At the beginning, all the original user data is in your database. When the user tries to log in to GenAuth for the first time, GenAuth will search and verify the user in your database through the custom database script you configured. If successful, the user will be migrated to GenAuth; when the user logs in for the second time, the GenAuth database will be used to verify it; when all users have logged in at least once, it means that the migration task to the cloud is completed. For details, please see: Use a custom database to implement lazy user migration.
- Use a custom database completely: In this mode, user data is always stored in your database, and GenAuth will never save your user data. In order for the system to work properly, you need to implement a complete user add, delete, modify and query script.
Configure database connection information
Next, fill in the database connection information. You can choose Connection URI and Programmatic:
Connection URI format
Original image 355 (in section "Connection URI format"; unverified language)
Connection URI is generally a URI in the form of protocol://username:password@host:port/database, such as postgres://postgres:postgres@localhost:5432/database-name. You can reference it in the script through the global variable env.DB_CONNECTION_URI, as shown below:
const { Client } = require("pg");

const client = new Client({
  connectionString: env.DB_CONNECTION_URI,
});
await client.connect();
Programmatic Form
Original image 356 (in section "Programmatic Form"; unverified language)
This mode specifies the database host, port, username, password, and database name respectively, which can be referenced in the script through the global variables env.DB_HOST, env.DB_PORT, env.DB_USERNAME, env.DB_PASSWORD, and env.DB_DATABASE, as shown below:
const { Client } = require("pg");
const client = new Client({
  host: env.DB_HOST,
  port: env.DB_PORT,
  user: env.DB_USERNAME,
  password: env.DB_PASSWORD,
  database: env.DB_DATABASE,
});
await client.connect();
Write database operation scripts
We currently provide MySQL, PostgreSQL, MongoDB, Custom service four types of templates, you can write corresponding scripts as needed.
When you choose Migrate user data to GenAuth (LAZY_MIGRATION) mode, you need to write two functions in total:
- Login: This script will be executed when the user tries to log in. If the user is not synchronized to the GenAuth database, the user account and password will be checked according to the script you filled in.
- Find user: This script will be executed when the user tries to register. If the script returns the user identity information, the user will be prompted that the user already exists and the registration failed.
When you choose Use your own database completely (CUSTOM_USER_STORE) mode, you need to write the following functions in total:
- Login: This script will be executed when the user tries to log in. If the user is not synchronized to the GenAuth database, the user account and password will be checked according to the script you filled in.
- Accurately find user: This script will be executed when the user tries to register. If the script returns the user identity information, the user will be prompted that the user already exists and the registration failed.
- Fuzzy search for users: This script will be called when the administrator uses the console or API to fuzzily search for users.
- Create user: This script will be executed when the user registers or creates a user using the API and console. You need to save the user information to your own database.
- Modify user information: This script will be executed when the administrator modifies the user information or the user modifies the user information himself.
- Delete user: This script will be executed when the administrator deletes the user account using the console or API.
- Get user list: This script will be executed when the administrator uses the console or API to get the user list. The data required by this interface needs to include the total number of users and the user list of the current page.
- Verify password: This script will be executed when the user tries to reset the password and verify the original password.
script-templateCode snippet: script-template
Test database script
We provide developers with an online database for quick testing. You can use this database for quick testing through the following address:
INFO
https://db-connections.genauth.ai
TIP
The database is free for all users. The database connection information is postgres://postgres:postgres_root_local@47.74.20.164:31000/custom-db-connection. You can create a test user or use the sample user in the list.
After configuring the Connection URI, click Save and then click the Debug button at the bottom.
Fill in a user in the user list of the sample user pool in the pop-up form:
Click the Test button, and you should see the relevant success prompt.
Lazy migration of users to GenAuth
Migration process
GenAuth supports smooth migration of users from a custom database to GenAuth without downtime. When this function is enabled, the following effects will be produced on login and registration requests:
Authentication request:
- The user will use the custom data script you configured to authenticate the user for the first time. After successful authentication, it will be migrated to the GenAuth database. Otherwise, it will prompt that the user does not exist or the password is incorrect.
- The user does not need to change the account password.
- The user's subsequent authentication will go through the GenAuth database.
- When all users have been successfully authenticated at least once, the database migration is completed smoothly.
Registration request:
- When registering a user, it will first check whether it exists in the GenAuth database. If it already exists, an error prompt will be returned.
- If the user does not exist in the GenAuth database, the
getUserinterface will be used to check whether the user exists in the custom database. If it already exists, an error prompt will be returned. - If the user does not exist in both the GenAuth database and the custom database, the registration is successful.
Configuration script
You need to write the Login and Search user scripts in the GenAuth console, Connect to identity source - Custom database page. For details, please see:
Verify the migration effect
After you enable user data migration, you can verify the fully migrated users in the following ways:
- Use the management API to get a list of users or search for users.
- View users in the GenAuth console User Management - User List page.
After user migration is complete
After all users have been migrated, close the custom database.
Original image 357 (in section "After user migration is complete"; unverified language)
Use custom database to save user data completely
Migration process
When using this mode, user data is always saved in your database, and GenAuth will never save your user data. In order for the system to work properly, you need to implement a complete user addition, deletion, modification and query script.
Configuration script
You need to write Login, Search user, Create user, Update user information, Delete user, Get user list, Verify password scripts in the GenAuth console, Connect to identity source - Customize database page, for details, please see:
- Write login script.
- Write search user script.
- Write create user script.
- Write update user information script.
- Write delete user script.
- Write get user list script.
- Write verification password script.
Best Practices
- We recommend that after a user completes authentication and is migrated to the GenAuth database, mark the user as migrated in the original database.
- Do not hard-code database connection information. It is recommended to use database connection information and environment variables to manage such constant data. We will encrypt and store this information in the database, but for performance reasons, we will not encrypt and store the source code you upload.
Account Binding
GenAuth supports login in various ways:
Conventional methods are that your users log in using their account password, SMS/email verification code.
Another convenient method is that if you configure third-party account login, your users can log in directly through their third-party account.
Under what circumstances do you need the account binding function?
Let's imagine a common scenario:
You are going to start using the user pool of GenAuth. Since your business is already in formal operation, you have accumulated some existing users. So first you import existing users into your GenAuth user pool:
At this point, the user information in your user list may already include the corresponding user's mobile phone number, email address, username, and other information:
In this case, you hope to use the third-party account login capability provided by GenAuth so that your users do not have to enter their account password every time they log in, but can log in directly with one click.
At this point you may have a question: How can you ensure that users can log in to the same account through different login methods when logging in to your application integrated in GenAuth through a third-party account?
User journey
Before we start to introduce the account binding function in detail, we first take the "PC WeChat QR code scanning" identity source login method as an example to introduce the role of the account binding function of GenAuth in your user login journey. See the figure below for details:
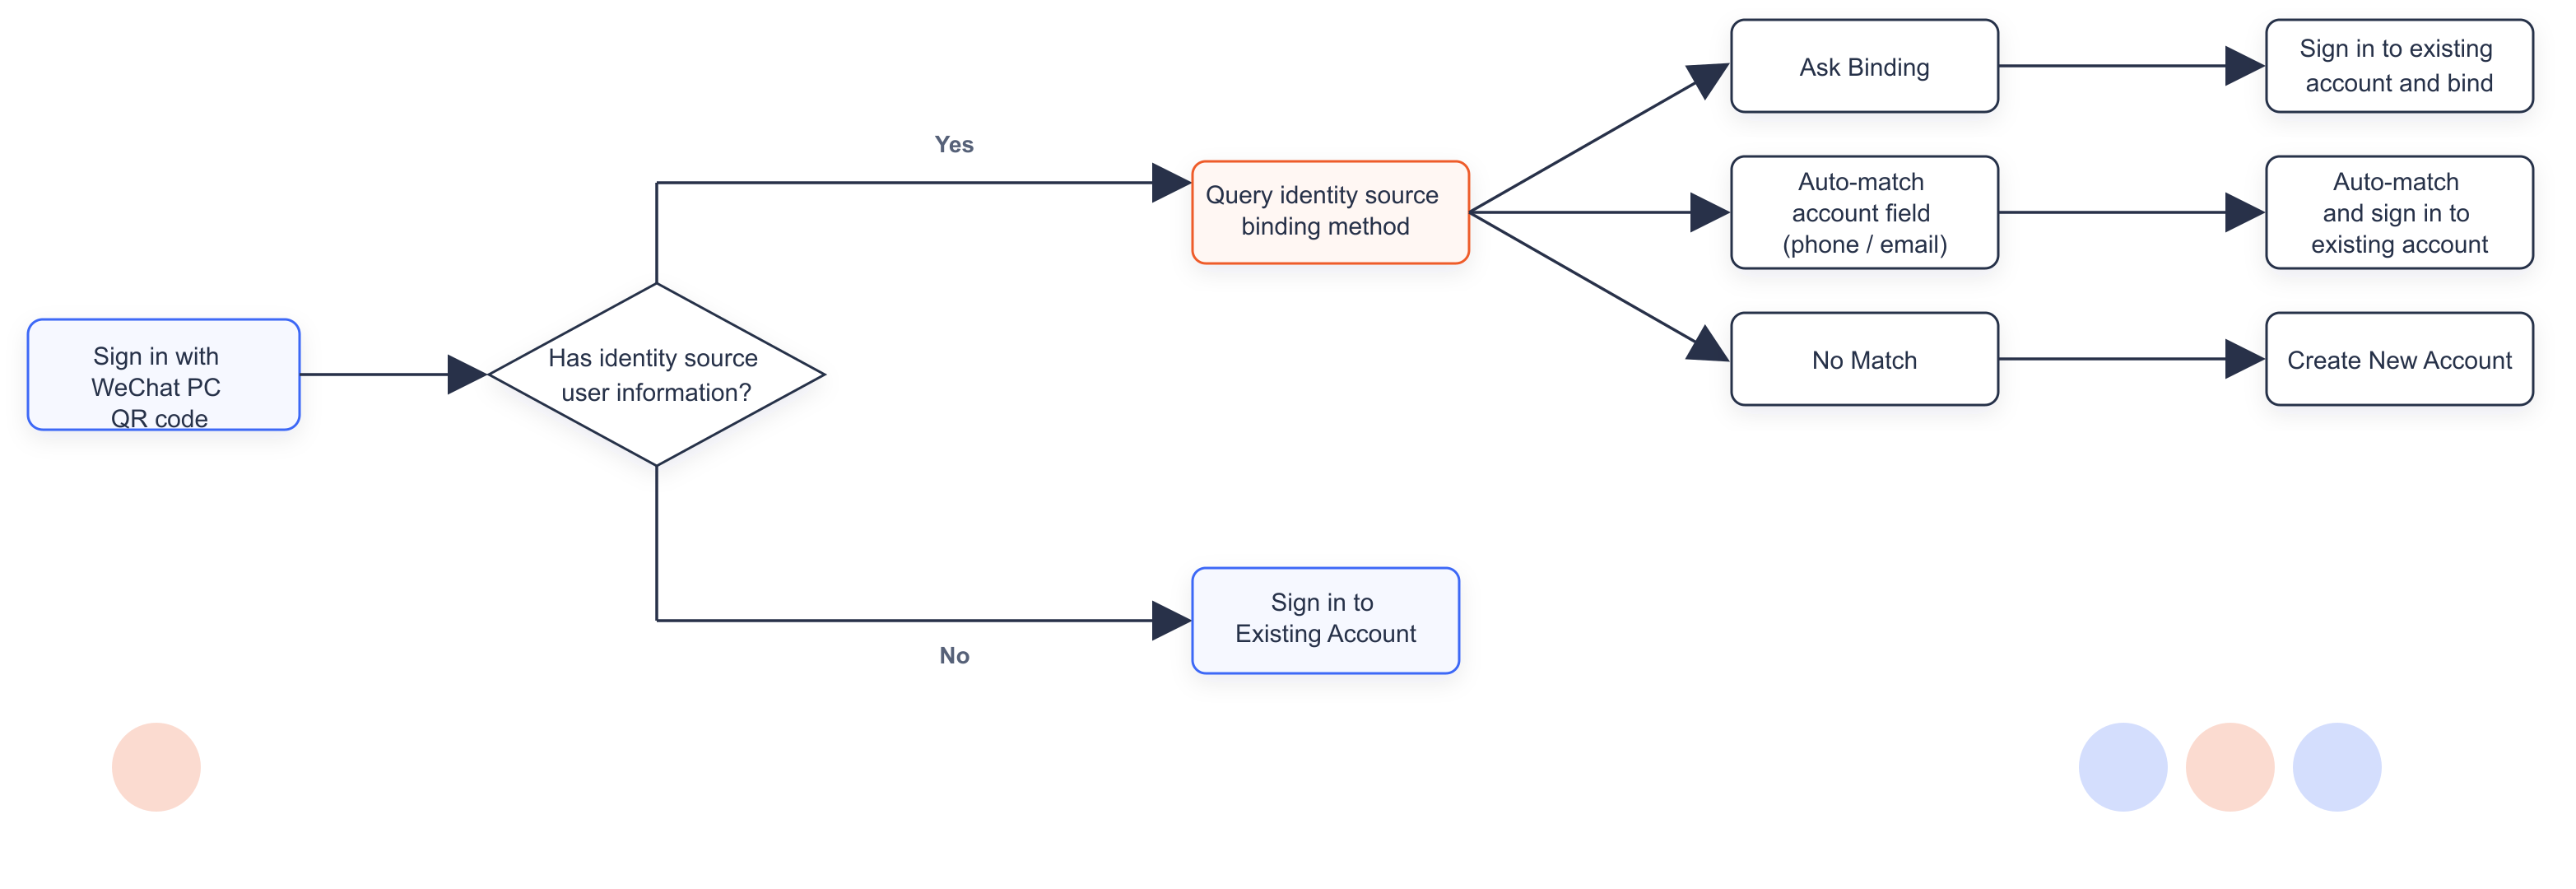
Function overview
When you configure a third-party identity source in GenAuth, you can use the "account binding" function to ensure that your users will eventually log in to the same account no matter which method they use to log in, thereby ensuring the uniqueness of each user's account in GenAuth.
GenAuth supports two ways to implement account binding:
Ask Binding
Field Matching
Take Github as an example:
Original image 360 (in section "Function overview"; Chinese UI)
You can choose a more suitable account binding mode based on the type of identity source used and the expected user journey.
Field Matching
"Field Matching" applies to identity sources that can obtain the unique field of the GenAuth user account.
Function
After turning on "Field Matching", when your user logs in through this identity source for the first time, we will use the fields you configured pulled from the identity source to match the corresponding fields in the GenAuth user pool. There are two possible results of the match:
- Successful match: The user will directly log in to the matched account successfully and complete the binding of the account and the identity information;
- Failed match: A new account will be automatically created in your user pool. When the user logs in again using this method, he will log in to the newly created account. In particular, if your app prohibits registration, then when the match fails, the user will be prohibited from creating a new account and will not be able to log in, ensuring the security of your app access.
User Usage Journey
After enabling field matching according to the above steps, when your user logs in through this identity source for the first time, he will go through the following path (using Github as an example):
Step 1: Log in using Github
Step 2: Get the user's email address from Github and match the email address with the existing users in your user pool
Step 3:
- Matching success: Log in to an existing account
- Matching failure: Create a user/prohibit registration
Administrator configuration steps
- Find "Account Binding" in the identity source configuration area you want to use and turn on the switch
- Select "Field Matching"
- Select the field to use for matching (mobile phone number/email address/other fields)
Using Github as an example:
Original image 361 (in section "Administrator configuration steps"; Chinese UI)
Ask Binding
"Field Matching" is applicable to identity sources that can obtain the unique field of the GenAuth user account. For other identity sources that cannot obtain key user information due to restrictions on third-party accounts themselves, you can use "Ask Binding" to achieve the purpose of user account binding.
Function
You have configured a third-party account login method for your users, and there are already some existing user accounts in your user pool. After you complete the third-party account configuration, users can log in more conveniently through the third-party account. You want to ensure that old users can still log in to their original accounts using the new login method.
User Usage Journey
After following the above steps to enable the query binding, when your users log in through this identity source for the first time, they will go through the following path (taking WeChat public account scanning code login as an example):
Step 1: Scan the code using WeChat public account
Original image 362 (in section "User Usage Journey"; Chinese UI)
Step 2: Select "Create a new account" or "Bind an existing account"
Original image 363 (in section "User Usage Journey"; Chinese UI)
If the user chooses "Create a new account", the account binding process will be skipped, and a new independent user account will be created directly in the GenAuth user pool after successful login;
If the user chooses "Bind an existing account", the third step will be entered.
Step 3: Enter the account to be bound
Original image 364 (in section "User Usage Journey"; Chinese UI)
Enter an existing third-party account in the GenAuth user pool that is not bound to other third-party accounts (in this case, not bound to other WeChat accounts), and the user will complete the account binding journey.
In addition to binding an account when logging in, your users can also directly bind a third-party account in the Personal Center (regardless of whether you use GenAuth's Personal Center or your own Personal Center) (you can also unbind it yourself). After completing the binding, you can log in to the same account through any login method (regular account password, third-party account).
Original image 365 (in section "User Usage Journey"; Chinese UI)
Administrator configuration steps
- Find "Account Binding" in the identity source configuration area you want to use and turn on the switch
- Select "Ask for Binding"
- Select the supported binding method (mobile phone verification code, email verification code, account password, mobile phone number password, email password)
Take Github as an example:
Original image 366 (in section "Administrator configuration steps"; Chinese UI)
Full identity source account binding function support status
Based on the limitations of various third-party identity sources, the current GenAuth account binding function implementation is as shown in the following table. You can find the corresponding identity source through global search to view the support status of the current account binding function.
| Identity source name | Login method | Support field matching | Match by email | Match by phone number | Match by other fields | Open query binding |
|---|---|---|---|---|---|---|
| Gitlab (gitlab) | Web | Yes | ✅ | ❌ | ❌ | ✅ |
| WeChat (wechat) | PC web scan code | ❌ | / | / | / | ✅ |
| WeChat (wechat) | WeChat web authorization | ❌ | / | / | / | ⌛️ |
| WeChat (wechat) | APP pulls up mini program | ❌ | / | / | / | ⌛️ |
| WeChat (wechat) | WeChat mobile terminal | ❌ | / | / | / | ⌛️ |
| WeChat (wechat) | PC small login scan code | ✅ | ❌ | ✅ | ❌ | ⌛️ |
| WeChat (Wechat) | WeChat public account follow | ❌ | / | / | / | ✅ |
| WeChat (Wechat) | Mini program | ✅ | ❌ | ✅ | ❌ | ⌛️ |
| Github | Web | ✅ | ✅ | ❌ | ❌ | ✅ |
| Enterprise WeChat (WeCom) | Enterprise WeChat self-built application scan code | ✅ | ✅ | ✅ | ❌ | ⌛️ |
| Enterprise WeChat (WeCom) | Enterprise WeChat self-built application scan code (pending development mode) | ✅ | ✅ | ✅ | ❌ | ⌛️ |
| Enterprise WeChat (WeCom) | Enterprise WeChat service provider application scan code | ❌ | / | / | / | ⌛️ |
| Enterprise WeChat (WeCom) | Enterprise WeChat mobile terminal | ✅ | ✅ | ✅ | ❌ | ⌛️ |
| Enterprise WeChat (WeCom) | Enterprise WeChat mobile terminal (pending development mode) | ✅ | ✅ | ✅ | ❌ | ⌛️ |
| Lark | Lark App Store App | ✅ | ✅ | ✅ | ❌ | ⌛️ |
| Lark | Lark Enterprise Self-built App | ✅ | ✅ | ✅ | ❌ | ⌛️ |
| Slack | Web | ✅ | ✅ | ❌ | ❌ | ⌛️ |
| DingTalk | DingTalk H5 micro-app (enterprise internal development) | ✅ | ✅ | ✅ | ❌ | ⌛️ |
| Web | ❌ | / | / | / | ⌛️ | |
| Web | ❌ | / | / | / | ⌛️ | |
| Web | ✅ | ✅ | / | / | ⌛️ | |
| Baidu | Web | ❌ | / | / | / | ⌛️ |
| Apple | Web | ✅ | ✅ | / | / | ⌛️ |
| Apple | Mobile | ✅ | ✅ | / | / | ⌛️ |
| Alipay | Web | ❌ | / | / | / | ⌛️ |
| Web | ❌ | / | / | / | ✅ | |
| Web | ✅ | ✅ | ❌ | ❌ | ⌛️ | |
| Mobile | ✅ | ✅ | ❌ | ❌ | ⌛️ | |
| OAuth 2.0 | Web | ✅ | ✅ | ✅ | ❌ | ✅ |
| OIDC | Web | ✅ | ✅ | ✅ | ❌ | ⌛️ |
| SMAL | Web | ✅ | ✅ | ✅ | ✅(externalId) | ⌛️ |
| CAS | Web | ✅ | ✅ | ✅ | ❌ | ⌛️ |
| LDAP | Web | ✅ | ✅ | ✅ | ✅(username) | ⌛️ |
| Azure AD | Web | ✅ | ✅ | ✅ | ❌ | ⌛️ |
| Windows AD | Web | ✅ | ✅ | ✅ | ✅(username) | ⌛️ |
| Windows AD | Password-free login within the windows domain | ✅ | ❌ | ❌ | ✅(username) | ⌛️ |
| QingCloud | Web | ✅ | ✅ | ✅ | ❌ | ⌛️ |
| Sina Weibo | Scan the QR code on the web page | ❌ | / | / | / | ✅ |
| Gitee | Web | ✅ | ✅ | ❌ | ❌ | ✅ |
| NetEase Yiton | Web | ✅ | ❌ | ✅ | ❌ | ⌛️ |
| Web | ✅ | ✅ | ❌ | ❌ | ⌛️ | |
| Welink | Web | ✅ | ✅ | ❌ | ❌ | ⌛️ |